
Hi there! I’m Lee from Freshly Pieced, and I’m so excited to be showing you my first Moda Bake Shop project, using one of my current favorite fabric lines, Terrain by Kate Spain.


1 jelly roll of Terrain by Kate Spain
2 yards of a contrasting solid for background
3/4 yard for binding
3 1/2 yards for back

Select 36 strips from the jelly roll. From each jelly roll strip, cut the following:
 4 – 2.5″ squares
4 – 1.5″ squares
4 – 2.5″ x 5.5″ rectangles
Cut your solid background fabric into 2.5″ strips. Cut on the lengthwise grain (parallel to the selvage) so that you get longer strips (this will come in handy when you make the borders). Now sub-cut the following:
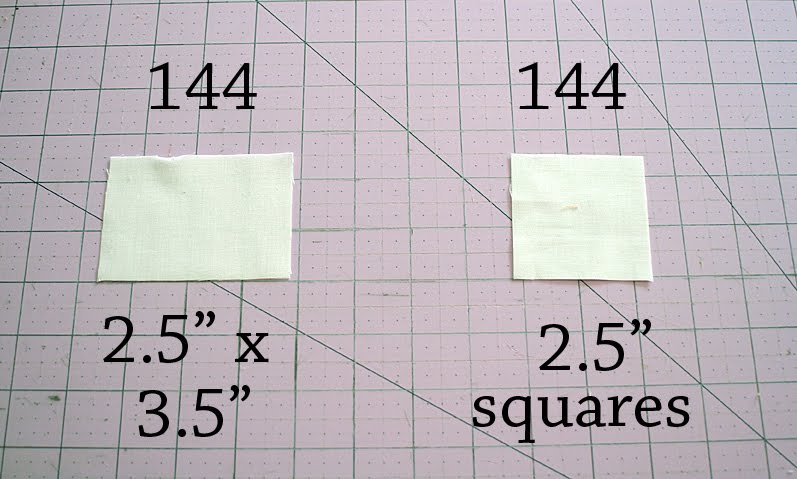 144 – 2.5″ squares
144 – 2.5″ x 3.5″ rectangles
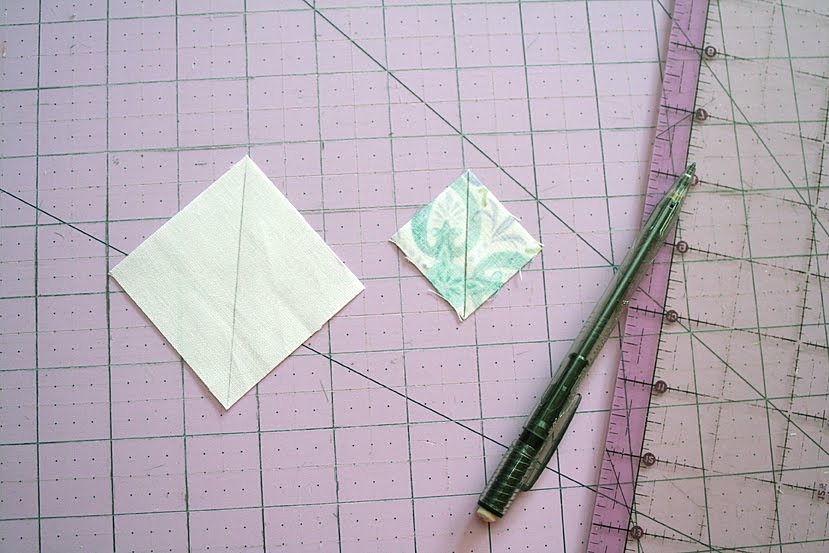
On the back of your solid 2.5″ squares and print 1.5″ squares, use a pencil to draw a diagonal line from corner to corner.
Match up each of your solid squares with a 2.5″ x 5.5″ rectangle, as shown above, with right sides facing (so the marked diagonal line is facing out). Make sure that the diagonal line is slanting in one direction for half of the squares, and in the other direction for the other half, as shown above. I found it helpful to layout all four rectangles from each print/strip, as I did above, to ensure I was doing half in each direction.

Sew directly onto the marked diagonal line, and trim, as shown.
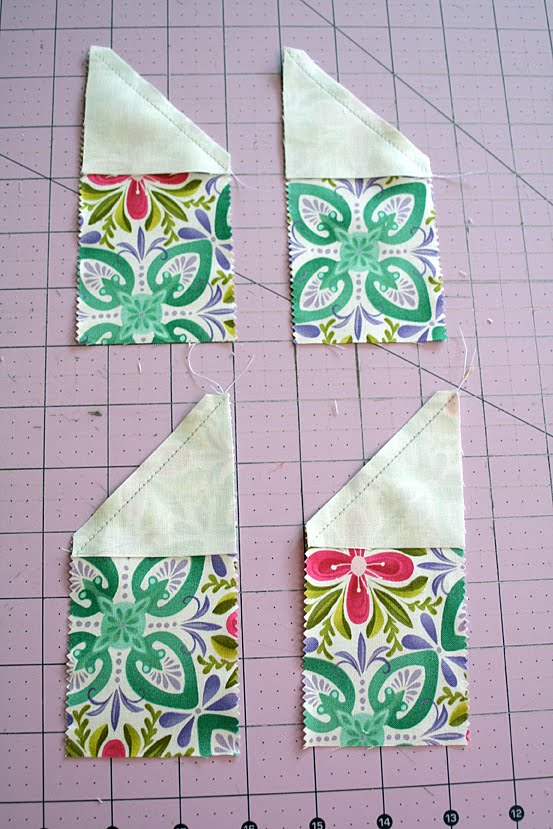
Press open.

Now match up each 1.5″ print square with a solid 2.5″ x 3.5″ rectangle. Again, right sides should be facing, with the marked diagonal facing out. Again, make sure that the marked diagonal slants in one direction for half of the squares, the other direction for the other half, lining up the squares so that the diagonal slants across an outer corner.
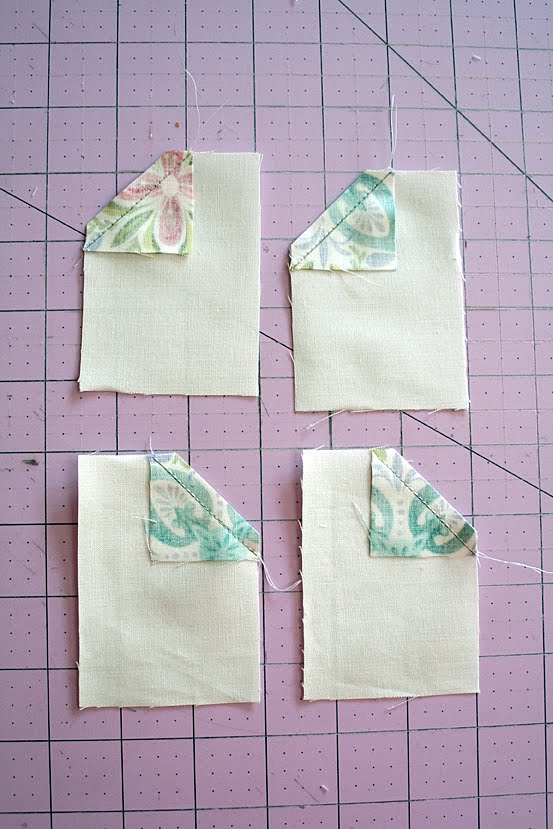
Sew on the marked line, trim, and press open.

Now match up a print 2.5″ square with each of your shorter pieced units, as shown. Sew together, with the 2.5″ square always on the end with the pieced corner.

Match up each of those units with one of the 5.5″ rectangle units you pieced earlier, matching the prints so that each unit contains only one print. The bias (angled) seams should always run parallel to each other, as shown above. You should now have a 5.5″ x 4.5″ unit that will make up one quarter of a completed oval.

Arrange your quarter-oval units into 12 rows of 12, mixing up the colors/prints so that they are randomly placed throughout. Sew the units together, first into groups of four to make completed oval blocks. Then sew those blocks together. I arranged mine so that there are half-ovals around all the edges, but you could also arrange it so that all of the ovals are complete and unbroken.

To Make the Borders:
For the inner solid border, use your remaining solid 2.5″ strips. Cut two strips 60.5″ long and two strips 52.5″ long. Sew the strips to the edges of quilt, starting with the long sides.
For the outer pieced border, cut 1.5″ x 2.5″ strips from your remaining jelly roll scraps and strips. You will need (116) 1.5″ x 2.5″ pieces to complete the border.

Join the 1.5″ x 2.5″ pieces short-end to short-end to create two strips 64.5″ long and two strips 54.5″ long (these strips may need to be trimmed down to size just a bit). Join these to the quilt as the final, pieced border.

Finish your quilt by quilting and binding as desired.

 One fun, colorful quilt measuring about 52″ by 63″—enjoy!
Lee Heinrich
{Freshly Pieced}
![]()
