Hi there, I’m Lindsey from LRstitched. I’m very excited to share my first recipe at the Moda Bake Shop!
Today, I’m going to show you how to make a fun and easy appliqued baby quilt.


- 1 Charm Pack, “Sophie” by Chez Moi
- 1 yard background fabric (Moda Bella Solid “Home Town Sky”)
- 1 yard backing fabric (Sophie “Blue Fiesta Collage”)
- 1/2 yard for the binding (Sophie “Green Peas Houndstooth”)
- batting (minimum 34×44)
- 8″ circle and petal templates (included in the Printer Friendly Version)
- water soluble pen
- measuring tape/ruler
- scissors
- fabric glue (My favorite is Liquid Stitch).
- template plastic (optional, if you’d like to transfer your paper templates for ease of use)

One charm pack will give you enough petals to make 2 of these baby quilts.
We will be using 72 petals for one quilt (18 charms). Keep that in mind, if you would prefer to only make one quilt, select 18 charms and save the rest for another project.
If you would like to make 2 quilts, you will use 36 of the 42 charms. You’ll also need to double the fabric requirements for background, backing and binding, as well as batting.
Once you’ve decided whether to make 1 or 2 quilts, grab your charm pack and let’s get started!
——–
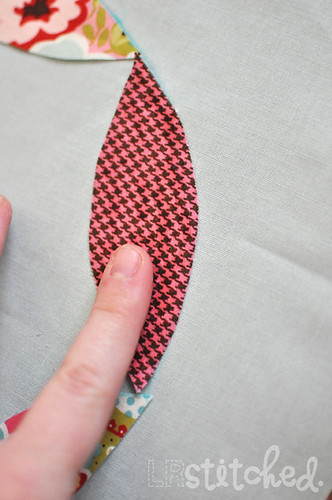
With the printed petal template, trace four petals per charm as shown below.
I like to cut my petals by hand since I’m trying to use every last scrap of fabric. However, if the thought of hand cutting makes you cringe, you can certainly use a rotary cutter!
If you choose to use a rotary cutter, be careful using this layout because space is tight. You may want to bump down to 3 petals per charm.


Now we need to prepare the background. Take your 1 yard background fabric (approx. 36″ by 44″) and cut down to 32″ by 42″. Press well.

Next we are going to trace our guide circles onto the background piece.
You will need the 8″ circle template and a fabric pen. Lay out your background fabric on a hard surface and beginning in the top left corner, lay down your template. While measuring, adjust the circle template until it rests 2″ from the top and 2″ from the left and trace.
Measure 2″ to the right of the first traced circle and repeat. Continue until you have traced all 12 circles as seen below.

Once the circles are traced, it’s time to layout the petals. You will need 6 petals per circle.
If you imagine a line down the center of each circle, you will be placing 3 petals to the left of the line and 3 to the right.
Place your first petal on the top left side of the circle you’ve traced. The drawn circle will be your guide for placement as you work your way around.


Once all 12 circles are filled, adjust the petals if necessary until you’re happy with the placement.

Now we need to secure the petals to the fabric to prepare for applique.
Begin by removing one petal from its place; apply a thin coat of glue and press firmly back to its spot on the background fabric.
Repeat for each petal until all are secured.

Once everything is glued down, you can start appliqueing each petal to the background fabric. I’m using a blanket stitch in the picture below.
If your machine doesn’t offer that option, you can zigzag or straight stitch close to the petal edge.

We’re almost done!
After appliqueing all the petals, press your top well. Take the backing fabric and layer it along with your batting and top, then quilt as desired.

Trim off the excess backing and batting and square up your quilt. Using your preferred method, make and apply the binding.
All finished!

A beautiful baby quilt, approximately 30″ x 40″.

Thanks so much, I hope you enjoyed this tutorial!
Lindsey Rhodes
If you do make a Mod Circle quilt, I’d love to see it! Feel free to share it in the LRstitched Flickr pool.
![]()
