Last summer was one for the record books with unthinkable day after unthinkable day over 100 degrees F and no rain in sight. Today is May 7, 2012 and we’ve already had days over 90 degrees in my home town.
We stay inside a lot around here. And, if you are smart (not that I am most of the time) you drink a lot of tall cold drinks.
But I hate it when my tall cold drink leaves a big wet spot on my work table or desk, or dribbles down my arm. You can’t color on a page that has been soaked in cup puddles, not to mention what they do to the furniture. Sooooo I made this…

It is a cold drink, cup cozy, “Condensation-erator”. (With a nod to Phineas & Ferb’s Summer Vacation.) It works great. No more puddles. I was asked if it leaks out of the bottom – nope! The condensation is caught by the sides before it gets to the bottom so no leaks. I’ve been using mine for about a month now…no issues to report…it does fit in the cup holder in my car (with a cup in it too). It makes an awesome “ice cube” down the back too…if you are of the mind to tourture someone with the wet cozy when you are done with your drink.
I thought you might like to make one too.
I started with things I had on hand. You need:

10 5″ charm squares (A charm pack could make 4 coordinating Condensation-erators!)
2 buttons
A scrap of batting approx 10″x15″
A pony tail tie
General sewing supplies

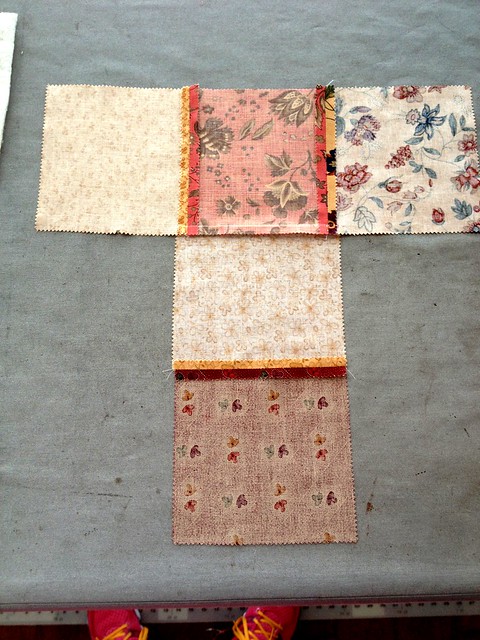
Sort your charms into two piles of 5. One pile is for the outside and the other is for the inside.
Arrange each pile in a “T” shape.
Sew adjacent edges together. Iron seams in leg and arms of “T” open. Iron seam at the joint toward the leg.
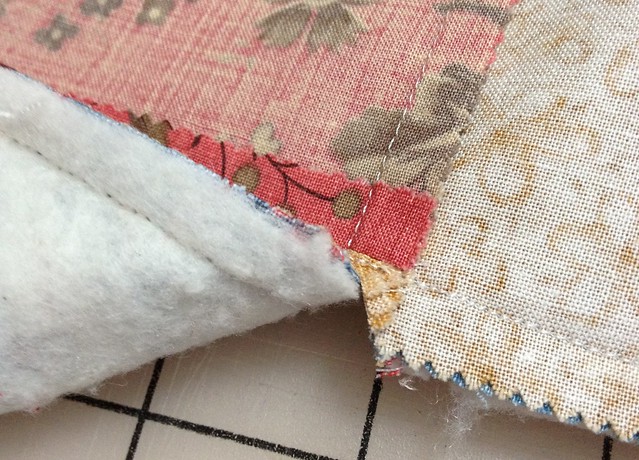
Layer inside and outside “T”s right sides together.
Cut batting into two 5″ wide strips. (Really, I just used scraps and winged it.) Lay strips of batting on top of fabric sandwich.
Flip three layers over and sew 1/4″ around edges being careful to leave a hole so you can flip it right side out.
Trim excess batting, and corners.
Clip inner corners (This will make them smoother when you turn it.)
Flip “T” right side out. Straighten out corners. Press flat.
Top stitch 1/4″ from edges. Make sure that you sew the opening closed.

Quilt as desired. This adds body to your project. Be sure to quilt it a little – in the ditch maybe – else the batting might shift when you wash the cozy. (After using mine I’ve decided that more quilting is better than less. The quilting seems to channel the moisture better.)
Sew two buttons on one arm of the T. Place them about 1″ from each edge and in the center of the block.
I tried Velcro buttons….they didn’t work. They don’t allow for the the cozy to stretch and mold to the cup.
If you use shank buttons….like the ones in this picture….try sewing a plane old ugly button to the back as you attach the shank button to the front. It gives the button a little more traction. (This helps flat buttons too.)
Stitch Ponytail tie to the other arm of the T. (I’m sure you can do a better job than I did. I just used the thread on my machine.)
Give it all one last pressing – then go to your favorite drink stop and order a tall cold one to test it on.
To dress your cup in it’s new Condensation-erator lay the cozy, wrong side up, on a table. Place the cup on the square at the top of the leg where it attaches to the arms. Fold leg up. Wrap arms around cup. Loop rubber tie over the button with the best fit. Tug on the leg a little bit, like you would on the tongue of a shoe, not too hard or you will spill your drink.

1 cup cozy, perfect for those hot summer days!
Enjoy!
Cindy Sharp