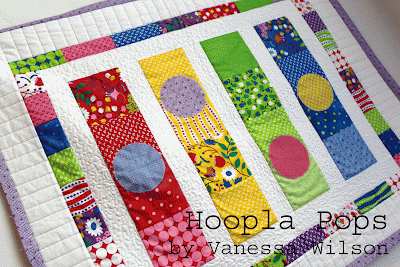
One Layer Cake – Pick a favorite 🙂 I used Hoopla by Moda.
1 2/3 Yards of coordinating print for lining and handles
3 Yards of Heavy Interfacing or Stitch and Tear ( iron-on is not necessary, just get something sturdy)
These instructions are for a case that fits a standard 24″ x 36″ mat. If your mat is sized differently, you will have to do a little math 🙂
Start by separating your layer cake into 2 piles. One pile with 30 “slices” of cake that will be used for the caddy case and one pile with 10-12 “slices” of cake that will be used for the pockets.
Grab your pile of 30 “slices”. Stack 3-4 slices on top of each other. Line your ruler up so that you are cutting a 3 5/8″ strip. Cut.
Now repeat cutting a second 3 5/8″ strip.
You now have two 3 5/8″ x 10″ strips and one 2 3/4″ strip. Repeat this process with all 30 slices.
Set the 3 5/8″ strips aside and line your ruler up along the edge of the 2 3/4″ strip along the 2 3/4″ marking of your ruler. Cut a 2 3/4″ square. Repeat this process with all 30 slices of cake. When completed, cut an additional four 2 3/4″ squares from your favorite four prints.
You should now have a total of 60 3 5/8″ Strips and 34 2 3/4″ Squares.
STEP 2 – PIECING THE CASE
We’ll make the basic block for the case first. Grab 2 of your 3 5/8″ x 10″ strips. Make sure not to grab the same print or color, try to keep them mixed up.
Place right sides together. Pin along the edge. Repeat this process until you have pinned 20 sets.
Chain stitch your pieces with a scant 1/4″ seam. It is important to do a scant 1/4″ seam (just smaller than 1/4″) so that your blocks line up.
Trim the threads between each of your pieces.
Press your seams open on all 20 sets.
And this is what you have. You are now ready to add the last strip onto your pieced block. Grab your remaining 20 strips. Add them to your blocks using the same directions as before.
You now have 20 blocks needed to make the case.
Lay your blocks out using the picture as a guide for your layout. Play with the blocks until you get a layout that is pleasing to the eye.
Sew your rows together. Sew block 1 and 2 together in each row and block 3 and 4 together in each row. Then sew your pieced block 1 and 2 to your pieced block 3 and 4 in each row.
Sew Row 1 to Row 2. Sew Row 3 to Row 4. Then sew Row 5 to your pieced Row 3 and 4. Lastly, sew your pieced Row 1 and 2 to your pieced Row 3, 4, and 5.
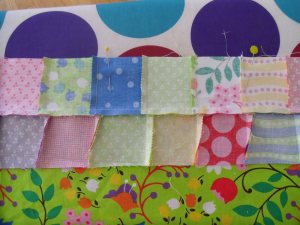
Now you are ready to make your top borders. Grab the 34 2 3/4″ squares. We will be sewing these into 2 rows of 17 squares. The easy way to do this is by setting 2 squares aside. Sew the remaining 32 squares into 16 sets of 2.
Take your 16 sets of 2 and sew them into 8 sets of 4. Then sew the 8 sets of 4 into 4 sets of 8, and lastly, sew the 4 sets of 8 into 2 sets of 16. Now grab those 2 extra squares you set aside and add one to each set making 2 sets of 16. Press. Now they are ready to add to the top and bottom (which will become another top) of your case.
Lay your pieced squares right sides together along the top and bottom of the case. Pin. Sew a 1/4″ seam along both rows and press.
Now your case top is complete. It should look like this 🙂
STEP 3 – INTERFACING AND QUILTING
Cut your interfacing in half. Now lay it along the wrong side of your material leaving a 1/4″ along the edge of raw material. It will lay over itself in the center. You can trim as necessary or just leave it. Pin around the edges just to tack it down.
Now turn your case over. Starting in the center, baste your quilt. Smooth out any wrinkles and continue to pin in an outward motion. Remove pins from the back as necessary to smooth out wrinkles.
When you have finished basting, remove any pins that are still in the back. You don’t want to run over these when quilting. 🙂
Attach the free motion foot to your machine and go ahead and quilt the top. This is a little tricky as the interfacing is pretty stiff. I found rolling it to be the best option. (side note . . . If you don’t like the look of it quilted, you can skip this step).
Now your top is quilted and ready to start being made into the Caddy.
STEP 4 – POCKETS
Fold your top in half with wrong sides together. Now, gather up what you want to make pockets for and lay them as you desire. This is where your own individual needs will require you to do a little math.
***Please note that if you have a ton of rulers or just don’t want pockets you can skip them all together. There is room inside with your mat to carry along any rulers you might need for your project
To figure out the size of your pocket, take the size of your item or ruler and add 1 1/2″. For example, I have a 6″ x 24″ ruler so I want my pocket pieces to be 7 1/2″ x 25 1/2″. For each pocket you want a top and a lining (so 2 pieces) Grab the 10-12 layer cake slices you set aside earlier. Obviously, they are not 25 1/2″ long, so you have to piece them together. (yup, more math, just remember add 1/2″ for each seam you have) To make my 7 1/2″ x 25 1/2″ I cut 4 pieces 7 1/2″ x 10 and 2 pieces 7 1/2″ x 6 1/2″
Now simply sew your pieces together using a 1/4″ seam. Continue this process for all of your pockets.
For each pocket you make, you are going to want a “top”. Simply cut them the width of your pocket x 2 1/2″. So whereas all of my pockets were 7 1/2″ wide, I cut 8 (4 tops, and 4 linings) 2 1/2″ x 7 1/2″ pieces.
Here are my pockets all cut and pieced together and ready to be sewn up. I know this part is a little tricky so if you get confused, please don’t hesitate to contact me via email.
Now to sew up the pockets. Everyone has probably sewn something up like this before. Place your 2 pocket pieces (top and lining) right sides together. Pin along the edges leaving an opening. Now sew a 1/4″ seam (black line) along the edge leaving an opening at the top (where my hand is :). Remember to back-stitch at the beginning and end to lock your stitches.
Now Turn your piece right side out. Use a pencil to poke out the edges so you get nice crisp corners.
Press your pocket nice and flat. Make sure your seams are not tucked in when you press. Fold the raw edges in and press. I have lifted them slightly so you can see what they should look like.
Sew a line across the top that has your raw edge. I sewed about 1/8″ seam. This closes the raw edge. Repeat the process with all of your pockets.
You are going to make your pocket tops the exact same way you made your pockets except for the very last step. Instead of just sewing along the edge with the raw seam, Sew along the 2 sides and the edge. This way you have the same finishing look as your pockets 🙂
Now grab your Velcro squares. You want to add your Velcro to the lining side of your pocket top and to the right side of your pocket. Make sure to line up your Velcro so that they will meet up when attached to your caddy case. I found it best to center it and then line it up directly under the seam you just stitched. Attach your Velcro using the stitched diagram below. Remember, back-stitch to lock your stitches.
If you like the look of appliqué, now is the time to add it. Grab your scraps from your layer cake and cut out some cute flower designs. (Remember, this is optional)
Zig-zag or blanket stitch around your appliqué. Unfortunately, I added mine as an afterthought, when I was all done, so I wasn’t able to do that important little step.
Now that your pockets are made (and decorated if you like) go ahead and line them up on your caddy top. Make sure you have unfolded your mat as you don’t want to sew the two sides together. Pin your tops and pockets on. Sew along the edge (once again I used about 1/8″ seam) using the sewing guide below (black lines). Do this for each pocket. Oh, and I am going to be honest, this is a little hard so if you have a walking foot, use it, it will help immensely!!
Your top should look something along the lines of this now 🙂
STEP 5 – MAKING THE CASE
You are now ready to make your top into a case. Fold your caddy case top right sides together. Pin along both side edges and sew 1/4″ seam along both side edges.
Turn your mat right side out again. It should look something like this 🙂
STEP 6 – ADDING THE LINING
Grab your piece of coordinating fabric. You are going to cut a square measuring 38″ x 52″ out of it. So first cut a 56″ long piece. Now fold it in half along the fold line and cut 3″ off the top. Set the two 3″ x 52″ piece and the remaining yardage aside for later. Take your square and fold it right sides together (short way, it should be a 26″ x 38″ square now). Pin along the two sides and sew 1/4″ seam along both sides.
Slide your lining into the case. The easiest way to do this is to put your mat in your lining first. Then with the mat giving it the proper shape, slide your lining into your case.
Slide it all the way in until your lining raw edges match up with your case raw edges.
Pin the two pieces together along the edges.
STEP 7 – BINDING THE TOP
Alright, now grab those (2) 3″ x 52″ pieces. Cut the selvage off. We are going to make them into a binding strip. Sew your two pieces together and then iron your entire strip in half.
Now to attach it. This is just like attaching a binding strip to a quilt only it is a little 3-D and you don’t have to worry about corners. Leave a few inches of binding strip and then begin sewing your binding strip to the inside lining of the mat.
Keep attaching, removing pins from the back as you go, and pushing the rest of the caddy out of the way 🙂
Fold your binding strip edge over and attach it to the outside of your case. You can hand sew this if you like, but I despise hand sewing so I just use my machine 🙂
And there you have it. All you need now are a few handles. So let’s get to them.
STEP 8 – ADDING THE HANDLES
Grab the remaining piece of your coordinating yardage. You are going to cut off a strip that will make your two handles. I wanted my handles skinny so I only cut a 4″ strip. (We will be making a double folded bias for the handles so whatever you cut divide by 4 to figure your total width.) If you want your handles fatter go ahead and cut your strip wider. Once you have cut your strip, trim the selvages and cut the entire strip in half.
Now that you have your strips, let’s make then into handles. Start by ironing the entire strip in half (top strip). Then open up what you just ironed and iron the top and bottom to the center crease (bottom strip).
Fold the top over onto the bottom. Your two strips should now look like this. Sew an 1/8″ seam along the edge of both sides of your strip. (top strip black lines) One will close up the strip and the other is purely just to make it look the same as the other side.
Fold your edge over 1″ (or whatever is a square for your handle width). Finger press. Do this with all four edges.
Find the center of your mat. Then measure out 3 1/2″ to 4″ and pin your handle just below the stitched edge of your binding. Then find the center again and measure out 3 1/2″ to 4″ in the other direction and pin the other end of your handle. Repeat the process on the other side of your carrying case and then check to make sure your handles line up.
Stitch the handles on using the same pattern you used to attach the Velcro earlier. Once again, this isn’t super easy but it is manageable and you only have to do it 4 times. Remember to use your walking foot if you have one, since you are going through a lot of layers 🙂
And there you have it!! Your own Cutting Mat Caddy!!
One super chic and adorable Cutting Mat Caddy.


