60-Minute Gift: Fold and Go Play Mat

1 x fat quarter in colour of your choice for backing.
1 x fat quarter for your binding
1 x 1/4 yard pale green fabric for grass
1 x 1/4 yard green/blue fabric for the ocean
1 x 1/4 yard pale blue for ocean/seashore
4 x Scraps of green/floral fabric measuring approximately 5 1/2″ by 6″ (I used four pieces in two designs) for paddocks
1 x 1/4 yard of your choice of fabric for bag flap
1 x 1/4 yard of your choice of fabric for bag straps
1 x piece of your choice of fabric, measuring approximately 7″ by 10″ for pocket.
4 x Basic snaps
1 x button
1 x Ribbon/elastic (just a small piece)
Some scraps of felt

Firstly you will piece together the play mat.  For this I used a soft green from the collection, and two shades of blue to create the ocean.   The measurements don’t need to be exact, but your entire mat will eventually measure that of a fat quarter (20″ x 22″) so let that be your guide.  For my version, I measured off the pieces as follows:
Green – 20″ x 10″
Pale blue – 20″ x 4″
Darker blue – 20″ x 6″
With a 1cm seam allowance, I stitched the three pieces together in the colour order pictured below.

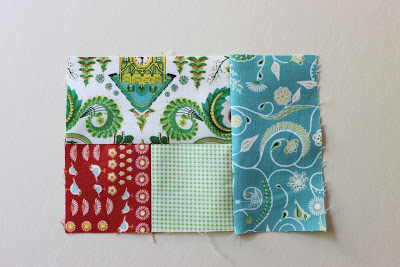
At the top of the play mat I wanted to create some little fields, so I took two different fat quarters and cut two pieces measuring 5 1/2″ x 6″ from each.
I pieced them together with right sides facing, and stitched them together – alternating the fabrics, with 1cm seam allowances.
It will look a little something like this, although perhaps a little less wonky if, unlike me, you are smart enough to use a cutting mat… (I’m an ‘imperfect is beautiful’ kinda girl).  Trim any excess fabric so that you have a fat quarter(ish) piece.  You can match it against another fat quarter to get a perfect sizing.
The next step is down to your own creative impulses.  I added two ponds, one with a stream, but left the play mat mostly bare, because I love leaving space for a child’s imagination.  You might want to make a mud pit for a pig, or a larger river with a bridge crossing it, or a road weaving across the park.  Different coloured felt would work perfectly for any of these options.  Simply cut out the shape you want, pin it on your mat, and topstitch it.
Next I took a purple fat quarter to use as backing.  It’s not necessary to use batting for this project, as a thinner mat will be easier for the animals to stand on.  I folded the FQ in half and ironed the crease, and then folded it in half again and did the same, dividing my piece into four equal parts (see picture).  Then I placed the mat to the side to make the handles.
My bag straps measured 4 1/2″ x 13″, which I folded in half longways – right sides facing, and stitched using a 1/2cm allowance, along the length and across one end, leaving the other end open (to turn the straps).  I then made small incisions about 1/2cm apart (closer if you like) around the corner of the sewed end.  These small incisions will make your fabric sit nicely when you turn it it right way out.  
Once you have turn your straps right side out (they should turn easily, but using a knitting needle if you’re having trouble), pin them to the top right-hand quarter of your backing piece.  You can leave the top edges raw at this stage, and be sure to leave an allowance of about 1/2 an inch on either side of the straps for the binding.

Now it’s time to cut out the bag flap.  Take a larger piece of fabric – I used a piece that measured 9″ x 10″ – and cut it in half so that you have two pieces that measure around 9″ x 5″.  Round the corners as pictured below.

Place the two pieces together, right sides facing, and sew them with a 1/2cm seam allowance, leaving the top open.  Make the same incisions around the corners that you did on your bag straps – as pictured below.

Pin the flap onto your backing so that it covers both straps.  Sew along the edge with a 1/2cm allowance, leaving the edges raw.

Place this to the side, as you will now be making your binding.  I cut four 2″ strips from a fat quarter, so they were around 2″ x 22″.  If you have never made binding before (this is not bias binding, which is cut on a diagonal across your fabric), it takes just a few simple steps.  Firstly, iron your pieces in half, longways.  Then open your fabric out, pull the edges back in so that they meet the middle (as pictured below), and iron again.

Now fold the two sides together, and iron it again. 

I was recently shown a neat trick for using binding, which help me immensely (I’m notoriously untidy when using binding).  It does make for a little extra sewing, but well worth it (and saves you from unpicking later).  Open out your binding again, and place the right side edge to edge against your backing.  You will be pinning three pieces of fabric together now.  The front of your playmat will be placed wrong side to wrong side against your backing.

Pin your binding, opened out, all the way down along the edge of your two pieces, as pictured below.  Sew close to the edge, ensuring that you are collecting all three pieces of fabric in your seam.

Now flip your mat over and fold your binding so that it encloses the edges of your mat (there’s a little yellow arrow showing you where to fold, in case this is not completely obvious already).  Now you can topstitch your binding, resting assured that you have collected all your pieces together!

When it comes to corners, I’m no expert, but this is what I do.  I tuck one corner of the first piece of binding (already sewn on) into the second piece of binding before I have sewn that piece.  When I sew the second piece of binding on, I make sure I only sew as far as the seam on the first side – around about where that blue pin is in the photo below.

I then fold the corners of the binding, tucking excess fabric underneath the binding, and creating a diagonal line reaching from the outside corner to the inside corner of the quilt.

Pin into place, and then topstitch.

When it comes to the pocket, it’s really up to you how large you want it.  My piece of pocket fabric measured 10″ x 7″.  First do a single fold hem on the top edge of the pocket.

Next pin your pocket to the top left hand quarter of your mat (as pictured below), making sure to leave room for the top flap and the button. Top stitch the sides and the base.

On the underside of the bag flap (where it won’t be visible from the outside), pin a looped piece of ribbon.  Tuck the edges under and stitch it where you’ve pinned it (a couple of times, so it’s nice and strong).

Add a matching button.

For the next (and final stage) you will need to fold your bag in half and in half again – so that it looks like this:

Making sure the button is undone, you will then take the top left hand corner, and add basic snaps to attach all four corners.  You will use three sets of snaps to attach the four corners of fabric.

The final set of snaps will be used to attach the bottom left hand corners, as pictured.

And then you’re done!

One fold and go child’s play mat.  Perfect for playing with farm or zoo animals, or you could create roads and parking lots for playing with toy cars.  This sweet little mat can then be folded into a backpack, with the toys stored in their own little pocket, and your little one can carry their own entertainment system to your next destination.  These would make perfect Christmas or birthday gifts for a little one.

Stella Rutherford
{verydarkhorse.blogspot.com}

Hexagon Flower Bag

Hi, I’m Julie from Narioka, Australia. After four quilt tutorials for the Moda Bake Shop, I’ve decided to show you a bag pattern. While paper piecing hexagons, this idea came to me. Its a really cute, quirky, fun to make bag. It would make a great hand-stitching project to take away if you are travelling.
Enjoy!

To make this bag you will need
One Charm Pack. (One bag takes 18 squares.)
Half yard of fabric to make lining and handle.
Three inch wide strip of coordinating fabric for handle.
Pre-cut 2 inch hexagon templets.
2.5 inch strip iron on interfacing.
I’ve used Lauren and Jessi Jung’s Flora for the main bag and for a different look, a second bag from the Indian Summer range from Laundry Basket Quilts.


Step 1.
To make this bag you will require 18 charm squares from your pack. Pick them at random or hand select your favourites like I did.

When I sew hexagons, I use pre-cut hexagon templates. Alternatively you can make your own. The ones I have used are two inch {ie. the length of each side measures two inches}.


Step 2.
Place your hexagon template over you first charm square and rotary cut around it allowing slightly more than 1/4 inch. I find 1/4 inch not quite enough. Some people don’t cut off the excess but I prefer to. It may give the bag a better finish if you do cut them off.


Step 3.
Place your first cut hexagon on a stack of five or so charms as a guide. Continue to cut out the remaining hexagons from all eighteen squares.


Step 4.
Lay your hexagon template on the wrong side of your first cut piece and evenly fold the first side down. Using a threaded needle, work your way all the way around the edge using a long basting stitch to hold the sides in place. See below.


You will end up with a pretty pile like this after a little while.


Step 5.
You are now ready to start joining your hexagons together. Place them right sides together and whip stitch along the edge. See image.


Use my pictures as a guide to how to arrange the hexagons.

You can join them in rows or make two hexagon flowers like I did below. I wanted to see what the front and back of the bag would look like so I joined them this way. I wanted the red in the centre front of the bag.


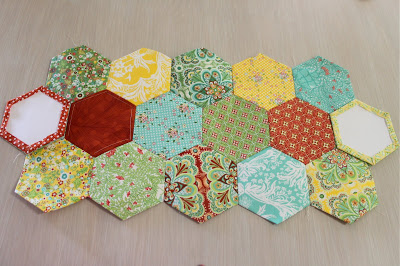
Keep working your way around until all 16 pieces are joined in the shape below.
Step 6.
Placed the two remaining hexagons, right sides together on the hexagon at either end.


Only stitch these two end hexagons on along the two sides as indicated in the photo. Leaving the end opening open to insert the strap into.


Step 7.
You can now fold the bag in half and partially stitch down the sides. Only stitch down three hexagon sides, from where I have indicated below.


Step 8.
After stitching the sides, turn your bag sideways and you will have an opening at the bottom. Lift the bottom hexagon (green) up to meet the two (yellow) hexagons above it. Stitch along these two sides.


This is how it will appear on the finished bag.


Step 9.

You can now snip your basting threads and remove the paper templates. Turn your bag so the correct side of the fabric is facing out. Flip over the top two top hexagons so they face the inside of the bag.


Give the bag a gentle press along the edges.


Step 10.
To make the lining and handles you will need to cut the following pieces.
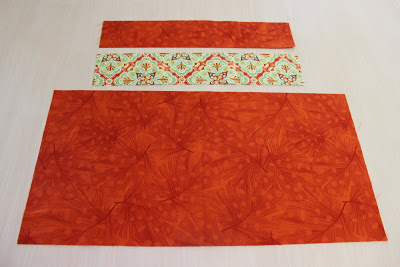
Bag lining 9 by 19 inches.
Bag straps 2.5 by 14 inches.
Optional – if you want a stiffer handle cut a 2.5 by 14 inch piece of iron on interfacing and fix to wrong side of one of the bag straps.


Step 11.
Press over about 1/2 inch the top edges of the bag lining.


Flatten pressed edge out and sew along side seam as shown.

Lay your bag exterior over lining and mark with a pin the position to sew the opposite side seam. This will make sure your bag lining fits snuggly into the bag exterior.

If necessary, trim excess fabric off the side seams back to about 1/4 inch. Fold each corner as shown and stitch across the corner one inch from the end of the side seam stitching. This will box out the bottom of the lining. Trim off excess back to 1/4 inch.
Step 12.
Fold over the top along the pressed mark.

Insert lining into bag, pin and then slip stitch around the top edge.
Step 13.
Iron on interfacing to wrong side of one bag strap.
Stitch bag straps together, right sides together along the long edge. Check required width against strap opening and stitch along the other side.


Turn strap in the right way, press and then insert the ends into the opening on the bag as shown. Insert about 1/2 an inch. Pin and hand stitch in place and you are finished.


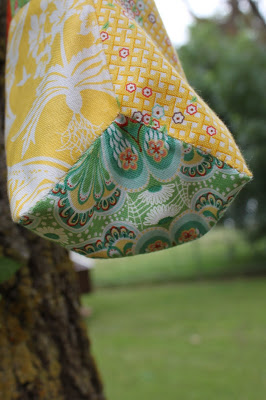
A cute pieced hexagon bag.
Perfect for day or evening.

9 3/4 inches widest x 6.5 inches tall {including strap}

Julie Sebire.

Cabins in the Hills


Cabins in the Hills Quilt
Made from the range HIDEAWAY by Lauren and Jessi Jung.
By Julie Sebire of “Narioka” Australia.

I’m very pleased to bring you my third Bake Shop project, I think this one is my favourite so far.
You can also visit my blog narioka@blogspot.com

One Hideaway Jelly Roll
38 inches white setting fabric
30 inches red gingham print
35 inches green clock print
70 inches of wide quilt backing (more if you require wider for quilting)
18 inches fabric for binding


Unroll your Jelly Roll and take out the darkest red strips.
Cut 41, 2.5 inch squares from these three strips.
It’s traditional in a log cabin quilt to have a red fireplace in the corner or centre of your cabin.


From the remaining 37 strips cut from each one
One 8.5 inch strip
Two 6.5 inch strips
Two 4.5 inch srips
and one 2.5 inch square.

Pop these into little piles like I have above. The top pile is the leftovers.

This next step may seem a little repetitive but it was the best way of explaining the cutting and still getting a good mix of the various fabrics over the quilt.

Cut these next strips from the leftover sections. There will be a complete mix of all the fabrics.
Cut carefully, there will be very little fabric leftover at the end.
Four 8.5 inch strips
Eight 6.5 inch strips
Eight 4,5 inch strips
and four 2.5 inch squares.

Add these to your piles as you go.


Piecing.

To start making your cabin blocks.
Take a red 2.5 inch square and join to a coloured 2.5 inch square (as above).

Repeat this with all 2.5 inch squares.
Its easiest to chain piece all 41 blocks.


Take the two pieces you have just joined and add a 4.5 inch strip. (as above)
Repeat the same step with remaining pieces, chain piecing again.
Make sure you add the 4.5 inch strip to the same side on every cabin block.


Join the next 4.5 inch strip as shown above.
Repeat on all blocks.


Now join a 6.5 inch strip as shown.
Repeat on all blocks.


…and another six inch strip as shown.


Finally, add the 8.5 inch strip as shown. This completes the cabin block.


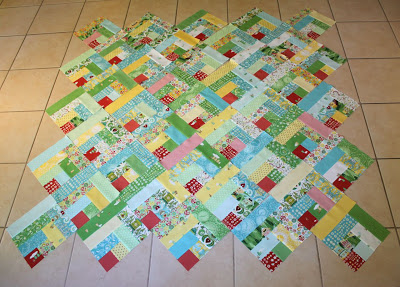
On a bed or a clear section of floor, layout your blocks as shown. Keep all the red corners (fireplaces) to the one direction.

Section the quilt now into diagonal rows. ie. 1st row has one block, 2nd row has three blocks. etc.

Label the first block in each diagonal row.
You will have nine rows.
We can now begin adding the “hills” around our cabins (white triangle setting pieces).
There are four triangles along each side that are the same size.
The four corner triangles are slightly smaller.
We will do the sides fist.

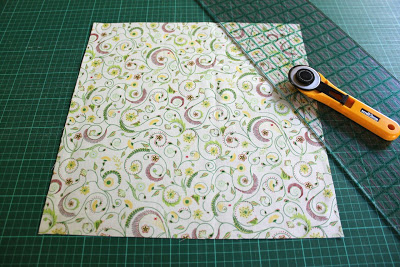
Cut four, 14 inch squares.

Cross cut these squares into four triangle each, as above.
Add one of these triangles to each end of rows 1,2,3,4 and 6,7,8,and 9 using my photos as a guide to placement. The point of each triangle needs to match up with the cabin block evenly. The triangle will overhang the cabin block at the edge of the quilt, don’t worry, this is intentional.


To make the triangles for the corners.

Cut an 8 inch square.
Cut diagonally once, to makes two triangles.
Repeat. You will have four triangles, one for each corner.

Join a triangle to either end of row five as shown above. Once again, there will be overhang.

Attach the final two triangles to the other corners as shown above.
Finish sewing rows together. The overhanging triangles will give the effect of the cabins being set into the hills, the white fabric completely enclosing the cabin blocks.
You may need even up the edges slightly with your rotary cutter before adding the borders.

I have put two borders on this quilt.
The first border is a 1 inch (1.5 inch cut) red gingham print.
The second border is 3.5 inch (3.75 inch cut) green clock print.
Quilt and bind as desired.
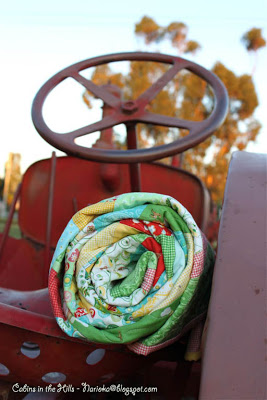
One quilt 65 inches square.
Much too pretty to roll up and take on the tractor to head up the hills!

Julie Sebire
{narioka@blogspot.com}

Sweet Silhouettes Wall Hanging & Pillow Covers


I’m April Rosenthal from Prairie Grass Patterns, and I’m so excited to show you my first recipe for the Moda Bake Shop–it’s a room makeover! With a few throw pillow slipcovers and a sweet wall hanging, you’ll want to make a set for each season and holiday. For even more versatility, make each piece double-sided.

(Psst! These slipcovers fit 20″ square throw pillows just right, but would also work great with an 18″ pillow.)

(1)  Hideaway Fat Quarter Bundle (you will use 16)
40 x 46 Batting
1⅓ yards Heat ‘n Bond lite (for applique)
1⅓ yard red gingham (backing & binding)
Applique templates included in PDF

Choosing your fabrics:

The biggest thing to remember when making this recipe is contrast. You’ll want each applique shape to stand out as much as possible, so you’ll need to do a bit of color planning. I chose to use all the red, white, and aqua fat quarters from my Hideaway bundle, which left me just enough yellow and green fat quarters to make another batch of this recipe for early spring!

Choose 2 white and 2 aqua non-directional fat quarters for your wall hanging backgrounds. Then, choose 2 red, one white, and one aqua fat quarter for the applique shapes.

Now, choose 4 fat quarters as the fronts of your pillow slipcovers. This would be a good place for a larger overall print, or directional prints. The applique shapes for your pillow covers will come from the aqua and white fat quarters you chose above. Also choose 4 more for the backs of your pillows.

Making the Wall Hanging:

Using the 4 fat quarters you chose for your wall hanging background, trim each piece to 16″x21″ (be sure to remove the selvage first!). Set aside.

Next, trace the applique shapes onto your Heat ‘n Bond. The inner and outer lines will be traced together, and will form the cut lines for your applique outline, and your pillow shapes. The middle line (dotted) will be traced separately and will be the cut line for your inner shape on your wall hanging. (In the pictures you will not see inner and outer cut lines, I freehanded it. After doing that, I thought you’d be happier if I added the inner and outer lines for reference.) Since the applique shapes are a little larger than a regular piece of paper, you’ll have to piece them together.

Cut the shapes apart individually, leaving room around each shape. Do not cut on the lines. Following the instructions on your Heat ‘n Bond package, adhere each shape to the appropriate fat quarter. My shapes were ironed-on as follows:

  • Single outline ice skate and snowflake: Red fat quarter #1
  • Single outline snow cap and mug: Red fat quarter #2
  • Double outline ice skate and snowflake: Aqua fat quarter
  • Double outline snow cap and mug: White fat quarter

Cut out each shape on the lines, making sure not to cut into any of the shapes. On the double outlines, you will need to cut the inner line by folding the fabric, and cutting a small snip along the line, just large enough to get your scissors into, then cutting out. Same for the inside shapes, like the inside of the mug handle & the cutouts in the ice skate blade. You’ll need all these pieces later, so don’t ruin them! Set aside the inner shapes to use on your pillow covers.

Iron the single outline shapes to your background pieces, centered. Then, iron your contrasting outline piece on top, being sure to include any small detail pieces, like on the ice skate above. Your outline should cover all raw edges on the shape underneath.

  
Stitch around each shape. I used a large zig zag with matching thread (to emphasize the contrasts) for mine, but a blanket stitch or other decorative stitch will work well also. I do not suggest using contrasting thread, as it blurs the contrast between your applique shapes and colors.
 
When all pieces are stitched on, press from the backside and square up if needed. Make sure each piece still measures the same size.
Assemble a 4-patch “block” out of your 4 appliqued rectangles, placing your shapes as shown. Pay attention to which way your shapes are facing so that they end up right side up. First, place top two squares right sides together with the right piece on top, pin, and stitch down the right side. Press to the right. 
Repeat for the bottom 2 squares, press to the left. Then, place top and bottom pieces right sides together, pin and stitch.
 
Open the newly stitched seam and press to one side. 
Now comes the fun part (and the reason I told you not to use directional fabric for your backgrounds). Measure 2″ from the vertical middle seam, cut. Repeat on other side of seam. 
Fold the middle piece at the seam, sew the opposite side together, and unpick the original seam. Open the newly stitched seam and press left and right in opposite directions, as shown below, reattach to both sides repressing seams on side pieces all one direction, ignoring the center seam.
  
Now, cut 2″ from each side of the horizontal middle seam, and 2″ from the top and bottom. Trade places with the bottom and top sections (see picture below). Reattach, re-pressing seams as necessary. Press toward border.
Now, cut 2″ from left and right sides. Rotate each piece 180 degrees. Reattach. Press toward border.
 
Back, quilt, and bind however you would like!

The Pillows

Using the (8) fat quarters you set aside for pillows, trim all so that they measure the exact same size, leaving selvage intact. Using method described above, attach the inner applique shapes to your pillow fronts, slightly offset as shown below.

Machine stitch around each applique shape to secure.

Now, putting right sides together, and matching up selvage edges, sew around 3 sides leaving selvage edge open. Zig zag around raw edge if desired.

Using your fat quarter scraps from the applique cut outs, cut (6) 8″x2½” pieces for each pillow, for the ties.

Fold lengthwise from edges in toward middle, press. 
Fold bottom up 1/4.” 
Fold in half lengthwise again. Press, then stitch as close to the edge as you can down both sides.

Fold the selvage edge in 1½”, pin in place. Then, lining up the ties directly across from each other (3 on front, 3 on back), pin a tie at the 4½, 9, and 13½” marks.

Sew around the hem twice, first about 1/4″ from the edge, and then about 1/2″. I just adjusted my needle position all the way to the right the first time around, and then all the way to the left the 2nd time.

Now fold the selvage up to the 1/4″ stitching line. Sew 1/8″ from the edge of the selvage, and again 1/8″ from the fold. This binds up the raw edges of the ties nicely and also creates a stiff edge so that your case looks more symmetrical and doesn’t sag on the tie side.

Your outside edge looks pretty cute too.

There you have it!

I hope you’ve had fun with this tutorial. While I was making these, I was thinking it would be really fun to make both the wall hanging and the pillow covers reversible, so that I could just flip everything around when the next season or holiday shows up. All you’d have to do, really, is applique another season’s shapes on the backside of the pillow, and make another wall hanging for the “backing” with the other colors. Do a little generic quilting, and voila! Easy to change holiday decor!

The winter shapes are included with this tutorial, but I’ll be posting shapes for other holidays/seasons on my blog very soon. Come stop by! And if you decide to try out the reversible thing, let me know, I’d love to see it.


1 seasonal wall hanging (29″ x 39″)
4 throw pillow slipcovers (fits a 18″ or 20″ square pillow)

April Rosenthal
{prairiegrasspatterns.com}
{21stcenturycharmschool.com}

Meandering Path Quilt


Hello Everyone! My name is Ellie from Craft Sew Create. I am so excited to be sharing my first Moda Bake Shop project!  I have been crafting and sewing since I got my first sewing machine in middle school. But I am currently obsessed with quilts! I absolutely fell in love with Lauren + Jessi Jung’s BOTANY fabric and knew I wanted to make a simple, modern quilt out of it.
 
One Botany by Lauren + Jessi Jung Layer Cake
One Botany by Lauren + Jessi Jung Charm Pack
1/2 yard Botany fabric for binding
3 yards Botany fabric for backing
Batting

 
Step 1:
{Cutting}
Take the entire Layer Cake and cut each square in half.
 
You will have two 5″ x 10″ rectangles.
Cut 1/2″ off of each 5″ side of the rectangle. Your rectangles will now be 5″ x 9 1/2″. {You can cut the 1/2″ off before you cut the squares in half, it will save time…I just didn’t get that picture, lol!}

That’s it! Now the fun begins.

Step 2: 
{Layout}
I like to lay my quilt squares first so I can get the colors right where I want them. This is layout I liked the best, feel free to move yours around a bit. There are seven rows where the 5″ x 91/2″ rectangles are laid out vertically, and two groupings where the rectangles are laid out horizontally with an alternating Charm Square. Some of the vertical rows have Charm Squares at the top and bottom so that the rows can be variegated.

Here is an illustration so you could see the layout. From left to right the quilt has two vertical rows, a horizontal grouping row, three vertical rows, a horizontal grouping row, and then two vertical rows.  

Step 3:
{Sew the Rows}
 Use a 1/4″ seam for the whole project. The first row has a Charm Square, 7 vertical rectangles and then a Charm Square. 
The second row has 8 vertical rectangles.
 
Next is the horizontal grouping row. Each row has one Charm Square and one 5″ x 91/2″ rectangle. Alternate between having the Charm Square on the left and on the right. There are 16 rows.
Don’t forget to press your seams along the way! I like to press mine open.
Step 4: 


{Sew the Rows Together}
                    

When you sew the rows together be sure to match the corners. 
On the outside rows and center row you can match the corners when you pin the row on like this.

Voila! Your quilt top is complete! 
 Now it’s time to Baste….
Quilt…
(I quilted the vertical rows with a vertical stripe and quilted the horizontal grouping rows in a stipple. I love the contrast and how it allows the different rows to stand out.)
…and Bind!


You’re done, yay! Let me know if you make it, I’d love to see pictures! If you have any questions or to show me some pics, email me at craftsewcreate@gmail.com.


One beautiful 60″ x 72″ Meandering Path Quilt!


Welcome Spring


52″ x 52″

Hi Quilters…I’m Cherri House of Cherry House Quilts, and this is my first Bake Shop project, it’s an honor to join the Bake Shop bunch!
I hope you will enjoy making Welcome Spring, a sweet quilt perfect for an afternoon picnic, a lap quilt for sitting out and reading your favorite book, or covering a little who has fallen asleep.

Please feel free to visit anytime http://cherryhousequilts.com/

Cherri


1 Jelly Roll (Botany featured by Lauren + Jessi Jung)

2 yards White Bella Solid (quilt and binding)

58” x 58” Batting (recommend Hobbs Heirloom Fusible Batting)
3 yards quilt backing


Use 1/4″ seam allowance throughout
Fabric Cutting:

From the White Solid cut 5 2 1/2″ strips, join strips together; subcut into the following:
5 each 8 1/2″ strips, 4 each 14 1/2″ strips, 4 each 10 1/2″ strips, 4 each 12 1/2″ strips
From the White Solid cut 21 1 1/2″ strips, join strips together, subcut into 16 52 1/2″ strips

From the White Solid cut 6 2 1/4″ strips, joins strips together for binding

From the Jelly Roll select 17 strips for your quilt, arrange on a design wall in a pleasing manner
Label strips 1 through 17
Trim the following amounts from the listed strips:
From strips 2, 6, 10, and 14 cut 6″ from the bottom of the strip (not the selvage edge)

From strips 3, 7, 11, and 15 cut 2″ from the bottom of the strip (not the selvage edge)

From strips 4, 8, 12, and 16 cut 4″ from the bottom of the strip (not the selvage edge)
Remove nothing from strips 1, 5, 9, 13, and 17

Assemble strips:

To strips 1, 5, 9, 13, and 17 add a 2 1/2” x 8 1/2” white strip section to the end, press to the dark
To strips 2, 6, 10, and 14 add a 2 1/2” x 14 1/2” white strip section to the cut end, press to the dark
To strips 3, 7, 11, and 15 add a 2 1/2” x 10 1/2” white strip section to the cut end, press to the dark
To strips 4, 8, 12, and 16 add a 2 1/2” x 12 1/2” white strip section to the cut end, press to the dark
Piecing the top:
Stitch a sashing strip to the right of strips 1 through 16, begin from the bottom of the strip (not the selvage end), press to the sashing strip.
Join strip sections by two’s, press to the sashing strip, again, begin from the bottom of the strip, not the selvage end.
When all strips are joined, evenly trim the top of the quilt, removing the selvage from the strips.
Prepare the quilt back:
Prepare quilt back by dividing 3 yards of backing fabric into 2 equal lengths.
Join the pieces lengthwise, press open seam allowance
Prepare to quilt:
If using fusible batting, cut the batting to 58” x 58”
Center the quilt top onto the fusible batting, following manufacturers instructions.
Center the quilt top and batting on the quilt back, and fuse
Quilting Recommendation:
Use a walking foot to create long linear lines for a contemporary look.
Starting in the center of the quilt, stitch in the center of each white sashing strip, moving outward across the quilt in one direction until complete, then repeat on the opposite side.
Next, using the edge of the walking foot as a guide, stitch on the inside of each fabric strip from the left and right side.
On the left and right sides of the quilt, stitch and 1/8 of an inch from the raw edge the length of the quilt to secure prior to binding.
Trim excess fabric and batting around the quilt.
Binding, label, and enjoy!
Enough strips for two quilts from each jelly roll
I hope enjoy making this quick little spring time quilt!
Cherri

Flip Floppin’ Toddler Wear

1 Jelly Roll {featured Botany by Lauren + Jessi Jung}
1 White Girls Shirt
1 White Boys Polo
Fusible Tape

1. Divide the jelly roll into colors.  Select two color ways you wish to use on your shirts.  I chose to use the yellow and green colorways for this tutorial. 
For the Girls Shirt, select 4 green and 4 yellow strips for the flaps and 1 strip for the tie.
For the Boys Shirt, select 3 strips. 

Girls Shirt

2. From the 8 strips you selected for the flaps on the girls shirt, cut them in half on the fold.

3. You should now have 16 strips.  Fold each of the strips Right Sides Together with the short ends matched up.

4. Using a 1/4″ seam allowance, sew down either side of the long ends creating a tube with an opening at one end (opposite from the fold.)

5. Using a Bodkin, turn your strip right side out.

To poke the corners out, I use a Crystal Point Turner by Lee. This thing is awesome… no poking through the fabric.

6. Repeat this process for all 16 strips.

7. Press and Top-stitch on all three of the closed sides.

8. Measure your shirt and determine how long you want your strips to hang down.  I measured my shirt from just below the arm pit down to the bottom of the shirt.  My measurement was 10″.  Trim all your pieces to the measurement you need.  BE SURE to trim from the open end of the strip.

9. Start placing your yellow strips evenly across the front side of the shirt making sure all the bottoms are lined up.  The two end pieces will be centered with the side seams of your shirt.

10.  Next layer your green pieces stagered ontop of the yellow strips hiding the white shirt behind.  I pinned my pieces in sections for easy handling when sewing.  I also pinned both the top and bottom of the strips.  You will only sew down the top of the strips.  The bottom pinned just helps in keeping your strips aligned.

11.  Stitch down the top of the strips to secure in place.

12.  Continue placing and sewing sections of strips down until you have 16 strips going all around the shirt.  You may need more or less strips depending on the size of the shirt.

13.  Take the piece set aside for the tie on the shirt.  With Right Sides Together (RST), fold the strip in half lengthwise and stitch down all three raw edges with a 1/4″ seam.  Leave open a 3 inch hole in the center of the strip for turning.

Turn the Strip right side out, press and topstitch 1/8″ on all four sides, closing the 3″ turn hole.

14.  Using some fusible tape, apply to the back side of the tie around the shirt. Press.  This will help keep the tie in place while stitching to the shirt.

15. Starting at one end of the tie where the two ends meet on the shirt, top-stitch onto the shirt on both sides of the tie.  Tie the loose ends in a knot.  Your knot can be on the front or the back side of the shirt.

16.  One adorable little Flip Floppin’ Shirt for a sweet little girl.

Boys Shirt
17. Cut the following sizes from your 3 strips.
cut 2 – 2 1/2″ x 5″
cut 2 – 2 1/2″ x 7″
cut 2 – 2 1/2″ x 9″

Depending on the size of your shirt, you may need to smaller or taller.  I just kept a 2″ height distance between the three strips.

18. Fold the ends of the strips in on the short ends and press.
Then fold the strip in half and then unfold. Fold the two raw edges in towards the center fold line and press.

19.  Using the Fusible tape, apply a piece the back side of each strip and press on to the shirt as shown.

Repeat the same design on the back opposite side of the shirt.

20.  Using a zig-zag stitch, stitch around the four sides of all six strips to secure onto the shirt.

21.  One handsome, modern little man.


One jelly roll will make several shirt combinations.

Mix, match and have FUN!

Angela Yosten
http://blog.angelayosten.com/

Fly-Away Canvases: Andy Warhol Style


I have always been a huge fan of Andy Warhol’s famous screenprints.

If you’re not quite sure who I’m talking about… you’d probably recognize his work if you were to see it. He’s most famous for his Campbell’s Soup prints and his Marilyn Monroe series which you can view here if you’re curious.
We’ve used the fabric line, Botany (which my mother and I recently designed) to create this series of “pop art” butterflies… It’s a great springtime project!

I’m so excited to be posting my very first tutorial here on The Bake Shop! Please feel free to reach out with any comments or suggestions or questions!

I hope you enjoy!

You can also find out more on our blog and website!


  1. 1 Botany Layer Cake
  2. Three 12” x 14” pieces of fabric for backgrounds (1 for each canvas)
  3. Three 8″ x 10″ canvases (you can find these at your local craft store: Michaels, A.C. Moore, etc., any brand will be fine)
  4. Staple gun
  5. Needle and thread
  6. Freezer paper and pen (for tracing templates)


This pattern will make 3 appliquéd canvases.


STEP 1 / We recommend planning out each of your canvases before starting… especially if you’re making more than one canvas. (When creating combinations that use 5 fabrics at a time, such as these do, it might be better to plan out groups of fabrics that contain similar color palettes. Here are some combinations that we really like, but the possibilities are truly endless!)


STEP 2 / Cut a 12” x 14” piece of fabric for background.


STEP 3 / To help you when laying out your appliqué pieces, we recommend creating guides:

  • Fold square in half vertically.
  • And again horizontally.
  • Press folds.


STEP 4 These are designed to print on an 8.5” x 11” sheet of paper.


  • Trace pattern pieces from templates on to dull side of freezer paper. (Be sure to add the identifying numbers to each piece.)
  • Cut out pieces.

Hint: Freezer paper is semi-transparent, so lay it on top of the diagram, then trace.


STEP 5 / Press the freezer paper pieces (shiny side down) on to the right side of your chosen fabric using a dry iron. (Pieces will temporarily stick to fabrics.)


STEP 6 / Trace around pattern pieces on right side of fabric using a mechanical pencil or pen. (Pencil/pen marks will be turned under and hidden when appliquéd.)


STEP 7 / Cut out drawn fabric pieces leaving a 1/8″ edge surrounding each piece.


STEP 8 / Position and pin pattern pieces on to the background square, referring to fold lines and placement chart as guides.


STEP 9 / Use “needle-turn” method of appliqué. Sew moth parts to square in layers following the number sequence on each piece. Do not appliqué edges which will be covered by overlapping layers. (Refer to placement chart.)


STEP 10 / Iron out fold lines.


STEP 11 / Center the butterfly on the canvas.


STEP 12 / Use a staple gun to attach the fabric onto the canvas. There’s no right or wrong way to do this, but I like to start by placing one staple into the middle of each horizontal bar (see left photo). Then I put a staple in the middle of each vertical bar (see right photo).


STEP 13 / Then I work my way out from those center staples until I reach the corners of the canvas.


STEP 14 / To finish off the corners, fold the excess fabric over a few times and staple it into place.


That’s it! Enjoy your awesome set of Butterfly Canvases!


You can also check out our blog at www.LaurenAndJessiBlog.com for more fun photos and ideas… AND, you can find 5 more free patterns on our website at www.LaurenAndJessiJung.com.


Happy Quilting!


Spring/Easter Dress


Hi! Tam here from Sew Dang Cute. I’ve got a fun Easter/Spring dress for you today using the bright, lovely colors from Lauren and Jessi Jung’s latest line, Botany. Love it!!


– 1 Botany Jelly Roll by Lauren and Jessi Jung
– 1/4 yd five different coordinating fabrics
– Coordinating thread(s)
– Elastic thread


*All seams are 1/4″ unless otherwise noted.

Note: I made two different dresses at the same time, so pictures are from both dresses.

1. First we need to get some measurements. Measure child’s chest/waist. Use whichever measurement is bigger and add 6″. My daughter’s was 22″, so my measurement is 28″. Next decide the desired length of the dress. For my 4T dress, I wanted it 27″ long. Select 5 strips from the jelly roll. Next we need to do a little math.

Here’s the formula: Desired length – 10″ + 3.5″ / 6.

Explanation:Each jelly roll strip is 2.5″, so with seam allowances and five strips, we will get 10″ of our desired length (27″), leaving 17″ we need to get from our five coordinating fabrics. We need to add in hem and seam allowances of the coordinating strips, so add another 3.5″. I used my top color twice, so divide by 6. ex: 27 – 10 + 3.5 /6 = 3.416. I rounded to 3.5″. Did you make it? Now we are ready to cut.

2. Cut your top piece 3.5″” x 28″”. (28 from chest/waist measurement, 3.5″ from above formula). Cut your first jelly roll strip so it is 28″ long. Cut 3.5″ strips from all 5 coordinating fabrics. Cut two strap pieces 2.5″ x 10″. Lay out all your pieces in the desired pattern.
3. Take the two top pieces (the shorter ones: 28″). Sew right sides together (RST). Finish seam with either a zig-zag stitch or serger. Press, making sure to press the bulk of the seam towards the topmost piece. Topstitch.
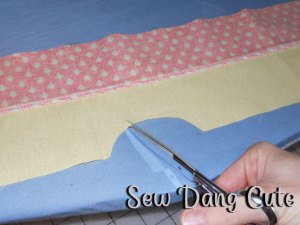
4. Fold in half RST, lining up the two short raw end sides. Mark in 1/4″ from the raw edges where your seam will be with pins, then line the pins up at 0″ on a ruler. Find halfway and mark with pin. Mine was 13.5″, so I marked 6.75″ with a red pin. Go left 1/2″ mark with a pin (mine is white), then add 3″ from there and mark with pin (mine is another white pin). Draw a scoop between the white pins. Click on image to enlarge. Cut out the scoop. Unfold and you should have two cut-outs. These are for the arms. Now we need to hem the top. Make a few small clips in the arm holes (this will make it easier to fold for the hem).Fold the top raw edge (the one with the scoops), down 1/4″ towards the wrong side of the fabric and press. Fold down another 1/4″ and press. Stitch down. Set top piece aside.

5. Grab your very bottom piece and hem it with a 1/4″ hem like we used above.
6. Stitch remaining pieces (all the 44″ length jelly roll strips and coordinating fabrics) together in desired order. Finish seams. Press and topstitch, switching threads as necessary if doing multiple colors. You should now have a top and bottom piece.
7. Fold bottom piece in half RST, lining up the seams and pinning in place. Stitch. Finish seam. Do the same with the top piece.

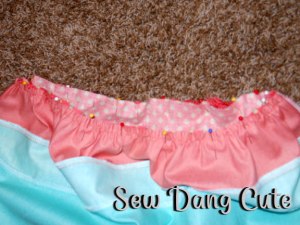
8. Sew a gathering stitch along the raw edge of your bottom piece. Divide both the top and bottom pieces into 1/4’s and mark with pins. Place the top piece inside the bottom piece RST, and raw edges lining up, and match up the pins. Pulling on the bobbin thread, gather the fabric between pins and pin frequently to hold the gathers in place. Make sure to change your stitchlength back to a regular stitch and stitch. Finish seam. Press and topstitch.

9. Next we are going to do some shirring. Lay your dress facedown. Mark about 1 1/2″ in from each side with pins. Handwind a bobbin with elastic thread. You don’t want to stretch it as you are winding or it will be too tight. Load the elastic thread in your bobbin and keep regular thread in the top. Starting 1/4″ down from the hem stitching, sew between the two pins, making sure to backstitch really well at the start and stop. Continue the next row 1/4″ down from the row you just made. Sew about 10 rows or so, just enough that you have sewn down the top two strips of the dress. Press those rows and watch the fabric shrink up to create the smocking.
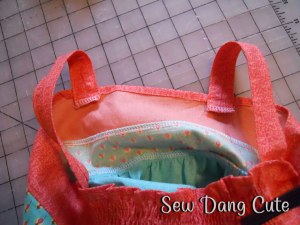
10. Let’s get those straps done. Fold in half lengthwise and sew RST. Turn inside out and press with the seam in the middle of the strap. Topstitch the long sides of the straps. To figure out where to attach the straps, I grabbed my daughters and slipped the dresses on them, then pinned the straps in place. Stitch the straps in place by going right over the hem stitching. Trim excess fabric on straps, if necessary, and finish the raw edges. Guess what?! You are ALL DONE!!! Back view: Add a cute matching fabric flower using this tutorial and you have one springy, happy, little lady (or in my case two)!

One jelly roll will be enough for multiple dresses, you will just need to buy extra yardage of the solid coordinating fabrics. I was able to make two dresses with the amounts listed.

Botany Charm Pack Reversible Purse


Hi Moda Bake Shop Fans!
I’m Bradie Sparrow from QuiltCetera.Com. I am thrilled to share this fun reversible purse recipe with you today. I love to make these purses with bright, funky fabrics, and this time I chose the new Moda line Botany, designed by Lauren and Jessi Jung. Say hello to my oldest of 8 children. My beautiful daughter Landen Emily modeling this cute little purse for us. Now, let’s get on with the show!

One Charm Pack of Botany Fabric – or any Moda charm pack with minimum 36 squares.
Batting : 2 pieces measuring aprox. 15 X 10.5 inches for body of purse
and 2 pieces 1 1/4 inch X 26.5 inches for purse handles.
2 Large Buttons to match fabric

Start by separating your charms into their different color ways. Choose two colors for the outside of your bag, and another two colors for the inside. As you can see, The Boss (AKA Teenaged owner of said bag) chose pink and green for one side, and brown with teal for the other side.

To Make the Sides of the Bag:
You will need 12 squares for the inside and 12 for the outside. Sew them together in groups of 6 as shown in the pictured layout.

Take one panel of 6 (pink/green shown) and stitch it onto your 10.5 inch X 15 inch piece of batting. Stitch about 1/8 inch away from outer edge of fabric so your stitches will be hidden in the seam allownace later. Trim away the excess batting.
Repeat for one brown and teal panel.

To shape the top of your bag:
Flip the second pink/green panel (without batting) to it’s wrong side. Make the following marks in the two outside squares of the top row. Mark a line 2.5 inches from the side of the square , and another line 2.5 inches from the top of the square. Draw a diagonal line between the two marks. Mark another small line 1/4 inch below the first mark on the side.
Use the same panel for the next step.

 To shape the bottom of the bag:
Make the following marks in the two outside squares of the bottom row. Mark a line 2.5 inches from the side of the square , and another line 2.5 inches from the bottom of the square. This marks the beginning and end of the curve to shape the bottom of the bag.

 Use a CD or DVD to draw the curve. This will be your cutting line. When you stitch the curve, it will be inside this drawn line. Repeat both shaping steps to mark the brown/teal panel.


To attach the bottom of two panels together:
Place your first pink/green panel, batting side down on your table. Place the second, with the markings, right side down on top of first panel. Pin the sides first at the small 1/4 inch mark. Pin your seams to make them match up nicely.

Pin the sides of the middle square in the bottom row (shown with 2 white flower head pins in picture above). This square needs to remain unstitched. You will turn the purse right side out through this hole in a later step. Begin stitching at the mark 1/4 inch below the diagonal line on the right side of the bag, carefully rounding the corners as you come to them. Remember not to stitch the middle square! (This is only for one ‘pouch’. When you attach the brown/green panels to each other, you WILL stitch the middle square.) Finish stitching 1/4 below the diagonal line on the other side of the bag. Trim the rounded corners and press seams open.

Repeat for the brown/teal panels.

To Attach the two pouches:
Turn the brown/teal pouch inside out (right side of fabric facing inwards) with batting facing the table surface. Turn the pink/green bag right side facing out with batting layer closest to you. Ensure you don’t have both batting layers on one side of the bag.

Begin pinning the top two layers together to attach the top of the two pouches. You will be pinning a pink/green to a brown/teal.
.

First pin the top outer corners to align the pieces. Next pin the seams. Lastly pin the bottom of the two diagonal lines. Repeat for the other side of both pouches. Begin stitching on the bottom a diagonal line. The seam allowance will be outside of this diagonal stitching line. Don’t worry about the small gap left open, we’ll close that up real soon. Stitch around the entire top of the bag ending at the bottom of the opposite diagonal line.
Repeat for pinning and stitching the other side of the bag.


Pull the inside bag out of the outer bag. Lay bag flat and trim top corners 1/4 outside of the stitching line. Make sure no part of the bag is under the area being trimmed.
(Don’t ask me why I am stressing this point!)

Now back to that little gap on both sides of the bag. Place a pin at the bottom of the diagonal line and stitch between the pin and the 1/4 inch mark only. You will need to stitch this gap twice on each side of the bag.

In the picture, I am showing you how the batting on the back is pointing to the left, and the batting in the front points to the right. Next stitch down the side of the bag to close the left over space.
This finishes the construction of the bag!

Now for the little details….

Remember the hole we left open in the middle square of the bag? Pull the entire bag out through that hole and arrange one bag inside the other.
Press the top of the bag really well, reaching inside to push out the corners as needed.
Stitch the opening closed. I stitched mine by machine (so it wasn’t flopping around) then removed the stitches after and finished it by hand.

Choose a thread you like for top stitching around the top of the bag.

See where the blue flower head pin is? This is where you should start and stop your stitching, You can back stitch here and it will be hidden by the purse straps.

Making the straps:
Choose 6 charm squares to match the brown/teal side of the bag. Sew them together in one long strip to measure 5 inch wides by 27.5 inches. Fold in half and cut the strip in half to finish with 2 strips measuring 2.5 by 27.5 inches.
Repeat with another 6 charm squares for the pink/green side of the bag.

Press the strap in half lengthwise.


Open the strap up and fold each side in towards the middle and press again.

Place the long batting strips inside the strap and close the folds over the batting.

Fold up the short end and stitch it in place to finish the ends.
Repeat with the straps to match the pink/green side of bag.
Do Not place batting inside the second set of straps.

Lay the straps out on top of each other, with folds facing each other. Pin together and top stitch down the sides leaving the last 5 inches unstitched. This is how you will attach the straps to the purse.

Pin the straps onto the purse matching the proper colors. The bottom of the strap should be 3.5 inches from the top of the bag, and the strap should be centered over the seam. Arrange the other color of strap onto the inside of the purse and pin in place also. I push a pin through at the corners to make sure bath starps are in the same place, inside and out. You will stitch both straps on at the same time.
The photo on the right shows the straps after stitching to the purse.

We are sooooo close now! Make the strap closure:
Take one last charm square and cut in half. Sew the two pieces together to finish with a long piece 2.5 inches by 9.5 inches.


Press the short edges under, and stitch in place. Fold strap in half, open up and fold outer sides into middle, just like we did with the purse strap. Finally, fold the whole strap in half, to finish approx 9.25 inches by 5/8 inch.

Fold the strap as shown in picture and stitch across to hold in place. Center the strap on the purse 1.5 inches from the top of the bag. Pin in place, stitch, add a couple of buttons,and voila! You have a new bright and funky reversible purse.

And there you have it… A reversible one charm pack purse! I look forward to reading your thoughts and comments. Have fun!