Tips and Tricks: Crafty Storage

Today’s Tips and Tricks post is all about crafty storage. 
I don’t know about you, but keeping my work space tidy is a constant battle. Fabric, fabric everywhere! There are scraps and jelly rolls and charm packs just piling up on every surface. And don’t get me started on notions!

A few of our Chefs share some of their crafty organization tips with us today.

Erin Davis, of mummyquilts.blogspot.com

I keep my needles and machine accessories in plastic craft bins meant for embroidery floss. I like the ones with removable dividers so I can accommodate large feet like the button holer and small needle packs efficiently. Everything is labeled so it makes it very easy for me to find the right foot without having to consult my machine manual.

Lisa Calle of vintagemodernquilts.com

My favorite way to organize fat quarters is by color and I’ve found that if you fold them just the right way, the fit perfectly in bins and shelves designed for media (CDs and DVDs).  With so many people going digital these days, I see CD shelving units for sale very inexpensively at yard sales and thrift shops. They aren’t always cute but there is nothing a good coat of spray paint can’t fix.

See more of Lisa’s studio and organization ideas here.

Angela Pingel of cuttopieces.com

I use comic book boards to keep 1/2 yard and larger pieces of fabric neat and tidy. I’ve figured out a way to fold the fabric so it fits nicely on the board and the shelves in my studio.

See the full tutorial on Angela’s blog.

Thanks for sharing, ladies! Readers, what are your favorite ways to keep your space tidy?

"Bubbles" Mod-Improv Color Pop Lap Quilt


Hi all!
Erin Davis here from Sew at Home Mummy with my contribution to Moda’s May Color POP! Challenge!  I think the colors of the “Noteworthy” line really pop against that Bella “Cloud”; this project incorporates both easy-peasy strip piecing and for a bit of a challenge, some gorgeous set-in circle work! Not to fear – you can do it – curved piecing just requires a bit of patience and a little practice! And for fun, you can personalize this quilt – after all, it’s improv!

This 50″ x 70″ lap quilt was a lot of fun – I hope you’ll give it a go!

1 Jelly Roll (“Noteworthy” by Sweetwater)
1 Layer Cake (“Noteworthy” by Sweetwater)
3.25 yards of Bella Solid, (front: Bella “Cloud”)
3.5 yards of Bella Solid, (backing: Bella “Snow”)
Twin-sized Batting
Circle Templates (in the “Printer Friendly Version” of the post)

Cutting Instructions:
Circles:
Cut 4 circles, using templates A – D provided, from layer cake pieces.
Cut 4 circle backgrounds:
          from front color yardage, cut 4 squares measuring  12.5” square
          from squares, remove circle cut-outs using templates E – H provided
Strips:
From Jelly Roll, choose at least 10 strips, and, cut strips at different lengths randomly (making sure the shortest is no less than about 12”); I left mine either 
– full length of strip    or/
– cut the strip in half
From front color yardage, cut approximately (6) 2.5” x wof strips (amount of strips required will depend on how many and how long the patterned strips you’ll be inserting)

Background:
“Cut on the fly”; once you start piecing the top, it’ll be really handy to have your cutting station set up so that you can cut fabrics as you need them – cut, piece, repeat.

Backing:
– Cut 2 pieces of backing fabric 36″ x 63″ (1yd27″).
– Select 7 layer cake pieces for the back piecing.
Instructions:
Inset Circles:
1.       Fold background and circles in 4 & finger press raw edges. Match circles with the appropriate background cut-out (A with E, B with F, etc.) 
2.       Pin circles to background, right sides together, easing fabric to fit.

3.       Sew, pivoting and easing fabric accordingly so as to eliminate risk of puckers.
4.       Press seams to inside of circle using steam and starch.
5.       Trim circle blocks to 11.5” square, centering circle while trimming.

Strips:
1.       Lay strips out in order you are happy with on your design wall/floor/table,  staggering/offsetting them randomly; organize your circle blocks in an orientation you’re happy with.

2.       Once you’re happy with your layout, attach pieces of background strips to the top ends of 4 of your patterned fabric sitting to the far left of your quilt, creating a “strip set”, so as to bring the ends even. 
3.       To the strips on the bottom of the quilt, add solids to either end; to the
a.       left side: enough to hit the vertical strip set already pieced (approximately 8″ wide strip)
b.      right side: enough to bring the horizontal strips to the end of the quilt 
4.       Sew in background fabrics accordingly to the blank areas surrounding the circle blocks, filling in the space as you go, starting from the top of the quilt and working down. Leave the sewn strip sets separate for now.

5.       Now, Sew all of your strips together, alternating the end you start sewing each time so as to avoid warping. Start with the vertical strips and sew them into one ‘section’. Next, sew your bottom strips together creating another “section”.
6.       Attach vertical strip-set section to the left side of the circle-block section; attach the bottom horizontal strip set section to create the quilt top.

Backing:
1.       Attach 7 layer cake pieces in a row randomizing patterns.
2.       Take the (2) cut back pieces and attach them to either side of your layer cake row lengthwise; press seam open.

Finishing the Quilt:
1.       Layer, baste, and quilt as desired.
2.       Bind quilt with left-over jelly strips.


One color-popping, gorgeous, 50″ x 70″ lap quilt!

…. and the back:

Erin Davis
{mummyquilts.blogspot.com}

120-Minute Gift: Drunkard’s Path Table Runner


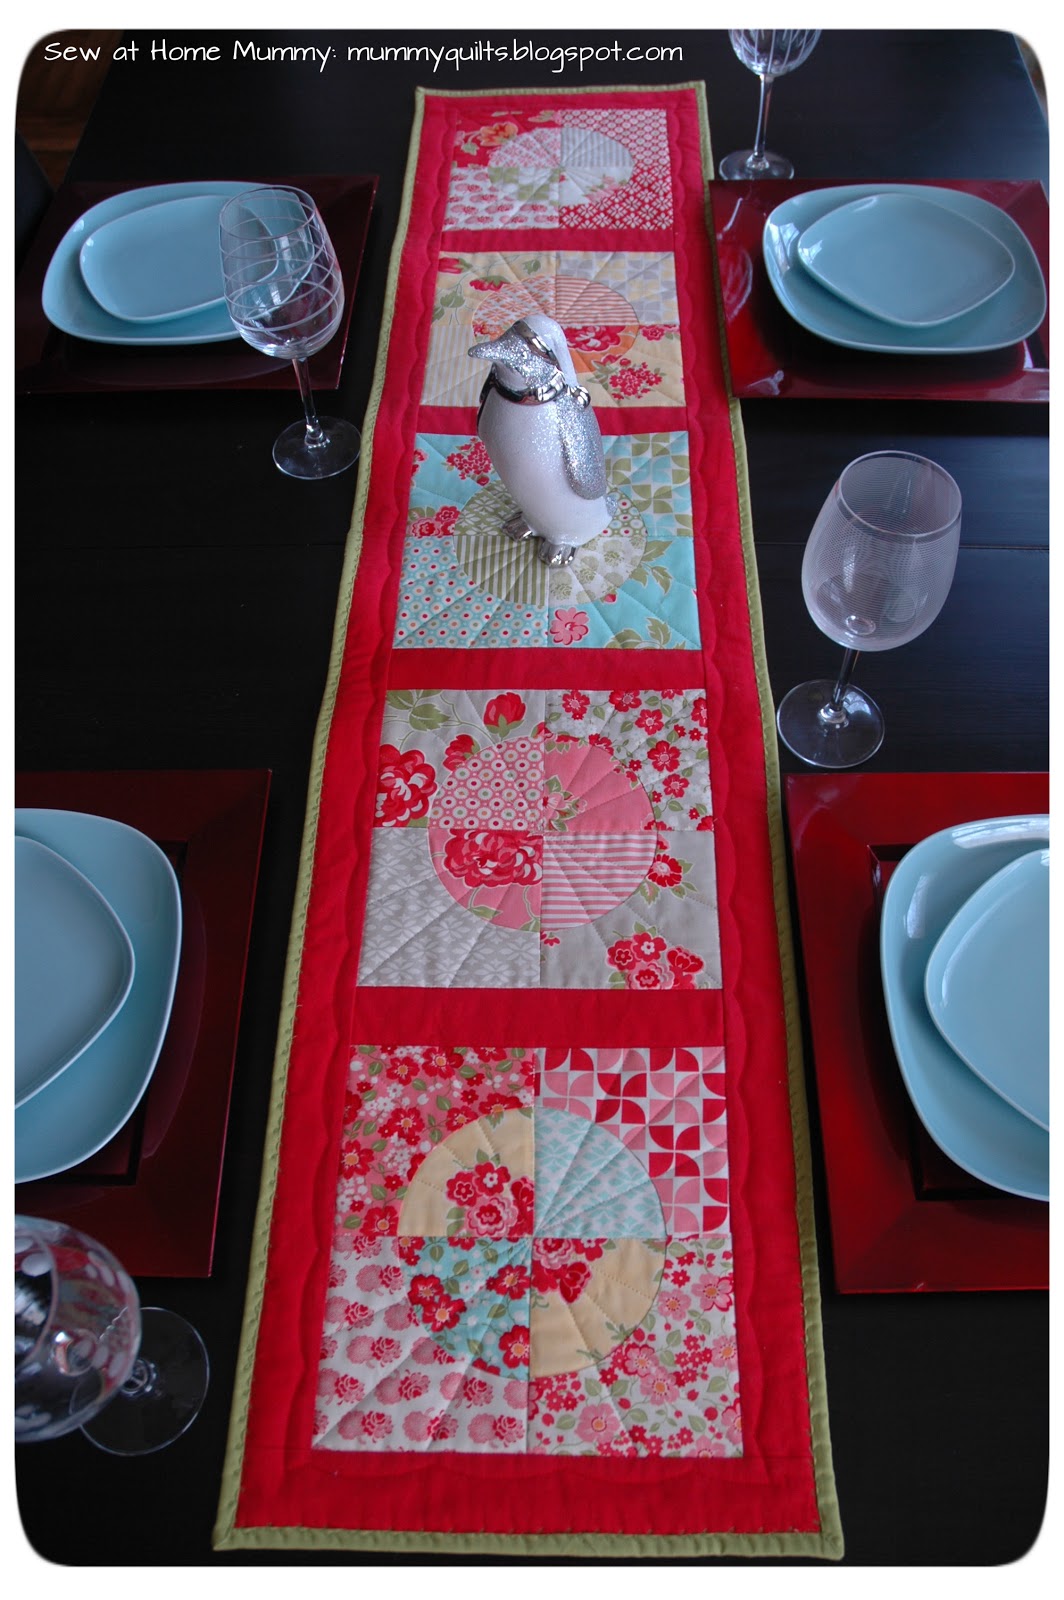
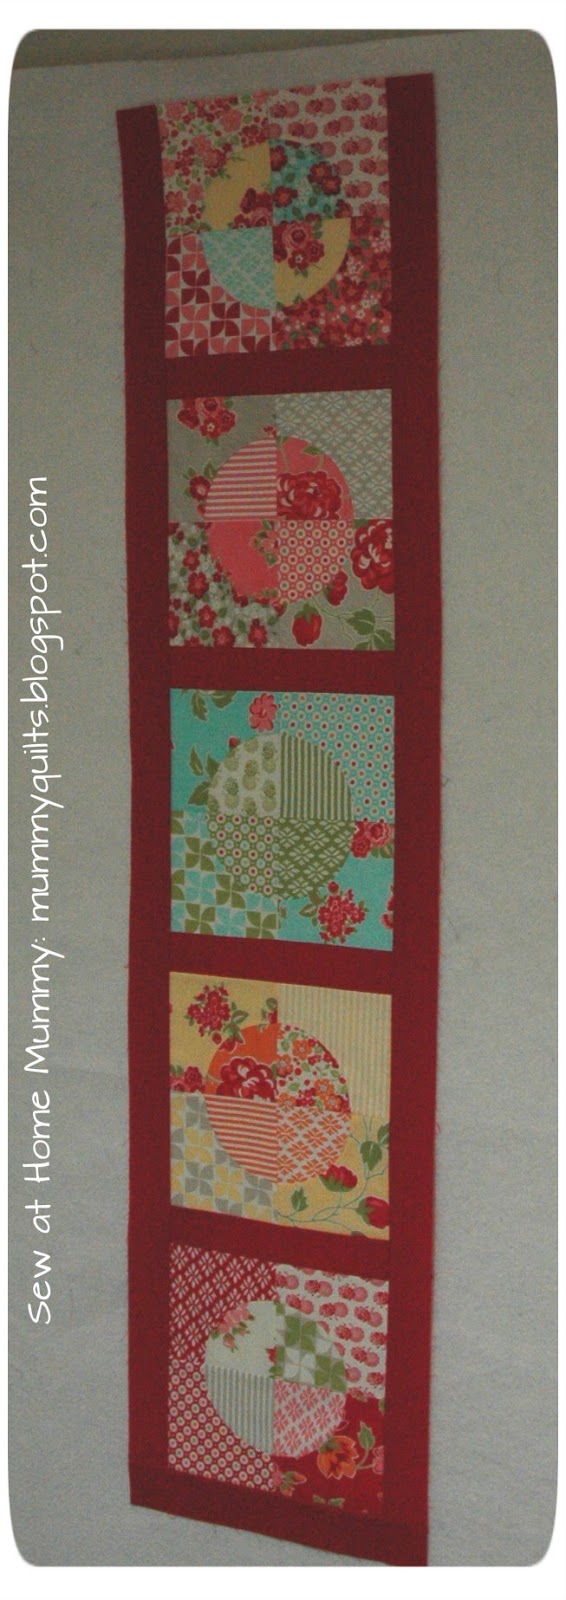
Drunkard’s Table Runner: ‘marmalade’ with a festive spin:  A 12.5” x 54” table runner featuring “Marmalade” by Bonnie and Camille for Moda, >composed of (5) 9.5” square drunkard’s path blocks
 

Recipe Pattern by Erin Davis of Sew at Home Mummy


Hi all!

I wanted to do something festive for my dining room table, and I thought, hey! I love ‘marmalade’, why not pair it with a modern red & green to give the line a Christmas-y spin? I love the way it turned out – it looks good on my table for the upcoming holidays, yet I could most definitely pull it off year round! I had a lot of fun composing this runner and I have to say: don’t be scared of curved piecing! Look how gorgeous it looks when it’s done. This would make a fantastic holiday gift, too. 

Happy sewing, quilting and crafting everyone!

Cheers and enjoy the project,

Erin


– 1 Moda ‘marmalade’ by bonnie and camille Charm Pack
– 1 yard Bella Solids ‘Pistachio’
– 1/3 yards Bella Solids ‘Scarlet’
– 16”x60” piece of batting


Cutting:
From charm squares:
see attached templates (A) & (B) in the printable version of the post… I cut mine from the cardboard on the back of the charm square pack, like this:

***sort the charm squares as you like – have fun with it! I pre-sorted my squares into colorways (i.e. – all the ‘reds’ in one stack, all the yellows in another, etc. and then paired the patterns based on what I’d like to see as the center wedge piece, and what I’d like to see as the outer ‘L’ piece.***

·         Cut 20 pieces of template (A) (creating the ‘wedge’ shapes)

·         Cut 20 pieces of template (B) (creating the ‘L’ shapes)

Tip: when cutting curved pieces, try to use the smallest sized rotary cutter you have; you’ll find it much easier to navigate the curves.Your cut pieces will look like this, with the wedge-shaped piece appearing larger than the concave part of the ‘L’ shape – don’t worry:

This is what you want – it’s the seam allowances that make it appear too big to fit.

From yardage:

Pistachio:
Cut (2) pieces of 16” x 30”
Scarlet:
Cut (4) pieces 2”x9.5”
Cut (2) pieces 2”x12.5”
Cut (3) strips 2”x width of fabric


Piecing (Runner Top):
1. Sort your A’s and B’s in combinations of fours (there will be 4 each of A’s and B’s in one block) ; I sorted by colorway in a way that was aesthetically pleasing to me. Have fun with it!

Have fun arranging your pieces
2. Attach piece (A)s to piece (B)s, creating quarter block units. If you have never pieced Drunkard’s blocks before, here are some tips.

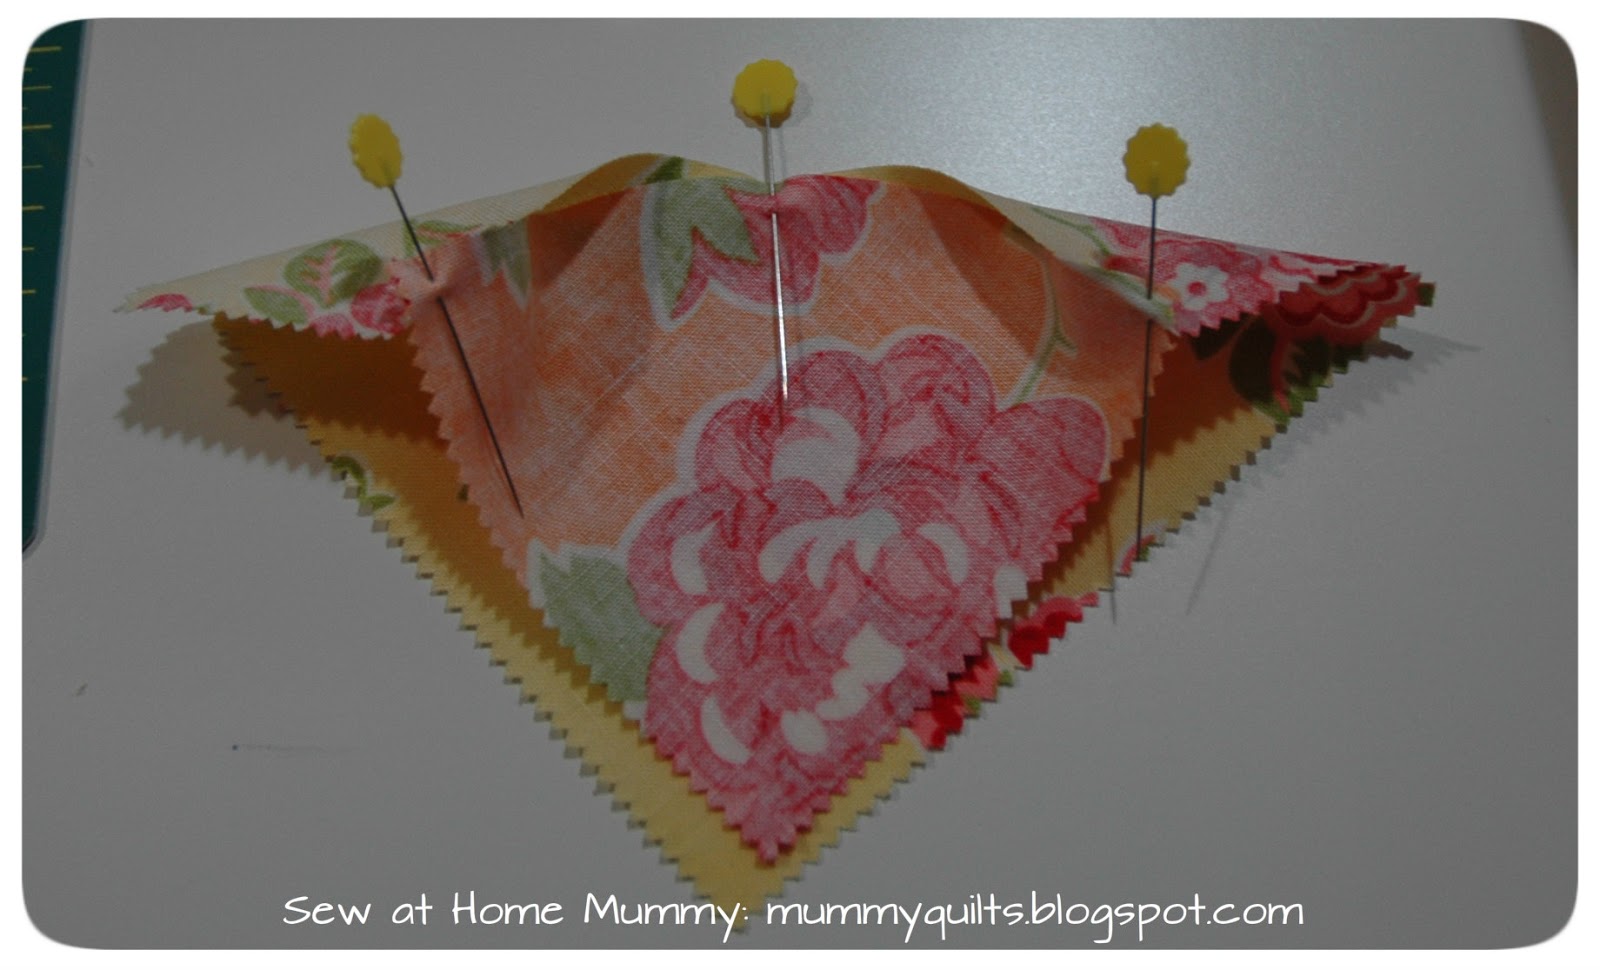
a. Fold your Piece (A) and (B) in half along the cut curve, and finger press like so:

b. Match your finger press marks, right sides together, and pin

Tip: When pinning for curved seams, try to have your pin enter where the sewing line will be – i.e. ¼” from the edge of the fabric, and only ‘grab’ a small amount of fabric with pin

c. Match the two outside edges together; pin in the same manner as described above. Place pins along the rest of the curve, easing the fabric to fit.

d.  Sew the two pieces together. I have sewn both with the wedge piece (piece (A)) on top, and the wedge piece on bottom. Personally, I find it easier with the ‘L’ shaped piece (or piece (B)) on top – but you’ll have to play with it to find what you’re most comfortable with. Here are some tips I have found helpful for sewing curved seams:

                             i. Slow and steady; don’t expect to zip around these curves like straight piecing (unless you’re pro! haha)

                             ii. Leave your pins in to the last minute, without sewing over them.

                             iii. every 3-5 stitches, lift your presser foot, pivot slightly, adjust your fabrics, etc.

                             iv. always be conscious of the fabric about to enter under your presser foot – make sure there are no lumps and bumps.

                             v. I have some more tips on my blog – I recently finished a 4” apple core quilt and posted ideas on curved piecing here: 
                             Sew at Home Mummy: Apple Core Quilt
e.  When you’re done sewing, you’ll have a block that looks like this:

f.   Press towards piece (A)s.
g.  Join two quarter blocks to create a half block; press. Repeat with other half of block.
                   Join two half block pieces, matching center seams. Press center seam open.
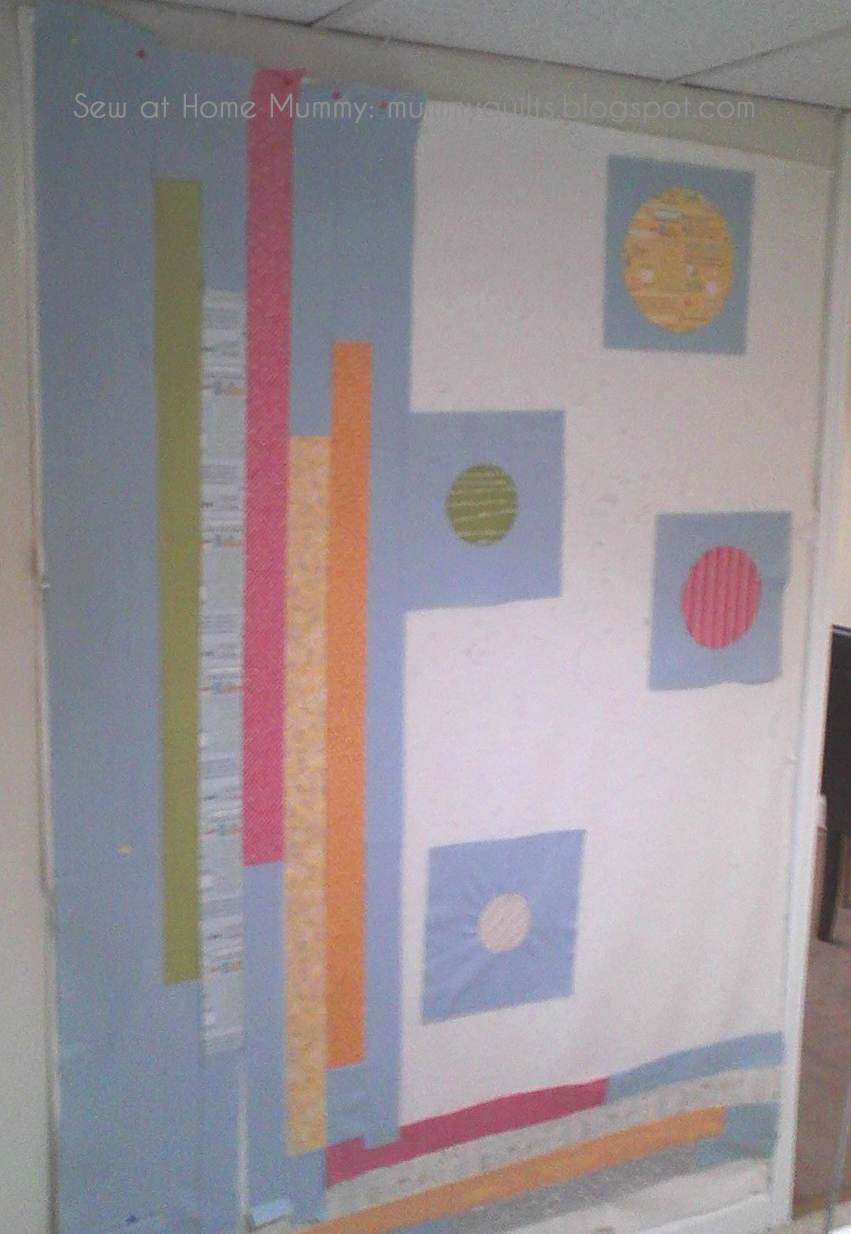
3.  Arrange completed blocks in an orientation you like. When you’re happy with your layout, attach 2”x9.5” sashing pieces (in ‘Scarlet’) between blocks to create table runner top, like so:
4.  Sew the (3) 2”x width of fabric (in ‘Scarlet’) together, creating one long strip. Use strip to border runner. ‘Cap’ ends with (2) 2” x 12.5” pieces:
Piecing (Backing & Binding):
1.  Sew short ends of the two 16”x30” pieces of ‘Pistachio’ together, creating a backing measuring 16”x60” with a ½” seam allowance. Press seam open.

2.  Use remaining ‘Pistachio’ for binding (as desired).
Finishing:
1.       Layer, baste and quilt as desired.
2. Bind as desired with remaining ‘Pistachio’. I used a decorative top-stitch on the binding seam to jazz it up a bit. 
One gorgeous ‘marmalade’ table runner with a festive spin.

If you have a minute, pop by my blog and see what shenanigans are brewing – there’s always something happening.

Erin Davis

{Sew at Home Mummy}

Big thanks to Moda for giving me the opportunity to work with their gorgeous fabrics again!

"Flirty" Jelly Roll Lap Quilt

A 55”x55” lap quilt featuring Sandy Gervais’ “Flirt” for Moda, composed of (36) 9.5” (unfinished) square blocks.
Recipe by Erin Davis of Sew at Home Mummy

1 Moda ‘Flirt’ by Sandy GervaisJelly Roll
2.75 yards Bella Solids ‘Etchings Slate’ #9900-170 for background fabric
3.5 yards of backing fabric; I used #17703-16 from the ‘Flirt’ line
64”x64” piece of batting
Unused jelly roll strips for binding

Cutting:
From Jelly Roll:

  • PIECE A (2.5”x 5.5”): from jelly roll strips, cut 36 pieces of 2.5” x 5.5”. For a scrappier look, use as many different patterns as possible from the roll.
  • Binding: use your discretion, but I cut 14″ strips, using as many fabrics from the roll as possible for a scrappier look

From Background Yardage:
  • PIECE B (2.5” x 2.5”):cut 72 pieces
  • PIECE C (4” x 9.5”):cut 36 pieces
  • PIECE D (5.5” x 9.5”): cut 18 pieces
  • PIECE E (2.5” x 9.5”): cut 18 pieces

Piecing:
Assume 1/4″ seam allowance.

1. Stitch (2) B pieces to the short sides of (1) piece of A creating a center block strip as seen below. To save time, chain-piece like I have in the picture. Press seams to gray. 
Chain piece! It’s more fun that way…
2. Repeat Step 1. to create (36) block center pieces.

3. Separate your block center pieces into two piles of (18) each. I divided the two piles by strip color; for every primarily red strip I put in one pile, another went in pile #2, and so on. 
Your blocks will be assembled like this:

4. Stitch (2) C pieces to the long sides of (18) block center pieces. Press towards gray. You’ve created your “Block 1″s!

5. Stitch a D piece and an E piece on either side of the long sides of the other (18) block center pieces. Press seams towards gray. You’ve created your “Block 2″s!
Composing your Quilt Top:
1. This is where a design wall or large table comes in really handy. Randomly lay out your blocks in a 6 block x 6 block grid. Make sure to vary block orientation (i.e. center strips lying both horizontal & vertical). Create a balance that you’re comfortable with. 
Make sure to have fun with it! I do suggest looking at the layout you choose close up and from a distance, and to leave it overnight and come back to it with fresh eyes to make sure you love the placement of the blocks.
There! I’m happy with this layout!
2. Once you’re happy with the layout, take a piece of masking tape, and number the rows from 1 – 6, on the first block on the far left of the quilt, like this:
Numbering the rows will allow you to remove them from the design wall and make sure that you maintain the right order and orientation you painstakingly decided on in the above step:


3. Stitch your blocks together in rows. Make sure to press your seams in alternating directions for each row.

4. Join your rows, nesting your seams to eliminate bulk. Press long seams open.
Nest & pin, nest & pin!
 5. Remove your masking tape number markers – your quilt top is done!


Finishing the Quilt:

1. Cut your 3.5 yards of backing fabric into 2 pieces 1.75 yards (63”) long; join pieces vertically. Press seam open.

2. Layer your backing, batting and quilt top; quilt as desired.

3. Use the remaining jelly roll strips to bind your quilt – cut several shorter pieces and sew together for a scrappier look. I joined my 14″ pieces together using a 45 degree angle.
Scrappy binding!!


One super snuggly 55″x55″ lap quilt perfect for cuddling up on the couch with!


If you have a minute, stop by my blog – there are almost always shenanigans a-brewing. Thanks for reading, and happy quilting!

Erin Davis
{mummyquilts.blogspot.com}