Garden Girl Quilt


We’re back…Yep, it’s been awhile since Kelli and I have had a quilt for you here at Moda Bake Shop. We’ve been really busy.  We sent our quilt book, scheduled to come out in early 2015, to our publisher.  Kelli’s been taking college classes and we bought an old foreclosure house that we are remodeling.  You can read all about that and see pictures on our blog, Jo’s Country Junction.  With all that going on you’d think we’d not have time to to sew anything else..NOT!!  Sewing is therapy for us and trust me, we need therapy.  Besides, who can resist a great fabric line like MoMo’s Avant Garden…not us!  Read the pattern here then stop over to our blog and we’ll fill you in on some behind the scenes info about the quilt and we have a sweet $50 gift certificate for one our readers to win.

Before we get going here are a few stats on the quilt.

Finished Block Size:  10”
Finished Quilt Size:  80” x 90”

Layout:  8 x 9

Fat Quarter Bundle of MoMo’s Avant Garden
4 yards Blue Background
4- 1/3 yard cuts of coordinating solids/dots
5 1/2″ yards backing
3/4 yard binding

**Note WOF means the width of the fabric**

Pick 24 fat quarters from the bundle.  From Each (of 24) fat quarters cut:
                -Cut 2- 7 1/2″ x 21” strips.  Subcut 1- 7 1/2″ x 21” strip into 2- 7 1/2″ squares
                -Cut the remaining 7 1/2″ x 21” strip into 1- 7 1/2″ square and 2- 3 ½” x 13.5” rectangles. 
                -Cut the 2- 3 1/2” x 13 1/2″ strips into a total of 12- 2” x 3 1/2″ rectangles.
                **From each fat quarter, you will need a total of 3- 7 1/2″ squares and 12- 2” x 3 1/2”                                  rectangles.
From Blue background fabric:
                -Cut a total of 36- 2” x WOF strips
                                -Subcut into a total of 576- 2” x 2 1/2″ rectangles.
                -Cut a total of 29- 2” x WOF strips
                                -Subcut into a total of 576- 2” squares
From Each of 4 coordinating solids/dots (cornerstones):
                -Cut 4- 2” x WOF strips
                                -Subcut each strip into a total of 72- 2” squares of each color (288- 2” squares)
From binding fabric:
                -Cut a total of 9- 2 1/2″ x WOF strips.
Sewing Instructions (for one block):
1.  Using 4- 2” squares and 4 matching 2” x 3 1/2″ rectangles, place a blue square, right sides together, on the corner of each of the colored rectangles.  Sew from corner to corner on the blue square.  

Trim seam allowance to a quarter of an inch.  Press to the blue.  Add a second square to the opposite side of the printed rectangle.  Again, sew from corner to corner of the blue square.  Trim seam allowance to a quarter of an inch and again, press to the blue. 

 Repeat for each matching colored rectangle.

2.  Attach a 2” x 2.5” rectangle to opposite sides of each flying goose created in step 1.  Press to the blue rectangles.

3.  Attach a 2” colored square (cornerstones) to opposite ends of two of the units created in step 2. 

 Attach the remaining two segments created in step 2  to the opposite sides of the main 7 1/2″ colored squares.  Press to the colored center.

4.  Attach the remaining segments (with cornerstones) to opposite sides of the block.  Press to the colored middle.

5.  Repeat to make a total of 72 blocks.
6.  Arrange in a 8 x 9 layout sewing the blocks first into rows then sewing the rows together.
7.  Quilt as desired. Check out our blog, Jo’s Country Junction, to see what we did for a quilting design.

8.  Join binding strips and bind.


Finished Quilt Size:  80” x 90”

This is such a fun fabric line…perfect for picnics and perfect for any girls room.  We couldn’t resist the fabric!!


Jo and Kelli Kramer
{ Jo’s Country Junction}

Jelly Roll Race Remix Quilt


Hello, Karin Vail from Cascade Quilts back again this month with yet another Christmas in July project!

2 Jelly Rolls (or 2 jelly roll race quilt tops – or a combo of the two!)  I used 24th and Pine by Basic Grey
2/3 yard for binding (or use leftovers for a scrappy binding)
1 yard inner border (cut into 8@ 4.5”WOF strips)
1 1/2  yards outer border (cut into 8@ 6.5”WOF strips)
5 yards backing

Probably most quilters have tried this at one point or another –  a ”Jelly Roll Race” (JRR) quilt top.  It works up fast for sure – but makes a rather ho-hum quilt.  I made one myself years ago, but it was not ever destined to be made into a quilt after I finished the top and didn’t love it.
So, WHAT do you do with a JRR quilt top that you love the fabric, but don’t love the design?  Rework it by adding yet another JRR top to the mix…..
Now, there are lots of JRR quilt tutorials out there, so I am not going to go into how to make those.  What I am going to explain is how I remade these two JRR tops into a beautiful quilt with MUCH more visual interest!  These JRR tops will each measure around 50”x64” to begin with.

Yes, I made TWO identical JRR tops, but you could certainly make two different tops and use this same technique.  It is similar to a ‘bargello’ technique.  If you did this, I would alternated between strips from the two JRR tops to get a uniform look throughout.
First, take one JRR top and fold it in half so that the top strip can be sewn to the bottom strip – so you make a JRR ‘tube’.  Think of it like a *giant* trip-around-the-world block setup.  From that tube, you will cut cross-section strips.   Here the seam has been sewn to make the tube and it’s again folded in half horizontally so I can do the subcutting.
In this quilt, I cut my strips 2.5” so that I have 2” squares in my final quilt, but you can certainly change it up and cut varying widths of strips!
For the first strip, take apart one seam between blocks.
The next strip, you will take apart the next seam up from the one you took apart on the first strip, and so on.
To make it easier to keep track and keep them in the right orientation (how they came off of the original JRR top), I cut only a few strip tubes at a time and sewed them a few at a time.
Match up your seams and sew the long verticle seams.
Where the fabrics change, you will get several almost-half square triangles.  Or, you might luck out and get a perfect HST in the mix too:
You should be able to get twenty 2.5” strips from each JRR ‘tube’, so with two ‘tubes’ you would be able to get a total width of 80” if you used it all.  But, since the length of the quilt is only 64” at this point, and I didn’t want an 80×64 quilt,  I decided to stop at 64” wide and add borders to enlarge it and have a balanced quilt.  I personally prefer a square quilt since you don’t have to worry which side is ‘up’ that way 🙂  If you are using 2 identical tops, cut 20 strips from one top, and 12 from the second.  If you are using 2 different JRR tops, then cut 16 strips from each JRR ‘tube’.
Now, take your 8@ 4.5”WOF strips and sew them into pairs to create 4 longer strips.  Measure your quilt top, cut border fabric to match, and sew the border on top and bottom.  Mine measured 64.5”.  Press, measure the length you will now need for the sides and cut your remaining border strips to length, and sew on left and right sides.  Mine measured 72.5”.
For your second border, take your 8@ 6.5” strips and sew them into pairs.  Again, measure your quilt top as per the first border.  My first measurement for the top/bottom was 72.5” and second for the sides was 84.5”.


A generous 84”x84” quilt!

Karin Vail
{Cascade Quilts}

Peppermint Swirl Christmas Tree Skirt

Happy Christmas in July! I’m Heather from Heather Kojan Quilts. I’m excited to share this tutorial for a super fun Peppermint Swirl Christmas Tree Skirt! Start now and you’ll have it done way before the holiday rush. (Tip: Make this in any fabric of your choosing to create a fun table topper for any season. Or, maybe a fun and unique baby quilt or play mat. Simply applique a center circle and you’re good to go!)

So, this is truly made in July, and nary a Christmas tree to be seen. So, here you have the perfect basketball hoop skirt!

Ready to get started?

12 Fat Quarters of Basic Grey’s 25th and Pine (4 green, 4 red and 4 white)
3 yards backing fabric
1/2 yard binding fabric

Batting, 54″ x 54″

Nine Degree Wedge Ruler

I’m using the fabulous 25th and Pine from Basic Grey. I love the feel of this fabric. So luxurious.

You’ll need 12 fat quarters to make your swirl: 4 green, 4 red, 4 white. 

Take each of your fat quarters and cut into strips, 2.5″ x 22″. You should get 7 strips from each fat quarter to yield 28 strips of each color.

Next we’re going to make strip sets. Following the chart below, we’ll make 9 unique strip sets. R=Red, G=Green, W=White. Use a 1/4″ seam allowance throughout this project.

Row 1
Row 2
Row 3
Row 4
Row 5
Row 6
Row 7
Row 8
Row 9
R
R
R
G
G
G
W
W
W
R
R
G
G
G
W
W
W
R
R
G
G
G
W
W
W
R
R
G
G
G
W
W
W
R
R
R
G
G
W
W
W
R
R
R
G
G
W
W
W
R
R
R
G
G
W
W
W
R
R
R
G
G
G
W
W
R
R
R
G
G
G
W
W
R
R
R
G
G
G
W
W

Sew your first strip set together, using the chart above. A finished strip set should measure 22″ wide and 18.5″ top to bottom.

After you sew your first strip set, lay out the next strip set beside the first. Try to avoid having the same fabrics next to each other. Label your strip sets 1-9 as you sew them. Press the odd numbered strip sets in one direction, and the even numbered strip sets in the opposite direction. After sewing all of the strip sets, you should have one leftover strip of each color. 

Now it’s time to cut your wedges.

You need to get 5 wedges from each strip set. Place the ruler so that the 22″ mark is aligned with the top edge of your strip set. Use your seam lines on your strip set and the lines on the ruler to make sure your ruler is placed correctly and everything is lined up straight. It’s helpful if you can place your cutting mat so that you can walk around it to make the cutting easier. Cut your first wedge. Re-position ruler at the top edge, and cut your second wedge. Repeat to make 5 wedges total. Stack the wedges (I clip them with a wonder clip) and label stack #1. You’ll end up with smaller “waste” wedges as you cut. Save these for creative play later!

Continue to cut your wedges from each strip set. Label and keep in order.

Find a nice open spot of “design floor”. Lay out your wedges in a circle, starting with one, continuing through nine, then repeating with one through nine and so on. Do you see the spiral happening? Cool, right? You’ll only need 40 wedges for this project. Again, set the remaining wedges aside for creative play (mug rugs? table runner?) After you have all 40 wedges laid out, check to make sure the spiral works and that nothing got out of order. (Your ending wedge will not create a continuous spiral with the first wedge.)

Let’s sew the spiral. I like to sew 8 wedges at a time. I pair the first 2, second 2, third 2 and fourth 2 by laying the right sides together. At my sewing machine, I sew the first pair, then 2nd, 3rd and 4th, chain stitching as I go. Because we did alternate pressing, the seams should nest together nicely. I then sew the first two pairs together, then the last 2 pairs together, and finally the 2 four wedge units together. Then I take this unit and return it to the spiral. Repeat for the reaming wedges. Once I have all 5 eight wedge units sewn, I check to make sure the spiral is continuous and nothing got out of order. Then I sew all the units together, including the seam where the end meets the beginning. I mark this seam with a pin.

Pretend there’s only 4 pairs of wedges above!
Back at the sewing machine, I do a little stay stitching around the inside and outside circle to keep the stitches from “popping”, about 1/8th inch from the edge. 
Cut your backing fabric into two pieces, 54″ in length x width of fabric. Trim selvages and seam the two pieces together. You’ll have a piece of fabric 54″ x 80″ (approximately). Trim to 54″ square. 
Layer your backing, batting and skirt top. Baste as preferred.
Time to quilt! I used my walking foot and did straight line quilting on each side of the seams. I started and stopped each line of quilting where wedge one and forty meet (where I placed that pin earlier.) Be sure to do an 1/8th of an inch stitch around the inner and outer circle edges as well. 
With your scissors, trim around the outer circle. Cut right down the seam where wedge one and wedge forty meet, then continue to cut the inner circle.

Make your bias binding. You’ll need approximately 240″ of bias binding. 1/2 yard will give you more that plenty! Lay out your 1/2 yard of fabric. Use the 45° line of your ruler to lop off the bottom left and top right corners of your fabric, approximately 10″ from the point. I do this so that I don’t have super short pieces of binding fabric. Keep the 45° angle going, and cut binding strips 2.5″ wide. If you want to make the optional ties, reserve two lengths, approximately 22″ long.

To join your strips, place two pieces together, matching the right angles.
Place right sides together. The strips will be at a right angle. Be sure to off set the corner by a 1/4 inch, as shown in the picture. Sew strips together with a 1/4″ seam. Continue to join all the strips until you have enough binding. Fold binding strip in half and press. Voila! Bias binding!
Optional ties: Take one piece of the bias binding strip approximately 20-22″ long. Fold in half length wise. Press. Unfold, then press so that each long edge meets the center “line” that you just pressed. Fold each short end under 1/4″ and press. Re-fold and press entire tie. Stitch along the long edge and short folded edges, close to the open edge. Cut into 2 lengths, approximately 10″ each. Repeat with second strip.
Pin ties in place with raw edges together, approximately 4″ from inner and outer circle. These will get sewn into the tree skirt as you sew on your binding.
Bind your quilt. Congratulations ~ your first Christmas finish of the year!


One Peppermint Swirl Christmas Tree Skirt, 45″ diameter.

Heather Kojan
{heatherkojan.blogspot.com}

Summer Sand and Stars Quilt


Summer Sand and Stars is about stars! Big stars, little Stars, embedded stars, floating stars…all made from the same basic set of instructions.  Playing with shadows and color, it is the perfect picture of summer daydreams and night sailing.

This quilt is made from 12 large blocks, set in a 3 x 4 grid.  There is one border with one setting square.


  • Stars: 1 Fat Quarter Bundle – I used Catalina Batiks
  • Backgrounds:
    • 1¾ yards light – I used SKU #4328-41 from Summer Vacation Batiks
    • 2½ yards dark – I used SKU #4328-42 from Summer Vacation Batiks
  • Binding: ¾ yards – I used SKU #4329-29 from Catalina Batiks
  • Backing: 5½ yards  – I used SKU #4329-30 from Catalina Batiks
  • It will also be helpful to have at least 13 Ziploc sandwich bags to hold your pieces.
  • 3 pieces of printer paper – on which to print a paper foundation pattern for the tiniest stars. When you print the patter be certain that the longest dotted line of the pattern measures 5″.  If it does not you can adjust its size by fiddling with the sizing on your printer. The Printer Friendly file at the end of this post has the foundation pattern for the star.

Determine Color Placement. Think of your quilt as a piece of 8½” x 11″ white printer paper.  In your mind, draw a line from one corner of the paper to its diagonal opposite. The colors in my quilt are loosely arranged along this line. The cooler colors (blues, purples, and greens) live in the north, above the line, and the warmer colors (reds, yellows, and oranges) live to the south, below the line. Sparkle happens when you let some of the colors drift across the imaginary border line.  It creates little pockets of interest that keep your eyes moving across the quilt.


Look at the gray scale drawing below.  Each block of the quilt is numbered.  The light and dark backgrounds are shaded respectively with white and dark gray.  The cold colors are black.  The warm colors are light gray.  Some blocks have three fabric in them.  Where this is the case an additional gray is used.

With all these things in mind, turn to your stack of fabrics. You want to select the fabrics for each square and label them accordingly.

Fat Quarter cutting diagram

Each Big Star (1 center square and 8 points) can be made from 1 fat quarter with enough left over to make one Center Star and a Tiny Star.   You could make the Big Star in block #2 and the Center Star in block #9, and one of the Tiny Stars in block #11 all from the same fat quarter, but no more

NOTE: Blocks 2, 3, 5, and 6 share a Quarter Star and so do blocks 4, 5, 7, and 8. You want to make sure that you use the same fabric for these pieces.

Block Types. There are 7 different block types in this quilt.  Their placement is illustrated in the drawing below and the block types are shown in the other diagram.


Before you start cutting, make labels for your blocks and block components so you can keep track of all the pieces. Label 13 different Ziplocs with numbers 1 through 13 (these are for the 12 blocks in the quilt top plus the star block pieced into the border). Make additional Post-It labels for each individual block and stick them on the Ziploc bags. Use Wonder Clips or paper clips to keep the pieces for each type of star together if desired.

  • Bag #1 | Labels for Big Star 1 (BS1) and Tiny Star 1 (TS1)
  • Bag #2 | Labels for BS2 and Quarter Star 1 (QS1)
  • Bag #3 | Labels for BS3, Center Star 1 (CS1), and QS1
  • Bag #4 | Labels for BS4  and QS2
  • Bag #5 | Labels for BS5, QS1, and QS2
  • Bag #6 | Labels for BS6 and QS1
  • Bag #7 | Labels for BS7 and QS2
  • Bag #8 | Labels for BS8 and QS2
  • Bag #9 | Labels for BS9 and CS2
  • Bag #10 | Labels for BS10 and CS3
  • Bag #11 | Labels for BS11 and TS2
  • Bag #12| Labels for BS12 and Tiny Embedded Star (TES)
  • Bag #13 | Labels for Tiny Floating Star (TFS)

CUTTING DIRECTIONS
Cut the pieces for one block at a time. When cutting from fat quarters, cut the biggest pieces you need first. When cutting background fabric, cut a 5½” x WOF strip.  Starting with the biggest pieces, cut all of your pieces from this strip.  Save any leftover bits and use them for the smaller cuts as you go.  You should have plenty of fabric.

BLOCK 1A | Big Star 1 + Tiny Star 1

  • BS1, cut (4) 5½” squares for points and (1) 9½” square for center
  • TS1, cut (1) 2¾” square for center and (8) 1½” x 2″ for points
  • Background (light), cut:
    • (4) 5½” squares for Big Star points
    • (3) 5″ squares for Big Star corner patches
    • (4) 1¾” squares for corner patches of Tiny Star
    • (4) 1¾” x 2¾” rectangles for edge patches of Tiny Star
  • Paper Pattern for Tiny Star. Be certain that the longest dotted line of the pattern measures 5″.

BLOCK 2B | Big Star 2 + Quarter Star 1

  • BS2, cut (4) 5½” squares for points and (1) 9½” square for center
  • QS1, cut (1) 3½” square for Quarter Star points and (1) 2¾” square for center
  • Background (dark), cut:
    • (3) 5” squares for Big Star corner patches
    • (4) 5½” squares for Big Star points
    • (1) 3½” square for Quarter Star points
    • (1) 2¾” square  for Quarter Star corner

BLOCK 3C | Big Star 3 + Center Star 1 + Quarter Star 1

  • BS3, cut (4) 5½” squares for points, (4) 2¾” squares for block corners, and (4) 3½” squares for points
  • CS1, cut (1) 5” square for center and (4) 3½” squares for points
  • QS1, cut (1) 2¾” square  for center and (1) 3½” square for points
  • Background (dark), cut:
    • (3) 5” squares for corners
    • (4) 5½” squares for Big Star points
    • (1) 2¾” square  for Quarter Star corner
    • (1) 3½” square for Quarter Star points

BLOCK 4B | Big Star 4 + Quarter Star 2

  • BS4, cut (4) 5½” squares for points and (1) 9½” square for center
  • QS2, cut (1) 3½” square for points and (1) 2¾” square for center
  • Background (dark), cut:
    • (3) 5” squares for Big Star corner patches
    • (4) 5½” squares for Big Star points
    • (1) 3½” square for Quarter Star points
    • (1) 2¾” square for Quarter Star corner

BLOCK 5D | Big Star 5 + Quarter Star 1 + Quarter Star 2

  • BS5, cut (4) 5½” squares for points and (1) 9½” square for center
  • QS1, cut (1) 3½” square for points and (1) 2¾” square for center
  • QS2, cut (1) 3½” square for points and (1) 2¾” square for center
  • Background (dark), cut:
    • (2) 5” squares for Big Star corner patches
    • (4) 5½” squares for Big Star points
    • (2) 3½” squares for Quarter Star points
    • (2) 2¾” squares for Quarter Star corners

BLOCK 6B | Big Star 6 + Quarter Star 1

  • BS1, cut (4) 5½” squares for points and (1) 9½” square for center
  • QS1, cut (1) 3½” square for points and (1) 2¾” square for center
  • Background (light), cut:
    • (3) 5” squares for Big Star corner patches
    • (4) 5½” squares for Big Star points
    • (1) 3½” square for Quarter Star points
    • (1) 2¾” square for Quarter Star corner

BLOCK 7B | Big Star 7 + Quarter Star 2

  • BS7, cut (4) 5½” squares for points and (1) 9½” square for center
  • QS2, cut (1) 3½” square for points and (1) 2¾” square for center
  • Background (dark), cut:
    • (3) 5” squares for Big Star corner patches
    • (4) 5½” squares for Big Star points
    • (1) 3½” square for Quarter Star points
    • (1) 2¾” square for Quarter Star corner

BLOCK 8B | Big Star 8 + Quarter Star 2

  • BS8, cut (4) 5½” squares for points and (1) 9½” square for center
  • QS2, cut (1) 3½” square for points and (1) 2¾” square for center
  • Background (dark), cut:
    • (3) 5” squares for Big Star corner patches
    • (4) 5½” squares for Big Star points
    • (1) 3½” square for Quarter Star points
    • (1) 2¾” square for Quarter Star corner

BLOCK 9E | Big Star 9 + Center Star 2

  • BS9, cut (4) 5½” squares for points, (4) 2¾” squares for center block corners, and (4) 3½” squares for points
  • CS2, cut (1) 5” square for center and (4) 3½” squares for points
  • Background (dark), cut:
    • (4) 5″ squares for Big Star corners
    • (4) 5½” squares for Big Star points

BLOCK NUMBER 10E | Big Star 10 + Center Star 3

  • BS10, cut (4) 5½” squares for points, (4) 2¾” squares for center block corners, and (4) 3½” squares for points
  • CS3, cut (1) 5” square for center and (4) 3½” squares for points
  • Background (light), cut:
    • (4) 5″ squares for Big Star corners
    • (4) 5½” squares for Big Star points

BLOCK NUMBER 11A | Big Star 11 + Tiny Star 2

  • BS11, cut (4) 5½” squares for points and (1) 9½” square for center
  • TS2, cut (1) 2¾” square for center and (8) 1½” x 2″ for points
  • Background (light), cut:
    • (4) 5½” squares for Big Star points
    • (3) 5″ squares for Big Star corner patches
    • (4) 1¾” squares for corner patches of Tiny Star
    • (4) 1¾” x 2¾” rectangles for edge patches of Tiny Star
  • Paper Pattern for Tiny Star. Be certain that the longest dotted line of the pattern measures 5″.

BLOCK NUMBER 12F | Big Star 12 + Tiny Embedded Star

  • BS12, cut:
    • (3) 5” squares for Big Star center
    • (4) 5½” squares for Big Star points
    • (4) 1¾” squares for corner patches of Tiny Embedded Star
    • (4) 1¾” x 2¾” rectangles for edge patches of Tiny Embedded Star
  • TS1, cut (1) 2¾” square for center and (8) 1½” squares for points
  • Background (dark), cut:
    • (4) 5” squares for corner patches
    • (4) 5½” squares for Big Star points
  • Paper Pattern for Tiny Embedded Star. Be certain that the longest dotted line of the pattern measures 5″

BORDERS + 13 G | Tiny Floating Star

  • TFS, cut (1) 3½” square for center and (4) 2½” squares for points
  • Background (light), cut:
    • (4) 2″ squares for Tiny Floating Star corners
    • (4) 2½” squares for Tiny Floating Star points
  • Light background, cut (4) 6½” x WOF strips
  • Dark background, cut (4) 6½” x WOF strips

BINDING: cut (8) 2½” x WOF strips

If you have cut and labeled all of those pieces you deserve a break.  Step away from the table and the rotary cutter.  Go outside and breath some fresh air.  Gaze at the sky.  Listen to the sounds that surround you.  Breath.

Make sure you take a break after you cut your pieces.

SEWING DIRECTIONS
As much as you are tempted to create a production line, play it safe and make only one block at a time.

Block A

Block A {There are 2 A type blocks. Gather bags 1 and 11 plus foundation pattern for tiny stars.}

  • Tiny Star.  Make 1 tiny star per block. Use the tutorial located {here} to paper foundation piece the tiny stars.
  • Big Star.  Create Double Half Square Triangles (HSTs).
    • Draw a diagonal line on the wrong side of 5½” background squares. Layer 1 background block with 1 star color block, right sides together. Sew ¼” on each side of the drawn diagonal line. Iron to set seams. Cut on drawn line to create 2 (HSTs). Gently iron seam allowances open. Trim to 5″ square. Repeat 3 times for a total of 8 HSTs.
Half Square Triangle Construction

  • Sew HSTs together in 4 sets of 2 so that the seam line marks the center of a large triangle of background fabric. Sew seam allowances open. Arrange pieces on desk or design wall in front of you to match drawing of block A.
Double HST

Piece A blocks together in rows, using the components you have created plus the background squares.

Big Star A, row 1
Big Star, row 2
Big Star, row 3

Iron seam allowances away from the double HSTs. Trim blocks to 18½” square. Create 2 of these blocks.

Block B

Block B {There are 5 B type blocks. Gather bags 2, 4, 6, 7, and 8.}

  • Quarter Star. Repeat process from A blocks to make 4 HSTs.Trim to 2¾” square. Join Quarter Star HSTs with background and print squares to make a Quarter Star unit as shown below. Trim to 5” square. Make a total of 5 Quarter Star units.

Quarter Star
  • Big Star. Repeat process as described for Block A replacing Tiny Star with Quarter Star when putting the block rows together. Be sure that the Quarter Star is on the outside corner of the block.

Block C

Block C. {There is only one type C block. Gather bag number 3.}

  • Repeat process for Quarter Star as described for Block B
  • Repeat process for double HSTs as described for Block A
  • Center Star. Repeat process for Big Star in Block A with smaller pieces. Use 3 1/2″ x 3 1/2″ squares for HSTs. Trim HSTs to 2¾” square. Arrange pieces to create a 9½” square star just like the big star but with 4 plain corners. Piece together the row components for block C:
    • Row 1: 5″ square background fabric; double HST with background triangle pointing down; 5″ x 5″ square background fabric.
    • Row 2: double HST with background triangle pointed to the right; 9 1/2″ x 9 1/2″ whole star block; double HST with background triangle pointing to the left
    • Row 3: Quarter Star with star fabric on bottom left edge; double HST with background triangle pointing up; 5″ x 5″ square background fabric
Block D

Block D. {There is only one type D block. Gather bag number 5.}

  • Repeat process for Block B replacing one 5″ background square with a Quarter Star
  • Rows 1 and 3 of this block are the same….but flipped.
Block E

Block E. {There are 2 E type blocks.  Gather bags 9 and 10.}

  • Repeat process for Block C replacing Quarter Star with a 5” background square.

Block F

Block F. {There is only one type F block. Gather bag number 12.}

  • Make Tiny star as described in Block A
  • Using Tiny star and (3) 5″ square star fabric make 4 patch.
  • Trim 4 patch to 9½”’ square to make center of block
  • Repeat process as described in Block A, replacing tiny star in corner with a 5″ square of background fabric.

Block G. {There is only one type F block. Gather bag number 13.}

  • Repeat process for Big Star in Block A with smaller pieces.
    • Use 2 1/2″ x 2 1/2″ squares for HSTs
    • Trim HSTs to 2″ x 2″
  • Arrange pieces to create a 6 1/2″ x 6 1/2″ star just like the big star but with 4 plain corners.

QUILT ASSEMBLY
Make sure all blocks are trimmed to 18½” square and join them together as shown below.

Block placement

Block placement

  • Be careful to keep the Quarter Stars pointing in the right directions.  You want them to create whole stars when the blocks are sewn together.
  • Sew 4 rows of 3 blocks each
  • Iron seam allowances to the right in rows 1 and 3 and to the left in rows 2 and 4
  • Sew rows together to complete center of top

BORDERS

  • Gather setting star, block G, (4) 6½” x WOF strips light background,  and (4) 6½” x WOF strips dark background
  • Measure quilt. It should be something like 54½” wide by 72½” long. Record measurements:
    •  ___________ wide
    •  ___________ long
  • Sew 2 light background strips together along short edge, creating a strip that is approximately 6 1/2″ x 84″
  • Trim newly created strip to 6 1/2″ x length of quilt
  • Sew to lighter/warmer side of quilt top.  In the diagram it will be to the right.
  • Iron seam allowance towards the border.
  • Repeat process with dark background, sewing strip on the opposite side of the top.
  • Measure width of quilt and record _______________.  (It should be close to 66 1/2″)
  • Sew remaining dark background strips together to make a strip that is 6 1/2″ x width of your quilt.
  • Sew to top of quilt.
  • Iron seam allowances towards the border.
  • Sew remaining light background strips and setting star block G together, with the star on one end to make a strip that is 6 1/2″ x width of your quilt.
  • Iron seam allowance between strip and block towards the strip.
  • Sew to bottom of quilt making sure that the star block falls to the left side, under the light background border.
  • Iron seam allowance towards the border.

Layer, baste, and quilt as desired.

I hope you enjoy making my quilt.  Be sure to share it with the other Tops to Treasures quilters on the Tops to Treasures flickr group.

A fun 67″ x 85″ throw or topper for a star struck twin bed.

Cindy Sharp
{topstotreasures.blogspot.com}

Winter Wonderland Peaks & Paddocks Quilt


Have you ever found a fabric line that made you squeal right there in the middle of the fabric shop? Have you ever found one that made you giggle with glee and rush to share it with your best quilty friends?  Winter Wonderland by Bunny Hill for Moda did that to me!  I am beyond thrilled to be able to share my quilt made from it with all of you!

I love, love, love the snowmen and the trucks.  What could be better than snowmen driving pick up trucks….perhaps a snugly quilt to make you laugh and keep you warm?!

detail of Winter Wonderland panel

Peaks & Paddocks is a simple quilt made from one, funky block.

I think I was thinking Snowball. I ended up with a center-less Shoo-flly.  Either way, the block screams, “You got it wrong!”  I wanted to find out what would happen if you made a bunch of blocks, all with the same irritating mistake in them, more on that later.


General Description of Quilt
16, 12” finished blocks in a 4 x 4 grid
2 borders
               1” finished inner border with tiny half square triangle (hst) setting squares
               4” finished outer border with large hst setting squares
As described the quilt finishes out at 59” x 59”


Fabric Requirements:
Blocks
What I used
           Red on White
1 ¾ yards
Selections from fat quarter bundle SKU#2870AB
           White on Red
½ yard
           Red on Red
¼ yard
           White on White
¼ yard
Inner Border + Binding
¾ yard
SKU#2875-15 red on red, twigs & berries
Outer Border
1 ¼ yards
SKU#2871-12 red on white, snowmen
Backing
3 ½ yards
SKU#2872-18 white on red, cars
Cutting Directions:
  • From Red on White
    •  80, 4 ½” x 4 ½” squares
      • Cut a total of 20, 4 ½” x 18” rectangles from fat quarters
      •  Sub cut each rectangle into 4, 4 ½” x 4 ½” squares for a total of 80 squares
    •  24, 5” x 5” squares for half square triangles (HSTS)
      • Cut a total of 6, 5” x 22” rectangles from fat quarters
      • Sub cut each rectangle into 4, 5” x 5” squares for a total of 24 squares
  • From White on Red
    • 24, 5” x 5” squares for HSTS
      • Cut a total of 6, 5” x 22” rectangles from fat quarters
      • Sub cut each rectangle into 4, 5” x 5” squares for a total of 24 squares
  • From Red on Red
    • 8, 5” x 5” squares for HSTS
      • Cut a total of 2, 5” x 22” rectangles from fat quarters
      • Sub cut each rectangle into 4, 5” x 5” squares for a total of 8 squares
  • From White on White
    • 8, 5” x 5” squares for HSTS
      • Cut a total of 2, 5” x 22” rectangles from fat quarters
      • Sub cut each rectangle into 4, 5” x 5” squares for a total of 8 squares
  • From Inner Border Fabric
    • 5, 1 1/2” x width of fabric (wof) strips for inner border
    • 2, 2” x 2” squares for inner border setting squares for HSTS
    • 2, 5” x 5” squares for outer border setting squares for HSTS
    • 6, 2 ½” x wof strips for binding
  •  From Outer Border Fabric
    • 5, 4 ½” x wof strips for outer border
    • 2, 2” x 2” squares for inner border setting squares for HSTS
    • 2, 5” x 5” squares for outer border setting squares for HSTS

Sewing Directions:
  •  Blocks
    • General description
      • Each 12” finished block (actually measures 12 ½” x 12 ½” to allow for ¼” seam allowances) is made from 9, 4 ½” x 4 ½” patches.
        • 5 patches are 4 ½” x 4 ½” squares
        •  4 patches are pieced HSTS 

      • The block is based on the classic Shoo-fly design with two exceptions.
        1. There is not contrasting center to my block.
        2.  One of the corners is WRONG!  If you looked at the picture above and thought, “Oh, Cindy drew this one wrong.”  You are absolutely right; however, I did it on purpose.  Over the last 11 months I have been exploring what happens when you make a bunch of blocks wrong on purpose.  The results might surprise you.  They did me.  You can check them out under the “Oops” tab of my block of the month blog, Quilty Friends.
    • HSTS
      • Gather 
        • 24, 5″ x 5″ squares red on white fabric for traditional corners
        • 24, 5″ x 5″ squares white on red fabric for traditional corners
        • 8, 5″ x 5″ squares red on red fabric for WRONG corners
        • 8, 5″ x 5″ squares white on white fabric for WRONG corners
      • On the wrong side of all squares with white background draw a diagonal line.
      • Layer 1 red on white square with 1 white on red square, right sides together
      • Sew 1/4 from each side of drawn line…yes, sew twice.
      • Cut on drawn line.
      • Being careful not to warp triangles, gently iron triangles open…into squares.
      • Iron seam allowances open.
      • You now have 2, HSTS
      • Trim HSTS to 4 1/2″ x 4 1/2″ square
      • Repeat process with all red on white and white on red squares for a total of 48 HSTS for traditional corner patches
      • Repeat process with all red on red and white on white squares for a total of 16 HSTS for WRONG corner patches
    • BLOCKS
      • Gather
        • 48 traditional corner patch HSTS
        • 16 WRONG corner patch HSTS
        • 80, 4 1/2″ x 4 1/2″ red on white squares
      • Making one block at a time, arrange 9 pieces in front of you to match drawing.
      • Be careful to get the red triangles oriented correctly.
      • Sew patches together to make rows
        • Row 1: traditional HST with RED down and to the right; red on white square; traditional HST with RED down and to the left.
        • Row 2: red on white square; red on white square; red on white square
        • Row 3: WRONG HST with Red down and to the left; red on white square; traditional HST with Red UP and to the left.
      • Iron seam allowances towards the red on white square in rows 1 and 3
      • Iron seam allowances away from the center in row 2
      • Sew rows together to make block
      • Trim block to 12 1/2″ x 12 1/2″ square.
      • Repeat 15 times for a total of 16 blocks.
  • Quilt Top
    • Gather
      •  16 blocks
    • Arrange blocks in a 4 x 4 grid being careful to orient them so that the WRONG HST corners touch.  (see arrows in layout diagram above)
    • Sew sets of  4 block rows.
    • With the WRONG HST on the side closest to you, iron all seam allowances in the same direction.,
    • Sew rows together to make center of quilt.
      • NOTE: If you ironed the seam allowances as suggested, the allowances will snuggle together when you flip rows 2 and 4 to orient them correctly.
    • Iron seam allowances in the same direction.
    • Measure quilt and record below.
      • It should measure something like 48 1/2″ x 48 1/2″. 
      • ________ wide
      • ________ long
  • Borders
    • Inner Border
      • Gather
        • 5, 1 1/2” x width of fabric (wof) strips for inner border
        • 2, 2” x 2” squares inner border fabric
        • 2, 2” x 2” squares outer border fabric
      • Setting Squares
        • Using method described above make 4, 1 1/2″ x 1 1/2″ HSTS from 2″ x 2″ squares
      • Edge pieces
        • Cut 1, 1 1/2″ x wof strip into 4 equal pieces measuring 1 1/2″ x 10 1/2″ give or take.
        • Sew 1, 1 1/2″ x 10 1/2″ section to the skinny edge of each 1 1/2″ x wof strip.
        • Iron seam allowances open.
        • Using measurements recorded above, cut strips to lengths equal to the side of your top.  They should be very close to 1 1/2″ x 48 1/2″ each.
      • Sew edge pieces to 2, parallel sides of top.
      • Iron seam allowances toward the border.
      • Being careful to orient the corners in the correct direction, sew setting squares to ends of remaining edge pieces.  See diagram below.
      • Iron seam allowances toward the setting blocks.
      • Sew pieces to remaining border-less edges of quilt
      • Iron seam allowances toward borders.
      • Measure quilt and record below.
        • It should measure 50 1/2″ x 50 1/2″
        • _______wide
        • _______long
    • Outer Border
      • Gather
        • 5, 4 ½” x wof strips for outer border
        • 2, 5” x 5” squares outer border fabric
        • 2, 5” x 5” squares inner border fabric 
      • Setting Squares
        • Using the method described above make 4, 4 1/2″ x 4 1/2″ HSTS from 5″ x 5″ squares
      • Edge pieces
        • Cut 1, 4 1/2″ x wof strip into 4 equal pieces measuring 4 1/2″ x 10 1/2″ give or take.
        • Sew 1, 4 1/2″ x 10 1/2″ section to the skinny edge of each 4 1/2″ x wof strip.
        • Iron seam allowances open.
        • Using measurements recorded above, cut strips to lengths equal to the side of your top.  They should be very close to 4 1/2″ x 50 1/2″ each.
      • Sew edge pieces to 2, parallel sides of top.
      • Iron seam allowances towards the border.
      • Being careful to orient the corners in the correct direction, sew setting squares to ends of remaining edge pieces.  See diagram below.
      • Iron seam allowances toward the setting blocks.
      • Sew pieces to remaining border-less edges of quilt
      • Iron seam allowances toward borders.
  • Layer and quilt as desired.
    • I quilted mine with white thread in Christmas Snow by Anne Bright
detail from Winter Wonderland panel
I hope you enjoy my pattern.  Please share a picture of your completed quilt with me!  I have a Tops to Treasures Flickr group just for that purpose!  Come join the group.
Stop by my blog, Tops to Treasures to win one of the wonderful Winter Wonderland panels!

Jelly Turnover Quilt


Hello! I’m Shannon from Modern Tradition Quilts.  It’s an honor for me to be with you today on Moda Bake Shop.  I love working with pre-cut fabrics.  When it comes to creating quilts, the possibilities are endless!  When designing this quilt, I thought it would be fun to use a jelly-roll for the sashing and candy squares for the gem-stone corners–after all, they are already pre-cut to the same width.  All that was left was to decide what type of blocks to use.  Since charm squares create half-square triangles so readily, this quilt came together like “Peanut-butter & Jelly”–hence its name, the Jelly Turnover Quilt.

To create this project you will need:
  • One packages of 5″ charm squares.  (I used Grant Park)  This quilt uses 40 print squares.
  • One packages of 5″ bella solids charm squares.  This quilt uses 40 white squares.
  • Three packages of 2 1/2″ candy squares for the gem stone corners on the sashing. (I also used Grant Park).  This quilt uses 99 squares.
  • One 2 1/2″ jelly roll for the sashing (I also used bella solid white).  This quilt uses 23 strips.
  • One yard navy blue fabric for the binding. 

    To create the half-square triangles (HSTs):

    • Draw a diagonal line on the wrong side of each white Bella solid charm square.
    • Layer one white charm square on top of one print charm square with right sides facing.
    • Sew down both sides of the drawn line.

    • Cut down the drawn line and press seams towards the darker print fabric.
    • Square all HSTs to measure exactly 4 1/2 inches. 
    Use your favorite method of choice for this.  I like using a small square ruler.  Basically, you are trimming off the factory-created pinked/serrated edges.
    • Yield: 80 HSTs.

      To create the sashing:

      • Select twenty-three 2 1/2 inch jelly roll strips.
      • Cut the 2 1/2 inch white strips from the jelly roll into 4 1/2 inch sections.  Yield: 16 sashing rectangles measuring 2 1/2 inches by 4 1/2 inches per jelly roll length.
      Quick tip:  It is easy to cut several jelly-roll strips at once by laying 5 or 6 strips on your cutting board at a time.  Then, simply make the same rotary cuts that you would doing just one strip at a time.
      • This quilt requires 178 of these rectangles.

        To sew the vertical sashing units:

        • Select five 2 1/2 inch by 4 1/2 inch strips and five 2 1/2″ candy squares.  Sew these end to end to create a vertical sashing strip.  Press all seams towards the sashing to reduce bulk.  Create 18 of these strips.

        • Sew one horizontal sashing row for the bottom of the quilt.  It is comprised of nine 2 1/2 inch candy squares and eight 2 1/2 inch by 4 1/2 inch sashing strips.

        Note: This quilt is sewn in four quadrants–one quadrant at a time to ensure the proper placement of the HST unit to make the echo effect.  Each quadrant uses 20 HSTs.

        General directions for sewing all four quadrants:

        • Take twenty HSTs and  twenty 2 1/2 inch by 4 1/2 inch rectangles.
        • Chain-sew the 2 1/2 inch by 4 1/2 inch rectangle to the top of the HST.  Check the orientation of the HST you are working on as they differ in all four quadrants.  Press all seams towards the sashing to create less bulk.

        Note, the HST rotates depending on which quadrant of the quilt you are working on.
        • Sew this units into four columns of 5 units down.  Press all seams towards the sashing to create less bulk.
        • Add four vertical sashing strips to the side of each of the four 5-unit columns.  Refer to the quadrant diagram to check if it is the right or left-hand side.  If pressed correctly, these seams should nest.  Pin-match the intersections and sew with the HSTs on top to avoid blunting the points.  Also press these seams towards the sashing.  This will enable the quilt top to lie flat.
        Sew the columns together with HSTs on top so their points do not get blunted.
        • Sew these four columns together to create one quadrant.

          The upper left-hand quadrant HST orientation is: 

          The upper right-hand quadrant HST orientation is:

          The lower left-hand quadrant HST orientation is

          The lower right-hand quadrant HST orientation is:

          Use this assembly diagram to add the four quadrant panels together.

          • First, add the top left-hand quadrant to a center vertical sashing strip, then add the right-hand upper quadrant.
          • Second, add the bottom left-hand quadrant to a center vertical sashing strip, then add the right-hand lower quadrant.
          • Third, sew the top and bottom halves together.
          • Fourth and final, add the long horizontal sashing strip to the bottom to finish your quilt top.
          Assembly Diagram

          The finished quilt top diagram:


          The finished quilt top measures 50 inches by 62 inches.

          I quilted this using a lasso edge-to-edge style.

          Shannon Mower
          {moderntraditionquilts.blogspot.com}

          Floral Gatherings Quilt


          1 – Floral Gatherings Layer Cake
          3 yards Bella Solids – Off White (for stars, sashing, borders)
          5/8 yard Bella Solids – off white  (binding)
          5 yards Floral Gatherings – cheddar  (backing)
           
          From the Bella Solid Off White : 
          Cut 6 – 10″ x width of fabric strips.
          Subcut 4 of the strips into 10″ squares.
          You will need : 16 – 10″ squares
          Subcut the remaining 2 strips into 5″ x width of fabric and then subcut those strips into 5″ squares.  You will have 8 from each 5″ strip.  You will need 32 – 5″ squares.
          Cut 19 – 2½” x width of fabric strips.
          Separate into two sections – 8 for the binding and 11 for the sashing and borders. 
          P { margin-bottom: 0.08in; }

          From the Floral Gatherings Layer Cake :
          Divide 40 of the 10″ squares in this manner:
          You will need 8 – 10″ squares for the four patches – subcut into 5″ squares.
          You will need 16 – 10″ squares for the star points.
          You will need 16 – 10″ squares for the star centers.

          For the four patch blocks :
          layout two 5″ cream tone and two 5″ whites in four patch pattern
          sew top two together and sew bottom two together, press towards cream tone squares
          sew top two to the bottom two, press open, should measure 9½” x 9½”
          For the star points : 
          draw diagonal line on the back of each white square, with right sides together – sew 1/4″ from line, trim blocks along line
          press open, should measure 9½”
          For the star centers :
          layout four 10″ squares
          sew top two and bottom two together – press seams open
          sew top row and bottom row together, 
          being careful to align pressed seams, then press open
           square to 18½” square

          make four

          layout star block as you would like it sewn
          sew both star point sides to center four patch, press
          sew four remaining points to smaller four patch blocks, press
          sew top to center and then sew bottom to center, press
          ta-da!  36½” square
           now make three more
          sew the 11 – 2½” sashing/border strips end to end, press
          subcut :
          2 – 2½” x 36½” strips
          3 – 2½” x 74½” strips
          2 – 2½” x 78½” strips

          sew 2 – 2½” x 36½” sashing between two top blocks and two bottom blocks, press
          sew 1 – 2½” x 74½”sashing between top and bottom sections, press
          sew 1 – 2½” x 74½” border to the top and 1 – 2½” x 74½” to the bottom, press.  sew 1 – 2½” x 78½” border to the left side and 1 – 2½” x 78½” border to the right, press.
          For the backing : cut the 5 yards of fabric in half, selvage to selvage.  You will have 2 – 2½ yards x width of fabric pieces.  Sew them right sides together creating a square.  It should roughly measure 87″ by 90″.P { margin-bottom: 0.08in; }
          Quilt and bind as desired.
          Long arm quilting by Kathy Olkowski.

           
          78½” x 78½” quilt 

          Trish Poolson
          {notesofsincerity.blogspot.com}

          Turkey Tracks Quilt


          Hello everyone! I’m Becky from Patchwork Posse.  Today I am going to show you how to sew up the Turkey Tracks Lap Quilt Top. I love quilts….especially lap sized ones.  They don’t take as long to sew up, are great for gifts, and are handy to have around the house for a quick snuggle and use.

          Great for any time or season.  Bright colors and prints would also work great.  Just make sure that your dark and medium fabrics are contrasting enough- so the blocks stand out and don’t get lost. 
          This quilt is a bit tricky, but I will show you a quick piecing technique for the flying geese to speed up your construction time.


          1/2 yard- dark fabric
          2 yard- background
          1 1/4 yard- green
          3/4 yard- red
          various fabric scraps for the piano keys border- 5″ X 2 1/2″ –92

          Dark Blocks~
          36– 4 1/2″ X 4 1/2″ dark
          36– 2 1/2″  X 2 1/2″ background
          36– 2 1/2″ X 2 1/2″ background- corners of blocks
          Flying Geese Blocks~
          36– 5 1/2″ X 5 1/2″ background
          108– 3″ X 3″ green
          Sashing~
          9–  Red 2 1/2″ X 2 1/2″ squares
          36– 6 1/2″ X 2 1/2″ background
          Border~
          2– 2″ X 43″
          2– 2″ X 47″
          Piano Keys:
          92– 5″ X 2 1/2″ vairous fabrics
          4– 5″ x 5″ corners- green


          Dark Block:
          Draw a line from corner to corner on the wrong side of the 2 1/2″ square
          1)  Place the small background 2 1/2″ square right sides on one corner of the 4 1/2″ dark square
          2)  Sew on drawn line, cut off remainder triangle and iron

          Flying Geese Blocks:
          Draw a line from corner to corner on the wrong side of the 2 1/2″ squares
          1)  Place the 2 1/2″ squares at opposite corners of the background square
          2)  Sew on either side of the drawn line
          3)  Cut on drawn line and iron
          4)  Place a 2 1/2″ square in the last corner of the background
          5)  Sew on either side of the drawn line
          6)  Cut on drawn line and iron
          Square these to 4 1/2″ X 2 1/2″

          Sashings:
          1)  Sew 6 1/2″ X 2 1/2″ on either side of a red 2 1/2″ square
          Repeat for a total of 9
          Set aside the remainder background pieces- will be used later

          Piano Keys:
          1)  Sew 23 keys (5″ X 2 1/2′ ) side by side
          2)  Repeat for a total of 4
          3)  Sew the corner 5″ X 5″ squares to either ends of 2 sets- set aside

          Block construction:
          1)  Sew single flying geese to the dark block
          2)  Sew the section from step 1 to the side of the block
          Repeat until you have 36 blocks

          Sew the sashing pieces in between two blocks
          Then use the layout below to sew 9 blocks total
          Sew the 9 blocks together in rows of 3 for the center of the quilt
          Sew your first border on the sides of the quilt top
          Sew your piano keys border on the sides of the quilt top


          56″ X 56″ Quilt
          For more quilt tutorials and easy sewing projects– come stop by: www.patchworkposse.com
          or follow me on Facebook at Patchwork Posse. You can also find me on Pinterest.
          Hope you enjoy this quilt!
          Becky @ www.patchworkposse.com

          Sew Busy! Organizer


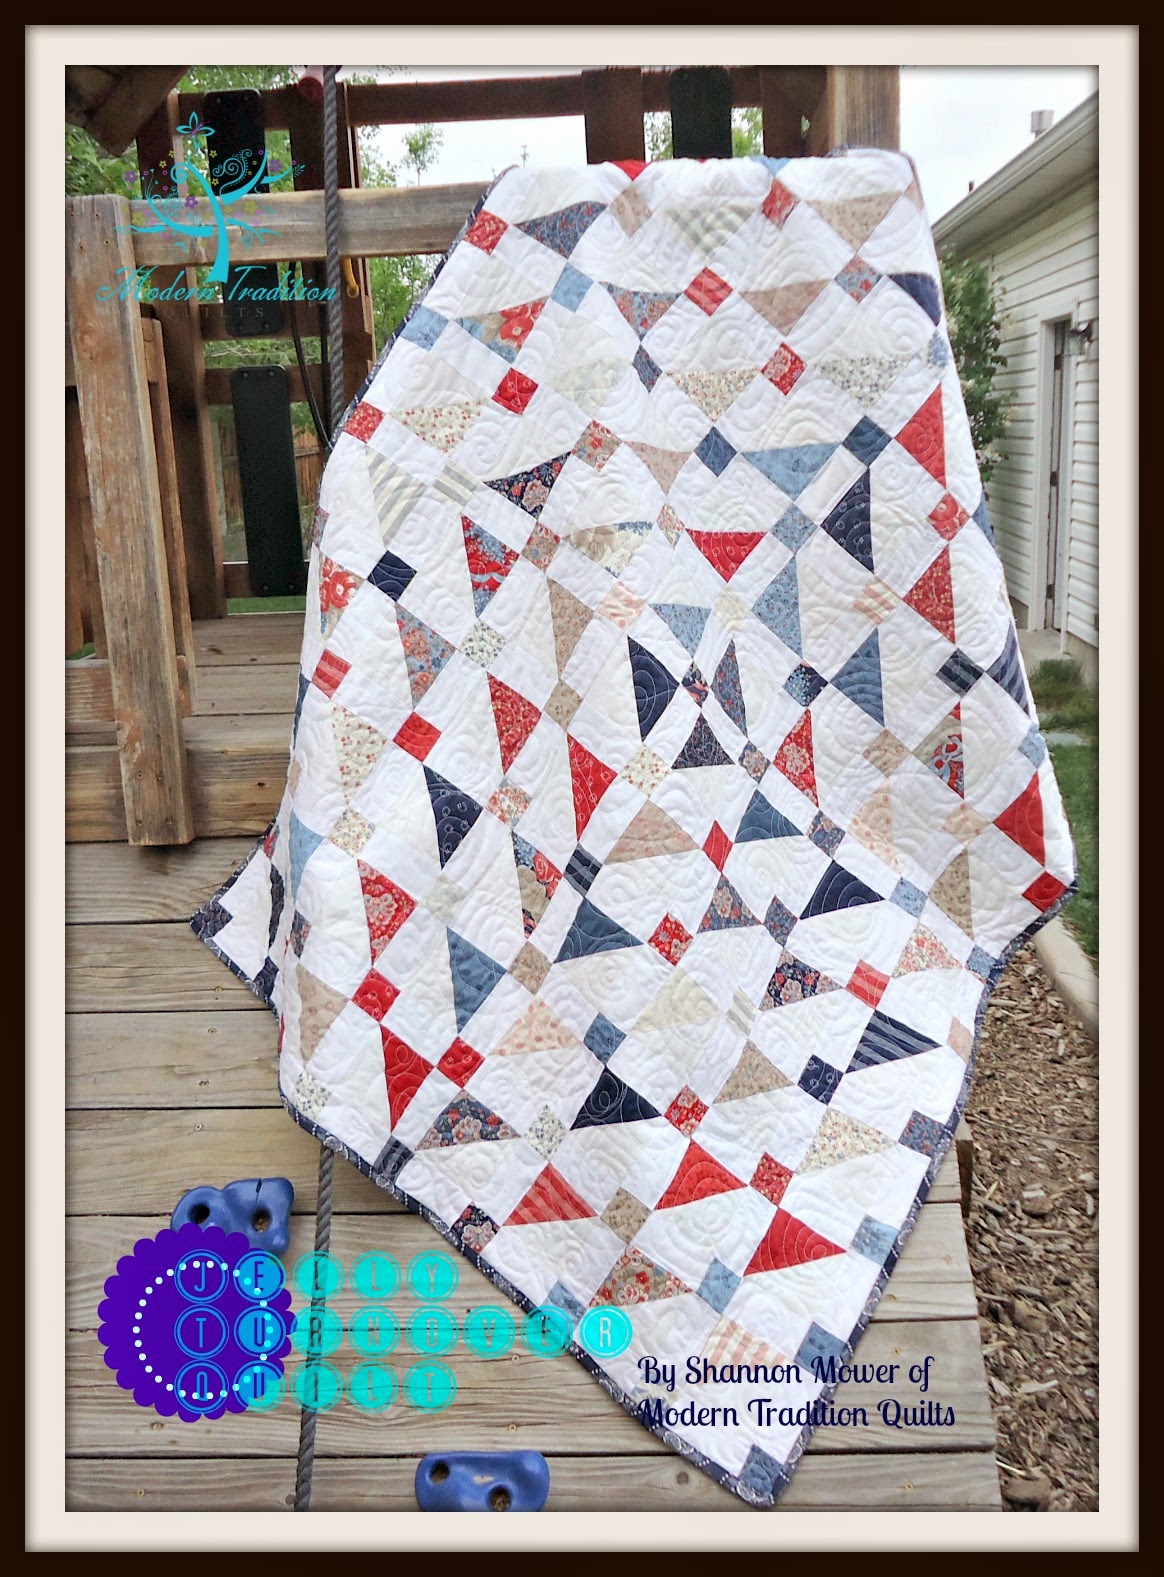
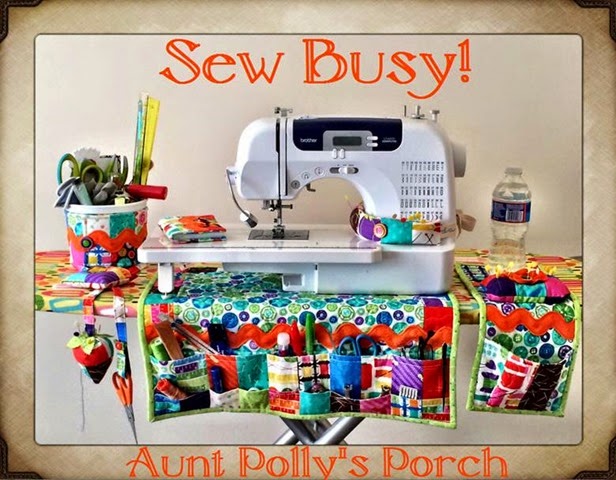
          Hello!  I’m Polly Monica from Aunt Polly’s Porch!  I’m so happy to be posting here today at the always awesome Moda Bake Shop!  I fell sewwww in LOVE with Moda’s Sewing Box collection and knew it would make some fun things for organizing any sewing room!  I hope you think so, too!  Let’s get busy making these eight sewing projects which include a sewing machine cover, a sewing machine mat, a versatile sewing caddy for your ironing board or armchair, a tub cover, a tie on pin cushion, a chatelaine, a square pin cushion and needle book.


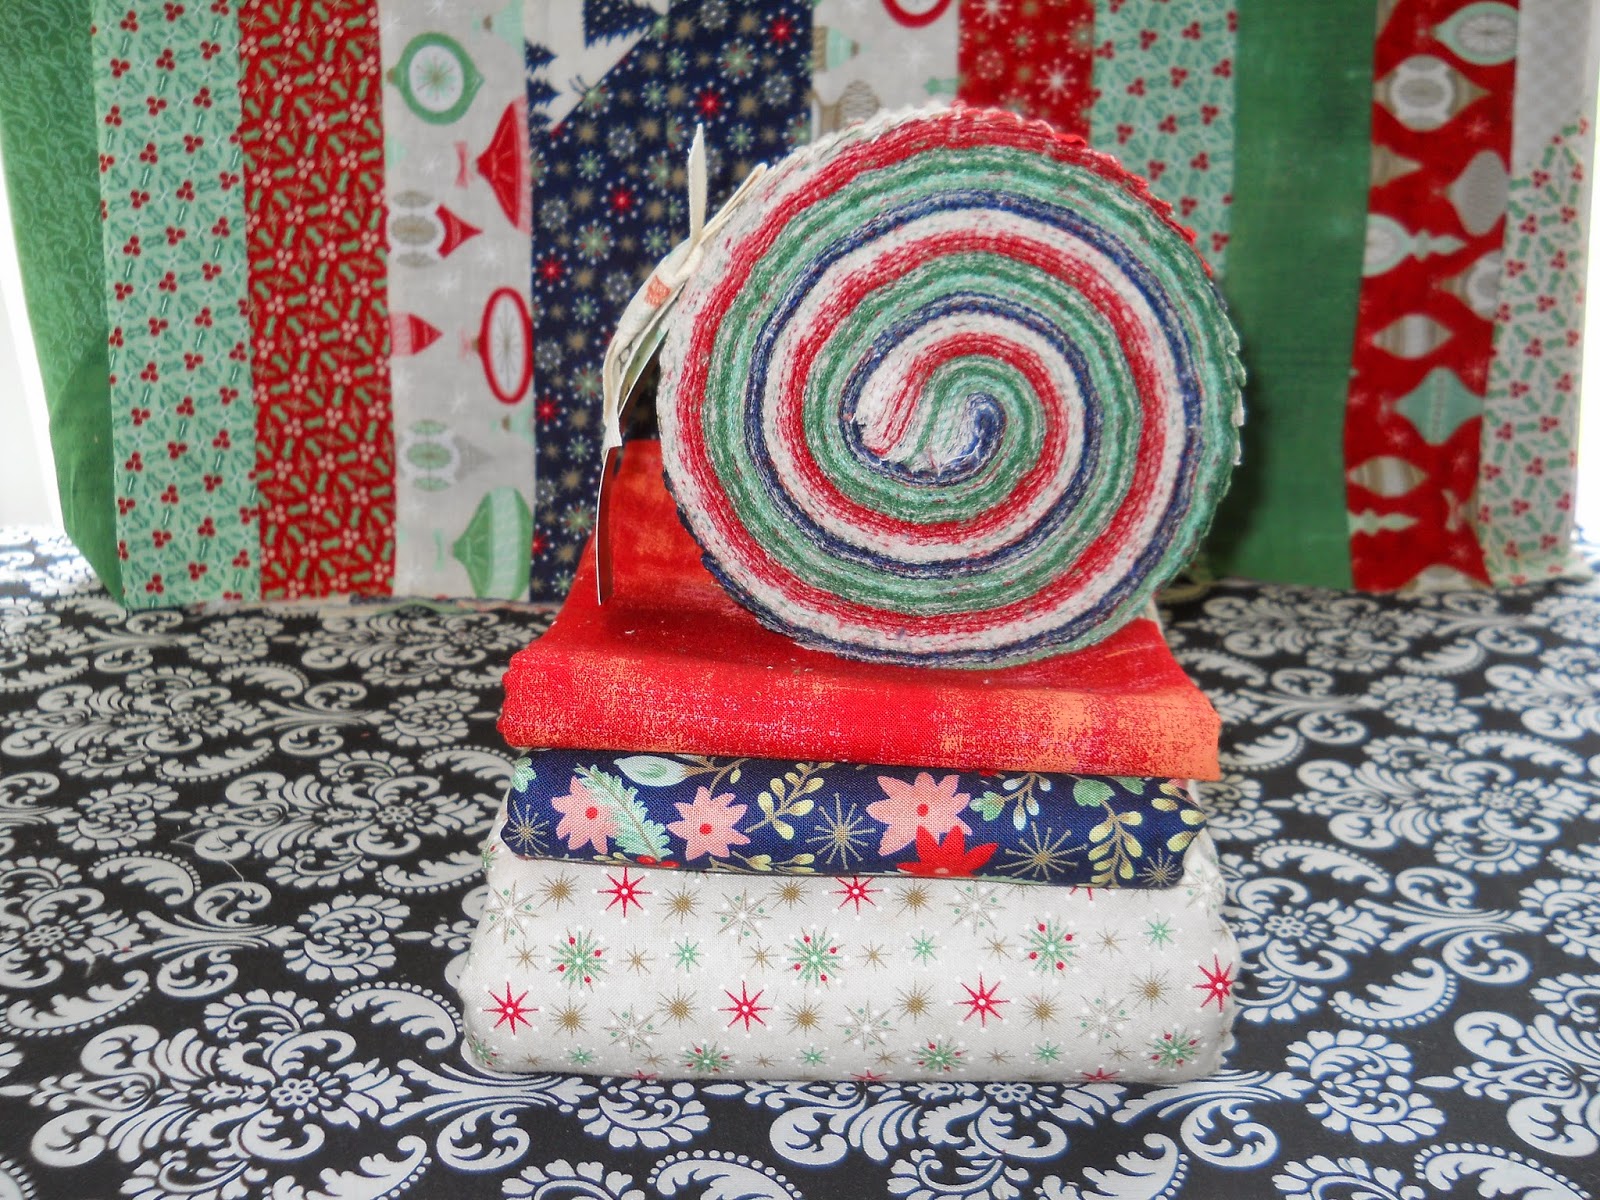
          1 Sewing Box charm pack

          Sewing Box Charm Pack by Gina Martin for Moda
           
          ½ yard coordinating print # 1 (notions print white)

          FABRIC SEWING BOX Sewing Notions Main Print Moda
           
          ½ yard coordinating print # 2 (tape measure multi)

          Sewing Box - Gina Martin - Moda
           
          ½ yard coordinating fabric #3 (pins lime)

          Sewing Box - Gina Martin - Moda
           
          1 yard coordinating print #4 (buttons blue)

          Sewing Box, Moda Fabric, Gina Martin, Buttons, 1/2 Yard
           
          1.5 yards fusible fleece
           

          3.5 yards Jumbo rick rack
          Assorted colors and sizes of buttons
           

          ABBREVIATIONS and NOTES-
          All seam allowances are ¼” unless directed differently.
          RST = right sides together
          RSO = right sides out
          WOF = width of fabric (selvage to selvage)
           
          Sewing Machine Cover Instruction
           
          clip_image004

          My sewing machine sits down in a Horne sewing table and it’s measurements are- 16” from right to left, 8 ½” from top of machine to tabletop, and 7 ½” deep looking at the machine from the side. (If your machine sits on top of a table, the height will be taller than mine!) You will need to measure your machine and adjust the measurements as necessary.
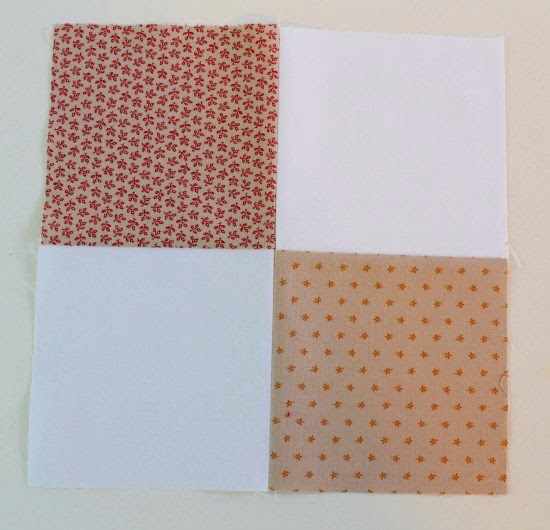
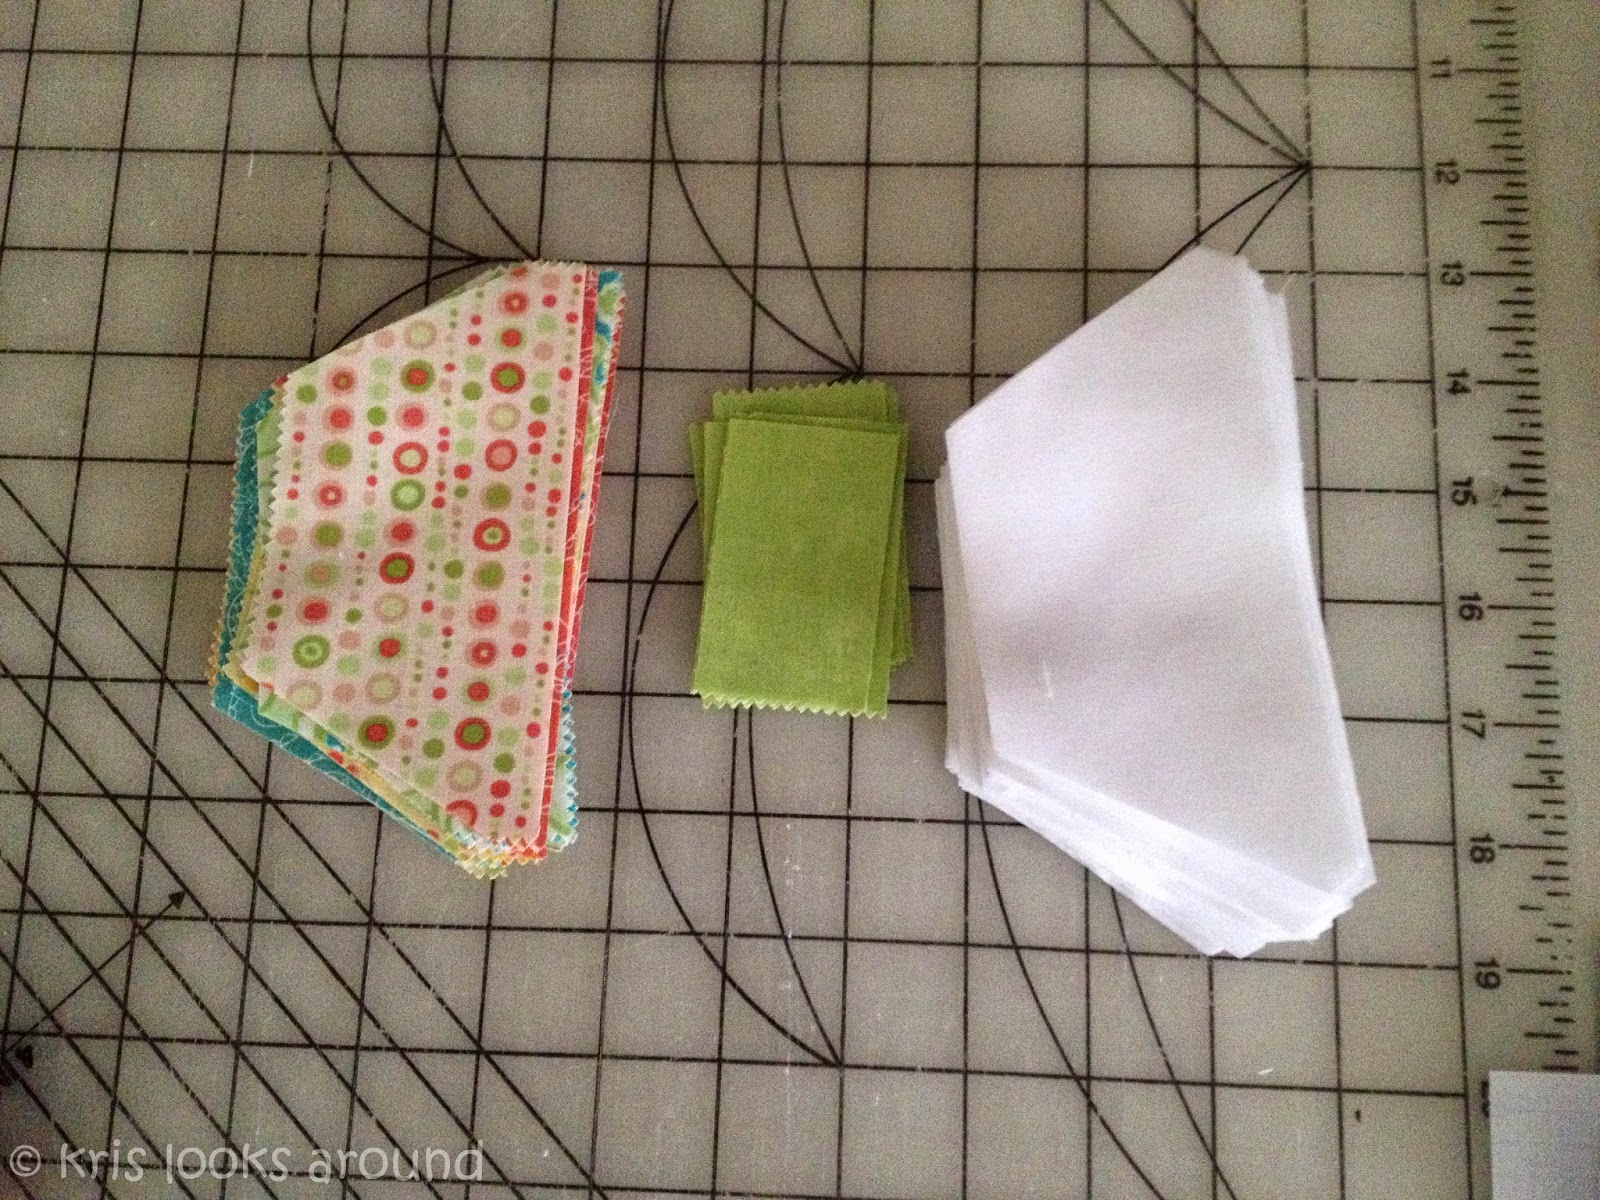
          Take charm pack and cut all pieces in half, giving you two stacks of 42 pieces – 2 ½” by 5” rectangles.

          clip_image006

          Set one stack aside, now cut the other stack in half, giving you two stacks of 42 pieces – 2 ½” by 2 ½” squares.

          clip_image008

          Set one stack aside, take remaining stack of 2 ½” squares and select 16 for each side of the cover.
          Lay them out in two rows of eight squares each (16 for each side).
          From the leftover squares, select 4 for a four patch that will be made into a square pin cushion
          And select 5 squares to be sewn into a row for a long skinny pin cushion.

          clip_image010

          Sew the two rows of squares for one side together- press seams in one direction on the first row and in the opposite direction for the second row so that the seams will nestle together when joined. The resulting long seam can be pressed to one side or open.

          clip_image012

          For the center panel on the cover, look at your fabric # 1. If the printed design is directional, like mine was, and you want it to be right side up on both sides of the cover, then you will cut two pieces that are 8 ¾” by 16 ½”. With RST, with the top of the design on BOTH pieces at the top, sew that 16 ½” long seam.

          clip_image014

          Now your design should be right side up on both sides of that center seam. If your print is NOT directional then you need no center seam and can cut one piece 17” by 16 ½”.
          Sew one pieced set on each 16 ½” end. Press those seams toward the center panel.
           
          clip_image016

          Cut a piece of fusible fleece and your fabric # 2 for the batting / backing 18 ½” by 27”. Fuse the fleece onto the wrong side of either front or backing. With RSO, pin the sandwich and quilt as desired. I just did an all-over meander design.

          clip_image018

          If you wish to add rick rack or other trim, do it now! Some folks just stitch down the center of rick rack, which is fine with the narrow ones, but for the jumbo size, I like to sew close to the edge, down each side. Then trim off excess batting/backing.

          clip_image020

          For the ties, cut one 2 ½” by WOF strip of your fabric #3. Press it in half lengthwise.

          clip_image022

          Then open it up and fold the two long raw edges into the center fold and press again.

          clip_image024

          Topstitch closely down each long edge.

          clip_image026

          Trim off selvage ends, cut it into 4 equal pieces. Lay the cover over your machine and decide where you want the ties to go

          clip_image028

          and baste them onto the backing side with the raw end edge even with the side of the cover.

          clip_image030

          For the binding, measure the perimeter of your cover and add 8”. Bind the edges your way! Everybody has their own way of binding . I cut my strips 2 ½” by WOF. I join the strips with a diagonal seam, press in half lengthwise, and sew onto the front of the quilt with a SCANT 3/8” seam allowance, flip binding over the seam to the back and hand sew it down. But, the binding can be done your own way!

          clip_image032

          If you wish to add a handle at the top of the cover, cut two 2 ¾ ” by 7 ¼”pieces of your fabric #2. Cut one piece of fusible fleece 2 ¾” by 7 ¼”, and fuse onto the wrong side of one fabric piece. If you wish to add rick rack or trim on the handle, sew it onto that piece now.

          clip_image034

          I wanted my handle to be a bit more narrow at the ends, so I folded the pieces in half and cut off the corners- see pix below.

          clip_image036

          With RST, sew a ¼” seam all around the handle edges but leave an opening at least 2” to turn it through!
          clip_image038
          Turn the handle RSO through that opening and hand sew the opening closed. Topstitch 3/8” inch from all edges.
          clip_image040

          Measure the cover to find the center and mark it with a pin. Center the handle over that center, but build in a gap!

          clip_image042

          Sew through all layers, attaching the handle to the cover at each end.

          clip_image044

          I LOVE adding buttons to projects and especially stacking different sized buttons!!

          clip_image046

          Add them now wherever you want!! You could even add them down the middle of the rick rack, too!!
          All done! Now stand back and admire your creation!!

          clip_image048

           
          Small Square and Tie-On Pin Cushions
           
          clip_image050

          Remember that fourpatch and row of five squares you selected and set aside back when you were picking out the squares for your cover front and back?

          clip_image052

          If you didn’t sew them together, do it now! Then lay them RST on top of a scrap of your fabric #1 which will be your backing, and cut around them.

          clip_image054

          Sew around all sides of the fourpatch, leaving a small opening on one side to turn it through.
          Clip the seam allowance diagonally across the corners, but not too close!
          This will reduce the bulk there and make those corner points look perfect!

          clip_image056

          Turn it RSO, fill it with your choice of polyfil or crushed walnut filler. I like the latter for pin cushions!!

          clip_image058

          I get it at the local pet shop- it’s cheap and is actually made for the bottom of small pet cages.
          I save my twill tape ties from all Moda jelly rolls and bundles, so I cut my ties for the Tie-On pin cushion from one of those ties. If you don’t have any, you can make ties like the ones you made for the cover from fabric scraps or use ribbon you have in your stash. To determine how long to cut your ties, measure your machine as shown below.

          clip_image060

          Add 6” to that measurement. My machine measured 24” + 6” = 30”. So I cut a piece of the Moda twill tape 30” then cut that in half. Insert one end of each tie between the long skinny 5 patch and its backing.

          clip_image062

          Then sew all around the edges, but remember to leave a small opening to turn it through.

          clip_image064

          Turn it RSO through that opening, pulling out the ties, too. Fill both pin cushions al full as you like. On the skinny one, first fill it only partially up to the second seam line. Stitch through all layers at that seam between the second and third square to facilitate it fitting snugly around the corner on your machine, then fill it the rest of the way.

          clip_image066

          Sew the openings closed with tiny stitches.

          clip_image068

          Add stacked buttons in the center of the four patch pin cushion and at the sewn down seam on the tie-on pin cushion.

          clip_image069

          Voila!! Done!! Yaaaay!!

          clip_image071

          Tie the Skinny pin cushion onto your machine!! Add pins!

           
          Sewing Machine Mat
           
          clip_image073

          Cut a 16 ½” by 16 ½” piece of your fabric #4. Grab your stack of 2 ½” by 5” charm pack pieces, and select 8 pieces. Sew them together along the 5” sides. Press the seams open. Now cut this strip in half lengthwise giving you two strips that are 2 ½” by 16 ½”.

          clip_image075

          Sew one strip on each side of the fabric square you cut above.

          clip_image077

          Select 10 more strips, sew them together as described above, press seams open and cut in half. Sew one of the strips across the back of the piece. Set the other strip aside for now.

          clip_image079

          Now, select 10 more strips for the tall pocket layer, sew them together as above, press seams open, then lay that piece on top of your fabric # 4, and cut a lining strip that exact same size. With RST, sew down one long side. Turn RSO, press and top stitch 3/8” from seam edge.

          clip_image081

          Lay this pocket strip across the bottom of the mat with raw edges even all around and pin, then baste these raw edges together.

          clip_image083

          Now, stitch through all layers wherever you want to create individual pockets. Make sure to backstitch at the top edge of each pocket seam.

          clip_image085

          I made all my pockets the same size by stitching through all layers on every other seam line.

          clip_image087

          Next, take the half sized strip you set aside above that has 10 squares and cut out a lining for it from your fabric #4, exactly as you did it above. With RST, sew across the top edge, turn it RSO, press and top stitch it 3/8” from edge.

          clip_image089

          Lay it over the tall pocket strip on the lower edge of the mat, creating a second row of smaller pockets.
          Baste the raw edges together on sides and bottom. Then sew through all layers again at seams to create the pockets.

          clip_image091

          In the photo above, the orange pins show where the tall pockets were stitched and the purple pins show where I chose to sew my smaller pockets. You can sew yours wherever you want!
          Use this top to cut a piece of fusible fleece the same size. Iron it onto the wrong side of the finished top. Cut the backing from your fabric #4 just a bit bigger all around than the top. Pin the sandwich and quilt as desired, but don’t quilt through the pockets!!

          clip_image093

          If you want to add rickrack or trim, sew it on now!!
          Trim the edges even and bind as desired using your fabric #3!

          clip_image095

          Hand sew the binding to the back of the mat! Taadaa!!
          Done!! YAY!! Now set your machine on it and fill up those awesome pockets!!

           
          Versatile Caddy
           
          clip_image097

          Believe it or not, you still have some leftover 2 ½ strips from your charm pack, and you have scraps from your yardage we’ve been using, which you can cut into a few more 2 ½” by 5” strips if you want more variety!
          Select 3 strips for pockets on one end of the caddy and 4 strips for the thread catcher on the other end of the caddy. Sew them together, cut a piece of fusible fleece for the four strip set, and fuse it on the back. Lay them both on your fabric #4, and cut a matching lining piece for each.

          clip_image099

          With RST, sew one long side together on both, turn both RSO, press seams and topstitch 3/8” from seam edge. On the four strip piece with the fleece inside, quilt it as desired.

          clip_image101

          Set both aside for the moment!
          Cut 2 pieces 6 ½” by 18” from fabric # 4, and one piece the same size from fusible fleece.

          clip_image103

          Fuse the fleece on the wrong side of one piece. Layer RSO, then quilt as desired, creating the caddy base.

          clip_image105

          Align the three strip piece at one end and baste the raw edges on all three sides.

          clip_image107

          Then stitch through all layers on the 2 seam lines to create 3 pockets. Backstitch at the top of each pocket seam.

          clip_image109

          Align then baste the SIDES of the four strip set at the other end of the caddy base. Then pin the center bottom of the four strip piece to the center of the bottom of the caddy base and then make two small pleats as you pin the rest of the bottom edge of the four strip piece to fit the base.

          clip_image111

          Then baste across the bottom edge.

          clip_image113

          If you wish to add rickrack or trim, add it now!

          clip_image114

          Trim edges even and bind with fabric #3. Set aside.
          Select 6 leftover 2 ½” by 5” strips for the caddy pin cushion.
          Cut them in half creating 12 squares 2 ½” by 2 ½”.

          clip_image116

          Arrange them in two groups of 6 and sew each group together, leaving a small opening in the center seam of one group to use to turn it through later.

          clip_image118

          Place the two pieces RST, and using a ruler and pen, draw a line 1” in from each corner point and trim those corners off.

          clip_image120

          Now, sew all around the edges. Turn it RSO through the opening in the bottom seam.

          clip_image122

          Fill the pin cushion with polyfil or crushed walnuts and handstitch the opening closed.

          clip_image124

          I cut an 8” piece of rickrack and hand stitched/gathered one long edge and drew the thread up to create a ruffled flower.

          clip_image126

          I hand stitched it to the center of the pin cushion and added some stacked buttons, as well.

          clip_image128

          You can embellish your pin cushion as desired! Center the pin cushion in the middle of the caddy and hand stitch it through the back side to the caddy. YESSSSSSSS! All done!!

          clip_image129

          Now you can use it on the end of your ironing board and on an armchair in front of the TV!!

           
          Tub Cover
           
          clip_image131

          I wanted a tub to sit on my sewing table for sewing tools and materials. I had a large plastic 16 ounce Cool Whip tub container that was the right size! The circumference was 18” and the height was 5”.

          clip_image133

          Using the stack of leftover 2 ½” by 2 ½” square charm pack pieces, select 20 pieces and arrange and sew them together in two rows of ten squares.

          clip_image135

          If you want to add rickrack or trim, do it now!! I added rickrack down the center seam line.
          Cut and fuse a matching piece of fleece to the back of it, then quilt it as desired. I grid-quilted it.

          clip_image136

          Cut a matching piece of fabric #4 for the lining, but make one end about an inch longer. Also, just a note here that for backings and lining and even batting/fleece, you can piece smaller scraps together when needed. I save small pieces of batting and connect them with fusible batting tape.

          clip_image138

          You will see this tape on the back of this tub cover!

          clip_image140

          Another tip is to trim off corners of seam allowance at points, as shown in photo below, to make them turn RSO better.

          clip_image142

          Sew two long sides and one short end seams- leaving open the short end with the longer lining piece.
          Turn the cover RSO, topstitch 3/8” from the edges and fold up the longer lining end to enclose the raw edges and stitch it closed.

          clip_image144

          Pin the cover TIGHTLY around the tub, then slide it off. Sew it closed on the topstitch line of the finished end. I added a stack of buttons for embellishment, then slid it back onto the tub.

          clip_image146

          Another little project complete!! Yahoo!!

           
          Sewing Chatelaine
           
          clip_image148

          Line up 18 to 22 of your leftover 2 ½” squares in a long row. (Don’t forget you have some yardage scraps you can cut into 2 ½” squares to supplement your leftovers and provide a bit more variety.)

          clip_image149

          Sew them together, press the seams open then press it in half lengthwise

          clip_image151

          and use the same technique you used above to create the sewing machine cover ties to make a long topstitched piece.

          clip_image153

          Fold in one short raw edged end as you topstitch it, and slip in a 2” loop created from a bit of stash ribbon or thinner rick rack as I did.

          clip_image155

          Knot the other raw edged end.

          clip_image157

          Set aside for now. Select a green 2 ½” square, fold it in half then in half again and cut into a petal shape using pinking shears if you have them,

          clip_image159

          if not, just use regular scissors. Cut carefully from between two petals just to the center of the piece. Set aside for the moment.

          clip_image161

          Select 8 more 2 ½” squares and sew them into four patches. Lay them RST, and trim off the bottom corners creating a triangular shape with the narrow end at the bottom. This will become your strawberry shaped pin cushion. Sew all around leaving the top open. Using needle and doubled thread, sew a gathering stitch around the open top edge.

          clip_image163

          Turn RSO, and stuff with polyfil. Push the knotted end of the finished strip down into the polyfil and draw up the thread- gathering the raw edge tightly inside around the strip. Secure it with stitches and a secure hidden knot.

          clip_image165

          Wrap the leaf piece around the top of the strawberry and hand stitch it there.

          clip_image167

          Add some pins and needles, if desired!!

          clip_image169

          Sew on a small button a few inches in from the loop at the other end, so you can secure your small scissors there!! Well done! Another part of the set is complete!! You can wear your chatelaine around your neck while doing hand sewing in your favorite chair in front of the TV and never lose your scissors between the cushions again!!
          clip_image171
           

          Needlebook
           
          clip_image173

          After all this, I still had a few leftover 2 ½” by 5” strips, and I cut two more from yardage scraps.
          Sew the four strips together. Cut and fuse a matching piece of fleece to the wrong side. Quilt as desired. Add trim or rickrack if you desire. Cut a 4” piece of stash ribbon or thin rickrack, fold into a loop and baste on the center of the back.

          clip_image175

          Cut a matching piece of fabric #4, or other yardage scrap, for the lining. With RST, sew around the edges leaving a small opening for turning.

          clip_image177

          Turn it RSO, hand sew the opening closed then topstitch around all edges.

          clip_image179

          Cut three 4” by 6 ¾” pieces of scrap batting .
          Draw a line down the center with a heat erasable pen.

          clip_image181

          Line up this drawn line with the center seam of the cover.

          clip_image183

          Carefully flip it over and sew down the center seam from the cover side and through all thicknesses.

          clip_image185

          Erase the drawn line on the batting with a hot iron. Fold the book on that center seam line.
          Add a button or two on the front allowing it to be secured with the loop from the back!

          clip_image187

          Add some needles inside and that’s it! You have completed the set of eight projects in this pattern collection!!

          clip_image189

          Pat yourself on the back and enjoy using your new sewing room creations!!


          clip_image191

          Eight sewing room essentials including a Sewing machine cover, a square pin cushion, a tie on pin cushion, a versatile caddy, a sewing machine mat, a tub cover, a chatelaine, and a needle book!
           
          Thanks ever so much for trying out these projects! You may have spotted my sweet Westie – Yogi, in some of the photos!

          clip_image193

          Come visit us soon at my blog- www.auntpollysporch.blogspot.com!!

          We’d love to have you come and visit!!
          Polly Monica
          {www.auntpollysporch.blogspot.com}

          Window Box Flower Quilt


          I hope you are having a great day.  My name is Kris from krisrunner.wordpress.com and I am pleased to share this quilt with you today.  At my house, the daffodils are blooming and the tulips are just around the corner.  I wanted to make a flower quilt using a hexi design – and that is how this quilt came to be.   I was surprised at how easy it was to use a half hexi template to make this quilt.  I loved the colors in Chance of Flowers by Sandy Gervais and hope the great colors brighten your day as you make this quilt.  This makes it easy to use with a charm pack or with jelly roll left overs or as a stash buster.

          • 1 charm pack Chance of Flowers
          • 1/8 yard of 4 browns for the window box. I used the Moda Marble collection: Coffee, Bark, Chestnut, and Dark Saddle
          • 2/3 yard Bella Solids Snow Fabric
          • 1/3 yard Cloud Rain Border Fabric
          • 1/3 yard Rose Binding Fabric
          • 1 1/2 yard Leaf Backing Fabric
          • Go!Hexagon 4 1/2″ sides ruler/template (item number 55437)


          ** All sewing will be done with a 1/4 inch seam.

          1.  Sort your charm pack into a couple of different piles.

          • Pick two green charms to be your stems of your flowers.

          • Next, pick 3 solid or mostly solids to be the centers of your flowers
          • Finally, create 3 sets of 6 charms to be the outsides of your flowers.
          2.  Cut each of your charms (except for the green stem’s) in half giving you 2.5 x 5 inch rectangles.  (you will have a total of 42 rectangles)
          3.  Use your half hexi template and cut the 42 rectangles into half hexis.  Make sure to cut the notches on the ends – this will help when you line them up to sew.
          4.  Next you will want to cut 9 strips of 2.5″x WOF from the Bella Solid Snow material.  Using your half hexi template, cut 88 white half hexis.
          5.  Take the green charms for your stems and cut 7 rectangles as 1.5″ x 2.5″ stem pieces.
          6.  Next you are going to want to lay out your flowers.  To do this you will want to start with one of your center half hexis and pair it with the matching half hexi.  Then, add 6 additional pairs of hexis to complete the flower. Continue this with the remaining two flowers and connect them with white as shown in the picture below.  Place the middle flower a hexi lower that than ones on the two sides.  
          7.  Once you have your flowers like you want, fill in with the rest of the white hexis. Place a row of white on the top and on the bottom and on each end of the flowers like in the picture below.  The ends will be jagged and that is correct.  We will trim them later.
          8.  We are going to now sew the stems on to the white hexi’s.   
          • Take the seven half hexis under the flowers for your stems. With each one, cut off 1″ from the top left edge. Cut 1/2 inch off the other side. 

          • Insert the stem piece (2.5″ x1.5″ green) using 1/4 inch seams between each side of the half hexi, Press your seams as you go.  Do this for the remaining 6 stem pieces. When you have completed this place the stem half hexis back onto your flower layout.

          9.  Now that you have your layout complete (congratulations!) Let’s talk about how to get ready to sew the rows. If you have a preferred approach, use that. I’m going to describe the approach that I’ve settled on for this type of quilt. 
          • Moving from left to right, take the first hexi and place it on top of the next hexi.  Making sure that you always place the next hexi on the bottom of your pile.  You will end up with 10 rows of 13 hexis. The top hexi is the left most piece.

          • I label each row with a sticky note so that I can keep the rows in the correct order.

          • I chain piece 5 rows at a time.  I have found that keeping track of the row I am on and which is the left hand edge piece can be tough.  My trick is to put a straight pin in the left hexi of each row. The vertical placement of the pin indicates row # (the highest pin is row #1).   I have circled the pins in the photo below so you can see my trick.

          10.  You are ready to start sewing your rows.  See the picture below to see how to line up your hexis.
          • Make sure to press your seams after each hexi.  You will sew the hexis together until you have sewn all 13 hexis together.  This is a picture of that it will look like as you are sewing part way along the row.

          11.  Once you have sewn all your rows together, lay it back out and admire your work!  You are amazing! Feel free to enjoy a cold or hot beverage of your choosing at this point.

          Now you will sew all your rows together. Pressing your seams as you go. Don’t you love it!
          12.  Now that the rows are all sewn together you will want to trim the edges.  Use a ruler and trim off the edge to form a straight edge.
          13.  Next step is to create your window box.  I loved using different browns to make more of weathered look to the window box.  If you don’t want the same weathered look, feel free to just use one piece of brown material (8.5″x 44.5″).   
          To create the weathered window box look you will want to cut from each of your brown colors so that in total you will have:  
          • 10 rectangles of 2.5″x 8.5″  (3 each from 2 browns and 2 each from 2 browns)
          • 24 rectangles of 2.5″ x 4.5″  (6 from each brown)
          • Hold aside 4 of your 2.5″ x 4.5″ rectangles (one of each color) for later.  
          • Select different color combinations from the smaller rectangles and sew them together giving you 10 rectangles of 2.5″ x 8.5″.
          • Combine each 2.5″x 8.5″ mixed color rectangle with a solid 2.5″ x 8.5″ rectangle resulting in 10 larger 4.5″ x 8.5″ rectangles.

          The final 4 rectangles which are 2.5″ x 4.5″ should be combined to make 2 blocks of 2.5″ x 4.5″ (see the right end blocks in the picture below)
          Arrange the blocks as in the picture below. I flipped each alternating 8.5″ block to give it more contrast.  Feel free to customize. When you are happy with the look sew the blocks together into one large window box which will be 8.5″ x 44.5″
          14.  Sew the flowers to the window block making sure that the window box is adjoining the flower stems.  
          15.  To add the border or window frame to the flowers and window box you will need to:
          • Cut 4 strips 3.5″ X WOF

          • Cut 2 rectangles 30″ x 3.5″.  Using the extra from those WOF you will sew them on to your 2 strips of 3.5″ x WOF to create 2 rectangles which are 51″ x 3.5″.
          • Sew the 30″ x 3.5″ strips to the ends of your flower and window box.  
          • Sew the 51″x 3.5″ strips to the top and bottom of the your flower and window box.

          16.  Add batting and backing to your quilt top and start adding texture.  Have fun!

          • I chose to quilt pebbles in the centers of the flowers and swoops in the outside flowers.

          • I tried to create wood grain on the window box.

          17.  Bind your quilt and then wash it to get all the crinkly goodness of a quilt.
          Hope your quilt helps to brighten your day!  It sure brings spring in from the outside…
          …into my sewing room wall.

          Happy sewing!   
          Finished size: 48″x 32″ (once washed and shrinkage happens)
          You could make a bed runner by adding a couple more flowers to each side if you wanted to expand it.
          Kris Allen