Maritime Baby Quilt

maritime baby quilt

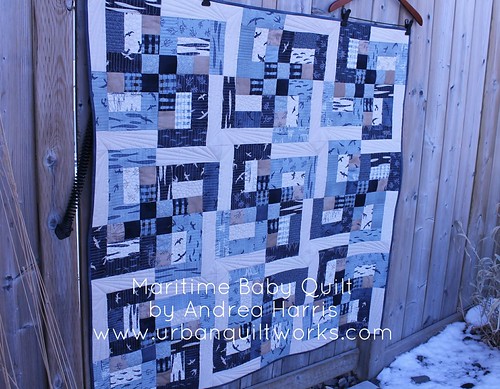
Hi everyone! Looking for a baby quilt that is simple and fairly quick to make?   This project is completed with a beautiful nautical and neutral line of fabric called Hearty Good Wishes by Janet Clare. I also envision this pattern in a fun black and white theme with pops of color in the secondary designs! If you decide to make this quilt, I would love to see your creation!   You can learn more about me and see some of my work on my blog at Urban Quiltworks.


  • 1 jelly roll –  Hearty Good Wishes  by Janet Clare
  • 3/4 yard Hearty Good Wishes – 1357 – Pearl
  • 1/2 yard Hearty Good Wishes – 1357 – Dark Ocean
  • 3.5 yards Hearty Good Wishes – 1352 – Sand


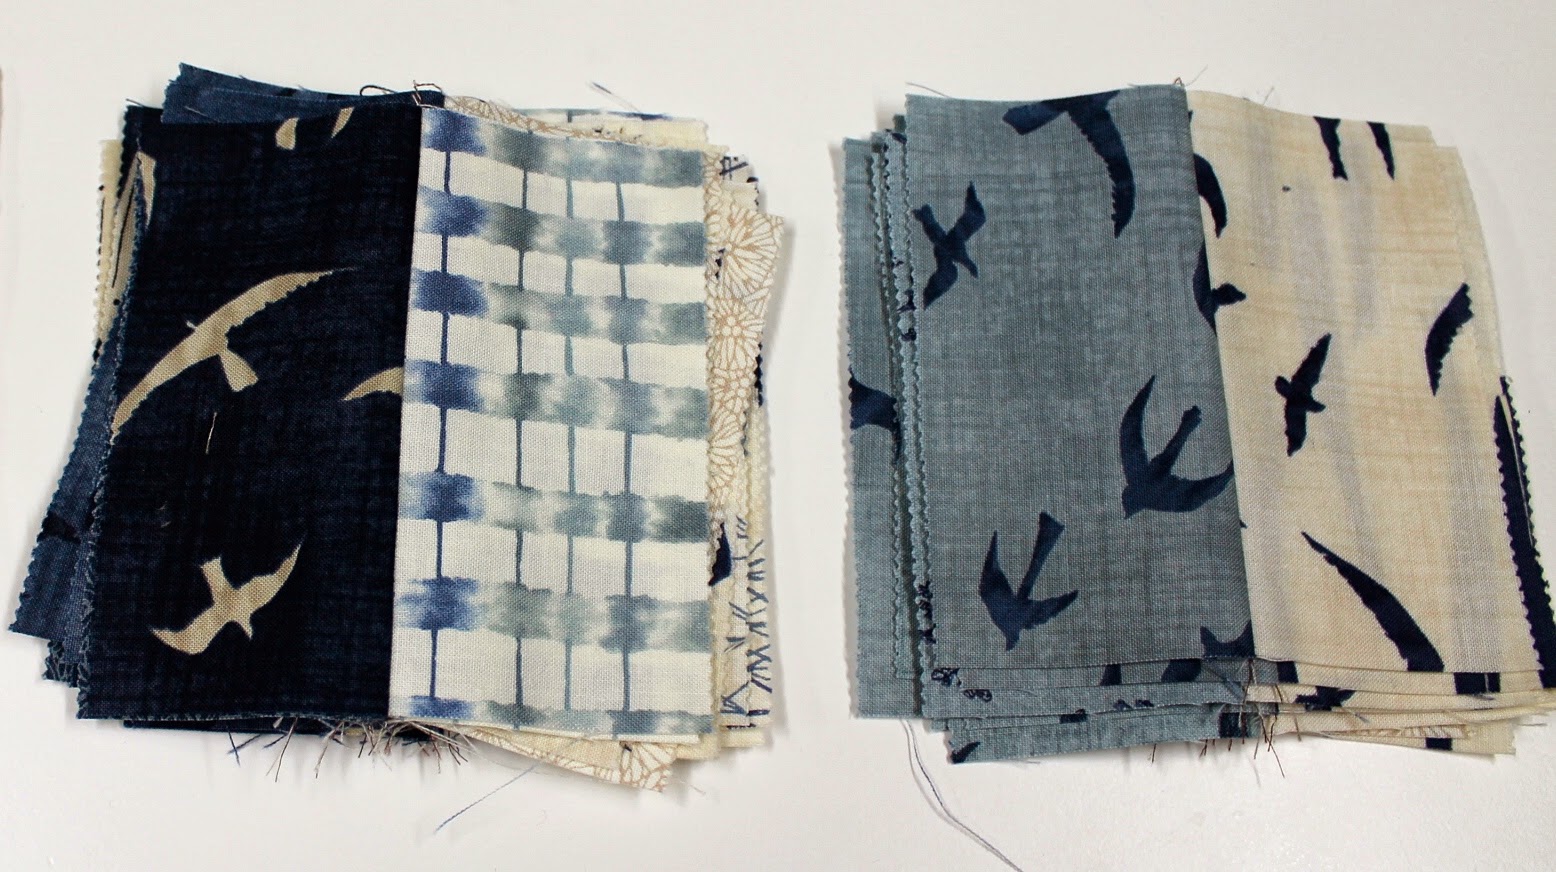
Separate jelly roll into creams, light blues, dark blues, and taupes.

From assorted cream prints cut:

  • 36 – 2.5” x 4.5” strips

From assorted light blue strips cut:

  • 36 – 2.5″ x 2.5” squares
  • 36 – 2.5″ x 4.5″ strips
  • 18 – 2.5″ x 6.5″ strips

Assorted dark blue strips cut:

  • 36 – 2.5″ x 2.5” squares
  • 36  – 2.5″ x 4.5” strips
  • 18 – 2.5″ x 6.5” strips

Assorted taupe strips cut:

  • 36 – 2.5″ x 2.5″ squares

Pearl fabric yardage  – cut 36  –  2.5” x 8.5” strips

*All seams are to be pressed open when assembling blocks. 
**When piecing together blocks, keep in mind that you will be making a total of 18 light blue and 18 dark blue blocks.

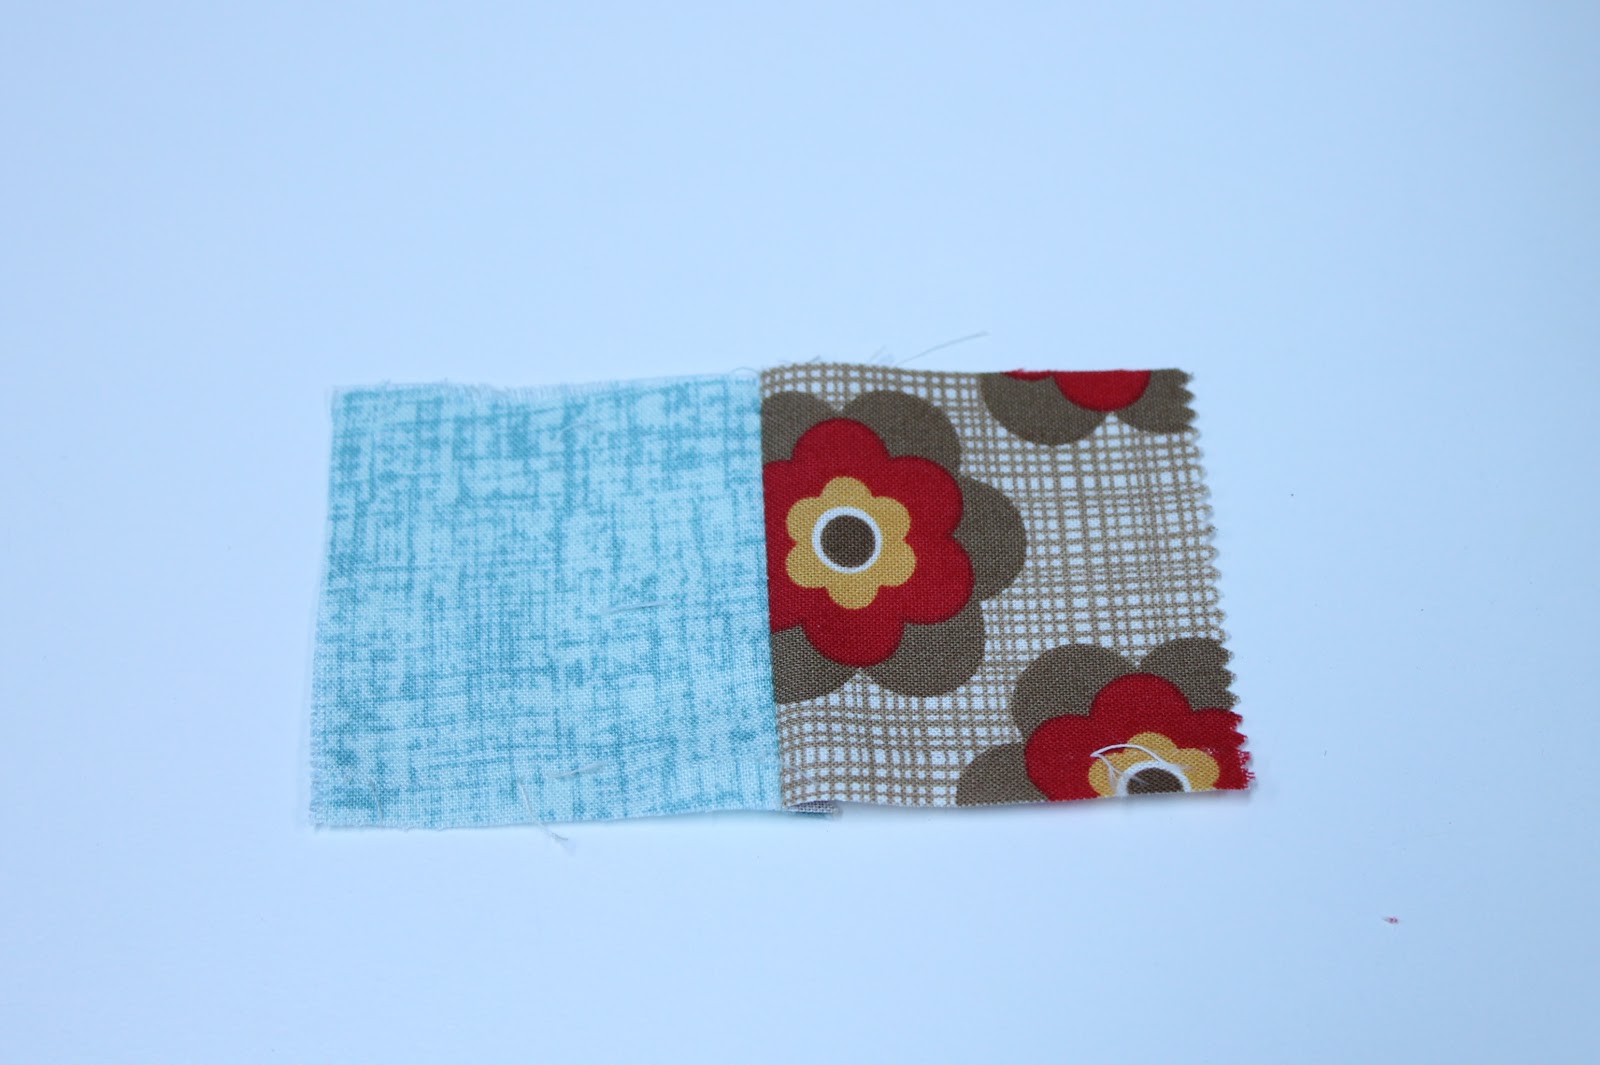
Sew cream 4.5” strip to light blue 4.5” strip –  make 18
Sew cream 4.5” strip to dark blue 4.5” strip –  make 18
Set aside.


Sew a  2.5” dark blue square to a 4.5” light blue strip –  make 18
Sew a 2.5” light blue square to a  4.5” dark blue strip – make 18
Set aside.


Sew a 2.5” taupe square to a 2.5” light blue square –  make 18
Sew a 2.5” taupe square to a 2.5” dark blue square –  make 18

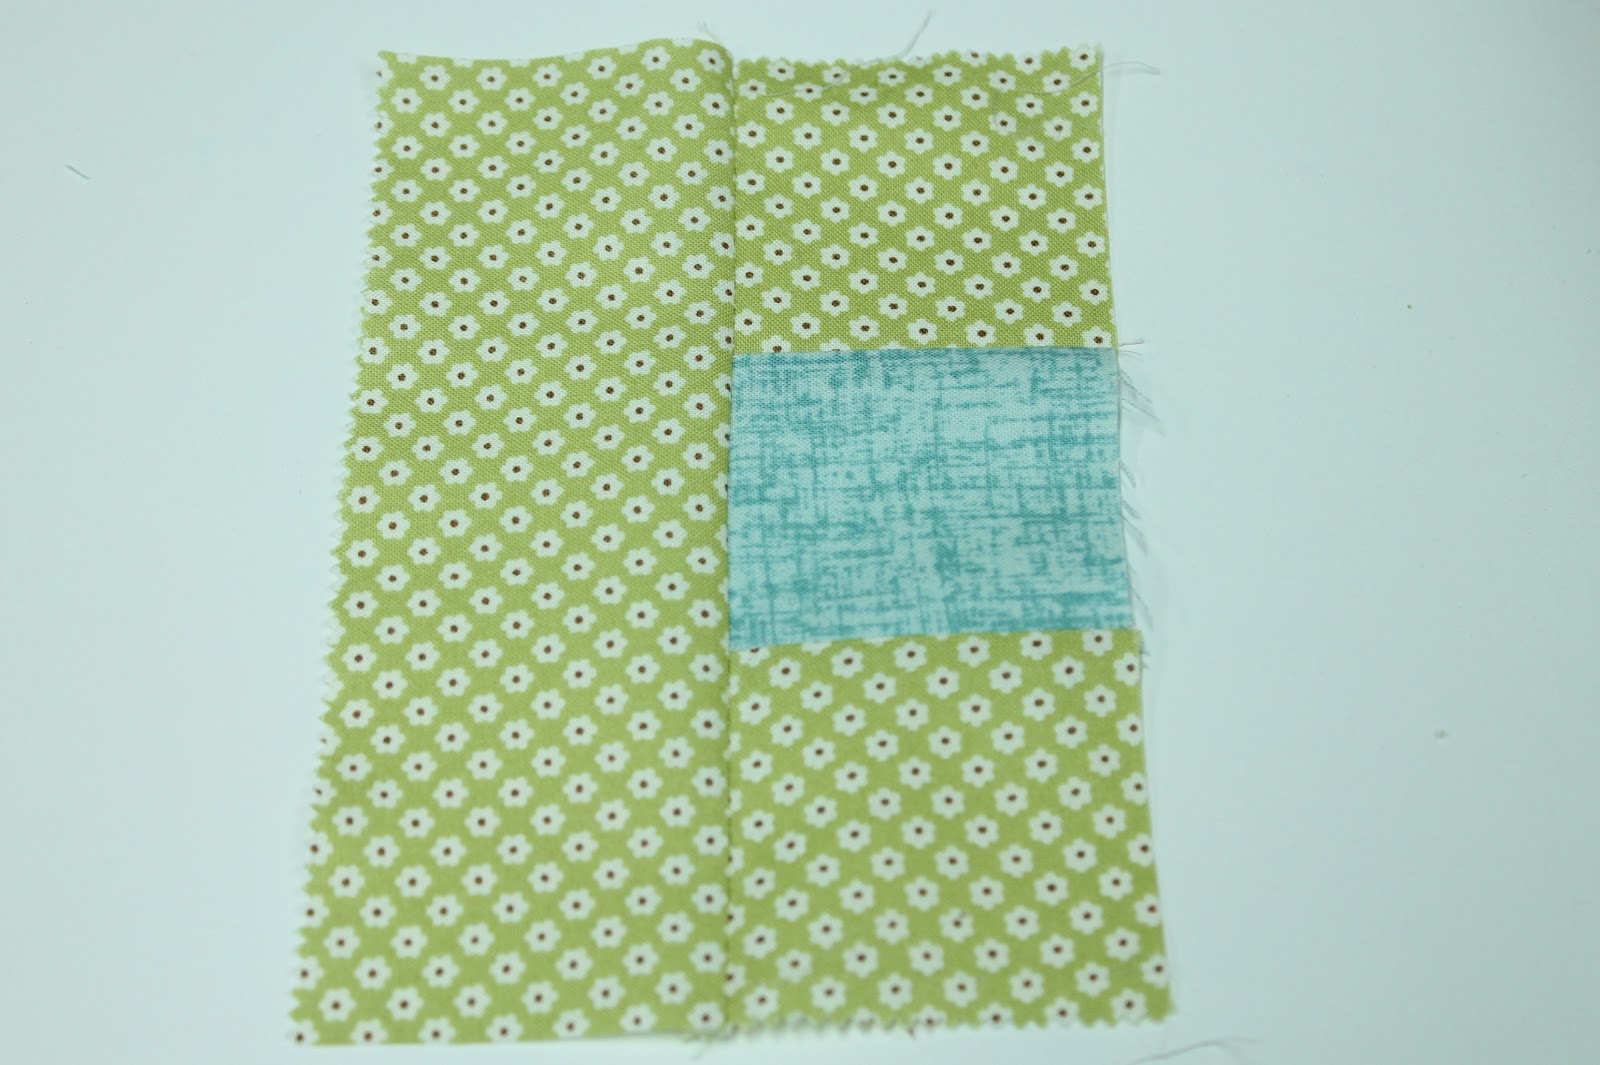
Sew 2.5” taupe/light blue pieced strip to 4.5” light blue/cream piece as shown.
(make 18) Make sure taupe coloured square is positioned on the top right corner.    

Sew 2.5” taupe/dark blue pieced strip to 4.5” dark blue/cream piece as shown (make 18).  Make sure taupe coloured square is positioned on the top right corner.

Sew dark blue pieced 6.5” strip to dark blue block(make 18)  as shown:

and light blue pieced 6.5” strip to light blue (make 18)  as shown:


Complete the rectangle shape by sewing the 6.5″ light blue strip to the top of the light blue block, and the 6.5″ dark blue strip to the top of the dark blue block as shown:

Sew one pearl 8.5” strip to the solid blue side of each block (make 18 dark blue, 18 light blue) as shown:

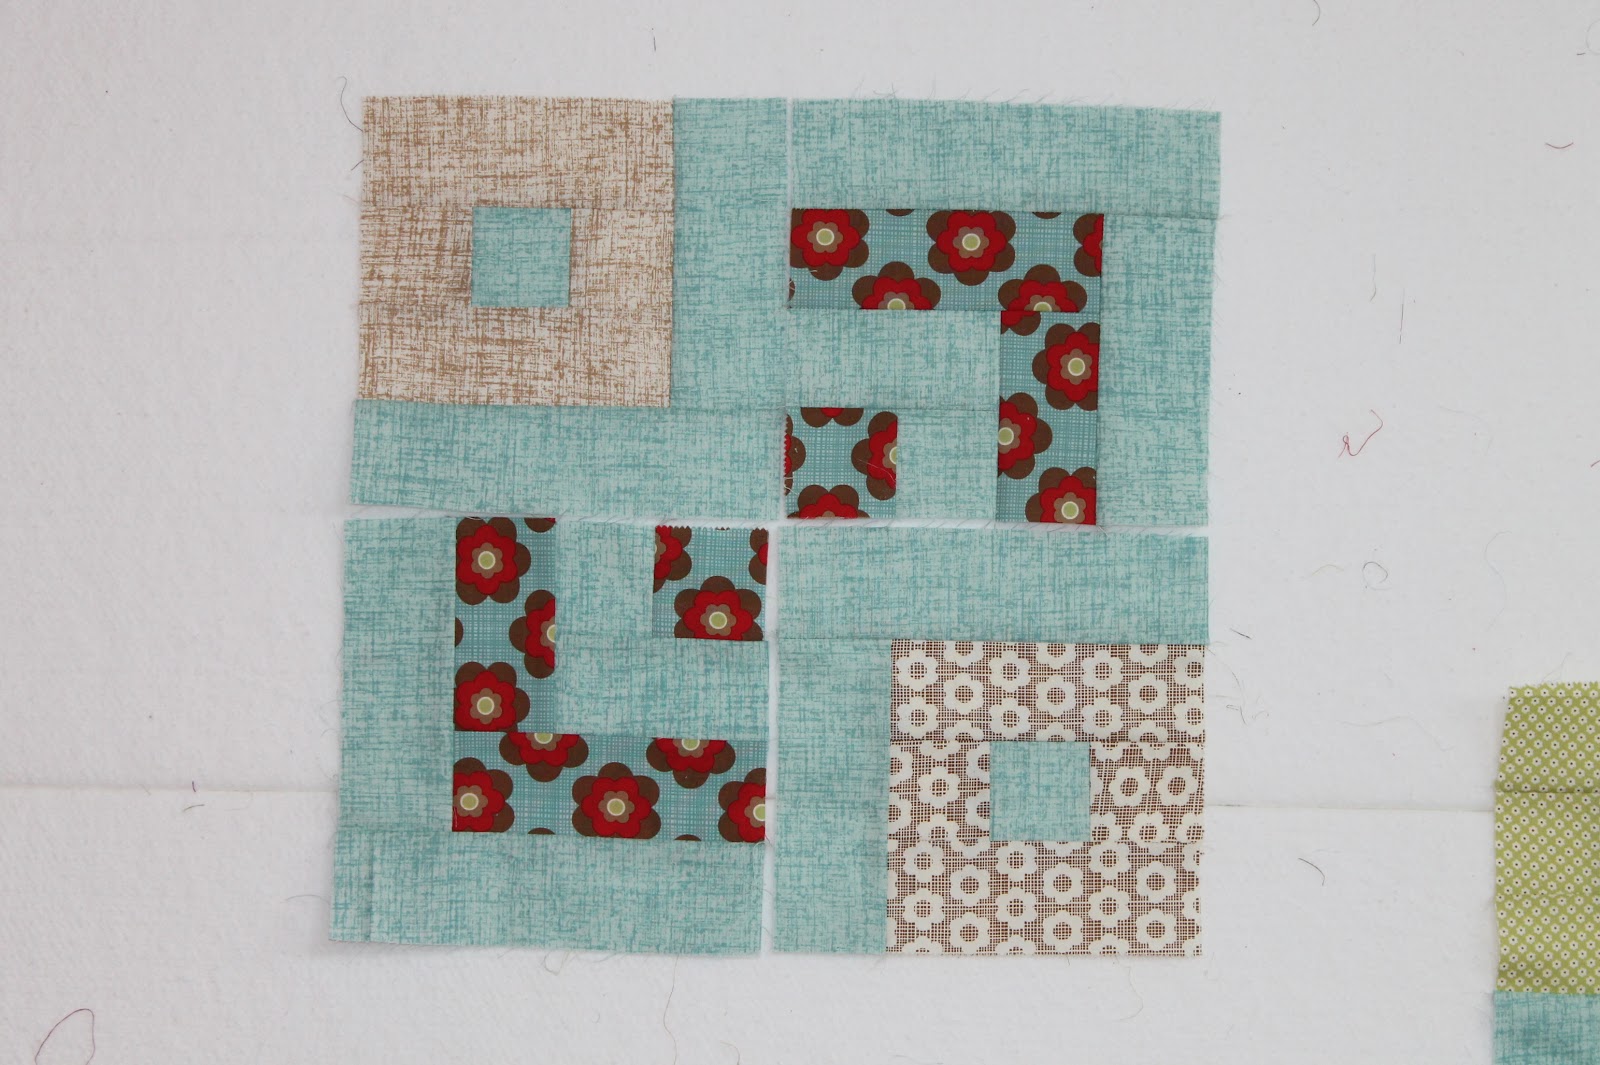
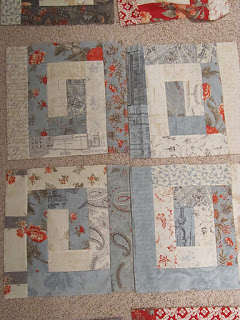
Assemble and sew two light blue blocks with two dark blue blocks as shown, matching seams:

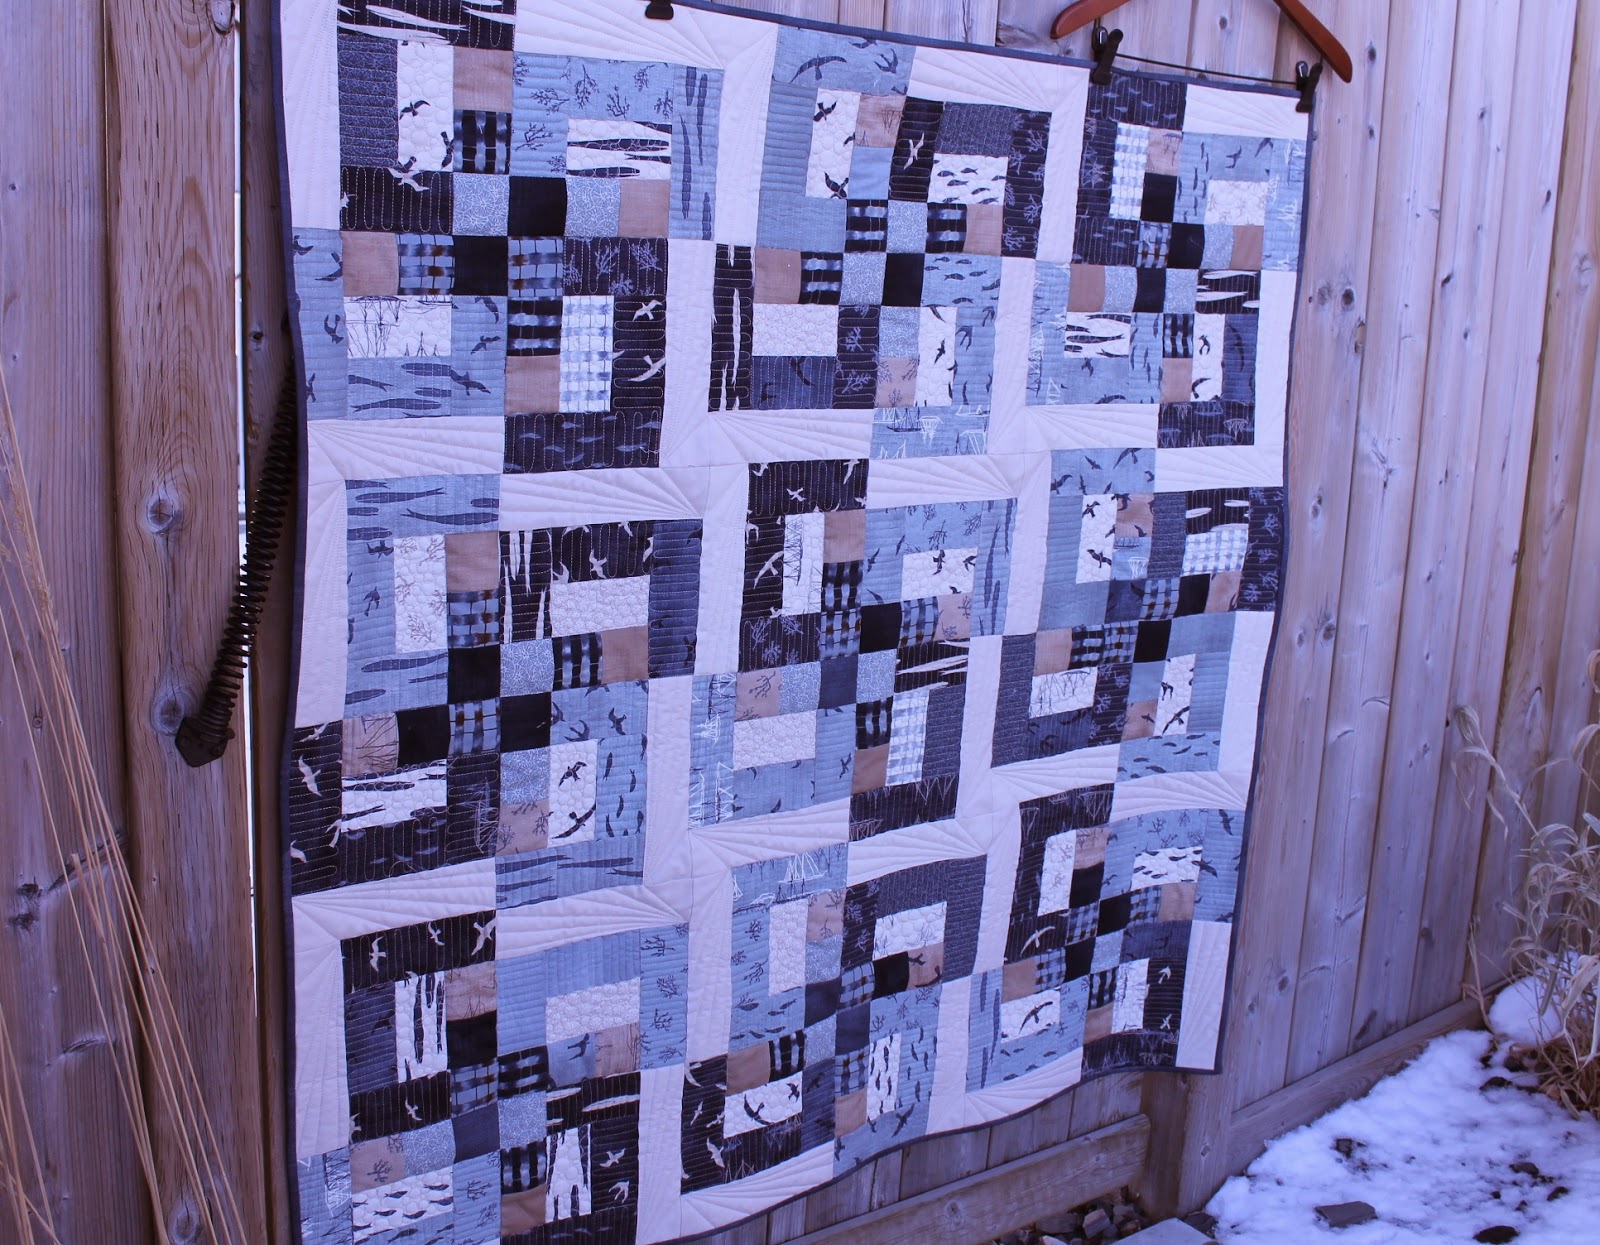
Lay out blocks  in a 3 x 3 order:

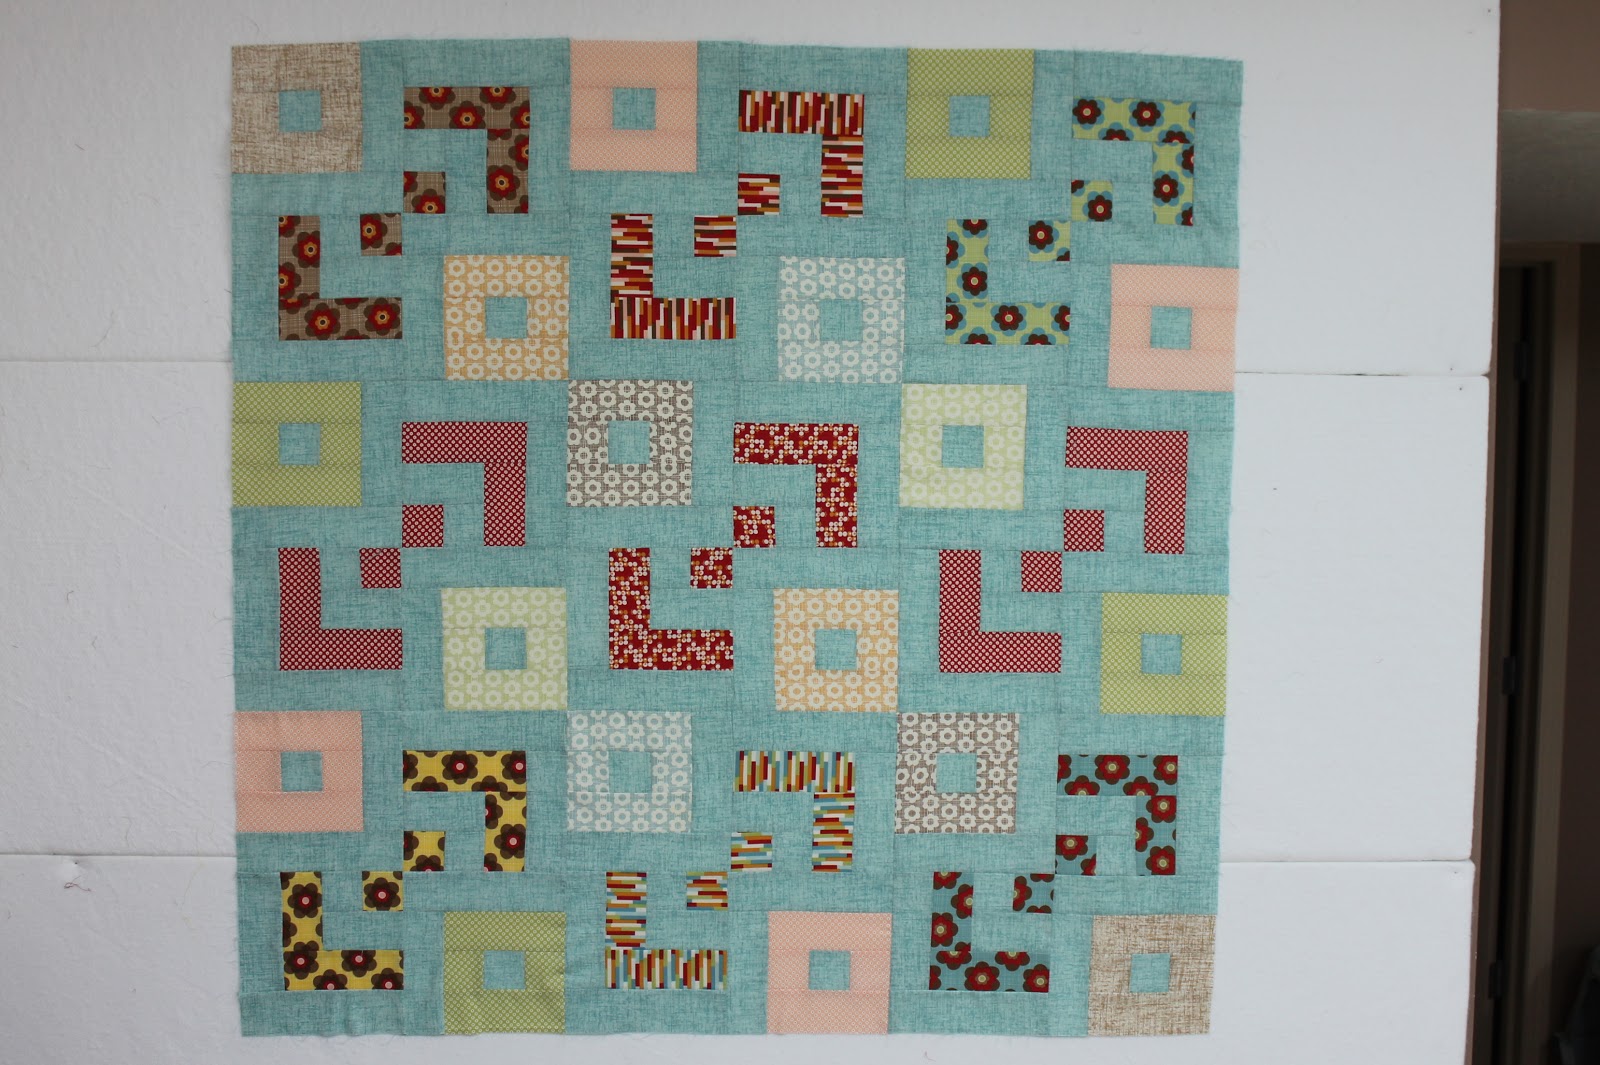
Sew blocks and rows together matching seams: 

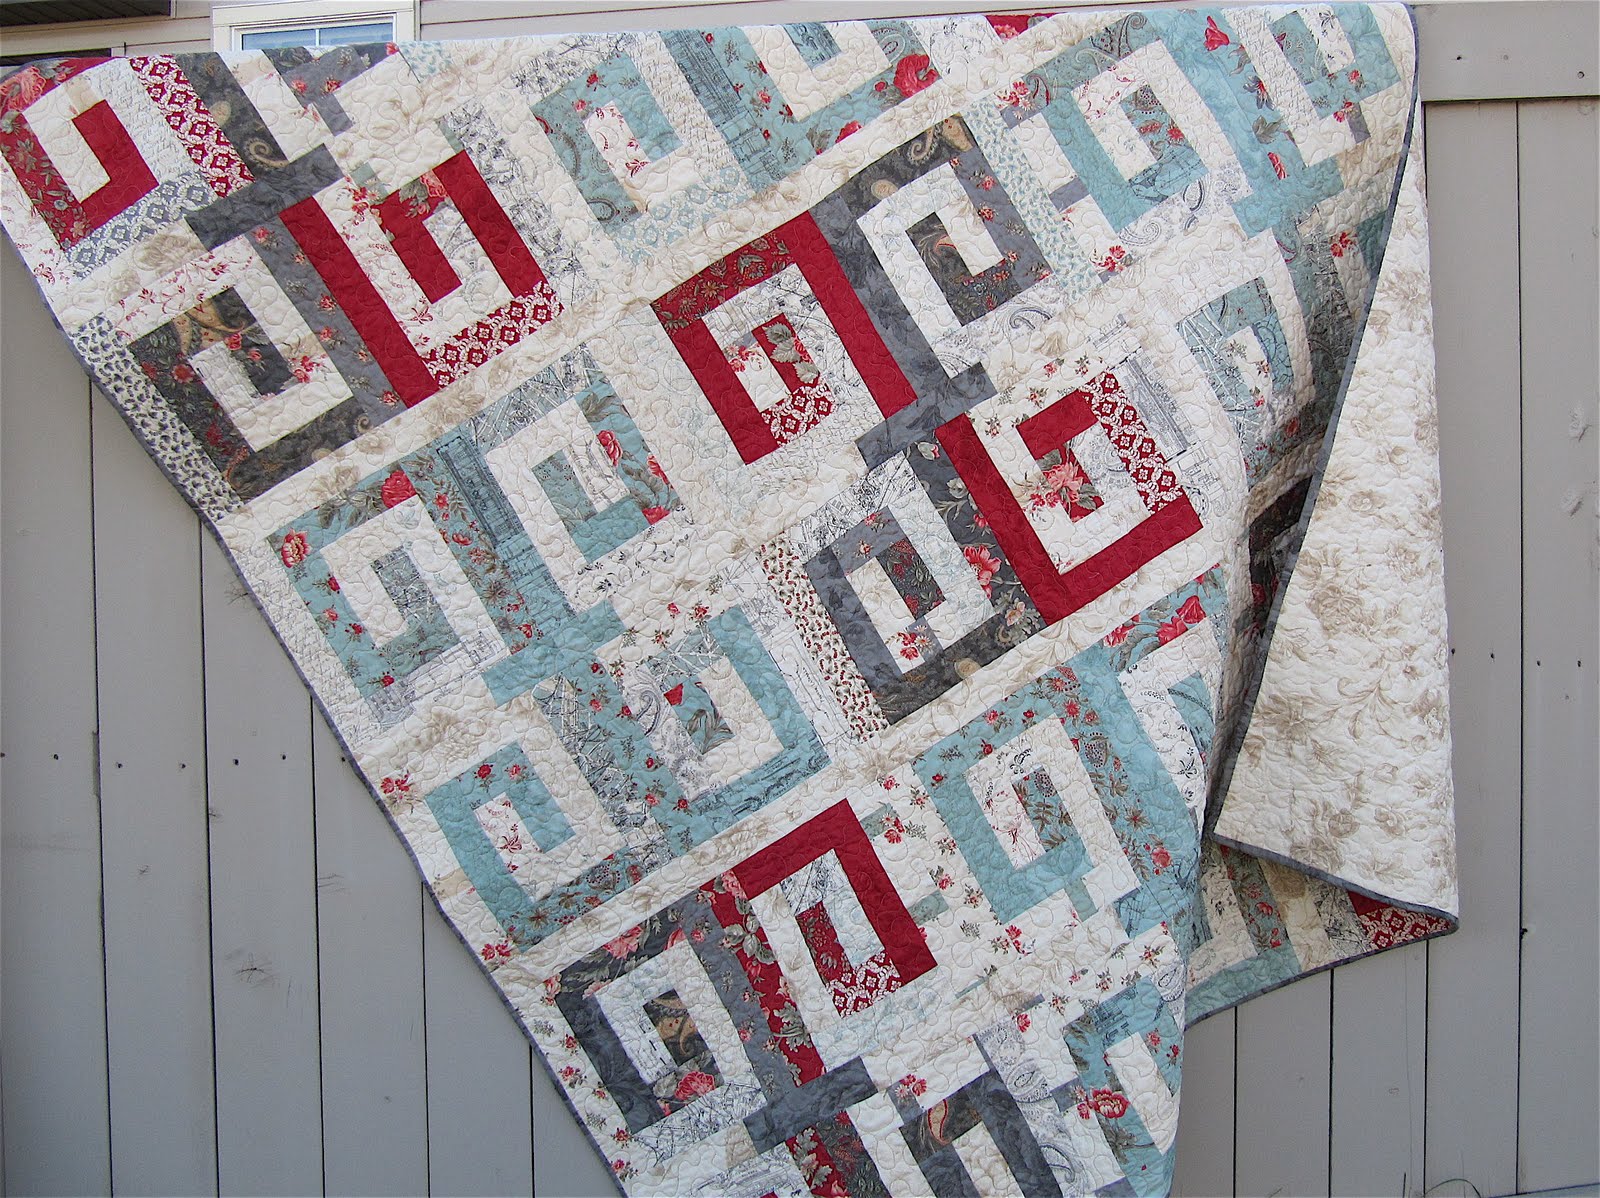
I quilted this quite heavily, although it can completed more quickly with an allover design:


Bind with the Dark Ocean fabric using your preferred method of binding.


This makes a beautiful baby sized quilt,  48”  x 48”

Andrea Harris
{www.urbanquiltworks.com}

Boxes of Colour Quilt

IMG_8679

Hi everyone, it’s Andrea from Urban Quiltworks, also known as Millions of Thoughts.  I love colour contrast in quilts, and I have created a quick and easy child’s quilt for you to make using Boho by Urban Chiks.   The quilt uses two blocks in its design, with a bit of a play on the bento box pattern.  With the right colour placement, this pattern creates bright pops of colour to capture attention.    Visit me at  UrbanQuiltworks for more photos and ideas about this pattern.  If you do make it or any of my other tutorials, please let me know.  I love to see what you have been creating!

IMG_8680


1 jelly roll –   Boho by Urban Chiks
1.5 yards – 31090-18  Boho Basic Rain – Boho by Urban Chiks
0.5 yards binding fabric  –  31091-18  Boho Bohemian Daisies Rain- Boho by Urban Chiks
3.5 yards backing fabric – 31097-16 Boho Free Spirit Earth – Boho by Urban Chiks

Block A

Choose NINE of the lightest print jelly roll strips to make Block A.   Each jelly roll print chosen will make two of Block A.  (18 blocks total)

For each jelly roll strip cut:
4 – 2.5″ x 2.5″
4 – 2.5 x 6.5″

Blue fabric cut:
18 – 2.5″ squares
18 – 2.5″ x 6.5″ strips
18 – 2.5″ x 8.5″ strips

Block B

Choose NINE strips of the boldest prints from the jelly roll.  Each jelly roll print chosen will make two of Block B.  (18 blocks total)

For each jelly roll strip cut:
2 – 2.5″ x 2.5″ squares
2 – 2.5″ x 4.5″ strips
2 – 2.5″ x 6.5″ strips

Blue fabric cut:
18 – 2.5″ x 2.5″ squares
18 – 2.5″ x 4.5″ strips
18 – 2.5″ x 6.5″ strips
18 – 2.5″ x 8.5″ strips

Separate jelly roll into lights and darks.   Choose the lightest lights and the boldest darks:

Block A – For assembly of Block A, press after each step towards the outside of the block.

Choose one 2.5″ blue square and sew a light printed 2.5″ square to each side of it:

 Sew a 6.5″ matching strip to each side of the block:

 Sew a 6.5″ blue strip to the one side of the block:

Making sure the blue strip is on the LEFT side of the block,   sew an 8.5″ strip to the top of the block:

**Your completed Block A should have a blue frame on outer LEFT and TOP sides.

Block B –For assembly of Block B, press after each step towards the outside of the block.

 Attach a DARK 2.5″ square to a blue 2.5″ square:

Sew a 4.5″ blue strip to the pair:

 Sew a matching 4.5″ dark print as shown:

Sew a matching 6.5″ print as shown,  making sure that the dark print will be at the TOP and LEFT of the block:

 Sew a 6.5″ blue strip to the block as shown:

Sew an 8.5″ blue strip to the block as shown, making sure that the blue strips are on the TOP AND LEFT of the block:

Layout
There are many variations of this quilt.   I chose to use the light prints contrasting with the darks, so that the lights blocks look like they are floating over top of the dark prints.
I made a few extra blocks to have more choice for my layout – this is optional.

Choose two of block A and two of block B (matching block B prints)  and place together to make one large block as shown:

Before sewing each large block of four together,  I recommend playing around with the colours and layout.  I really wanted the prints and the colour to “POP”  so I changed the layout several times before I was happy with my final outcome:

 Sew together the blocks, row by row.   Press towards block A to ensure seams will nest together:

IMG_8685

IMG_8683

Quilt and bind as you wish.  I chose to quilt only the blue fabric using straight line and wavy quilting to make the colour blocks pop and out even more.


A quick and easy baby quilt measuring 48″ x 48″

Andrea Harris
{www.urbanquiltworks.com}

Urban Shades Quilt


Hi everyone!  I’m Andrea Harris and  I’m excited to share this tutorial with you today.  It uses Sweetwater’s Mama Said Sew collection, and can be assembled quickly and easily.    If you have any questions or if you make your own “Urban Shades Quilt”, please feel free to email me or contact me through my blog at Millions of Thoughts .  I would love to hear from you!

1 Fat Quarter bundle –  Mama Said Sew by Sweetwater
1/2 yard 5498-23  black zigzag stripe for binding
4 yards coordinating fabric for backing

Separate and organize the fat quarter bundle:

9 Grey fat quarters – choose the boldest greys in the bunch. There was a gingham and a dot fabric that    
                                 technically were black, but appeared better as a grey
4 Black fat quarters
1 Red fat quarter
12 Cream print fat quarters
2 Cream ‘solid’ fat quarters
**Set aside remaining fat quarters.
Press open all fat quarters before cutting.

From each grey / black fat quarter cut:
4 –  4.5″ x 6.5″

4 –  2.5″ x 6.5″
2.5″ x 2.5″ (only need 4 assorted blacks and 9 assorted greys)
2.5″ x 14.5″ (only need 6 assorted greys and 6 assorted blacks)

Red Print  –  cut 4 – 2.5″ x 6.5″ 

Cream Solid –  cut 22 – 2.5″ x 6.5″

From each of the 12 cream print fat quarters cut:
2  –  6.5″ x 14.5″
2  –  2.5″ x 6.5″  (cut one additional pair from a random cream print to make a total of 26 strips)

This quilt is made up of two blocks, A & B, and can be assembled in a scrappy or matched way.  For this tutorial, I have written instructions as the quilt is pictured, with colours in a particular organized order:


Block A Sewing Instructions: (14.5″block)

You will make 9 grey blocks and 4 black blocks.   Of the 9 grey blocks,  two will have a red accent center, rather than the cream.  
**pressing note: all steps press to the dark side
1. Sew a 2.5″ x 6.5″ cream ‘solid’ strip to a dark 2.5″x 6.5″ strip:   
    (For a red accent block, sew a 2.5″x 6.5″ red strip to a grey 2.5″ x 6.5″ strip and continue steps 2-4)
2. Sew a matching 2.5″ x 6.5″ dark strip to the block:
3. Sew a 4.5″ x 6.5″ matching dark strip as shown:

4. Sew a 4.5″ x  6.5″ matching dark strip to complete the rectangle block:

**Repeat steps 1-4 to make two rectangles.  
For steps 5 through 8, I coordinated black 2.5″ squares with a cream/red/black print and grey squares with plain cream/grey/black.  For the two red/grey accent blocks, I matched a red/cream print with a grey.  See photos for examples.


5. Sew a 2.5″ x 2.5″ dark square to a 2.5″ x 6.5″ cream PRINT:
6. Sew a 2.5″ x 6.5″ cream PRINT to complete the center strip:

7. Sew the center strip to one of the rectangle blocks:  
8. Sew a matching rectangle to complete Block A:
Block B Sewing Instructions: (14.5″block)
1.  Sew a 2.5″x 14.5″ dark strip to a 6.5″x 14.5″ cream print:
(I matched the light prints with red in them to the 2.5″ x 14.5″ black strips. Light prints with grey/black were matched with grey strips) 

2.  Sew the matching 6.5″ x 14.5″ cream print to complete the block:

Once your blocks are all complete, arrange them in an alternating pattern and sew your rows together.  You can choose to do this in a random pattern, but I chose to group black accent blocks together and grey accent blocks together :

Assemble your quilt sandwich using your preferred method, and quilt.  I chose a horizontal meander:

Bind quilt with the coordinating zig zag stripe:


70″ square quilt.

*My quilt shrank quite a bit in the dryer, turning it into a 65″ quilt! But you can see the gorgeous puckering in the photo below:

Andrea Harris
{millionsofthoughtstrappedinmyhead.blogspot.com}

Salt Air Crossings Quilt


Hi again, it’s Andrea from Millions of Thoughts.   I’m happy to share this quilt tutorial with you, using Cosmo Cricket’s Salt Air.   I love the coastal feel of the fabrics paired up with the light blue solid.  The debate  – West Coast or East Coast?  

If you have any questions, please feel free to email me via my blog!   

1 jelly roll – Cosmo Cricket Salt Air
2 1/2 yards  – Bella Solid Ruby Ice – 9900-169
1/2 yard – Cosmo Cricket Salt Air – Ocean Stripe – 37027-23
4 1/2 yards – Cosmo Cricket Salt Air  – Seafoam – 37023-21
Batting for a 60″ x 70″ quilt top

This quilt is comprised of two blocks:  


             Block A  – 10.5″ square                           Block B – 10.5″ square
Separate the jelly roll into similar colours.

For Block A you need:
11  blue/green prints
7 red prints
3 yellow prints
ruby ice solid
You will make 21 Block A. 

For Block B you need:
5 blue/green print strips
4 red print strips
2 yellow print strips
ruby ice solid
You will make 21 Block B. 

In the jelly roll, there are a few strips that have a combination of colours, as well as a few pastels.  Use these for the requirements above.  e.g. I used a red/blue/yellow floral print for the ‘red’ block.  I used a red/blue/yellow stripe for the ‘yellow’ block. 

Cutting:
Light Bella Solid fabric yardage – cut  30 –  2.5″ width of fabric strips
Block A
For each PRINT strip (21 strips), cut:
2  –  2.5″ x 10.5″
1  –  2.5″ x 6.5″
3  –  2.5″ x 5″ 
*Block A uses one entire printed jelly roll strip, with about 2″ left over.  Be mindful of cutting!
SOLID strips cut:
63  – 2.5″ x 5″ 
This will make 21 of block A.  
Block B  
For each PRINT strip (11 strips), cut:
4  –  2.5″ x 6.5″ 
2  – 2.5″ x 5″
Block B uses 1/2 jelly roll strip for each block
SOLID strips cut:
42  – 2.5″ x 10.5″
21 –  2.5″ x 6.5′
42 –  2.5″ x 5″
This will make 21 of block B.
Block A Piecing Instructions:
*All piecing instructions assume 1/4″ seams
1. Sew 2.5″ x 5″ solids to 2.5″ x 5″  print:
2.  Press seams towards print:
3.  Cut horizontally to make two 2.5″ x 6.5″  pieced strips:
4. Sew  2.5″x 6.5″ pieced strips to matching 2.5″ x 6.5″ print strip:
5. Press toward print.  Set aside for step 9.


6. Sew two 2.5″ x 5″ matching prints to one 2.5″ x 5″ solid:


7. Press seams to prints:

8. Cut horizontally to make two 2.5 x 6.5″ pieced strips: 
9.  Sew pieced strips to top and bottom of ‘plus sign’.  Nestle and match seams:
10. Press seams to outside:
11. Sew 10.5″ matching print strips to sides of block.

12. Press seams to OUTSIDE of block.


Block B Piecing Instructions:
*All piecing instructions assume 1/4″ seams
1. Sew 2.5″ x 6.5″ matching prints to 2.5″ x 6.5″ solid:

2. Press seams towards the prints.   Set aside for step 6.

3. Sew  2.5″ x 5″ solids to a  2.5″ x 5″ print:
4. Press seams towards the print:

5.  Cut horizontally to make two 2.5″ x 6.5″ pieced strips:

6. Attach 2.5″ matching pieced strips as shown, making sure to nestle and match seams:

7. Press seams to outside:

8. Attach 10.5″ solid strips to sides of blocks as shown:
9. Press seams towards INSIDE of block:


Arrange both sets of blocks in a palette that is pleasing to you, in a 6 x 7 layout.  You can do a random colour arrangement, but I chose to arrange mine in an organized colour pattern, with alternating blocks. 
Assemble blocks together, row by row, taking care to match seams. Press towards block A.

Assemble quilt sandwich, quilt and bind using your preferred method:

I chose to do horizontal and vertical straight line quilting

Bind the quilt using the Salt Air stripe fabric: 

One quilt measuring 60″ x 70″  
This quilt washes and softens up beautifully! 

Andrea Harris
{millionsofthoughtstrappedinmyhead.blogspot.com}

Etchings Quilt

Hi! I’m Andrea from Millions of Thoughts and I am so pleased to show off a beautiful line of fabric that I was able to work with in creating this quilt. There is no doubt that this colour combination and fabric is one of my new favourites. The Etchings by 3 Sisters line includes beautiful small and large florals, etching prints, and gorgeous French influences.
This quilt is easy to make, and if you are like me and need to fight over share a quilt with wee ones on movie night, then this quilt may be for you! A generous 72 x 84 size will fit a twin or double bed, or will be the perfect family snuggle quilt for very tall people like me!

2 Jelly Rolls – 3 Sisters Etchings (4060JR)

3/4 yard binding (4061-25)
6 yards backing (4061-26)

Separate jelly rolls into two piles, lights and darks.
From your strips choose:
  • 36 strips light/cream
  • 16 strips blue
  • 10 strips red
  • 10 strips grey


Cutting :
Small Blocks – cut each strip (lights and darks) following these measurements:
  • 2 – 2.5 x 4.5″
  • 2 – 2.5 x 8.5″
  • 1 – 2.5 x 12.5″

Keep cut strips organized by size and colour.

Foursome Block Sashing
  • 9 – 2.5 x 8.5″ dark strips from binding fabric (or any leftover dark strips)
  • 18 – 2.5 x 8.5″ light strips from backing fabric (or any leftover light strips)
Main Sashing between rows
  • 4 – 2.5″ x width of fabric of the backing fabric (light)
This quilt is comprised mainly of two similar blocks – a mirror reflection of each other.
The first block, block b looks like this:
(it looks a bit like a ‘b’ and the dark colour spirals out from the center in a clockwise path.)

The second block d, looks like this:
(looks a bit like a ‘d’ and the dark colour spirals out from the center in a counterclockwise path)

To assemble the quilt exactly as I have – you will need the following number of blocks per colour:
grey – make 6 ‘b‘ and 4 ‘d‘ blocks = 10 blocks grey
red – make 4 ‘b‘ and 6 ‘d‘ blocks = 10 blocks red
blue – make 8 ‘b‘ and 8 ‘d‘ blocks = 16 blocks blue
*All blocks are done slightly scrappy – mixing ‘like’ colours together. As you assemble the blocks, randomly choose light strips and dark (according to colour) strips.

*Pressing- always to the outside edge of the square
*Sewing – use 1/4″ seams

Instructions for making block b:
1. Sew a light 4.5″ strip to a dark 4.5″ strip.

2. Sew on a dark and light 4.5″ strip, following the placement diagram below:


3. Sew a light and dark 8.5″ strip, following the placement diagram below:


4. Sew a light and dark 8.5″ strip following the placement diagram below:


5. Sew a 12.5″ light and dark strip to complete the spiral b block, making it a 12.5″ block.

6. Completed block b:

Instructions for making block d:

Repeat the same steps as above for the mirror image block, called block d. The completed spiral looks like the letter d. To assemble block d, the colours go out from the center in a counterclockwise path. When starting step 1 for block d, the dark 4.5″ strip will be on the right side. Follow the diagram below as a guide:


Making the foursome blocks:

Pair up blocks b and d according to the colour combination you would like to make. You can choose an all over scrappy look – I chose a more distinct combination.
Sew b and d together to make a pair:
Arrange sewn pairs into a ‘foursome’ block, planning for the final quilt layout. Now we are ready to prepare the sashing for the foursome block.


Sew foursome block sashing together (two light 8.5″ strips and 1 dark 8.5″strip)
Attach sashing to the bottom pair of blocks:

Press towards sashing.

Attach matching pair to make the final foursome block. Press towards sashing.

Arrange your large foursome blocks to determine your final quilt layout. Sew blocks together to make three rows of large blocks.

Main Sashing:
Piece together 2.5″ x width of fabric strips and trim to to 2.5″ x 72.5″

Pin and sew sashing to rows, ensuring that seams between rows of blocks match.
Press towards sashing.
*optional – sew an additional sashing row to top and bottom of quilt, giving the appearance of a white frame around entire quilt
Finishing:
Attach batting and backing and quilt as desired. I spray basted this large size, and had no problems.


Cut and prepare binding for your quilt and sew according to your preferred method.

One large quilt 72″ x 82″ – this quilt could easily extend to a queen size bed quilt by adding outer borders.
Please stop by and say hello on my blog at Millions of Thoughts where you will find more photos, as well as a few details about other ways I envisioned, and re-visioned this quilt!

Andrea Harris
{Millions of Thoughts}

Avignon Picnic


Hi again, it’s Andrea from Millions of Thoughts. Looking for a perfect summer picnic quilt? A few flips and turns makes a basic two rail block into something dreamy!
Can you imagine sipping your favourite wine, reading profound literature, savouring imported cheese underneath a great oak tree in the park? I can…but my reality says it will be koolaid, cheesestrings, oreos and will be on the sparse grass at the local playground. Ahhh the name of this fabric line makes me dream!!

1 Jelly Roll – Breath of Avignon by American Jane
1 Jelly Roll – Jelly Roll Basics – 9900-12JR – Natural
4 yards backing fabric – Breath of Avignon 21304-13 – Rouge
1/2 yard binding fabric – Breath of Avignon 21098 50A – Bleu


1. Separate jelly roll into colour groupings (red, green, yellow, blue). You will need almost every single coloured strip for this quilt, except for the few white prints. I even used the prints that look like they are strips from border/panel prints.

2. Sew a white solid strip to each one of the Avignon strips, using 1/4″ seams. Press towards the dark print.


3. Cut into 4.5″ blocks.

5. Separate the 4.5″ blocks into the colour groupings.

6. Using one 4.5″ rail block from each colour, arrange and sew them together as I have indicated in the illustrations below. Make sure to vary the prints and the position of the colours in the block. Block S and Block Z are basically mirror images of each other.

Block Snotice that the dark fabrics make it kind of look like an S?
Make 32 of these. Remember to vary your prints and colour positions:

Block Znotice how this one kind of looks like a Z?
Make 32 of these. Again, as you sew them together, remember to vary your prints and colour positions:
7. Separate and organize into Block S pile and Block Z pile:
8. Sew one Block S to one Block Z. Do this for all of your blocks:


9. Turn one of your SZ blocks upside down and match together.
Here is an example below…
this one I didn’t like the two reds and the two blues touching each other:

This one has more variety:
This is where varying colour/position in step #6 is very helpful!

10. Sew the two together to get one large, O looking block.
11. Arrange your large blocks into 4 rows, 4 blocks in each row.


12. Sew blocks together in each row.

13. Sew rows together.

14. The backing of this quilt is a gorgeous red (rouge) floral from the Breath of Avignon Line.
The 2 1/4″ binding completes it with the pindot print in blue (bleu).

64″ x 64″ quilt
It washes and crinkles up beautifully – I had no problems with colours running!

Freebird Interpretations Quilt


Hi, I’m Andrea from Millions of Thoughts. I’m thrilled to be able to share this project with you. I designed this quilt after my 7 year old son surprised me with a special drawing of a quilt for me. In return, I decided to interpret his drawing into a quilt.

1 Layer Cake – Freebird by Momo
1 yard Snuggles – Cream
2 yards Snuggles – Chocolate
This quilt can be made in a variety of ways, but I chose to designate each row of blocks with a main colour (green, blue, red and brown rows) Notice that each row has 5 unique sized inset blocks.

Step 1 – Choosing Fabrics
Select 4 main colours from the layer cake. You will need five 10″ squares of each colour:
Step 2 – Cutting Fabrics
Cut blocks A-E for each row. Use one 10″ fabric per block. You should have 20 blocks cut in total.
Block A 4 ½” x 8 ½”
4 ½” x 4 ½”
4 ½”x 4 ½” (inset)
Block B 3 ½”x 8 ½”
5 ½” x 3 ½”
5 ½”x 5 ½” (inset)
Block C 3 ½” x 8 ½”
5 ½” x 4 ½”
5 ½” x 4 ½” (inset)
Block D 5 ½” x 8 ½”
3 ½” x 5 ½”
3 ½” x 3 ½” (inset)
Block E 5 ½” x 8 ½
3 ½” x 3 ½”
3 ½” x 5 ½” (inset)

*I cut a few additional inset block sizes from the layer cake prints to add variety to my inset blocks.

Narrow vertical sashing – cut sixteen 1 ½” x 8 ½” strips
Horizontal sashing – cut three 5 ½”x 44” strips
-cut two 2 ½” x 44” strips
Binding – cut five 2.5” strips x width of fabric
modacuts

Step 3 – Organize
Separate inset blocks after cutting and organize into sizes.
Pin block pieces together and organize piles based on sizes:
Step 4 – Mix and Match
Mix and match outer blocks with a contrasting inset block. :
**Pin the block sets together after you have matched a contrasting inset block.
modamixandmatch


Step 5 – Piecing Blocks
**Sew all blocks and sashing with ¼” seams, and press well after each step.

Sew inset block to outer block in two stages shown below.

First, sew inset to lower outer block:
Then, sew left side of block to right side of block to make a complete block:
Step 6 – Arrange Blocks for final layout
Once all 20 blocks have been sewn and pressed, arrange blocks in colour rows, in preparation for sashing the blocks:

Step 7 -Vertical Sashing
Sewing with Snuggles TIPS – use a walking foot when sewing with the Snuggles Fabric. It is a thicker pile with some stretch to it and the walking foot helps minimize stretch and shifting of fabrics. Do a test strip first with scrap fabric to get the feel for the extra pile and ‘give’ for seam allowance. I estimated about 2 millimeters ‘shift’ when sewing the Snuggles to the cotton.
Pin and sew narrow sashing to each block. (Do not stretch the fabric!) Note that the far left block and far right block do not have sashing on the outside edge of the quilt.
Trim and square up the sashing, as the Snuggles may stretch somewhat in the sewing process:

Step 8 – Horizontal Sashing
Pin and sew wide 5 1/2″ horizontal sashing below rows 1, 2, and 3:
Trim and square if needed. Pet your quilt.
Pin and sew the narrow 2 ½” sashing to the top and bottom of the quilt.
Trim and square if needed. Your quilt top is complete!
Step 9 – Layer and Quilt
Layer your quilt top with batting and the Snuggles backing. Baste with your preferred method.
I usually pin baste my quilts densely, but I spray basted this one generously, and it was super!
I chose to machine quilt the individual blocks using a gentle meander:

In another one I’ve made, I quilted the entire quilt.


One soft and cuddly quilt, measuring approximately 44″ x 50″
You can easily make an additional quilt with the leftover layer cake fabric!