
![]()
Hi all!
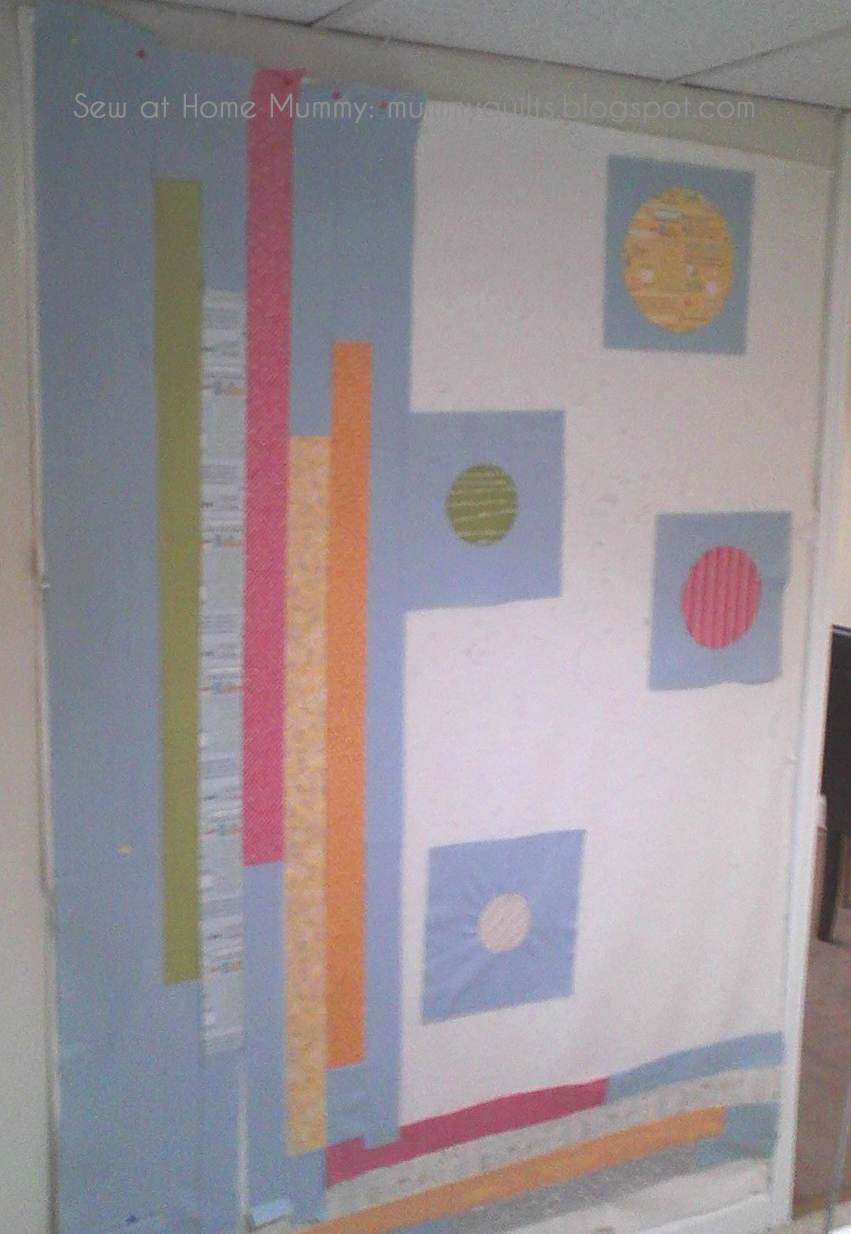
Erin Davis here from Sew at Home Mummy with my contribution to Moda’s May Color POP! Challenge! I think the colors of the “Noteworthy” line really pop against that Bella “Cloud”; this project incorporates both easy-peasy strip piecing and for a bit of a challenge, some gorgeous set-in circle work! Not to fear – you can do it – curved piecing just requires a bit of patience and a little practice! And for fun, you can personalize this quilt – after all, it’s improv!
This 50″ x 70″ lap quilt was a lot of fun – I hope you’ll give it a go!

1 Jelly Roll (“Noteworthy” by Sweetwater)
1 Layer Cake (“Noteworthy” by Sweetwater)
3.25 yards of Bella Solid, (front: Bella “Cloud”)
3.5 yards of Bella Solid, (backing: Bella “Snow”)
Twin-sized Batting
Circle Templates (in the “Printer Friendly Version” of the post)

Cutting Instructions:
Circles:
Cut 4 circles, using templates A – D provided, from layer cake pieces.

Cut 4 circle backgrounds:
– from front color yardage, cut 4 squares measuring 12.5” square
– from squares, remove circle cut-outs using templates E – H provided

Strips:
From Jelly Roll, choose at least 10 strips, and, cut strips at different lengths randomly (making sure the shortest is no less than about 12”); I left mine either
– full length of strip or/
– cut the strip in half
From front color yardage, cut approximately (6) 2.5” x wof strips (amount of strips required will depend on how many and how long the patterned strips you’ll be inserting)
Background:
“Cut on the fly”; once you start piecing the top, it’ll be really handy to have your cutting station set up so that you can cut fabrics as you need them – cut, piece, repeat.
Backing:
– Cut 2 pieces of backing fabric 36″ x 63″ (1yd27″).
– Select 7 layer cake pieces for the back piecing.
Instructions:
Inset Circles:
1. Fold background and circles in 4 & finger press raw edges. Match circles with the appropriate background cut-out (A with E, B with F, etc.)


2. Pin circles to background, right sides together, easing fabric to fit.

3. Sew, pivoting and easing fabric accordingly so as to eliminate risk of puckers.
4. Press seams to inside of circle using steam and starch.
5. Trim circle blocks to 11.5” square, centering circle while trimming.
Strips:
1. Lay strips out in order you are happy with on your design wall/floor/table, staggering/offsetting them randomly; organize your circle blocks in an orientation you’re happy with.

2. Once you’re happy with your layout, attach pieces of background strips to the top ends of 4 of your patterned fabric sitting to the far left of your quilt, creating a “strip set”, so as to bring the ends even.

3. To the strips on the bottom of the quilt, add solids to either end; to the
a. left side: enough to hit the vertical strip set already pieced (approximately 8″ wide strip)
b. right side: enough to bring the horizontal strips to the end of the quilt
4. Sew in background fabrics accordingly to the blank areas surrounding the circle blocks, filling in the space as you go, starting from the top of the quilt and working down. Leave the sewn strip sets separate for now.


5. Now, Sew all of your strips together, alternating the end you start sewing each time so as to avoid warping. Start with the vertical strips and sew them into one ‘section’. Next, sew your bottom strips together creating another “section”.
6. Attach vertical strip-set section to the left side of the circle-block section; attach the bottom horizontal strip set section to create the quilt top.

Backing:
1. Attach 7 layer cake pieces in a row randomizing patterns.
2. Take the (2) cut back pieces and attach them to either side of your layer cake row lengthwise; press seam open.
Finishing the Quilt:
1. Layer, baste, and quilt as desired.
2. Bind quilt with left-over jelly strips.

One color-popping, gorgeous, 50″ x 70″ lap quilt!

…. and the back:

Erin Davis
{mummyquilts.blogspot.com}
![]()
