Tumbling Around Quilt


Hi there! Konda Luckau from Moose on the Porch Quilts here. I have loved playing around with honeycombs! I have a tumbling block quilt from my grandmother that I love. I have wanted to make one for a very long time. These Honeycombs finally make this quilt easy, and fun, to make! I have a new technique for piecing these blocks by machine – including being able to chain piece the blocks. I have a new book coming out this Spring full of projects using this new technique. Give it a try. You just may like it!

1 25th & Pine Honeycomb
1 1/4 yards White Bella Solid
2/3 yard Honky Tonk Red Plaid
1 1/4 yards Backing
Plastic Hexagon Template from Honeycomb


Cutting Instructions:
1. Take the plastic hexagon template from the honeycomb. Cut it as shown below.

2. Cut the white background fabric into 4 – 2 1/2″ strips, 4 – 4 1/2″ strips, and 3 – 2 5/8″ strips.
3. Using the diamond template, cut 28 diamonds from the 2 5/8″ strips.
4. Cut the red accent and binding fabric into 4 – 1 1/2″ strips and 4 – 2 1/2″ strips.
5. Take 25th & Pine Honeycomb and cut each hexagon into three diamonds as shown below.

Sewing Instructions:
6. Reorganize the diamonds into three stacks according to color.

7. Now for the magic! This is the trick to piecing y-seams on a sewing machine. The difference between my method and traditional machine piecing techniques is that my method can be chain pieced! Chain piecing means it is a lot faster and less thread waste. Refer to the picture below.
    a. Start the seam 1/4″ down from the corner.
    b. Sew 1/4″ into the diamond parallel to the top edge of the diamond.
    c. Sew down the right edge of the diamond with a 1/4″ seam.
    d. Stop 1/4″ from bottom edge.
    e. Sew to the right edge parallel to the bottom edge.
    f. Now it is ready for the next piece!

8. Seams will be pressed clockwise.

9. The bottom diamond is sewed on one seam at a time. Using the same method as above, matching diamond points, sew the right seam.

10. This is what it looks like opened up.

11. Fold hexagon in half matching points and sew the last seam as shown below.

12. Press the seams clockwise opening up the center of the seam allowances into a bitty hexagon.

13. With those three seams, one tumbling block is created! Repeat to make 38 tumbling blocks.

 14. Lay out the center of the quilt as shown below.

15. Using the same machine piecing technique as before, sew the tumbling blocks into rows.

16. Again, using the same machine piecing technique as before, sew the rows together.

17. Trim the left and right sides even. Trim the top and bottom 1/4″ outside of the points. The quilt should now measure about 26″ x 27″. Your measurements may differ slightly because of the many bias edges. Press carefully.

18. Use the 4 – 2 1/2″ white background strips to sew on the first border. Measure carefully before cutting the length of border strips.
19. Use the 4 – 1 1/2″ red accent strips to sew on the second border. Measure carefully before cutting the length of the border strips.
20. Use the 4 – 4 1/2″ white background strips to sew on the third border. Measure carefully before cutting the length of the border strips.
21. Quilt and use the 4 – 2 1/2″ binding strips to bind the quilt.

One fabulous quilt machine pieced tumbling block quilt that measures about 39″ x 40″.

Konda Luckau
{www.moosequilts.com/blog}

Quick Honeycomb Wine Coasters


Hi there!  I’m Emily and I blog at Sew E.T.  I’ve been a long time follower of the Moda Bake Shop and many of my quilts are from tutorials found here!  I even have a binder chock-full of my favorite tutorials that I’ve printed out over the years.  

Ever since Honeycombs came out, I’ve been looking for ways to use the cuties.  I came up with this project when I needed a last minute gift for my office Christmas party. These are great for a hostess gift!  Ok, enough chit chat. Let’s make something!  


1 Moda Honeycomb (I used Color Me Happy by V & Co.) – Note: you only need 4 per coaster


7″ x 17″ Iron-on vinyl such as Heat N Bond, enough for 4 coasters


Use a 1/4 inch seam throughout

1.  Choose 4 honeycombs for each coaster.  One piece will be the bottom and the others will be showing on top when it’s all finished.  I chose all 4 from the same color group, so that way a person can remember what color they have and they’re not just pretty coasters!


2.  Optional step:  I decided to apply iron-on vinyl to just the bottom of my coasters to provide some additional protection on the tabletop.  Follow the instructions on your particular brand of iron-on vinyl.  I was able to get all 4 honeycombs side to side under the 7″ x 17″ piece of vinyl.  I put a piece of tissue paper or scrap paper under the honeycombs that are to be the bottoms, laid them out in a row face up on top, and then ironed the vinyl onto the paper and fabric, so that there wasn’t any overlap of the vinyl onto my ironing board.  Once it’s all ironed down, simply cut out along the edge of the fabric and the paper underneath comes right off the back!

Lay the bottoms down side by side over tissue paper or something to protect your ironing board.  Following directions for your vinyl, lay the vinyl over the bottoms.  Be sure to cover all the fabric!

Following directions for your vinyl, iron the vinyl down.  Mine said to have my iron at medium heat and to place the paper backing over the vinyl while pressing.

After pressing, peel away the paper from the vinyl and cut out close to the fabric edge.

The tissue paper isn’t attached and just peels right away!

Now all the bottoms are ready!

3.  Let’s go back to the remaining honeycombs that will be on the top of the coaster.  You’re going to iron them in half, wrong sides together, so the print is facing out.  Let’s call this a half honeycomb.  You’ll need 3 for each coaster.  


4.  Ok, let’s build a coaster.  Place the piece that will be the bottom right side up on your table.  Place the first half honeycomb on the bottom piece, lining up the edges.  The second half honeycomb stacks on top, slightly overlapping the first one.  See the photo for placement.  The last half honeycomb stacks on top of both the first and second.  You’ll slip one edge of the third half honeycomb underneath the edge of the first one so they are all interlocked.  Be sure the edges are all lined up with the bottom piece!  Pin these in place.


5.  I bet you saw that Moda put a fancy plastic template in your honeycomb bundle.  Do you see the little holes in each corner?  Those clever people placed those holes 1/4″ from the edge so you know when to stop sewing and pivot your needle.  They’re so nice 🙂  Place this template on top of the whole pinned up coaster, lining up the edges as best you can.  Use a marker to dot each corner through the template.  


6.  Let’s sew it together!  Now at your sewing machine, you’ll start along one edge, sewing 1/4″ seam on the top side of this little bundle.  Stop at the dot you made and pivot your needle so you can continue on each side until you meet your starting point and secure your threads.  Now you have a coaster – almost.


7.  I iron lightly before I turn it all right side out.  You’ll need something pointy to crisp up your corners.  Once you have it all turned right side out, you can press again, but don’t iron directly onto the vinyl if you did that part!   You should see a hole in the center of the top if you wiggle the fabric around.  That’s where your wine glass stem will come out, with the half honeycombs all snuggled around the base.  


8.  Pour yourself some red, white, or pink and snuggle your coaster over the bottom of your glass.  Ta-da!  Make one or twenty, but people will think you’re pretty clever.  Did I hear somebody say mimosas? 😀


4 or more awesome wine glass coasters!  

Thanks for checking out my tutorial.  I’d love to see pictures of any that you make at the Moda Bake Shop Flickr group.  Happy sewing!

Emily Thompson
Sew E.T.

Hallie’s Hexi Stars

My name is Konda Luckau of Moose on the Porch Quilts. I have been quilting for a long time. In the past, I have always said that the only reason I can quilt is because I could do everything on a machine. With 6 kids from 4 – 14, I don’t always get as much time to quilt as I would like. I love precuts because I can start sewing faster. I love quick projects because I can actually get them finished.

I have recently been changing my mind. I still like to see projects finished, but I have tried hand piecing and hand quilting. I started small. I found that hand applique is too slow of a process for me. Hand piecing surprised me. I enjoyed being able to work on it while waiting for kids in various places.

If you haven’t tried hand work, this might be a project to change your mind.

1 Hope Chest Prints Honeycomb
3/4 yard backing
3/4 yard square batting
1/2 yard binding


1. Take 28 of the hexagons, 14 light and 14 dark. Each hexi star takes 2 light hexagons and 2 dark hexagons.

2. Cut each hexagon into three diamonds as shown. Using a ruler from corner to corner, cut half way.

3. Turn the hexagon and cut half way again. Repeat to make three diamonds as shown. 

4. Take 2 sets of 3 light diamonds and 2 sets of 3 dark diamonds for one hexi star.

5. Lightly mark the 1/4″ seam allowance on one of each dark diamond in a narrow V as shown. Lightly mark the 1/4″ seam allowance on all 6 of the light diamonds in a wide V as shown.

6. Lay out half of the star with the marked diamond between two unmarked diamonds.

7. Align two adjacent diamonds. Sew with a running stitch along marked line.

8. Tie off the thread at the corner and align the next diamond. Continue sewing down the next side. Tie off and cut thread. Finger press.

9. Repeat with the other three dark diamonds to make two half stars as shown.

10. Mark the 1/4″ seam allowance along one side as shown.

11. Pin the two halves together and sew along the marked line.

12. Press seams in a circle and press seams open in the middle rotating in the opposite direction.

13. Take one of the light diamonds. Align and pin it onto one dark diamond as shown. Sew along the marked seam allowance. Knot thread, but do not cut.

14. Align the light diamond to the next dark diamond. Pin and sew the next marked seam allowance. Knot thread again, but do not cut unless you need to.

15. Repeat with the next light diamond.

16. Continue sewing the light diamonds around the dark star. That makes one Hexi Star.

17. Repeat to make six Hexi Stars with a dark center and light edges. Make one Hexi Star with a light center and dark edges.

18. When pressing, always rotate seams.

19. Lay out seven Hexi Stars as shown. Hand piece in the same manner.

20. Layer backing, batting, and top. Baste with pins or spray. 

21. Hand or machine quilt.

22. Cut the 1/2 yard of binding fabric into 2 1/2″ bias binding. Bind.


One approximately 24″ table topper that you will be very proud to show off!

I hope you will give hand piecing a try. If you do, I would love to see it! My email is kluckau(at)moosequilts.com. I hope you have as much fun as I did!
Konda Luckau

Sweet as Honey Quilt


Hello everyone!  My name is Chrissy Lux and I am thrilled to be sharing a project here at the Moda Bake Shop!  I co-own Sew Lux Fabric with my mom and share my adventures in sewing on our blog.

Hexagons are so cute and I was excited when Moda introduced their Honeycomb precuts.  If you’re scared to piece them, don’t be!  I am going to walk you through this quick and easy quilt.  I’ve listed the ingredients below, but if you need a kit for this quilt you can order one here.

Let’s get sewing, shall we?!

Fabric Needed: 
1 Honeycomb (Scrumptious 55070 HC)
1/2 half yard for sashing (Bella Off White 9900 200)
1/2 yard for inner border (Scrumptious Berry Pink 55074 21)
1 yard for outer border (Scrumptious Paisley Aqua 55077 12)
1/2 yard for binding (Scrumptious Printed Color Aqua 55078 12 )
3 yards for backing (Scrumptious Summer Aqua 55072 12)

Tools Needed:
Marking Pen
Hexagon template (included with Moda’s Honeycomb precuts)
Rotary cutter & ruler
Machine & Basic sewing supplies


STEP ONE: 
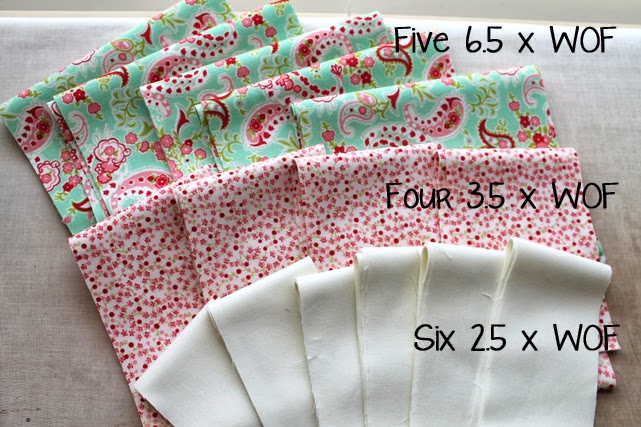
First, let’s cut all your sashing & borders so they’ll be ready.

From the outer border print, cut five strips 6.5″ x WOF.
From the inner border print, cut four strips 3.5″ x WOF.
From the sashing solid, cut six strips 2.5″ x WOF.
From the binding, cut six strips 2.5″ x WOF (not shown in photo below).

STEP TWO:
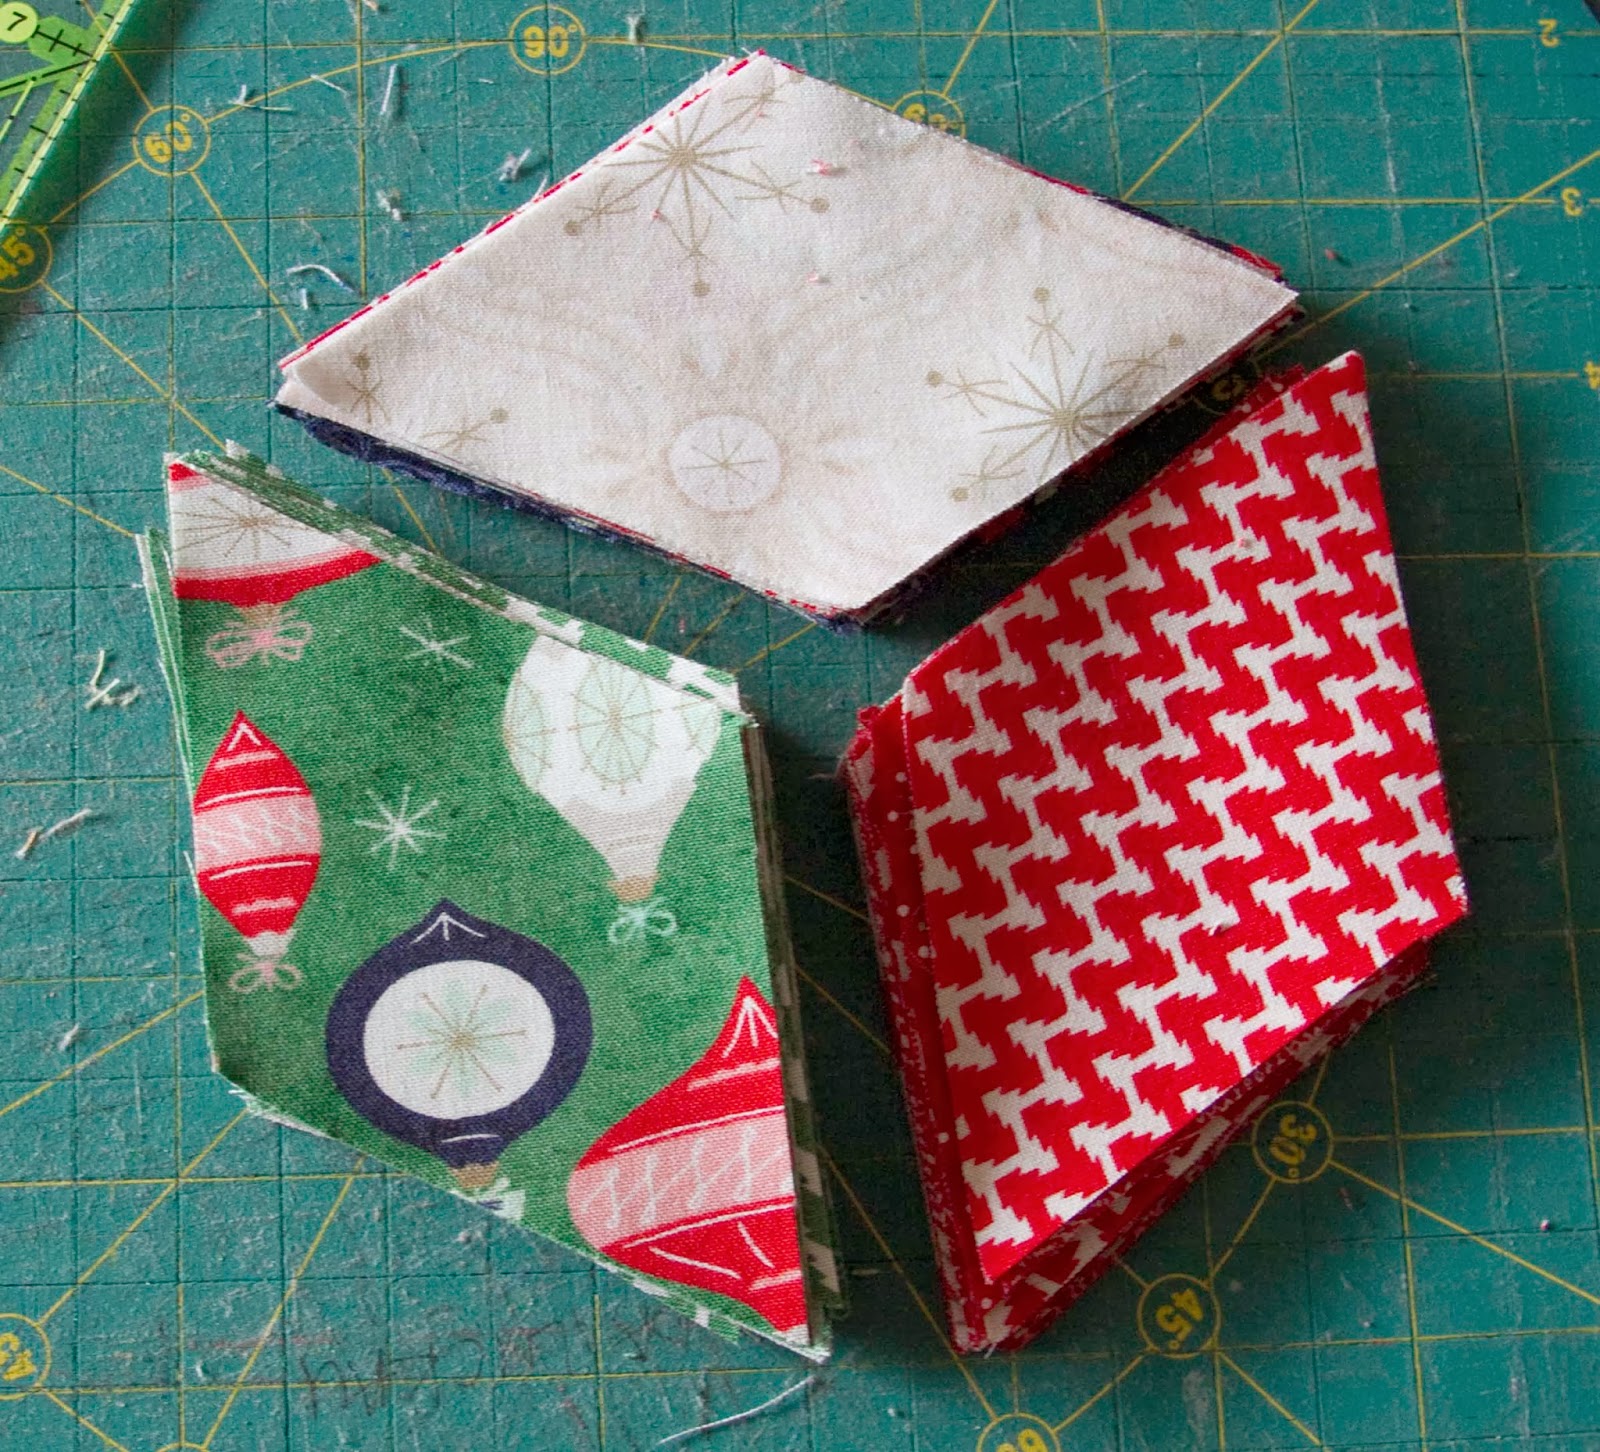
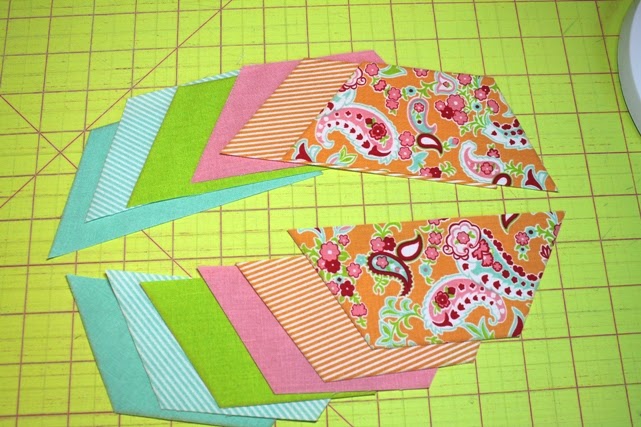
Sort your precut hexagons into the following stacks:
SIX stacks of 5 prints
ONE stack of 6 prints (these will be cut in half and mixed among the stacks of 5 hexies)

Note: Try to disperse your colors among each stack.  OR make them monochromatic – its up to you!

Use a ruler to cut the stack of six hexies in half.

Add two half hexies to each of the six stacks of 5.
STEP THREE: 
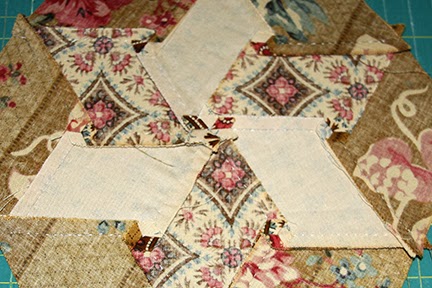
Each Honeycomb comes with a plastic template with holes in the corners that make it super easy to mark your seam allowances!

 Grab a stack of five full hexies + two half hexies, the template and a marking pen.

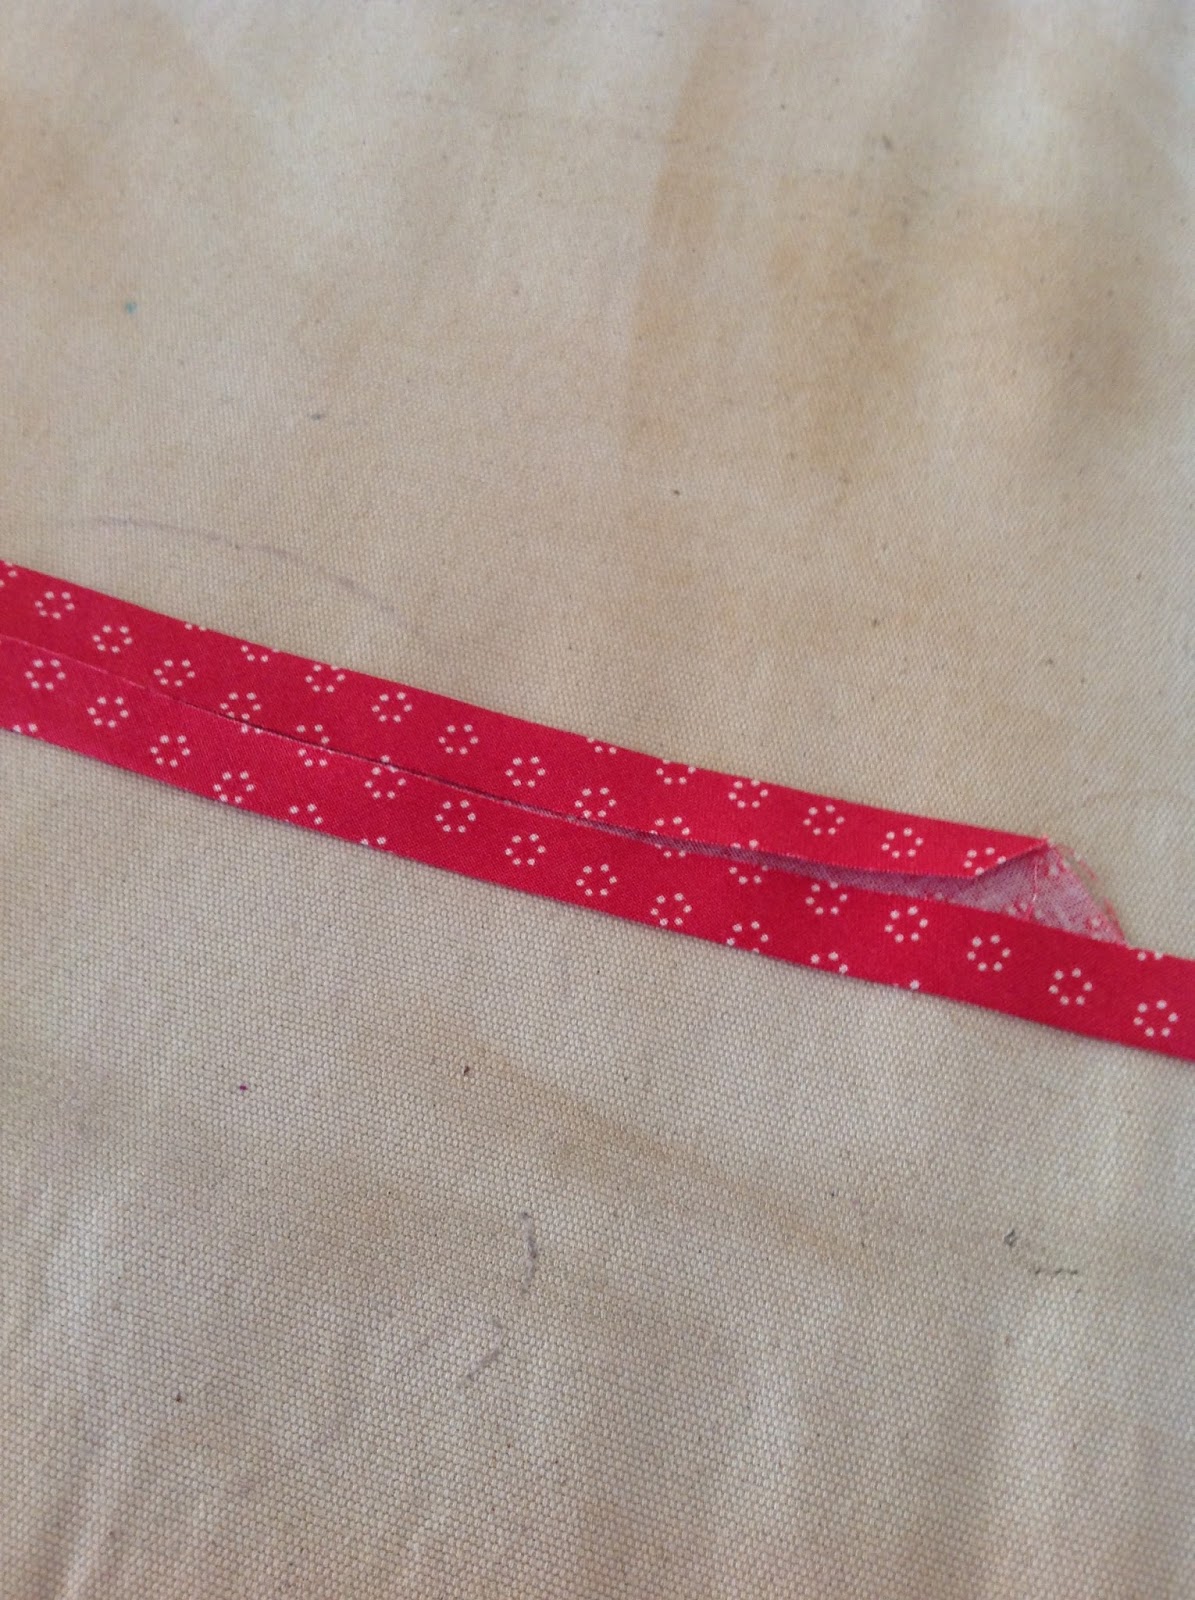
Use the template to mark dots on all the points the WRONG side of each hexie.

Next, take your center hexie and one of the half hexies and place them right sides together, lining up the dots.

Pin in place and stitch from dot-to-dot using a 1/4 in seam.  Be sure to back stitch at the beginning and end (the dots).

Stitch the other half hexie to the opposite side of the center hexagon.

Sew two full hexies together.  Line up the dots and stitch using a 1/4″ seam from one dot all the way to the outside edge of the hexies (ignore the second dot).  Don’t forget to backstitch at the beginning dot!  Make two pairs.

Now its time to hook them all together!  Start by sewing one hexagon to the half hexagon.  Match the dots and stitch from the inside dots (closest to the center hexie) to the edge of the fabric (past the outer dot) using a 1/4 inch seam.  (NOTE: You are going to ignore the dots along the outside edges of the hexie block and stitch all the way to the edge of the fabrics so that all seams along the outside of the block are completely closed.) 

BE SURE YOU ARE ATTACHING THE SIDE PAIR WITH THE OPEN DOT TOWARDS THE CENTER HEXIE.

Pin the top side hexie to the center hexie.  Match the dots and move the other pieces out of the way so they are like wings sticking out from the intersection of the dots. Stitch from dot-to-dot.  Don’t forget to backstitch!

Continue going around the center hexie.

Pin and sew from dot-to-dot to attach the hexies.  Make sure to move the other fabrics out of the way.

For the bottom, you’ll sew from the inside dot all the way to the outer edge of the fabrics.

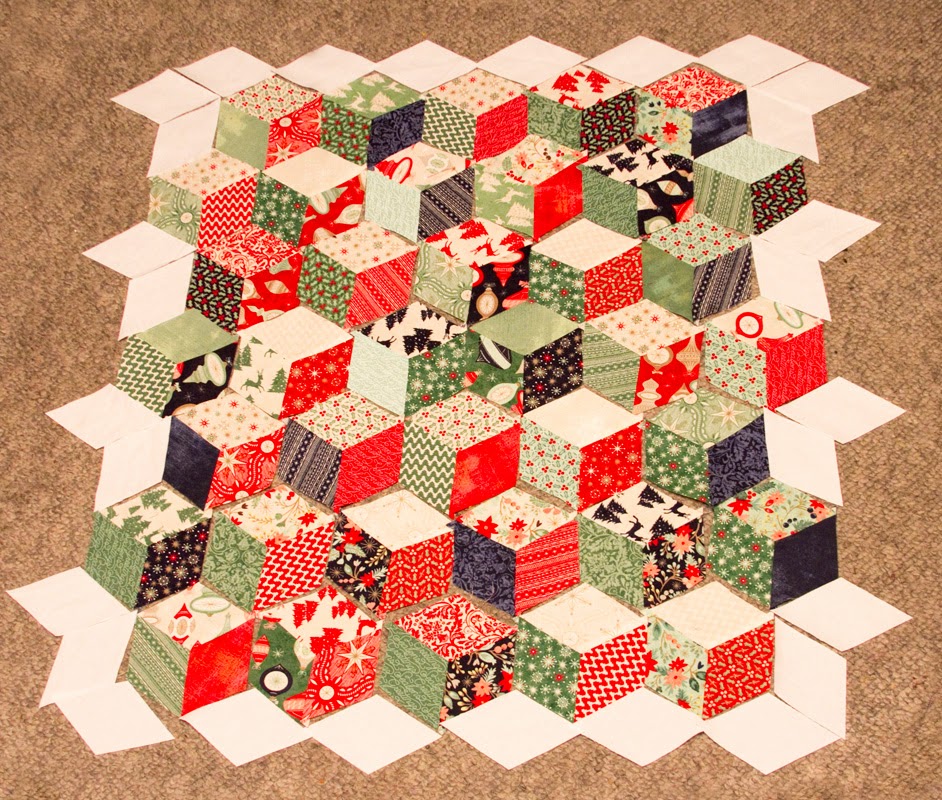
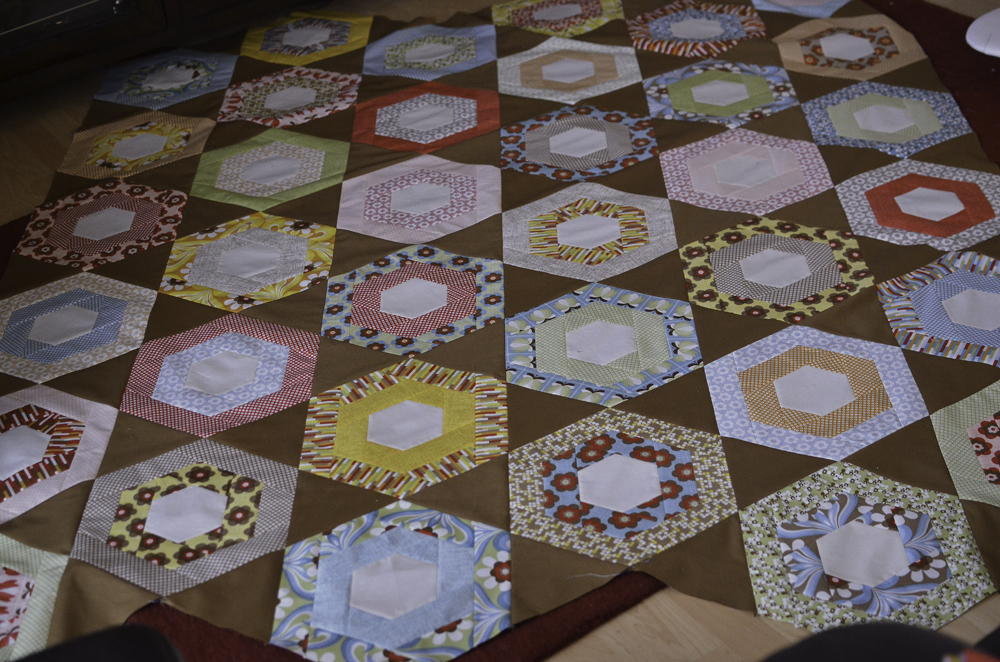
Repeat the process on the other side so you have a ring of hexies around the center hexie as shown below.

Press your hexagon block as shown.  (Away from the center hexie.)

Make six blocks of pieced hexies.

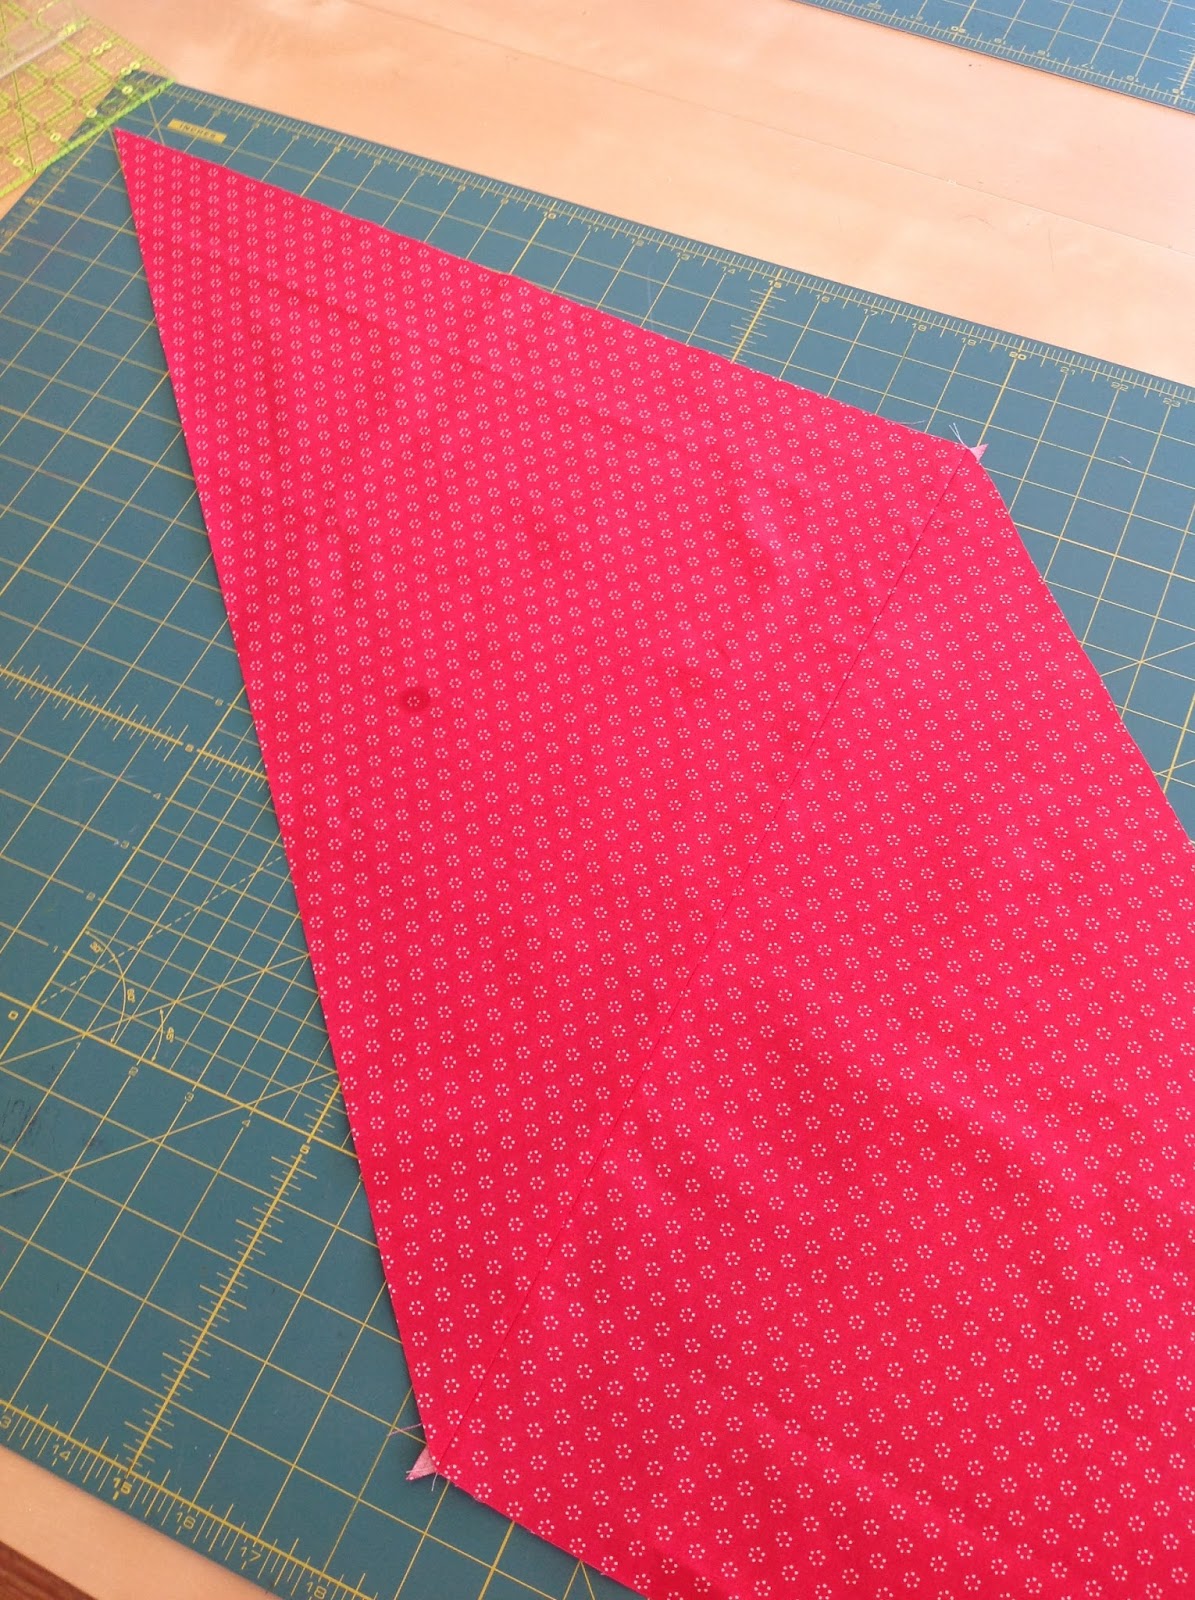
Press and use a ruler and rotary cutter to trim each hexie block to 9.25 in  x 11.5 in. 

STEP FOUR: 
Let’s sash and add the borders!

From one of the sashing strips, subcut into four 2.5″ x 9.25″ strips.
Sash the blocks by adding the 9.25″ long strips between blocks to make two columns of 3 blocks.

Then join the columns by adding the WOF strips between the columns and onto the right and left sides. Then use the remaining two strips to add sashing to the top and bottom.

Add the inner border to the sides first (long sides) and then to the top and bottom (short sides).

Finally, add the outer border.  Cut ONE of the outer border strips in half (6.5″ x 22″) and sew one half strip to each of TWO WOF strips to make them longer.

Sew two WOF strips to the top and bottom (short sides).  Then add the pieced strips to the right and left sides (long sides).

For the backing, cut your yardage into two 1.5 yard pieces.  Sew along the selvage side – be sure to include a seam allowance and trim away the selvage.

Layer and quilt as desired.  Finish by adding binding.

Need help binding?  See the MBS tutorial here.


One pretty lap quilt (42 in x 59 in)

Chrissy Lux
{www.sewlux.blogspot.com}

Hexa-Bunting


Hi everyone! This is Anna from HootnHaller. I am very excited to share my first Moda Bake Shop tutorial with you today. This is a tutorial for a bunting that is a great decoration for a party, special event, or to spruce up any room. If you have been nervous to try the honeycomb precuts in the past, I hope you try out this project that uses these fun fabric cuts!


1 Moda Honeycomb precut (Honeysweet by Fig Tree & Co.)
1/2 yard coordinating fabric


MAKING THE HEXAGONS
1. Sort your hexagons into pairs. Stack the pairs right sides together.

2. Use the template that comes with your precuts to mark dots on one of the hexagons in each of your pairs. (If you have never used the honeycombs before you are in for a treat! This template is amazing and makes sewing the quarter-inch seam soooooo much easier!)

3. Connect the dots that you drew using the template as a straight edge. You can leave one side without a line. These lines show you where to stitch your seams.

4. Follow the lines to sew a quarter-inch seam allowance along five of the sides.

5. Trim off the corners of each of your sewn-together pairs.

6. Turn each unit inside out. You may need to use a turning tool to get the points to pop out. Give your unit a good press.

7. Bring the units back to your machine. Using a coordinating thread, topstitch a quarter-inch from each edge.  

MAKING BIAS TAPE 
1. Cut one 20″ square from your fabric.

2. Using your rotary cutter, cut down the diagonal of the square. I used two rulers to reach the entire length, but you can use one ruler and move it for a second cut.

3. Sew the two triangles together by lining up the straight sides as shown below.

4. Cut 2″ strips along the bias, or the diagonal line you have created with the fabric.

5. Pin and sew the strips together.

6. Fold the bias strip in half and press.

7. Open the fabric up on the fold and fold each side towards the center crease. Press.

8. Fold the strip in half so that no raw edges are showing. Press. You have just created double-fold bias tape!!

ASSEMBLING THE BUNTING
1. Lay the hexagons out in an order that is pleasing to you.

2. Pin the hexagons into the center of the bias tape. Make sure to leave at least 10″ of bias tape before you place your first hexagon. Leave 3-5″ between each hexagon. Once you start to pin the hexagons you may decide to leave a larger or smaller gap – it depends on how you want your finished bunting to look.

3. Sew about 1/8″ from the edge of the tape. This will keep the bias tape closed and will secure the hexagons.

You will have one completed hexa-bunting! Enjoy!!

 Anna Haller
{www.hootnhaller.blogspot.com}

Boho Honeycomb Quilt


Hi!  My name is Erica and I blog over at Kitchen Table Quilting.  I am so excited about Moda’s new honeycomb pre-cut and this is a fun, quick way to put them to good use.  There are no Y seams involved and it yields a generously sized lap quilt.


1 Honeycomb Hexagons in Natural
2 Boho Jelly Rolls
2 Yards Moda Bella in Sienna
4.5 Yards Boho Wild Child Rain
2/3 Yard Boho Basic Earth
Batting at least 80″x90″


1. Unroll your jelly rolls and put the matching strips into pairs.  You will need 36 pairs of strips.

 
2.  Leave the strips folded in half and subcut the first strip into pieces 5.75″, 8″, and 8″.  Since you left your strip folded, this will give you two pieces each time you cut.  CUT CAREFULLY.  There is very little wiggle room here.  
3.  Leaving the strip folded again, subcut the second strip in the pair into pieces 10.25″, 3.5″, and 5.75″.  
4.  Separate the strips into two piles.
  • Pile for the inner ring: two 3.5″ pieces, 2 of the 5.75″ pieces, 2 of the 8″ pieces.
  • Pile for the outer ring: two of the 5.75″ pieces, two of the 8″ pieces, two 10.25″ pieces.  

5.  Each honeycomb hexagon will need a set for the inner ring and a set for the outer ring.  Take a hexagon and sew a 3.5″ piece to the top and bottom of the hexagon.  Make sure to center your jelly roll piece over the side of the hexagon so a little bit hangs over on each side.

6.  Press and then trim two opposite sides by lining up your ruler with the side of the hexagon.  You only need to trim the two opposite sides because the other sides will be trimmed later.
It should now look like this.
7.  Add two 5.75″ pieces to the sides you just trimmed.
8.  Press and trim.
9.  Now add your 8″ pieces to the two remaining sides.  
10.  To trim down to a hexagon shape, line the 2.25″ inch mark on your ruler with the edge of your hexagon in the center.  Trim around each side.  

11.  Now, using a different print, add two 5.75″ pieces to two opposite sides of your hexagon, press, and trim.  

12.  Add the 8″ pieces, press, and trim.

13.  And then add the 10.25″ pieces, press, and trim just like before by lining up the 2.25″ mark on your ruller with the inner ring (the blue print here).  

14. Cut your solid yardage into seven inch x width of fabric strips.  You will need 9 strips, each strip yields 8 equilateral triangles.

15.  To make equilateral triangles, lay a 7 inch strip (folded in half) on your cutting mat.  Line up the 60 degree mark on your ruler with the top of the fabric.

16.  Cut along the edge of the ruler.

17.  Flip your ruler over and line up the 60 degree mark with the bottom of the fabric to make an equilateral triangle.

18.  Sew the triangle to one side of your hexagon by centering the triangle over one side of the hexagon.  A little of the solid fabric should hang over each side.  Once it has been sewn on and pressed, it should line up with the adjacent hexagon side as shown in the photo below.  
You will need 6 total hexagons with 1 triangle, we will call these the “B” hexagon.  It doesn’t matter which side you add the triangle to since they are all of the same.  

19.  Take the 30 remaining hexagons and add a triangle to the opposite side.

20.  You will need 24 total  of these “A” hexagons with 2 triangles added, so take the remaining 6 hexagons and we will add a third triangle.

21.  Add a third triangle to make three “C’ hexagons.

22.  And a third triangle to make three “D” hexagons.

23.  Arrange your blocks into this layout:

24.  Piece the horizontal rows together.  Do this by taking two hexagons at a time.

And flipping the hexagon on the right up to sew the parallel edge together.  
25. Sew the rows together to finish the quilt top.

26.  Once you have the finished quilt top, two of the sides will need to be trimmed.  Use your ruler and rotary cutter to square up the bottom of the quilt and make this edge straight.

27.  Baste, quilt, and bind as desired.

Finished size: 76″x80″

Erica Jackman
{kitchentablequilting.blogspot.com}

Moda’s New Precut: Honeycombs + A Quilt


Hello! My name is  Lissa and I work for Moda, so conveniently I go by modalissa. I am super excited to share a bit of information about the newest Moda precut – Honeycombs. This blog post does have a finished quilt but really I wanted to share with you some tips and techniques on how to machine
piece honeycombs together. I can’t wait to see you create your own hexie-pieces. (that stands for hexagon masterpieces).

 
{This quilt features Moda’s 6″ laser-cut Hexagons, that we’ve named Honeycombs. Each package contains 40 pieces.}
1 pk.Robin’s Egg 9900HC85
1 pk.Silver 9900HC183
1 pk.Admiral Blue 9900HC48
2 pks White 9900HC98
 Backing and binding 2 1/3 yds of Happy Go Lucky, stock # 55067-17


Marking tool of your choice.
{I used Sewline Fabric Mechanical Pencil Trio 7021. I love this because it is three tools in one, including a black 0.9-mm lead for marking light fabrics, white 0.9-mm lead for marking dark fabrics, and a 1.6-mm tracing roller ball point to trace or transfer patterns. I also tried out the Pilot Frixion pen for my demo and it works very nicely.}

 bella021713_8

Each of the honeycomb packs is backed with a piece of template plastic that has pre-drilled holes 1/4″ from corner edges. This is the perfect to mark the stop and start when sewing the honeycombs together by machine. The Pilot Frixion pen disappears when ironed so I thought I would give the Sewline pen a try. It seemed to work very nicely. I am no expert on pens and chemicals but I did have good results.

bella021713_9 

These hexagons are laser cut. This does leave a slight browned edge that shows up more on lighter fabrics. The nice thing about this is that it lightly singes the edges of these fabrics and helps prevent fraying and stretching. All my brown edges disappeared when I washed the final quilt.

bella021713_10 

 I used bright thread to make it easier to see the actual steps.

Place two hexagons right sides together, lining up one of the edges. Sew from dot to dot, back stitching at each dot. If your machine stitches in place, do that instead of back stitching. A few stitches is all it takes to keep the ends from coming loose as the additional hexagons are added. If you have had experience doing set in seams then this process will be a breeze. I do not press as I go because I want the seam allowances to be flexible so I can “push” them out of my way as I continue to add hexagons.

bella021713_12 

Add the third hexagon, and start sewing from the outer edge into the center, pushing your seam allowance away so the seam allowance remains loose. Machine piecing hexagons can be done in sections or in rows.
I was designing the quilt as I went along so I did not sew the quilt in rows for this demo. I made my super duper large hexagon flower first and then decided to add a bed of white hexagons. This is when I discovered it is a bit less cumbersome to design your quilt and construct it in rows.  I have attached a {graph page} for designing your color placement before you start. There is also a copy in the Printer Friendly Version at the end of this post.
 bella021713_14

This is the back side of the hexagons when one side of the third piece is added. This technique takes practice but after you have done a few of them you won’t even have to mark your dots.

 bella021713_16 

Repeat this process by sewing from the outside edge into the center. Continue working in sections, finger pressing as you go. These big hexagons  make the quilt get big fast.

bella021713_17

This is the back of my section. Butting the seam allowance right up to the dot allows you to finger press the seams in any direction.  Do not press your seam allowances open. This will help at the center sections to cover any pin hole or small gaps. If you sew past the dot, a small pucker will show up on the front. This is easy enough to fix by ripping out {gently} 1 or 2 stitches.

Now you are ready to press the seam allowances. They tend to naturally fall in one direction making it easy to press. If you are piecing in sections, press each section once complete. If you are piecing in rows, press once you’ve sewn at least two rows together.

Have fun creating your own Honeycomb projects!

Here is a {pdf of tips and graph pad} for sewing with Moda’s newest precut, Honeycombs. I hope you have fun creating all kinds of projects with this yummy cut of fabric. 

 
 One honey of a quilt! It measures 44″ x 62″

This was such a fun project to make. I couldn’t decide how to quilt it so I sent it to  Crystal Zagnoli at The Quilted Cricket in Colorado and asked her to do some simple loop-dee-loops. I love how it turned out. Many of the Moda designers will be introducing Honeycombs and patterns, so be on the lookout for all kinds of new projects for this classic shape.

bella021713_4

Lissa Alexander
{modalissa.blogspot.com}