
![]()
Hi! My name is Kymberly from Peas in a Pod Creations. I’m so excited to be back on the Moda Bake Shop today with this cute table runner. It might look hard, but with the candy charm squares it’s actually pretty easy and versatile. Be sure to scroll to the bottom of this post to see how this runner looks in solids.

4 candy mini-charm packs or 1 charm pack (for this runner I used Kansas Troubles Favorites II)
1/2 yd. dark blue fabric (this will be used for sashing, backing, and binding)
1/8 yd. cream fabric (note: you will need (10) 2.5″ square cornerstones so you could use a jelly roll strip or other scrap)

*Since the Candy mini-charms are 2.5″ square they can easily be created from larger pre-cuts if you can’t find them at your LQS. I wanted some extra fabric so I started with a layer cake, but a charm pack is the perfect substitute in this pattern if you can’t find the mini-charms.

If you’re working with something bigger than the mini-charms cut your fabric into 2.5″ squares.
Match the fabrics from your mini-charm packs and decide which colors you want to use for each star. Kansas Troubles Favorites II has several fabrics in each color so I chose to make a brown, blue, red, and green star. Choose three color/dark fabrics and three lights for each star.

Decide which square will be the center of your star and set aside. Cut your remaining squares in half diagonally to create triangles and sew along short sides of triangles. The corners are made of 2″ HSTs that are created by sewing two small triangles together. I found an easy cheat if you don’t always have perfect points is to sew like fabrics together. This is also a great way to practice those quarter square pieces.

Sew triangles into squares and trim to 2.5″.

I forgot to take a picture of the star points in progress, but it’s the same process as the corner units. The only difference is this time you won’t sew likes with likes. Sew a dark triangle to a light along a short side to create a larger triangle. Sew two large triangles together to create a square and trim to 2.5″.

Assemble pieces as shown, and repeat process for remaining three stars.

Cut dark yardage into 2.5″ strips and subdivide into (13) 6.5″ long rectangles for sashing. Cut (10) 2.5″ squares from light fabric for cornerstones. My favorite method for doing sashing is to sew a long strip on one edge of the block. On the last block sew a second strip opposite the first. Chain piece (8) cornerstones to the remaining strips, and choose two strips to attach cornerstones to the opposite edge. Press blocks and strips and sew a sashing strip to the top of each block. Make sure that the sashing with two cornerstones goes on the block with two strips of sashing. (If I was doing this in a quilt with more than one row I’d sew all of my blocks like this and only the last row would continue with the next step.) Attach your remaining sashing/cornerstone units to your blocks and sew blocks into a row.

I chose to quilt this table runner using a walking foot to quilt in the ditch around the stars.

One 33″x10″ table runner.

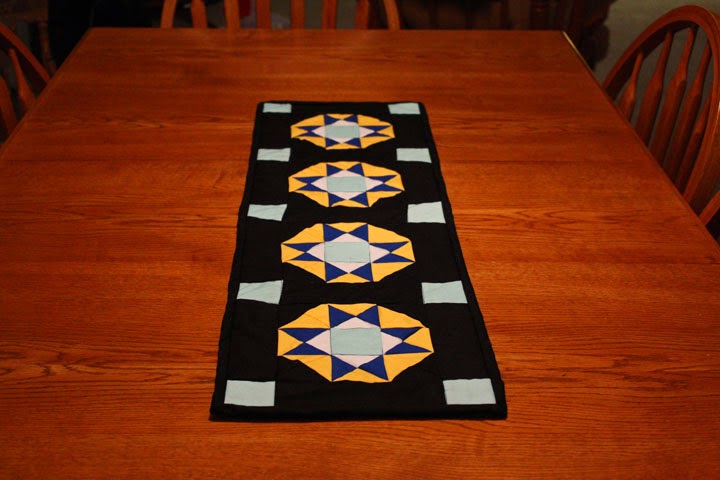
Here’s another version of this table runner made with solids and all of the blocks the same. Each star is 6″ square so the length of this table runner can easily be adjusted by adding or subtracting stars.
Hop over to my blog to see a way to use the mini charms to make matching mug rugs.
Kymberly Pease
![]()


