Mason Jar Tea Cozy

Mason Jar Tea Cozy


I can never get enough tea in the winter, and love to use quart-sized mason jars to fuel my addiction.  These jars are designed for canning, so adding boiling water is perfectly safe! This tea cozy insulates the jar (and protects your hands!) nicely, and it is also great in the summer for keeping your drink cold and preventing your glass from sweating.

Extra bonus – screw the lid on for a handy, spill-proof travel mug. Double-extra bonus – it’s perfect to make with scraps if you don’t have Charm squares handy!

These make a great holiday gift, especially paired with a box of your favorite tea! I’ve got a few more simple holiday gift ideas coming up soon at my blog at WaterPenny.net.

8 Charm squares – or an equivalent measure of scraps
Two pieces of batting measuring 14″ x 6″ and 5” square.

Extra fabric for optional accents
Button

Assemble the sides – finished sides should measure 13×5. Gather your fabric and batting:
    Mason Jar Tea Cozy Tutorial by WaterPenny for Modabakeshop.com

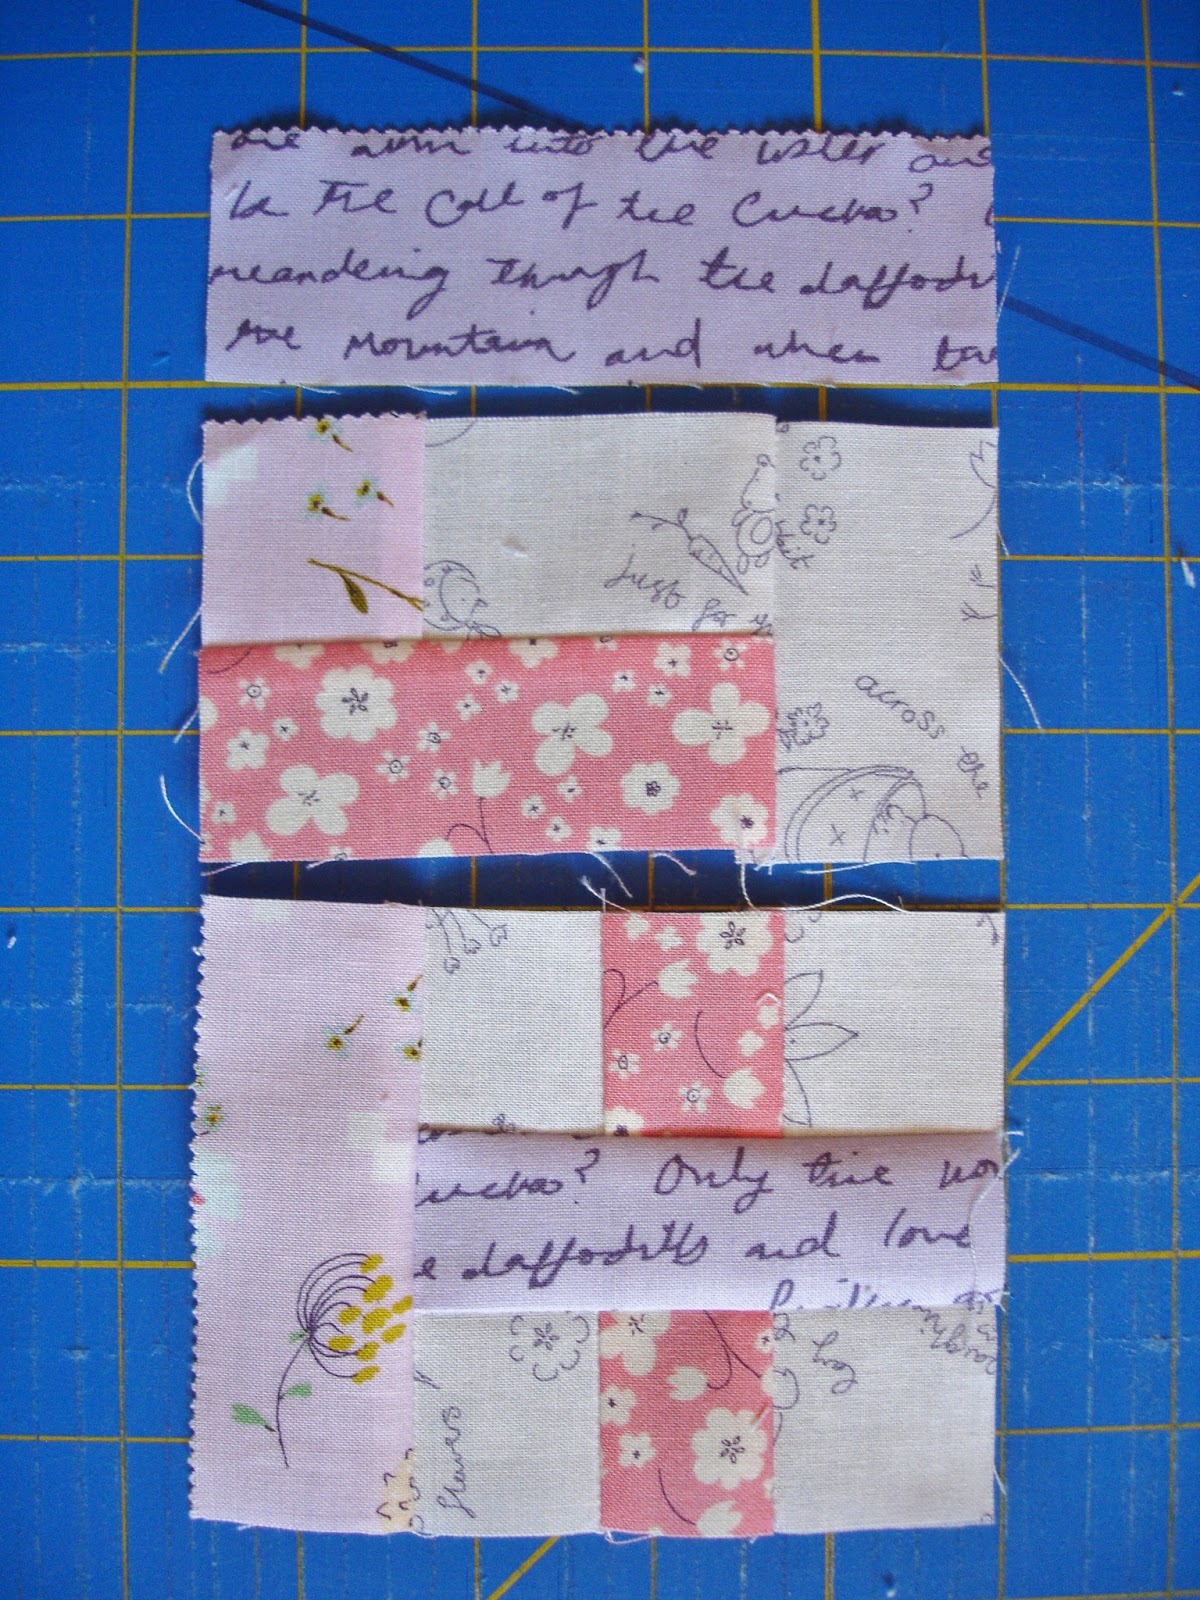
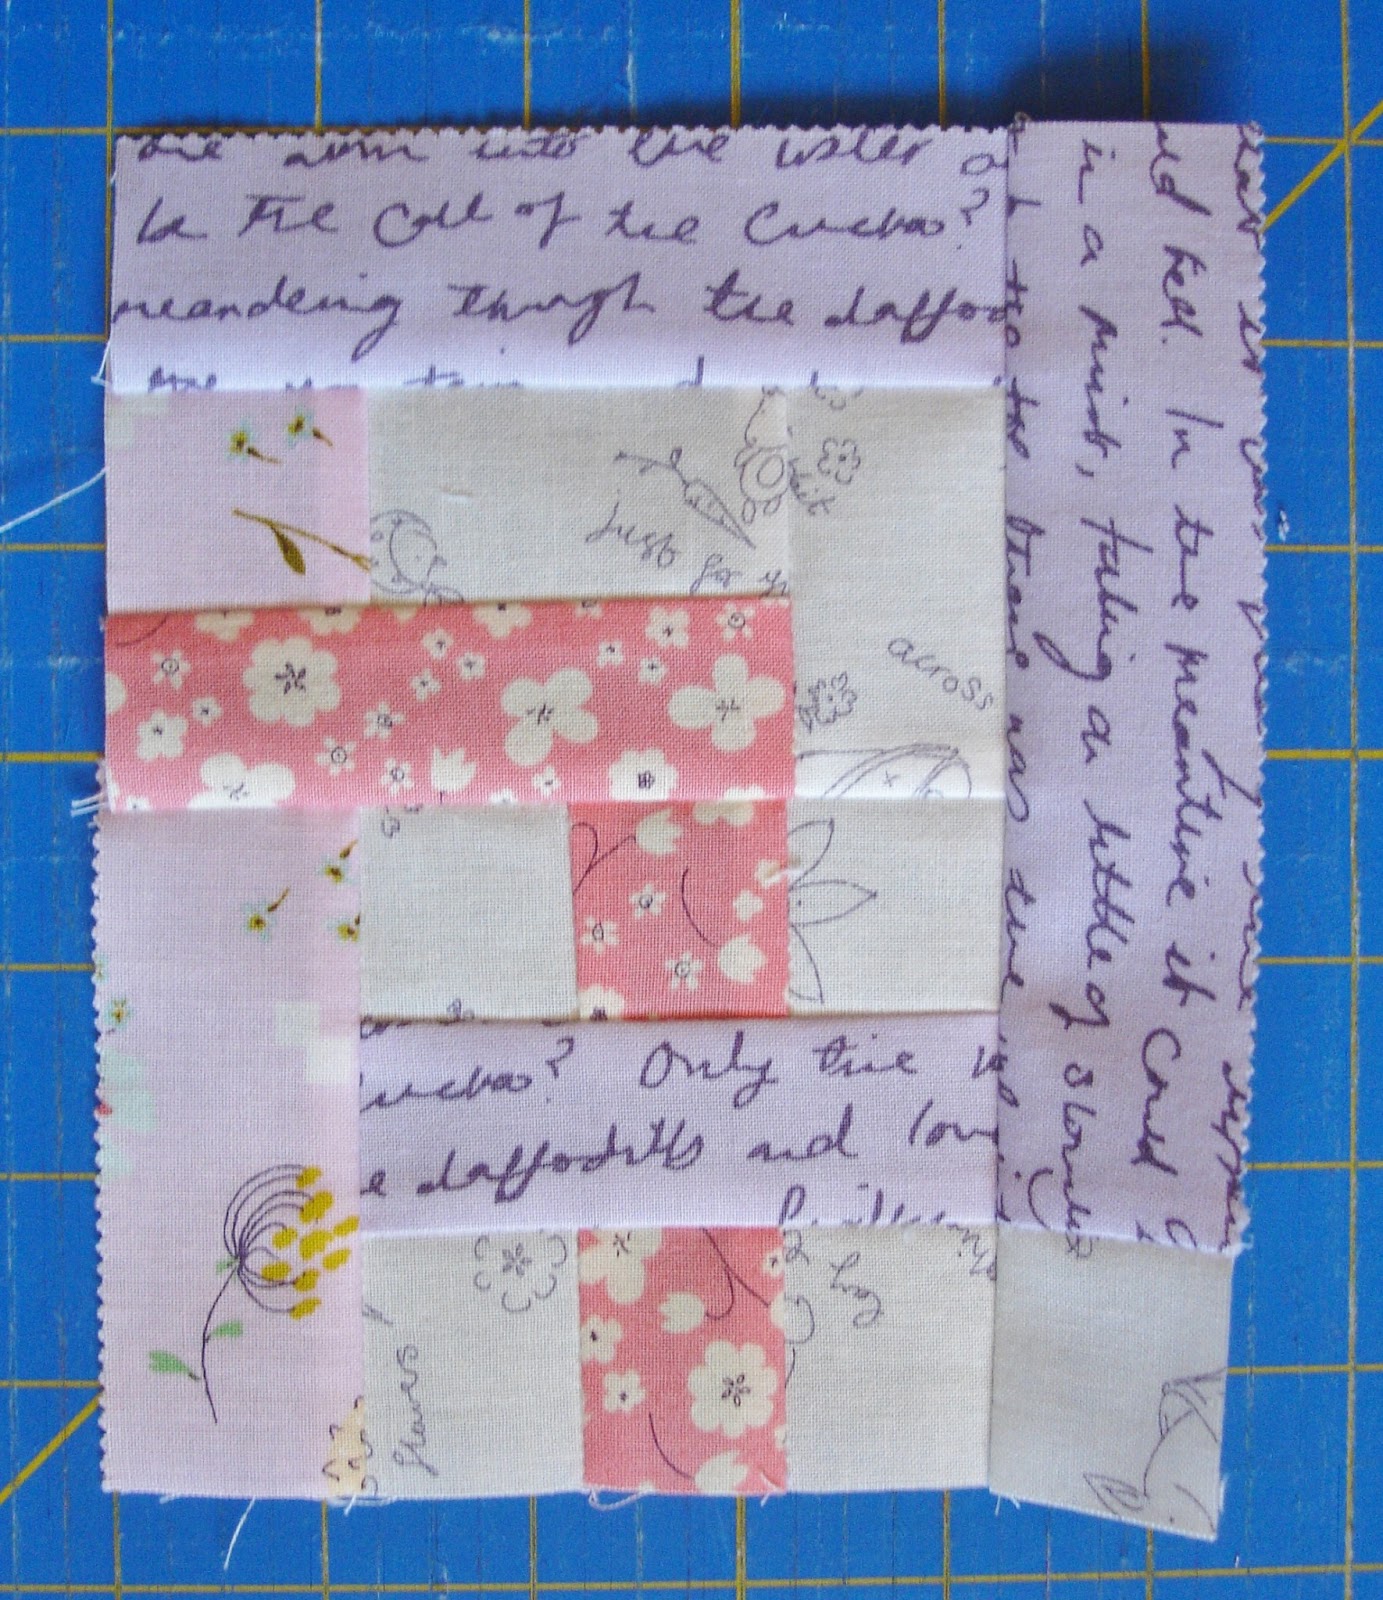
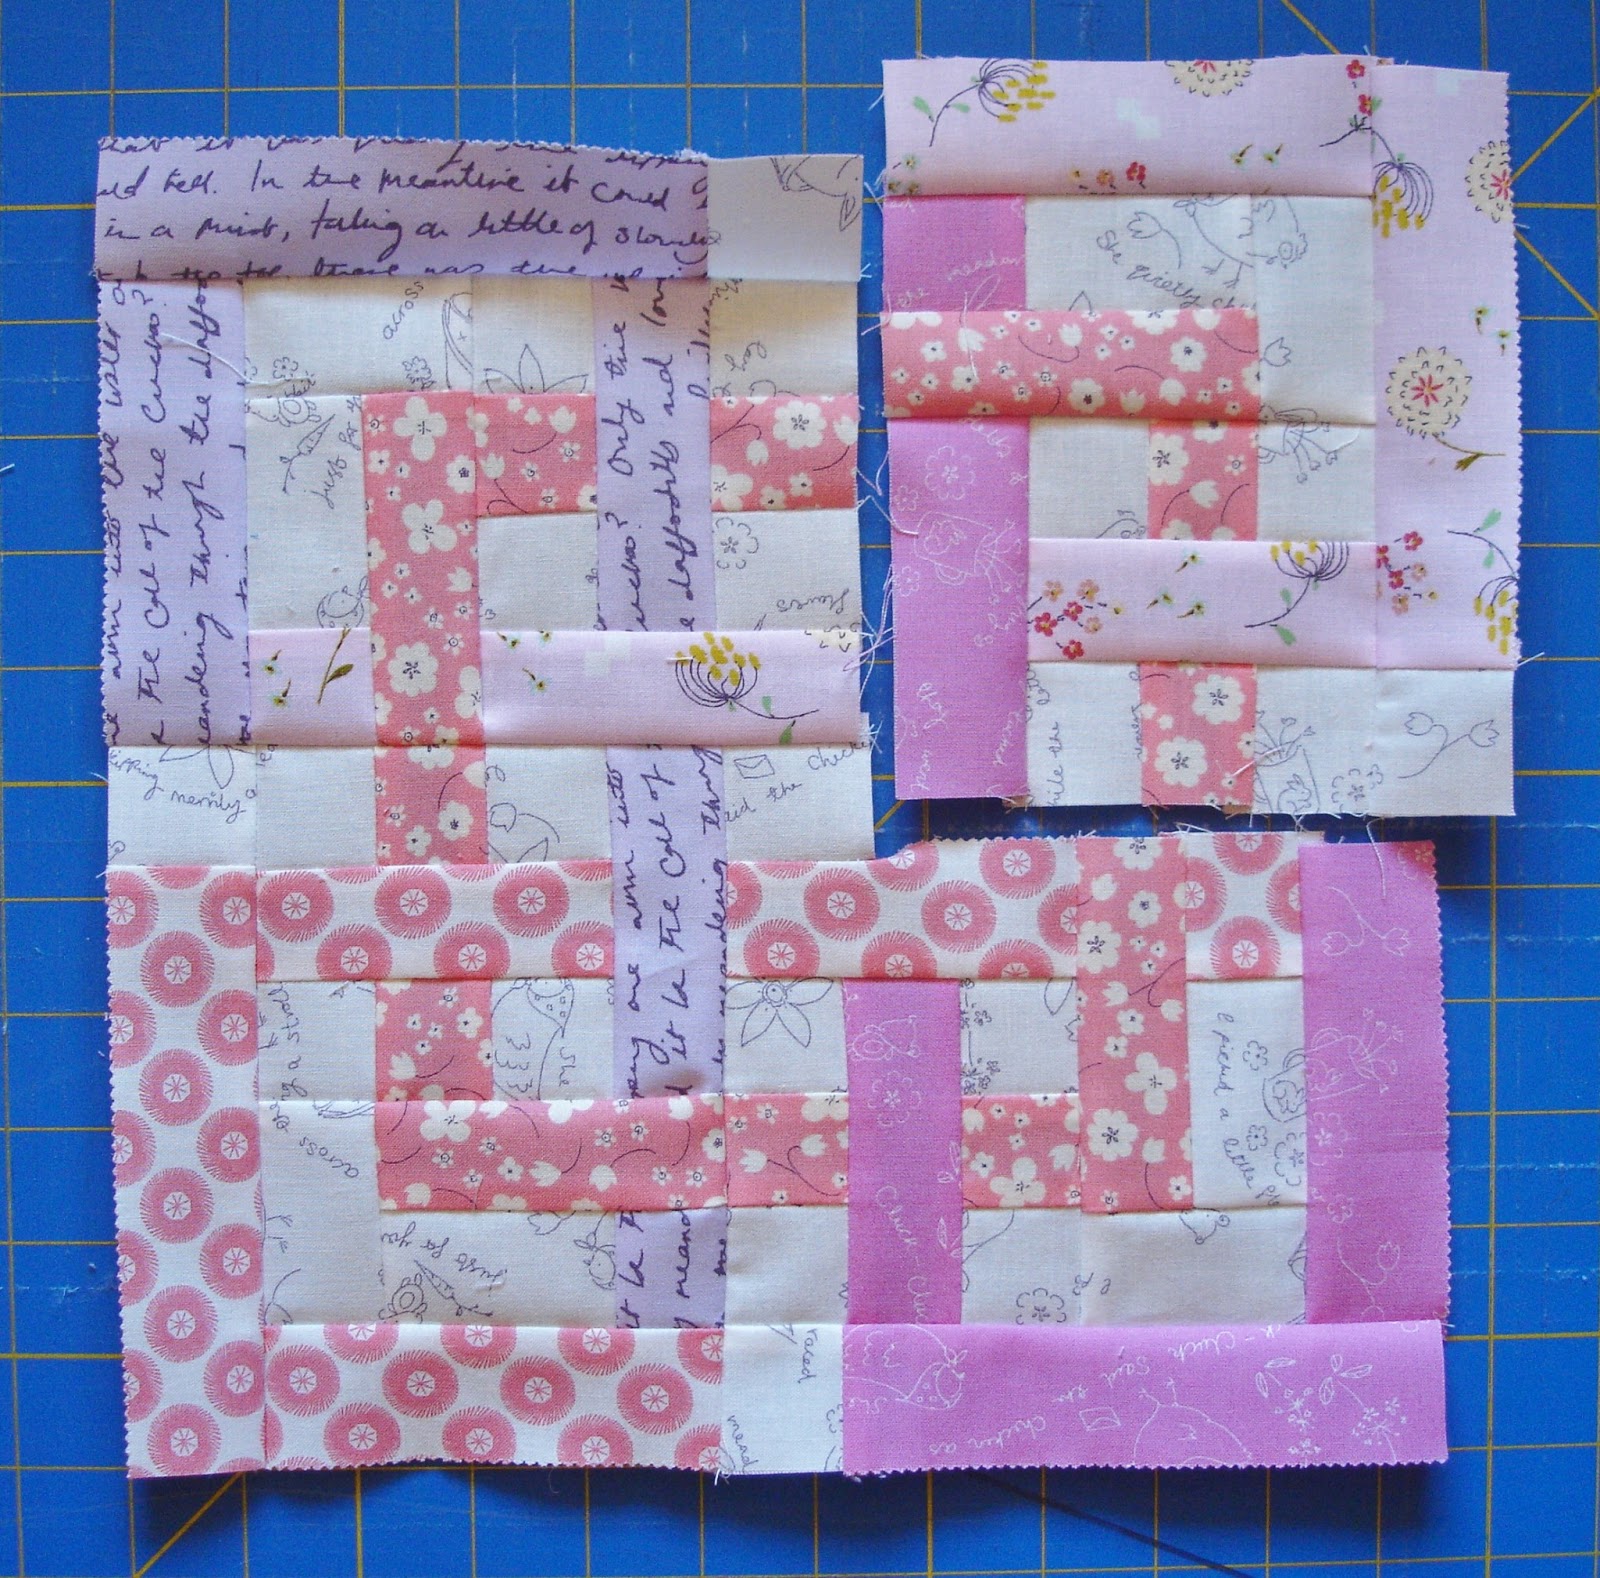
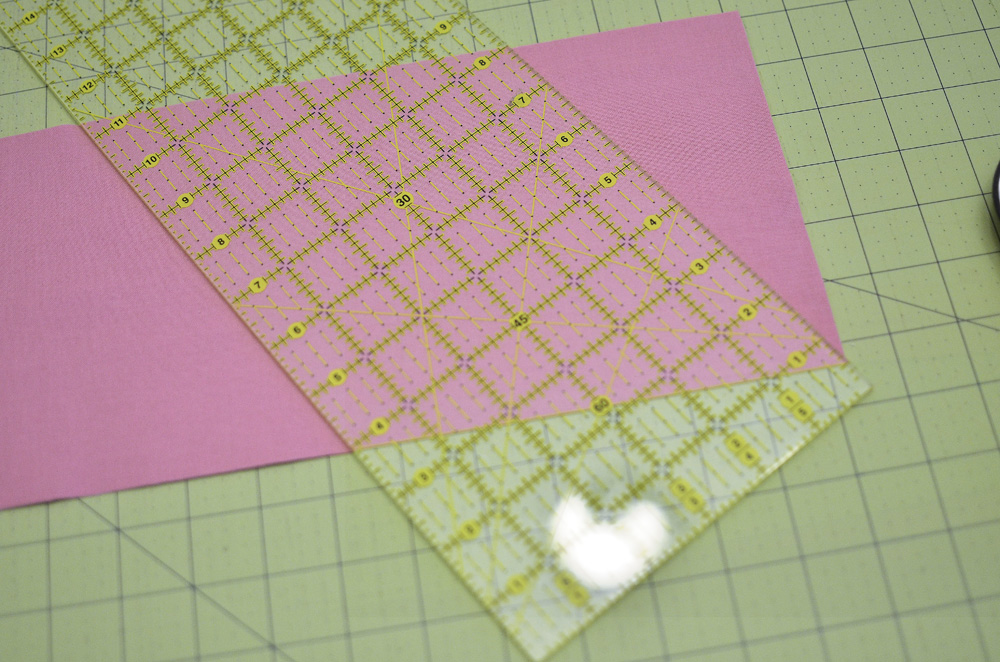
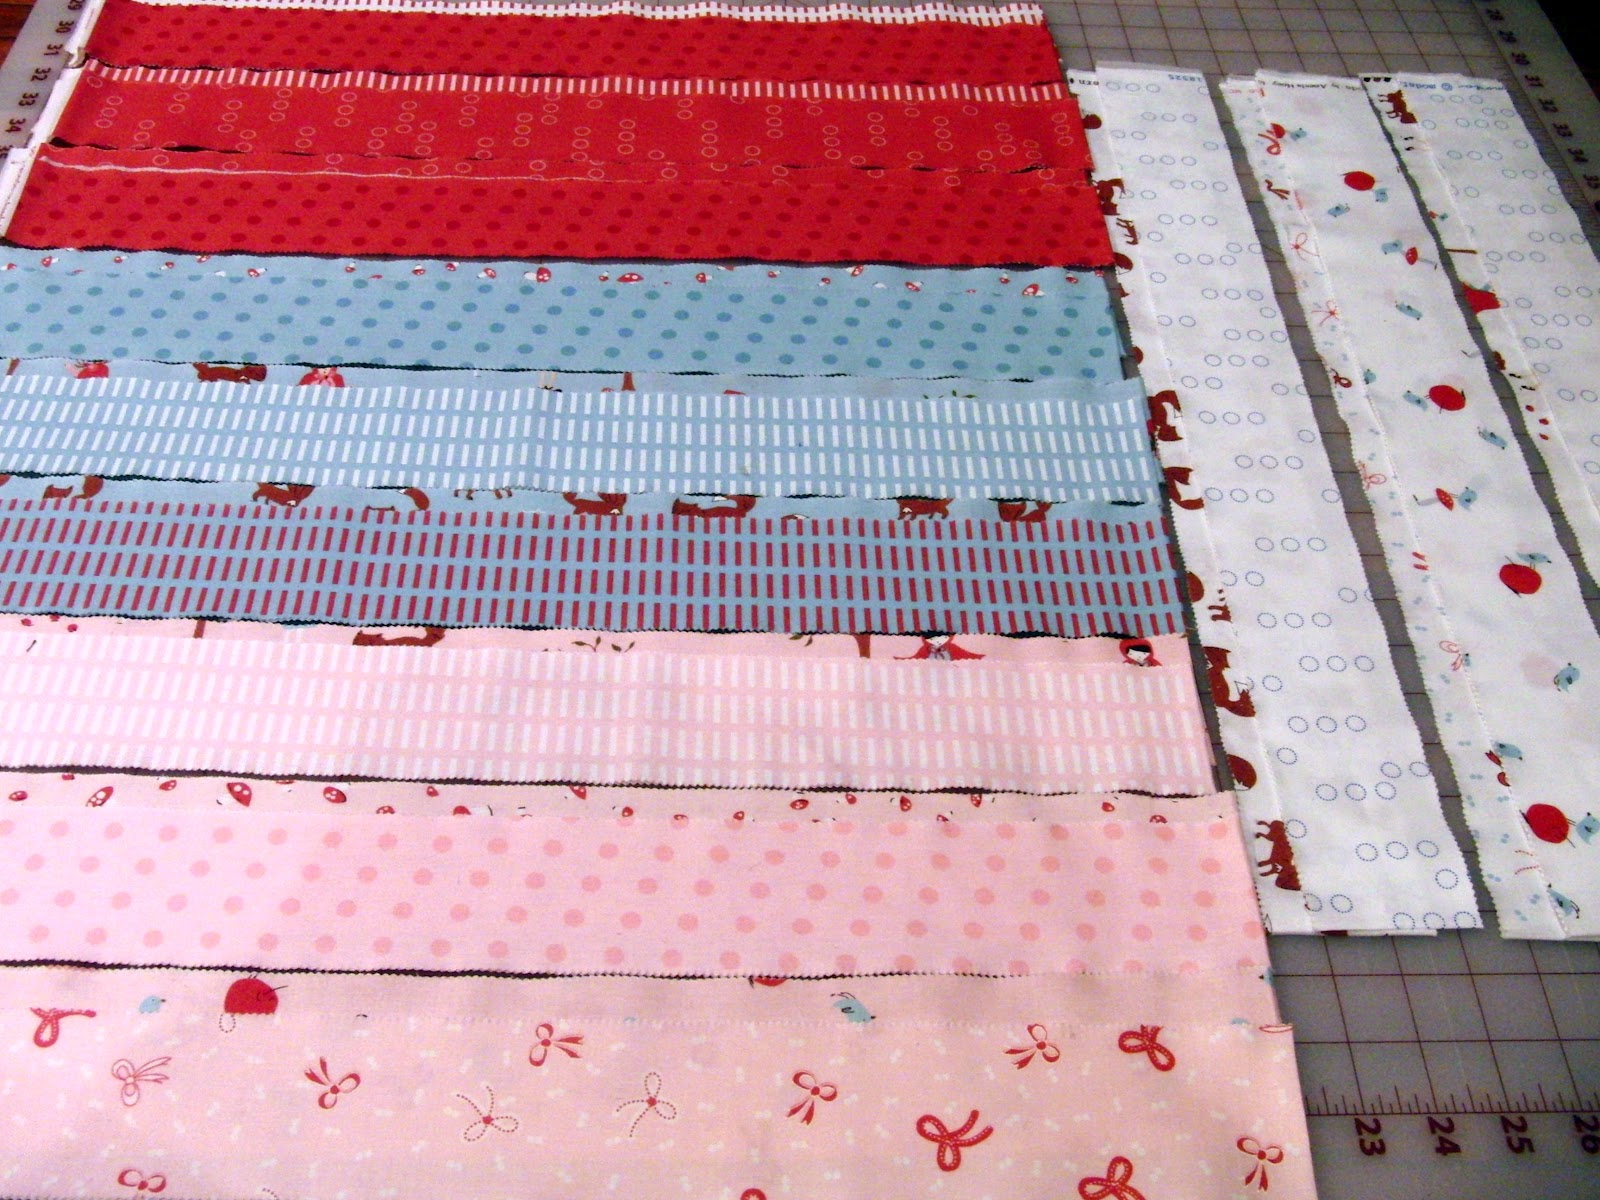
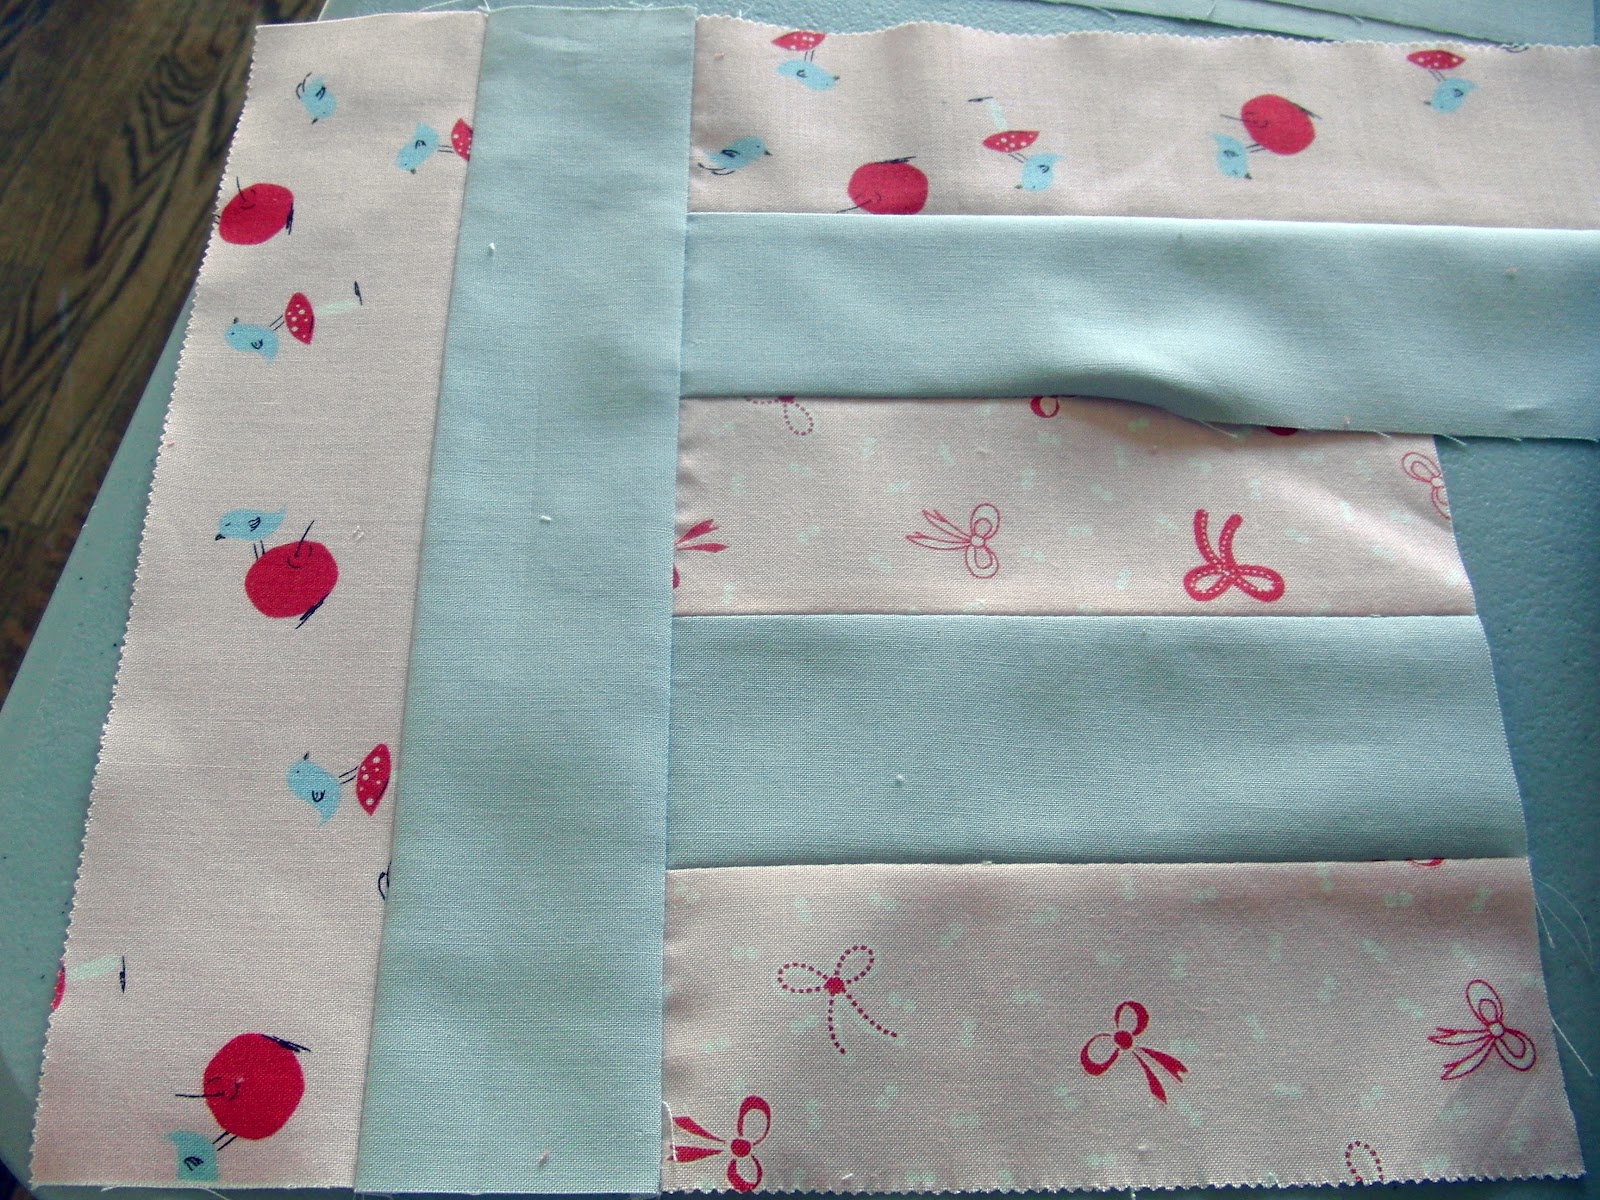
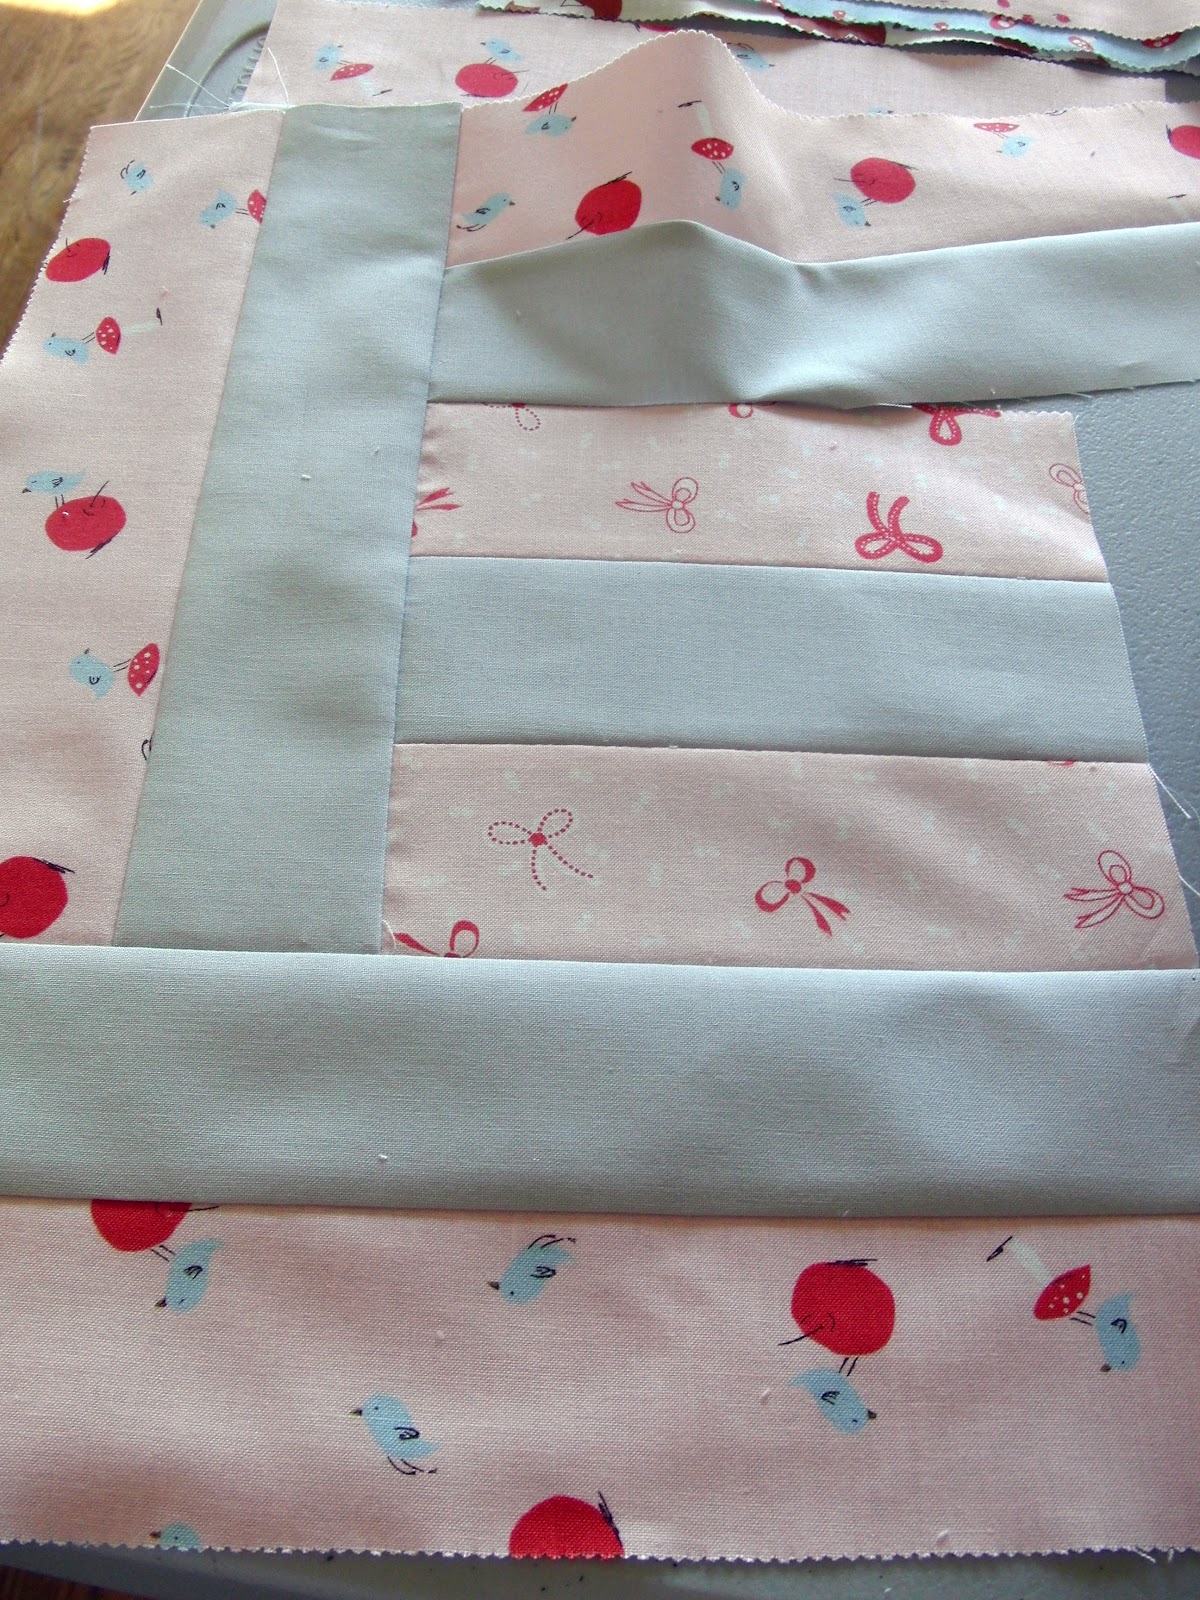
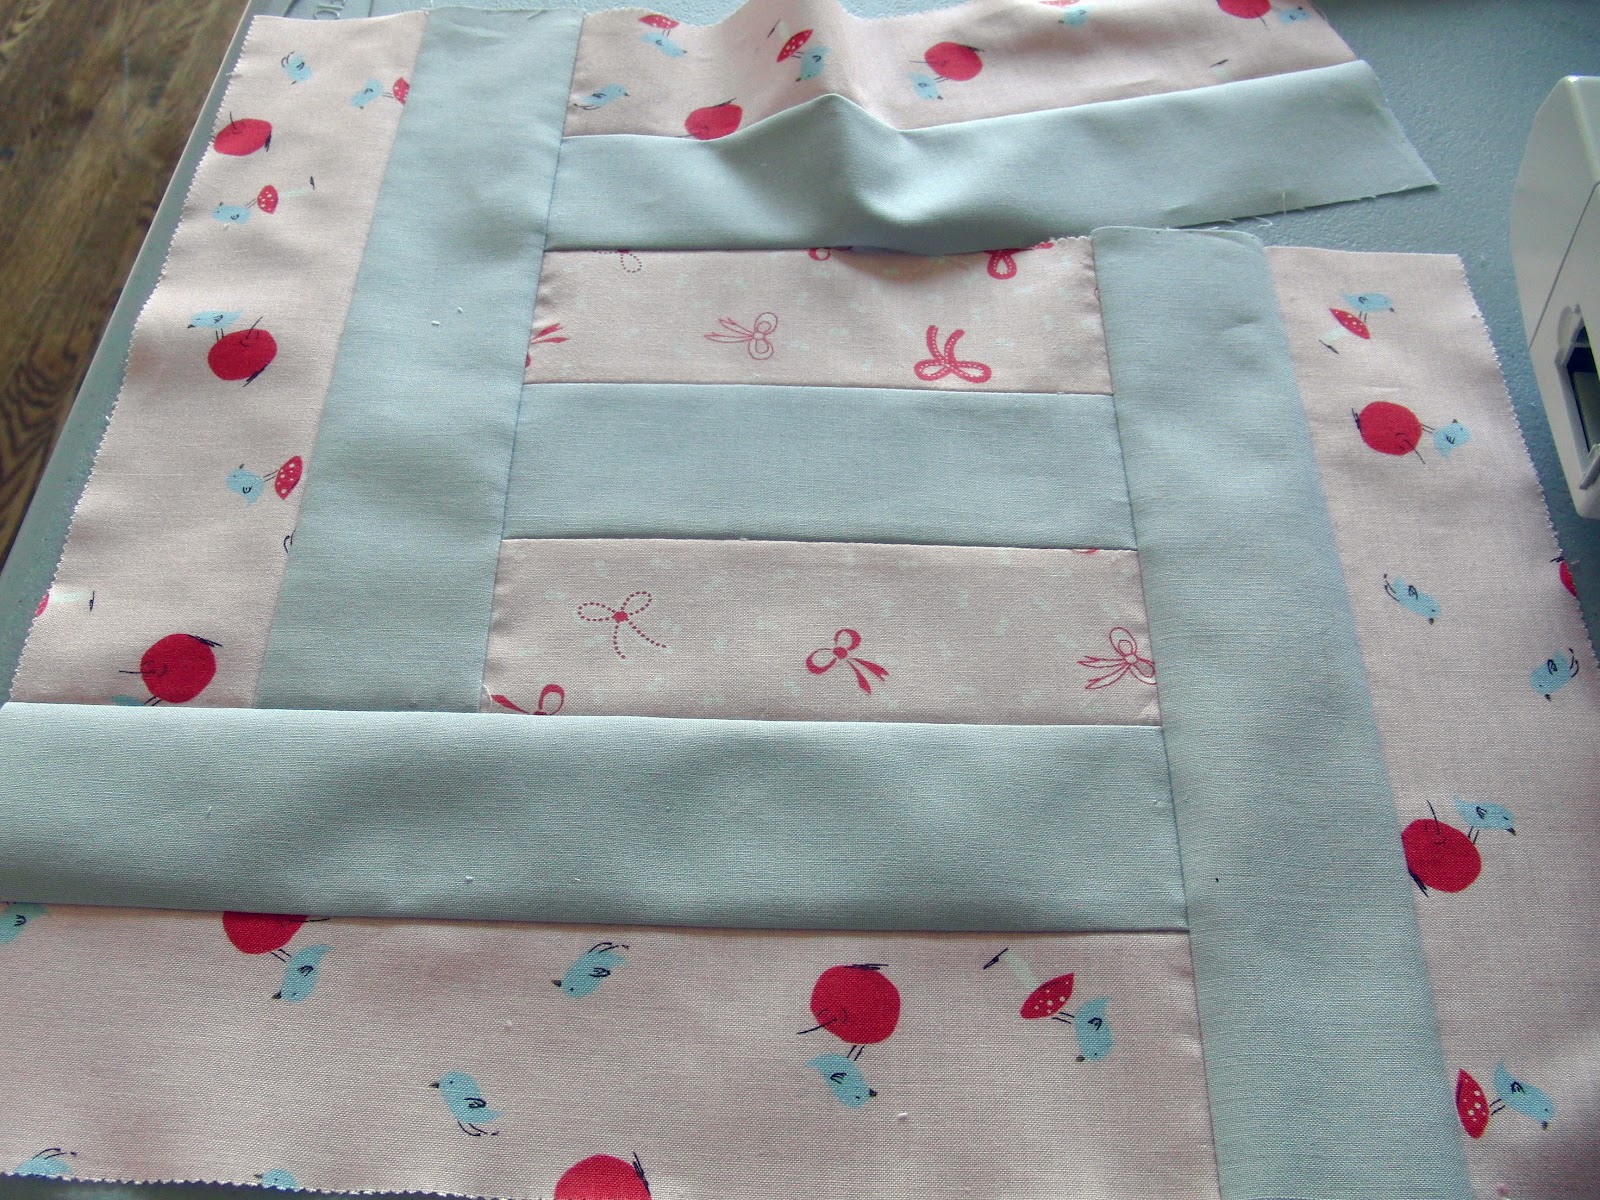
  • Sew together three charms and trim down to 13×5 inches. 

Optional: OR, you can piece the fabric as desired, as long as the end product is 13×5. If adding applique or other fabric design, do so at this stage.

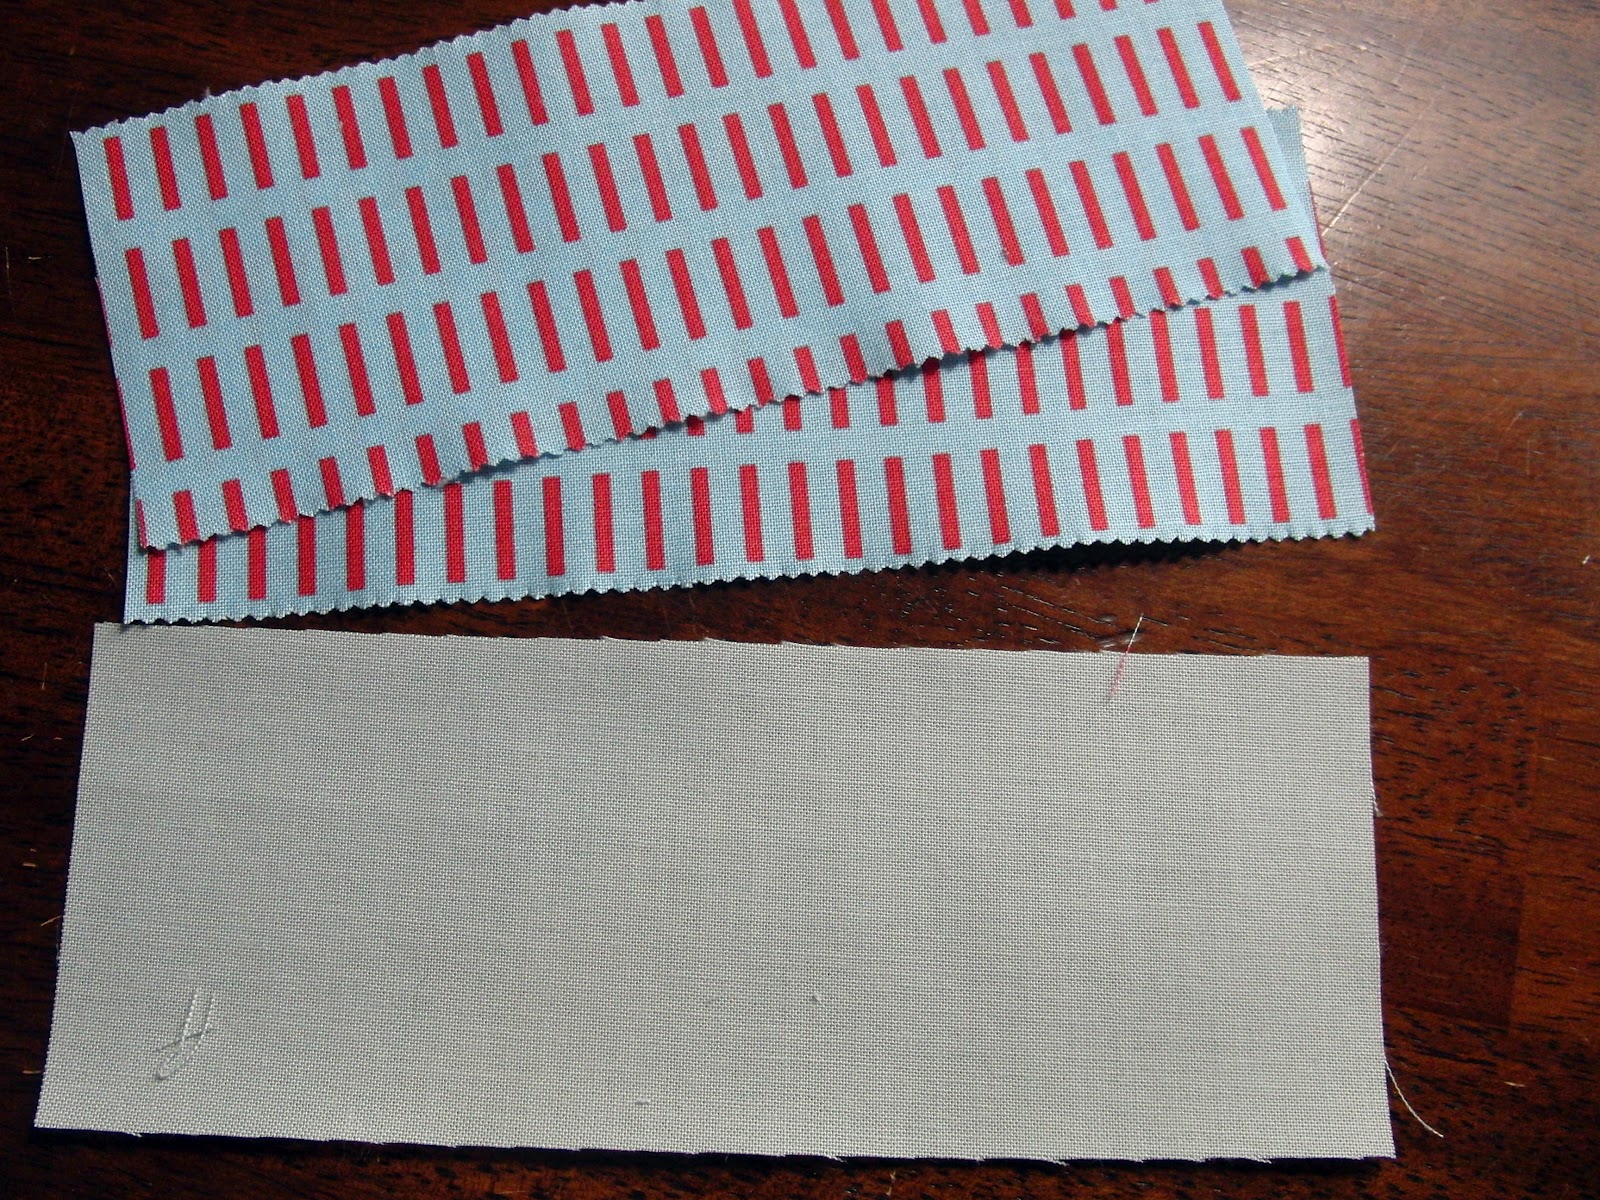
  • Layer outside fabric with quilt batting and sew layers together, quilting as desired. I did a quick wonky checkmark pattern, but this is a great place to try something new. (Note: You can pin before sewing, but I find ironing the layers together makes them hold quite nicely in a project this small.)
  • Trim off any extra batting.
Mason Jar Tea Cozy Tutorial by WaterPenny for Modabakeshop.com

  • Sew the short ends of the outside fabric (right sides together) to form a loop. Use a generous quarter inch seam (as opposed to a scant quarter inch).
  •  Repeat with the inside fabric to create a 13×5 piece of fabric sewn with the ends sewn together to form a loop (right sides together).
Mason Jar Tea Cozy Tutorial by WaterPenny for Modabakeshop.com

Assemble the bottom:
  • Cut out two 4″ circles from charms and one circle from your batting. I trace a four inch embroidery hoop for this step.
Mason Jar Tea Cozy Tutorial by WaterPenny for Modabakeshop.com

  • Fold circles in half twice and iron to create folded lines as shown below (top right) – with the crease lines marking four equal quarters.
  • Layer your outside bottom circle with the batting as shown below (bottom right).
  • Now take the side pieces from the previous step, and fold these in half twice; iron to create four fold lines – marking four equal quarters.
Mason Jar Tea Cozy Tutorial by WaterPenny for Modabakeshop.com

  • Next, line up your four fold lines on your bottom circle and your side piece (right sides together). Pin where fold lines meet.
Mason Jar Tea Cozy Tutorial by WaterPenny for Modabakeshop.com 
  • After I have my fold lines pinned together, I add a lot more pins! 

Note: In the outside layer, which has a layer of batting in the bottom circle, take care when pinning to make sure you are catching both the fabric layers and the batting layer together.

    Mason Jar Tea Cozy Tutorial by WaterPenny for Modabakeshop.com

    • Everything pinned? Sew the bottom layer to the sides, pulling the pins out as you go. This is the trickiest part. But you’re almost done!
    Mason Jar Tea Cozy Tutorial by WaterPenny for Modabakeshop.com 


    Put it all together:

    • Turn the inside piece right side out.  Tuck this inside piece into the outer layer, so that right sides are together and the batting is on the outside. Pin along the top  at the fold lines.
    Mason Jar Tea Cozy Tutorial by WaterPenny for Modabakeshop.com
    • Sew along the top of the two pieces, using a quarter inch seam allowance. But wait! BE SURE to leave a two inch gap unsewn:
    • Mason Jar Tea Cozy Tutorial by WaterPenny for Modabakeshop.com
    • Now reach in there to pull your piece right side out through the two inch gap you left unsewn at the top. You’re almost there!
    Mason Jar Tea Cozy Tutorial by WaterPenny for Modabakeshop.com

    • Tuck the inner lining in. I usually iron the top for a nicer finish, folding in the unsewn seams.
    • Topstitch around the outer edge to finish.

    Optional: Attach a cute vintage button to hang your teabag from so it doesn’t get lost in your mason jar!
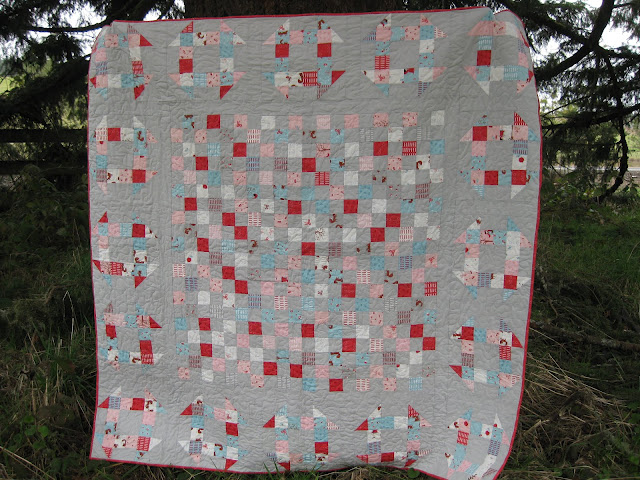
      Mason Jar Tea Cozy Tutorial by WaterPenny for Modabakeshop.com

      Make it your own! 

      You can add binding around the top – just like a quilt! One the cozy below on the right, I used Aneela Hoey’s Sew Stitchy Spools, and added a fat binding using standard quilting methods to the top.

      One Mason Jar Tea Cozy
      Mason Jar Tea Cozy Tutorial by WaterPenny for Modabakeshop.com

      Let me know if you have any questions! I’d love to see your own spin on the cozy mason jar cover!
      Happy Sewing! 
      Dana Kuhnline

      Pink Ombre Patchwork Quilt


      Hi Everyone!  I’m so pleased to be back here with a fun and easy project that is absolutely perfect for the beginner quilter (or for those who need to whip up a quick-yet-pretty gift).  The layout of this quilt is very simple and works with many pre-cuts – fat quarters, layer cakes, or charm packs. The trick is blending the fabrics from two different lines. I made this one with my daughter and it makes a great kids’ sewing project.

      5 to 6 charm packs (choose lines that have lots of pink in different shades) – I used Posy by Aneela Hoey & 2wenty Thr3e by Eric and Julie Comstock.
      3/8 yard Bella Solids for binding
      3 2/3 yards Bella Solids for backing

      From your charm packs, select fabrics with pink or white hues. Try mixing warms and cools too, as I did.  I even used a bit of orange. The results are actually very pretty.  Because you will be creating a quilt from dark to light, ensure that you have a nice even mix of both, along with a good amount of mid-range pink (or whichever colour you have chosen.  Say a mixture of five or six darker pinks/reds/oranges, five or six whites (with a touch of pink), and the rest in mid-range pinks.

      Lay the charm squares on the floor and work out your desired design, ensuring that you gently blend the colours from dark to light.  Take a photo of this design to help ensure you get it right later on.

      Starting in the bottom right hand corner, work backwards along the quilt, right to left, collecting your squares into a pile.  This will make it much easier when you come to sewing the quilt top.  Plus it looks pretty too…

      Begin assembling your quilt in rows of eight, with a 1/4″ seam allowance for each seam.

      Attach the strips together, either as you go or all at the end, your preference.

      I gave my quilt top a good iron before sandwiching and quilting the top (very basic quilting – I am still very much a beginner quilter!).  Bind and quilt as desired. I used a white binding, but soft pink would look lovely too…  Didn’t I tell you it was easy?!

      One small 40′ by 60′ single quilt for a pink-mad girl.  This would be a fun (and even easier) project using charm squares if you have enough pinks and whites – no cutting required!  Use fat quarters or layer cakes to make a larger version, and you can easily recreate this project using any colour you wish!

      Stella Rutherford
      {verydarkhorse.blogspot.co.nz}

      Granny Square Quilt


      Hi there!  I’m Jolene from Blue Elephant Stitches.  I’ve always loved the look of crocheted granny square throws.  Since I don’t know how to crochet, I came up with a quilt block that would give a similar look.  I wrote that tutorial on my blog about a year ago, using scrappy squares.

      Here is a revised version using a jelly roll which makes it go so fast!  I tried to write this tutorial in a way that made the best use of strips, yet still gave a scrappy look, since you don’t want all your blocks to look the same.  When you use this method, you will have two blocks of each color set.

      Quilt dimensions: 52″ x 62″


      1 jelly roll ( I used Posy by Aneela Hoey) you will only use half the strips
      Main Background fabric – 2.5 yards
      Border (optional) – 1.5 yards
      Binding – 0.5 yard
      Backing – a piece of fabric measuring at least 56″ x 66″
      Batting – a piece measuring at least 56″ x 66″


      1.  From your Main Background color cut:

           16 strips – 3″ x width of fabric (these strips will be for your blocks)
           13 strips – 2.5″ x width of fabric(these strips will be sashing)
      2.  Choose twenty strips from your jelly roll that you want to use in this quilt.  (the remaining strips can be    
           used for binding, or saved for another project) Separate into two piles of ten.  One stack will be for your                  
           inner granny rings, and the other set will be for your outer granny rings.
      3.  Now we will subcut our strips as follows:
         
             Inner Granny Rings – cut all 10 like the diagram below:


            Outer Granny Rings – cut all 10 like the diagram below:

             Background – cut 10 of your 3″wide strips like the diagram below:

             Background – cut 3 of your 3″ wide strips like the diagram below:

         
             Background – cut your remaining 3 strips into 3″ squares.  (you will need 40 of these squares)

             YAY!! the cutting for your blocks is done!  Your stacks should look a bit like mine above.  Now let’s    get ready to assemble them.

      4.  We are going to assemble these blocks in sets.  Each set will make two blocks, so we will make 10 sets       of blocks, for a total of 20 blocks.  It works best to first sort the sets into piles so that we don’t get mixed up and sew the wrong strips together.

            We’ll start with our Inner Granny Rings.

      Take two 5 1/2″ strips from the same fabric, and their two matching 10 1/2″ strips.  Put them together in a pile.  Do this for each of the 10 sets.  You should now have ten 5 1/2″ strips left.  These will be for those little center squares.  Put one on each pile, making sure they are a different fabric..

      Now we’ll add the outer ring fabrics to these piles:

      For each set, there will be two 5 1/2″ strips and two 10 1/2″ strips of the same fabric.  Place one set together with each pile, keeping in mind the values and colors, since you want these fabrics to have contrast to each other.

      Now we just need to add our background fabric:

      To each set add two 5 1/2″ strips, four 10 1/2″ strips, and four 3″ squares.

      Now we’re ready to sew them together!

      5.  Take your sets to your sewing machine and sew the strips together as shown below.  (do one pile or block set at a time)

      Press these seams open.

      Now cut your sets into strips that are 2 1/2″ wide.  I gave you an extra half an inch when we cut out our strips, so you may have a little bit to trim off.

      Arrange your strips as shown above and sew together.  You will have enough for two blocks from each set.

      Press these seams to the outside, as I’ve shown above.

      Now you can trim your block.  I trimmed mine to 9″ square, but yours might be slightly different.  The most important thing is that your blocks are all square, and all the same size.

      Sew your nine remaining block sets together, and you should end up with 20 blocks!  Now we can just add the sashing and the optional border!

      To make a border like mine, cut your strips 6″ wide.

      To make rounded corners like I did, quilt your quilt as usual, then choose your desired round shape, trace it onto each corner and cut it off.  Use a bias binding to finish your quilt.  Binding made on the bias will make it possible to sew around the curved corners.
                         

      52″ x 62″ finished quilt!  I hope you find this tutorial useful!  I’d love to see your finished quilts.

       Jolene Klassen
      {blueelephantstitches.blogspot.com}

      The Love Knot Block

      Leah Douglas from thebuggspot.blogspot.com here. St. Valentine’s Day is soon arriving and I’ve whipped out a little table runner in anticipation of the Saint’s Day celebrating the man who performed marriage ceremonies for Roman soldiers who had been denied the luxury by the Emperor Claudius II. There’s your history lesson for the day.

      And here are some roses from my hubby. He’s so romantic.
      Let’s get started!


      1 jelly roll (Posy)
           1 jelly roll will make 16 blocks (approx. 2 1/2 strips per block) but you probably don’t want to use
             any strips that are similar in color to your background fabric, so more like 12 blocks total
      white background (cluck daisy white)
           1 1/2 strips (at 2 1/2″ wide) per block


      These are instructions for making ONE love knot block. I chose to make three total and turn them into a table runner, because that’s what I happened to need at the time. You should be able to make 12 blocks easily out of one jelly roll and turn them into a 3 x 4 block quilt if you would like. Each block finishes at 11″ square.

      Cutting the Love Knot Block:

      Start by choosing 5 strips from your jelly roll. Trim them from 2 1/2″ wide down to 1 1/2″ wide. If you have a honey bun instead of a jelly roll, that will be perfect without any trimming.

      Set aside one of the five strips to be used for the middle square of the block. You have four strips remaining. Cut each of the four strips remaining in half. You will only use half of each strip, so save the rest for a different block later. Fold each of the four strips in half. 
      Pick one strip and cut as follows:
           Cut a rectangle measuring 1 1/2″ x 3 1/2″. You should have two total. 
           Unfold the strip. Cut one rectangle 4 1/2″ wide, another 5 1/2″ wide and one 1 1/2″ square. You will 
           have a smidge leftover fabric to do with as you please. 

           Do the same with the three other strips (not that one you set aside earlier for the center square 
           though, that’s next).
      Now take the strip you chose to use for the center square. Fold it in half twice. Cut 4 rectangles measuring 1 1/2″ x 3 1/2″ and 8 squares 1 1/2″ x 1 1/2″. You will have some leftovers to set aside for whatever you’d like.

      Next the white background fabric. 
      From your 1 1/2 or 2 strips of white cut 8 rectangles measuring 1 1/2″ x 2 1/2″ and 21 squares measuring 1 1/2″ x 1 1/2″. 
      The pieces required to make one love knot block:

      Sewing the Love Knot Block together:
      Perfect 1/4″ seams are 
      INCREDIBLY 
      important for this block!
      Take your 8 squares from the center square fabric (my center square will be white flowers on a pink background) and 16 white background squares.
      Using that perfect 1/4″ seam, sew together like this:

      IRON, IRON, IRON. I always iron away from the white fabric. This will result in tricky seam matching later, and some ironing towards the white, but if I can get over it, so can you. We’ll all be fine.
      To be sure your seams are the correct width, check to make sure the pieces pictured above all measure exactly 3 1/2″ across. If not, find the “scream” ripper and do it again. It’ll be grand.
      Now set out the first of four corners for your block. 
      top row: purple 4 1/2″ wide going horizontal, purple 5 1/2″ wide going vertical
      second row: baby pink square and 2 white rectangles 2 1/2″ wide
      third row: center fabric 3 1/2″ wide
      fourth row: baby pink 3 1/2″ wide (vertical), white square, center fabric square, another white square
      fifth row: purple 3 1/2″ wide
      sixth row: white square, center fabric square, 2 more white squares

       Start by sewing these pieces together and then iron (ironing will be assumed from now on):

      Then add the 3 1/2″ baby pink to the left side:

      Set that section aside and sew this one:

      Add the 2 1/2″ white rectangle to the right side:

      Sew the 5 1/2″ purple to a white square:

      Sew these three pieces together, careful to match your seams:

      Then add the long purple with white square to the right side:

      Woohoo! This is one quarter of your block. 
      Rotate your finished quarter-of-the-block COUNTERCLOCKWISE and lay out the pieces for the next quarter-of-the-block like so: 
      Sew it together the same way you did above. It should go something like this:

      Once again, rotate things counterclockwise and begin the third quarter-of-the-block:

      And the last quarter-of-the-block:

      See that extra little white square I threw in the middle of the above picture? That is what pulls everything together here. Sew that little guy onto one of your quarter-blocks leaving a 1/4″ unsewn like this:
      It should look like this below, ready to be sewn to the second quarter-of-the-block: (match the seams!)

      Sew those two together, rotate counterclockwise, and sew the third quarter-of-the-block on:

      Now the tricky part. Adding that last bit. 

      You can start from that middle white square or from the outer edge of your blocks, whichever you choose. Either way should be fine if you are being careful to line up all your seams along the way. However, look at the picture below and notice that the last little 1/4″ near the center white square is not sewn.

      That’s so you can sew up the other side and turn out a beautiful little 11 1/2″ block like this!

      You’re done! 
      Here’s a few snapshots of how I finished my 3 blocks into a table runner.
      First, I cut (2) 11 3/4″ squares into 4 triangles:
      Second, I laid it all out to be sewn into rows:

      Quilt top finished!

      Isn’t this fabric fantastic? Here’s my backing after quilting:
      Table runner complete with roses from my love. 


      One Love Knot Block measures 11″ square, finished
      1 jelly roll yields 12+ blocks
      My table runner measures 15″ x 45″

      Leah Douglas
      {thebuggspot.blogspot.com}

      Cozy Posy Triangle Quilt


      Hello!  My name is Erica and I blog over at Kitchen Table Quilting.  I wanted to share this tutorial with you because (a) I love the fabric and I cannot get enough of those sweet little bunnies and (b) because this is a great way to make a quilt that is much easier than it looks!


      2 jelly rolls of Posy by Aneela Hoey
      1/2 yard Bella Lilac
      1/2 yard Bella Tea Rose
      1/2 yard Bella Petal Pink
      1/2 yard Bella Green
      1/2 yard any print or solid for binding (you could also use leftover jelly roll strips)
      Batting that is 62″x72″ or larger
      2 Yards Snuggles in White


      Unroll your jelly rolls and separate them into groups:

      • 16 strips for the A Triangles.  Cut each strip into an 11″ piece, a 13″ piece, and a 15″ piece.  
      • 36 strips for the B Triangles.  Cut a 30″ piece from each strip and set the remainder aside for the D Triangles.
      • 6 strips for the C Triangles.  Cut each strip into 2 15-ish” pieces (you can cut these a little bigger if you want a little more room for error).  Set aside the remainder for the D Triangles.
      From each of your solid fabrics:
      • Cut a strip that is 6.5″ by width of fabric (which I will refer to as WOF) and keep these folded in half.  
      • Cut a strip that is 10.5″ by WOF (keep these folded in half too).
      To make the A Triangles, take your strips from step 1 and the 6.5″xWOF strip from each solid color. Subcut your solid strips into equilateral triangles.

      To make the triangles with your ruler, place your folded fabric on your cutting mat with the raw edge to the right (trim your selvage if you haven’t already).  Align the 60 degree line on your ruler with the bottom of the fabric and the right side of the ruler with the bottom corner of the raw edge.  Cut along the ruler.

      I like to move to the other side of the table or spin my cutting mat around so that the raw edge is now on the left side (you don’t have to flip it, I am just a little crazy about how I cut things).  Once again, line up the 60 degree angle line with the bottom of the fabric.  Line up the top edge of the ruler 1/4″ from the end of the fabric.  I don’t know why this works, but it does.

      Here is a closer photo.  Cut along the edge of the ruler.  Continue cutting triangles along your strips by next lining up the ruler 1/4″ from the edge of the bottom.  You need 4 triangles of each fabric, but I cut a couple of extra so that I had options when pairing them up with my jelly roll strips.

      Sew the 11″ strip onto one side of the block (it doesn’t matter which one) and press.
      Trim the extra fabric off of the sides.
      Add the 13″ strip, press, and trim.
      And then add the 15″ piece, press, and trim.  Continue until you have made 16 of these blocks.  
      To make the B Triangles, take your 30″ jelly roll strips and separate them into groups of 6.
      Sew the strips together along the long side until you have one long piece that is 12.5″x30″.  

      Just like in step three, cut the fabric into equilateral triangles.  You should be able to get 3 blocks out of each of these 12.5″x30″ pieces.  Continue until you have at least 16 triangles.

      To make the C Triangle, take your solid strips that are 10.5″xWOF.  Cut into equilateral triangles just like in the previous two steps.  You only need a total of 12 of these blocks, so cut three triangles from each color or whatever suits your needs.

      I managed to forget to take a photo of this step, but it is just like making the first part of the A Triangle.  Take your 15″ inch jelly roll pieces and attach to one of the triangle sides.  Press and trim the triangle and you’re done.

      For the D Triangles, take your remaining streps for the B and C triangles.  Separate into groups of 3 and sew together along the long sides.

      Cut into equilateral triangles just like before.

      You should be able to get 2 triangles out of each of these.  Take 4 triangles and arrange them into a larger triangle (it doesn’t matter which way they are turned, I tried to vary between blocks).

      Sew together the bottom three triangles.

      And then sew on the top triangle.  Each the A, B, C, and D triangles should finish the same size.  Make at least 8 of these triangles.

      Arrange your triangles on your floor (if you are me) or on your design wall (if you are lucky).  I alternated mine roughly A, B, C, A, B, D, A, B, C, etc.  Sew together into diagonal columns.  Please excuse my poor Photoshop skills, but I hope this illustrates my point.

      Piece sets of triangles together, side by side.

      And then piece the sets together to create a diagonal.

      Arrange your diagonal columns.

      And then start to shift them so that they are offset a little bit.  There is no right or wrong way to do this.  The more they are offset, the more waste you are going to have at the edge of the quilt, but you want to move them enough that it is obvious you did it on purpose 🙂  I moved my columns up or down by 2-3″.

      Sew your columns together (this will feel weird because nothing will line up, but let go and enjoy that that the points aren’t supposed to match!).

      And then square up the quilt so that all of the sides are even.

      Baste, quilt, and bind as desired.  I backed my quilt in Moda Snuggles.  It makes an incredibly soft, luxurious quilt and it is much easier to work with than you might think.  I would definitely recommend giving it a try!


      This yields a wonderfully cozy lap-size quilt.  Mine finished 55″x65″, but yours may vary a little depending on how much you offset your columns.

      Erica Jackman
      {kitchentablequilting.blogspot.com}

      All Things Equal Quilt


      Hi! This is my first project for Moda Bake Shop, so I’m a newbie! My name is Kaelin Telschow, and I blog over at The Plaid Scottie (aptly named after my Scottish Terrier Sir Whiskers MacTavish, who oversees [read: sleeps on] all my craft projects).

      The top of this quilt requires nothing but jelly rolls, and the large blocks come together easily to make a good size quilt in a short amount of time. The soft, sweet colors make it perfect for little ones. If you choose to make your quilt the same size as mine, you’ll also have about half of your jell roll left over, so you could actually make two of these quilt tops from one printed jelly roll (you’d need an extra solid jelly roll though).

      • 1 Print Jelly Roll (Walk in the Woods)
      • 1 Solid Jelly Roll (or 2 3/4 yards) (Zen Grey)
      • 5 yards of Backing Material (Girl & Tree in Whisper)
      • 1/2 yard of Binding Material (Line Print in Poppy Whisper)
      • Cotton Batting (I used prepackaged Twin size batting which is 72″ x 90″)


      Step 1: Pull out 24 strips from your print jelly roll and group them in pairs. I tried to group mine according to color and scale (one large scale + one small scale print per pair…if I couldn’t find a good large/small pairing, I tried to pair a novelty print with a coordinate).

      Step 2: Take your 12 large-scale strips (or whichever printed strips you want toward the outside of each block) and leave them folded in half. Trim the ends off so it’s exactly 21″ long, and then cut in the center so that you have two 10.5″ sections (once you peel the cut pieces apart, you’ll have a total of four 10.5″ pieces per jelly roll strip)

      Step 3: Find your 12 (small-scale) strips and, leaving folded in half, cut a 6.5″ section from the end. Pull apart your two pieces, and set aside the remainder of the jelly roll strip.

      Step 4: If you’re using a jelly roll of solid material, cut the strips as follows (if you have yardage of your solid instead, cut into (38) 2.5″ strips first and then follow the instructions below):

      • Using 12 strips, cut into 18.5″ pieces (2 pieces per jelly roll strip, for a total of 24). 
      • Using 12 strips, cut into 14.5″ pieces (2 pieces per jelly roll strip, for a total of 24).
      • Using 12 strips, cut into 10.5″ pieces (4 pieces per jelly roll strip, for a total of 48)
      • Using 2 strips, cut into 6.5″ pieces (6 pieces per jelly roll strip, for a total of 12) 

      Step 5: Once all the fabric is cut, it’s time to start assembling the blocks. Below is a diagram of what a finished block will look like.

        Find your 12 sets (2 per set) of 6.5″ printed pieces, and twelve 6.5″ solid pieces.

        Step 6: To make the center pieces for your blocks, sew the printed pieces to either side of the solid strips.

        Step 7: Find your (48) 10.5″ printed pieces (12 sets of 4), and (48) 10.5″ solid pieces. Pair up one printed piece with one solid piece, and sew together along the long edge.

        To make each block, you’ll need one of the 6.5″ centers, and four of the 10.5″ pairs that you just sewed. Before you begin sewing your blocks, group the centers & 10.5″ pairs based on the groupings you made in Step 1 (see photo below).

        Step 8:  To make your first block, take a 6.5″ center piece and one of the four coordinating 10.5″ pieces. Line up the end of the 10.5″ piece (solid side at the top) with the top left corner of the center piece.

        Pin in place, and sew a partial seam between 3″ to 4″ long.

        Open at the seam and press only the area where they’re attached.

        Step 9: Grab a second 10.5″ piece, and line it up with the left edge of the pieces you just sewed together. They should line up perfectly. Sew, open, and press.

        Step 10: Find your 3rd 10.5″ piece, and line it up with the bottom. Pin, sew and open to press.

        Step 11: Fold back the loose end of the top 10.5″ piece so that it’s out of the way, and pin your last 10.5″ piece along the right side. Pin, sew and open to press.

        Step 12: Now we can go back and finish off that partial seam. Fold the top piece down and pin the loose ends together.

        Sew together, open and press the side you just sewed (the other half has already been pressed).

        The interior of your block is now finished, and all you have to do is add the sashing!

        Step 13: Pull two 14.5″ pieces and two 18.5″ solid pieces from your stacks. Sew the two 14.5″ pieces to the top and bottom of your block, and then add the two 18.5″ pieces to the sides.

        Ta da! Now you have your first finished block! Each finished block will measure 18.5″ square, and you have enough fabric to make 12 blocks total.

        You can organize your blocks however you like. For this particular quilt I grouped mine into rows by color….

        …and then sewed the quilt top together.

        But here’s a photo of an alternate layout I did before sewing the top together – you can scramble up the blocks for a more random color distribution if you’d like to mix things up a bit 😉

        For the backing, cut your yardage into two equal pieces, trim the selvages, and sew together down the long edge. Baste, quilt and bind.

        One 54″ x 72″ quilt, perfect for babies, snuggling, napping or picnics 🙂

        Kaelin Telschow
        {www.theplaidscottie.com}

        Dashes in the Woods


        I’m Michelle Marr and I blog at Michelle’s Romantic Tangle. Little Red Riding Hood has always been one of my favorite fairy tales, so as soon as I saw A Walk in the Woods, I wanted to play with it. It’s such a fun collection, and it makes a wonderful big girl quilt — which was supposed to be mine, but was stolen by my teenage daughter as soon as I got the binding on!

        1 “A Walk in the Woods” Jelly Roll

        1 “A Walk in the Woods” Charm Pack

        3 1/2 yards Zen Grey Moda Solid for background

        4 yards fabric for backing

        3/4 yard fabric for binding

        Cutting:

        Before you start cutting, unroll your Jelly Roll and remove any strips that do not contrast well with your background fabric. To make the churn dash blocks stand out from the background, I removed all of the grey prints. Because I didn’t want to leave out the adorable little foxes, I did use the grey fox print in the center checkerboard. You can make the quilt with just a Jelly Roll, but without the grey fabric, there’s not a lot to spare so I added the charm pack as insurance against cutting errors.

        From the Jelly Roll, cut:

        128 print half square triangles for Churn Dash blocks (see instructions below)

        160 2 1/2″ squares for Churn Dash blocks

        200 2 1/2″ squares for center checkerboard

        From background fabric, cut:

        16 4 1/2″ squares for Churn Dash blocks

        64 4 1/2 x 2 1/2″ strips for Churn Dash blocks

        64 half square triangles for Churn Dash blocks (see instructions below)

        200 2 1/2″ squares for center checkerboard

        16 2 1/2 x 12 12 1/2″ strips for sashing between Churn Dash Blocks

        2 2 1/2″ x 40 1/2″ strips for border of center checkerboard

        2 2 1/2″ x 44 1/2″ strips for border of center checkerboard

        Using the Easy Angle or other similar ruler, cut 128 half square triangles from 2 1/2″ Jelly Roll strips (4 each from 32 different strips) and 64 half square triangles from 4 1/2″ strips of background fabric.

        Sew two of the small print triangles to a square to form a larger triangle. Then add a white triangle to form a square. Press. Make four units for each churn dash block, sixty-four total.

        For the bars of the churn dash blocks, sew two 2 1/2″ squares together. Press open and sew to a 2 1/2″ x 4 1/2″ strip to form a square. Press. Make four units for each churn dash block, sixty-four total.

        Using four scrappy half square triangles, four bar units, and a 4 1/2″ background squares for the center section for each block, assemble sixteen churn dash blocks.

        For the center checkerboard section, sew 200 print squares and 200 background squares into 100 four-patch units. Arrange in ten rows of ten. (40 1/2″ unfinished size)

        Border with 2 1/2 strips. The bordered checkerboard section should measure 44 1/2″

        Using the churn dash blocks and 2 1/2 x 12 1/2″ strips, assemble the outer border. You will make four strips as pictured — two with three churn dash blocks and two with five blocks.

        Add the borders to the center checkerboard section.

        Quilt, bind and snuggle up on your next trip to Grandma’s House!

        one 68″ square quilt

        Michelle Marr
        {mychellem.blogspot.com}

        Patchwork Chevron Quilt


        Hello all! I’m Jeni from In Color Order! I’m very excited to be here today to share a fun and quick lap quilt with you!

        This quilt was inspired by a serious love for patchwork; it just makes everything better! I have loved working with Aneela Hoey’s previous fabric collections, and a Walk in the Woods did not disappoint! I had fun showcasing the sweet prints in this quilt!

        – 4 charm packs of A Walk in the Woods by Aneela Hoey
        – 2 1/2 yards of Moda Bella White 9900 97
        – 5/8 yard of A Walk in the Woods 18525 13 (circles on gray) for binding
        – 5 yards of A Walk in the Woods 18522 13 (birds on gray) for backing

        *Note: Use 1/4″ seam allowances throughout

        Cutting

        From Moda Bella solid:
        – Cut 6 strips: 14″ x width of fabric
        – From those strips, cut (3) 14″ squares from each, for a total of 18 squares.


        Take apart your 4 charm packs. Pick out 6 squares and set them aside, you won’t need them for this quilt!

        Piecing 9-Patch Blocks

        First we’ll be piecing traditional 9-patch blocks to make the patchwork!

        Grab 9 squares and arrange them in a simple 3×3 layout, making sure to get plenty of variety in prints.

        Piece the squares together in each row. Press seams open.

        Sew the three rows together to complete the 9-patch block.  Press seams open.

        Make a total of (18) 9-patch blocks!

        If you’d like to chain-piece the rows for these 9-patch blocks, you’ll need to first separate your squares into two piles: 108 squares and 54 squares. Piece the 108 squares into pairs.  Now join each pair with a single square (from the other pile!).  This will give you 54 rows that can be pieced into 18 blocks!

        Piecing Half-Square Triangle Blocks

        Now that you’ve completed your 9-patch blocks, we’ll be using them to make half-square triangles!

        Take your 14″ solid squares and draw a line diagonally from corner to corner using a ruler and pencil. Do this to all 18 squares.

        Place a 9-patch block and solid square together, with your pencil marked side facing up. Pin in place.

        Sew 1/4″ on either side of the pencil line.

        Using your rotary cutter (or scissors), cut along the pencil line, separating your half-square triangles. 

        Press seams toward the solid triangle to reduce bulk. Repeat with remaining squares until you have a total of 36 half-square triangle blocks.

        Finishing

        Arrange your blocks, 6 rows of 6 blocks, in a chevron pattern as shown in the diagram below:

        Piece your rows together, pressing seams in alternating directions.  Pin your rows together, matching up the block seams. Don’t worry about the patchwork seams; they won’t match up! Sew your rows together and press seams open. Your quilt top is done!

        To piece your backing, first cut your backing yardage in half. Press. Carefully trim off the selvedges and sew your pieces together lengthwise. 

        Now you’re ready to baste and quilt! I quilted mine using a doodle-like free motion quilting pattern. I wanted something fun and whimsical to play with the sweet prints in this line! Finish off your quilt with binding made from the gray circle fabric! Yay, you’re done! 🙂


         A cheerful lap quilt! Before washing it should measure approximately 78″x78″.

        Throw it in the wash for wrinkly goodness!

        I hope you’ve enjoyed this tutorial! Happy Sewing! 🙂

        Cheers,

        Jeni Baker
        {In Color Order}

        Big Girl Quilt and Pillow

        moda bake shop big girl quilt 001

        Hello all! My name is Megan and I blog over at Downtown Housewife. I also work at the fabulous Sew Sweet Quilt Shop with my family. I was inspired by my niece Drake Lynn to make a quilt that would fit a toddler-sized bed.  Enjoy!

        title_ingredients
        Quilt:
        2 charm packs
        7/8 yard print for big inner border
        1 1/2 yard print for final border and binding
        (2) 1/2 yard cuts of a patterned print for scrappy inner borders
        1/2 yard cut of a solid colored fabric
        Quilt backing 53” x 65”
        Quilt batting 53” x 65”

        Pillow:
        1 yard fabric (keep in mind how directional prints will lay out)
        Scrap piece of fabric (2” x 43”)

        For Both:
        Coordinating thread
        Washable pen
        Scissors and ruler or rotary cutter and cutting mat
        Iron

        title_garnishes
        1  1/4 yard pom pom trim for pillow case

        title_instructions
        Cut Your Pieces:
        Cut 24 stars (prints of your choice) with the stencil included in the Printer Friendly Version. The stencil should be printed and sized to approximately 4  1/2”. Each star is cut from one charm square. You may be one square short. If so, use an extra scrap piece.
        moda bake shop big girl quilt 007

        Cut 4 (9  1/2” x  9 1/2”) squares with the solid fabric.

        Out of your 2 half yard patterned prints, cut 14 strips (13” x 2”), 7 of each print.

        Use 6 charm squares to cut 12 strips (2” x 5”).

        Cut 36 charm squares into half. This will give you 72 (2  1/2” x 2 1/2”) strips.

        For the big inner border, cut 2 strips (5” x 43”), 2 strips (9  1/2” x 43”) and 4 (5” x 9  1/2”) for the corner pieces.

        Cut 2 strips  (6” x 53”) for the final border.

        Cut 5 (2” x width of fabric) strips for the binding.

        Begin Piecing:  All seam allowances are 1/4”.

        Begin by making 5 blocks made up of 4 charm squares each.
        moda bake shop big girl quilt 002

        Once you have sewn your 5 blocks, lay them out with your 4 solid blocks and sew them all.

        moda bake shop big girl quilt 003
        Next, sew together the scrappy border. This will be for the 2 thin inner borders. Together you will have 288” x 2”. Once you have one long strip you will cut each of the 8 pieces as needed, as you go. I found this method easiest! Use the 14 (13” x 2”) and 12 (5” x 2”) pieces to make up your 288” following the diagram below.
        moda bake shop big girl quilt 004
        moda bake shop big girl quilt 005
        Next, take 2 stars and place one directly on top of the other, lining up all edges. Both stars should have the right sides of the fabric facing up. Next, sew both stars onto the quilt using one continuous set of stitches 1/4” from the edges of the star so that it has an unfinished edge in order to allow it to ravel. A stitching line is shown on the star stencil. Repeat with the other 3 stars.

        Note: One point of the star is longer, point the longest point of each toward the center of the middle block.
        Next, sew the inside out border using the 72 (2  1/2” x 2  1/2”) pieces. Simply sew 4 strips made up of 18 pieces each, making sure to place each piece of wrong sides together!

        Once all 4 sides of the inside out border are attached, piece on charm square in each corner. This is a little tricky because these will be sewn with the wrong sides together also. The ends of each border strip may need to be trimmed before attaching the corner pieces if  more then 1/4” is left on the end.

        Next, sew and attach the bigger inner border. Begin by sewing 1 corner piece to the end of each of the 2 (5” x 43”) strips. Attach the 2 (9  1/2 x 43”) onto the top and bottom.  Finish by sewing the 2 (5” x 43”) with the corner pieces to each side.

        On the top and bottom big inner border sew 4 evenly spaced stars. Attach them in the same manner as the first set of stars. Doubled stars with a 1/4’”seam.

        Finally, attach the final border pieces. They are the 2 (6” x 53”) strips. Simply sew one to the top and bottom.
        moda bake shop big girl quilt 006
        Finish The Quilt:
        Quilt your pieced top, batting and backing together.

        When finished, make your binding out of 2” strips and sew in place.

        In order to get the shabby border and the stars to ravel, give the quilt a quick wash through the washer and dryer.

        Make sure to add a cute label to personalize your quilt!

        Pillow Case:
        Cut the pillow body (43” x 33”)
        Cut the trim piece (2” x 43”)

        Begin by folding each side of the trim piece over long ways. Each raw edge will meet in the middle of the strip. Thus making the strip 1” x 43”.
        moda bake shop big girl quilt 008
        Layout the pillow material. On one 43” side, draw a line 6” up from the bottom. This will be the trim placement guideline while attaching the trim, if you prefer trim!
        moda bake shop big girl quilt 009Place the pom pom trim under the 1” trim strip and pin in place directly over the guideline drew in the previous step. Sew in place and consider adding a decorative stitch!

        After, fold and press the bottom seam under the stitch.

        Next, fold the body piece in half with right sides together and sew the two unfinished edges. Finishing them by serging or using a zig zag stitch.
        moda bake shop big girl quilt 010
        moda bake shop big girl quilt 011
        title_yield
        Quilt: 53” x 65”
        Pillow case: 21  1/2 “ x 33”

        I hope your toddler will enjoy “The big girl quilt and pillow” as much as my niece. Although I must mention when I gave it to her she said, “Aw,but  I wanted a pink one!” Too cute. You may want to ask your wee one for her of his fabric choices!

        Megan Frock
        {Downtown Housewife}

        A Charming Maze Quilt


        Hi, it is Kristy from HandmadeRetro back with another Moda Bakeshop recipe!

        This quilt  has been a long time coming… the fabric was lost in the mail and then the replacement package got caught up with the recent mail delays between the US and Australia. So I have a heap of satisfaction to bring you this postage-stamp-style maze quilt!

        2x charm packs of Little Apples by Aneela Hooey (because of the mail mix-up I have a layer cake pictured but two charm packs are all that are required for the recipe)

        2 yards of Etchings Slate for maze path and binding

        2 yards for border (Little Apples Aqua 18515 13)

        5 yards for backing (Little Apples Lollipop 18510 11)


        Step One: Cutting the fabric
        From the charm squares
        Cut each of the charm squares into 4 2.5″ squares
        You will also need to cut an extra 11 2.5″ squares from a combination of the backing and border fabric

        From the Solid fabric:
        Cut 20 2.5″ strips, sub cut these into 2.5″ squares

        Cut another 6 2.5″ strips and set these aside for the binding


        From the border fabric (Little Apples Aqua)
        Cut 4 strips down the length of the fabric 9.5″ wide and 65″ long

        Step Two: Construct the maze.
        The maze section of the quilt is made up of 9 uneven sections. Each block is constructed in the same manner and diagrams indicate which block goes where in the centre panel.

        Construct each of the nine blocks one at a time.
        I have gone through the step-by-step construction of a single block below. Each of the nine blocks will be constructed in the same way so I am not going to picture all the steps each time. The process of the block construction is pictured below but remember to refer to the individual block pictures/diagrams for colour placement.


        Some tips to keep everything organised.
        – Sew a small scrap of fabric to the first seam of each row to mark the block and the row number (this will also orient the left side of the block).
        – Work with one block at a time. Sew one square to the right of the last added to build the row, chain piecing. 

        1. Layout the 2.5″ squares using the diagram or photo to assist you. If using the diagram, the white squares refer to the solid (maze path) and the blue/grey squares are the print (maze wall).

        2. Get ready to start sewing. To keep everything in order I paired the first square in each row by placing square two face down on the top of square one. I then stacked these pairs with the pair for the bottom row on the bottom of the stack. If using the row markers (see below) place these between the pairs.

        3. Stack the remaining squares into piles for each row. You can see in this picture I started to stack them by placing the square on the right of the block on the bottom and stacking each square to the left on top. I was left with 10 stacks (11 for blocks 7-9).

        4. Chain piece the first pairs of the rows, separating with the markers if you are using them.

        5. Leaving the squares joined, take the next square to the right for each row. Stack with the square for row 10 (11) on the bottom and the square for row 1 on the top to get ready to piece. Chain piece these to square 2.

        6. Continue until all squares are added, you will have a block that has all the rows sewn together and these joined with threads.

        7. Working with two rows at a time, trim the threads between the rows and press all seams in the direction of the arrows. I leave the row markers on at this stage.

        8. Nest seams and sew rows together, being careful to keep the row markers free.

        9. Repeat with remaining rows, adding pairs of rows to the block as you go.

        10. Blocks 1-6 will be 7 squares by 10 squares, blocks 7-9 will be 7 squares by 11 squares.

        11. Press row seams to the bottom of the even numbered blocks and to the top of the odd numbered blocks. Trim the row markers off.

        Individual Block Layouts


        Constructing the Centre Panel
        Sew the blocks together in rows, nesting seams again.  Press seams to the right in row 1 and 3 and the left in row 2.

        Sew the rows together, matching nested seams. Press seams to the bottom of the panel.

        Adding the Borders
        Measure the panel vertically through the middle of the quilt. Trim two of the border strips to this measurement.  Find the centre of the border strips and panels by folding in half and marking with pins. Match centres and edges. Pin, sew, press seam towards the border.

        Measure the quilt horizontally through the middle of the quilt. Trim the two remaining border strips to this measurement. Find the centre of the border strips and the quilt top by folding in half and marking with pins. Match Centres and edges. Pin, sew, press seam towards the border.

        Prepare the Backing
        I prepared my backing with a vertical join. I cut the backing fabric in half and removed selvedges and joined. See this useful tutorial here for how to match up prints.


        Baste, quilt and bind
        I basted in the ‘hedge’ to leave the ‘path’ free for my chosen quilting design.


        I quilted my top on my domestic machine 1/4″ inside the ‘path’ with my walking foot. If you start from the beginning or ending square and follow around you will quilt the entire path (except for a small section you will need to do separately using the same technique.

        I straight line quilted the border, pacing the lines 3/4″. I marked the corners with a Hera marker to make identifying the spot to turn a little easier.

        One 60″x80″ quilt.

        Kristy
        {HandmadeRetro}