Improvisational Sampler Quilt


Have you ever wanted to make improvisational quilt blocks, but didn’t know where to start or what to make with them?  Well, now is the time to try some out!  I’ve created this sampler quilt using some popular improv blocks plus some that you might not have seen before. I will demonstrate the more unique blocks and provide links to tutorials for the others on my blog.  Then we will put them together to make this fun eye-popping sampler.  Improvisational piecing is fun and doable for beginning and advanced quilters alike.  Let’s get going!


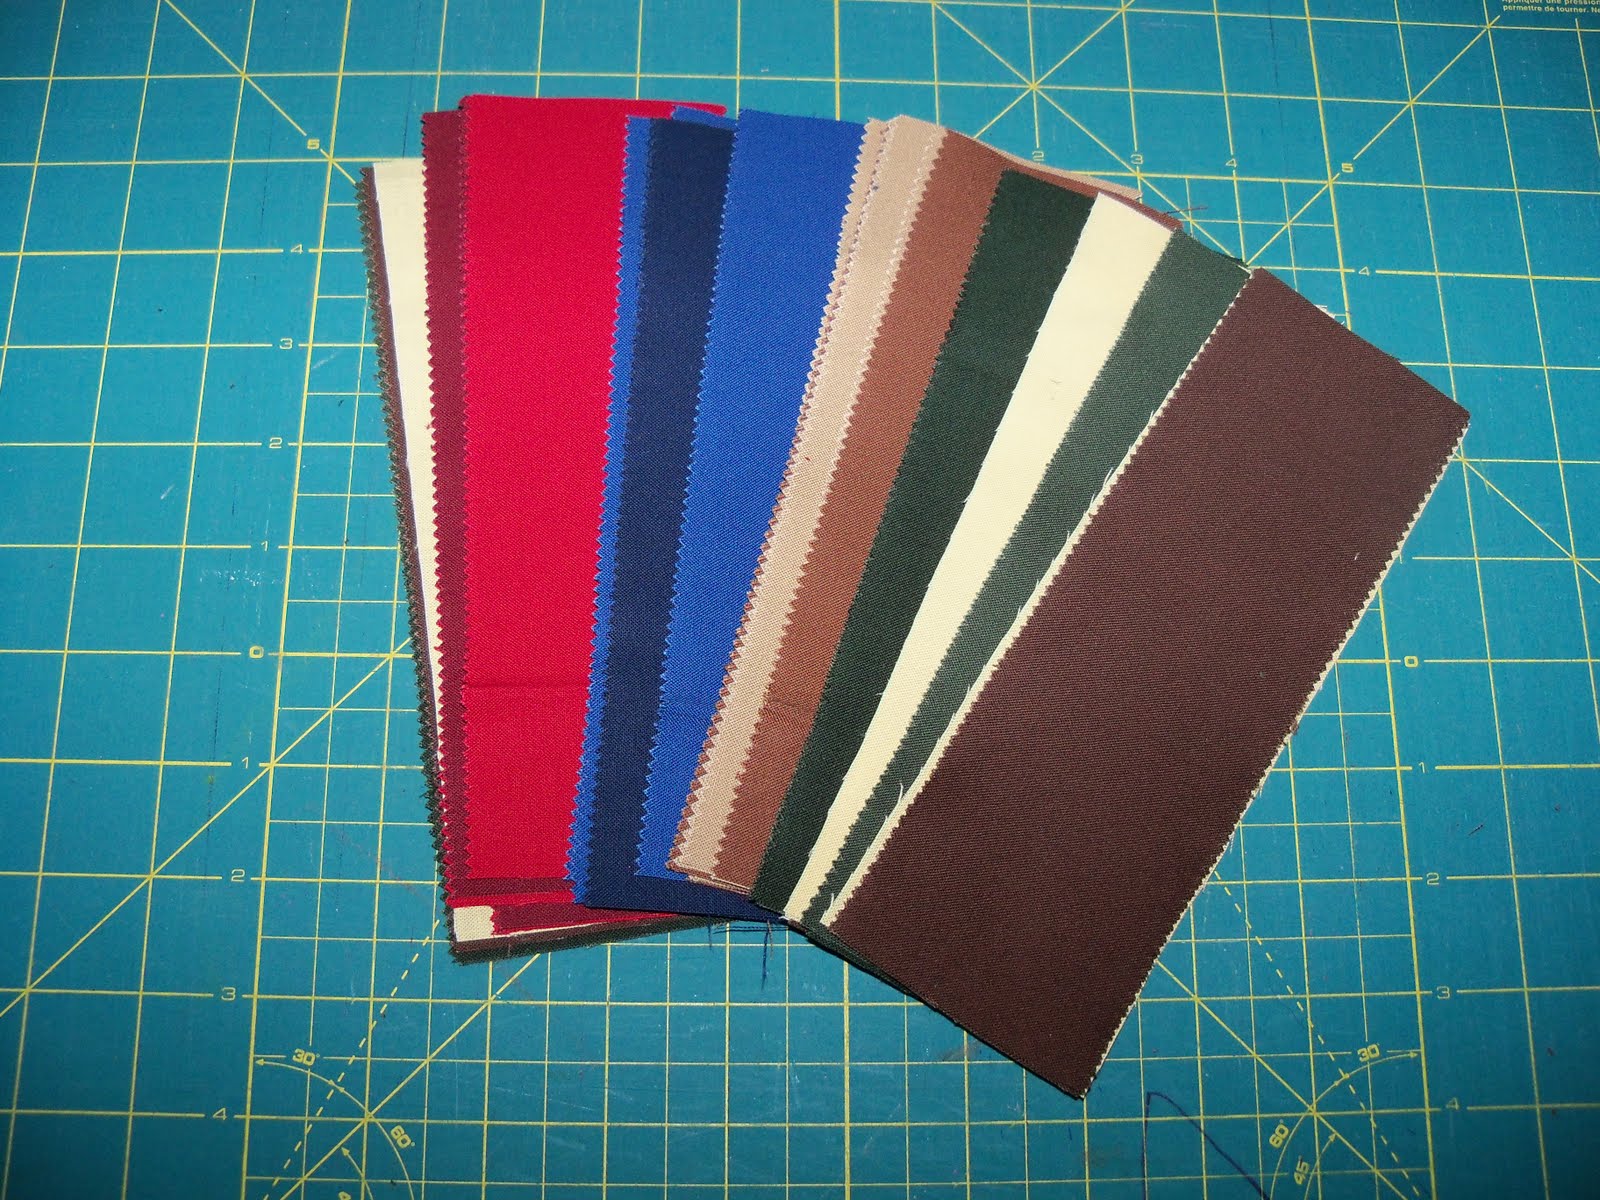
1 fat quarter bundle or approx 36 fat quarters of your choice (I used A Stitch in Color by Malka Dubrawsky*)
1¼ yards** of red tonal (23210 16) for sashing and binding
4 yards of blue with green dot (23209 16) for backing

* Malka Dubrawsky’s latest line is From Outside In and will be available in stores January 2014.
**You only need 1 yard of sashing/binding fabric but I’ve allowed for a little extra in case you have to square up the fabric.


There are seven different block types, pieced borders, and sashing. You can make the sampler like mine or choose your favorite improv block style and make 12 plus the four wonky fan blocks for the corners.

NOTE: Use a scant ¼” seam throughout. WOF = width of fabric. The short edge of a fat quarter measures 18″ and the long edge measures 21″/22″.

ASTERISK BLOCK
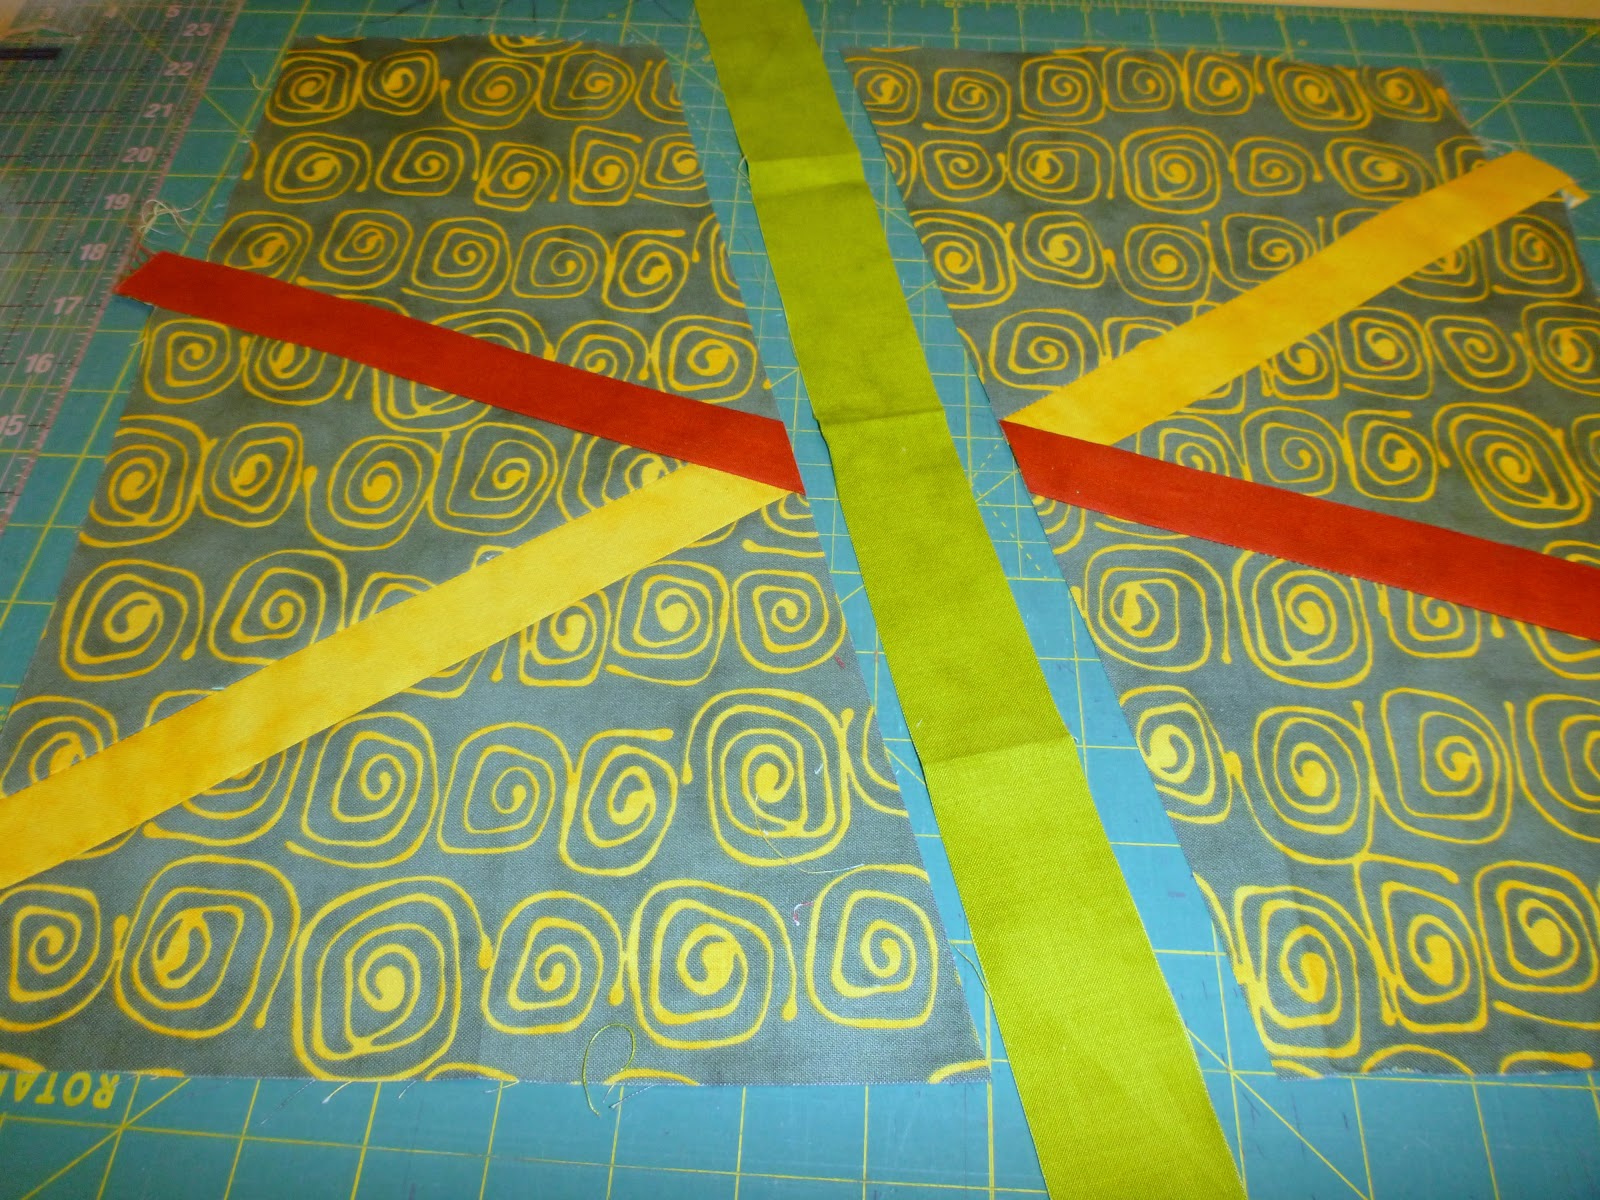
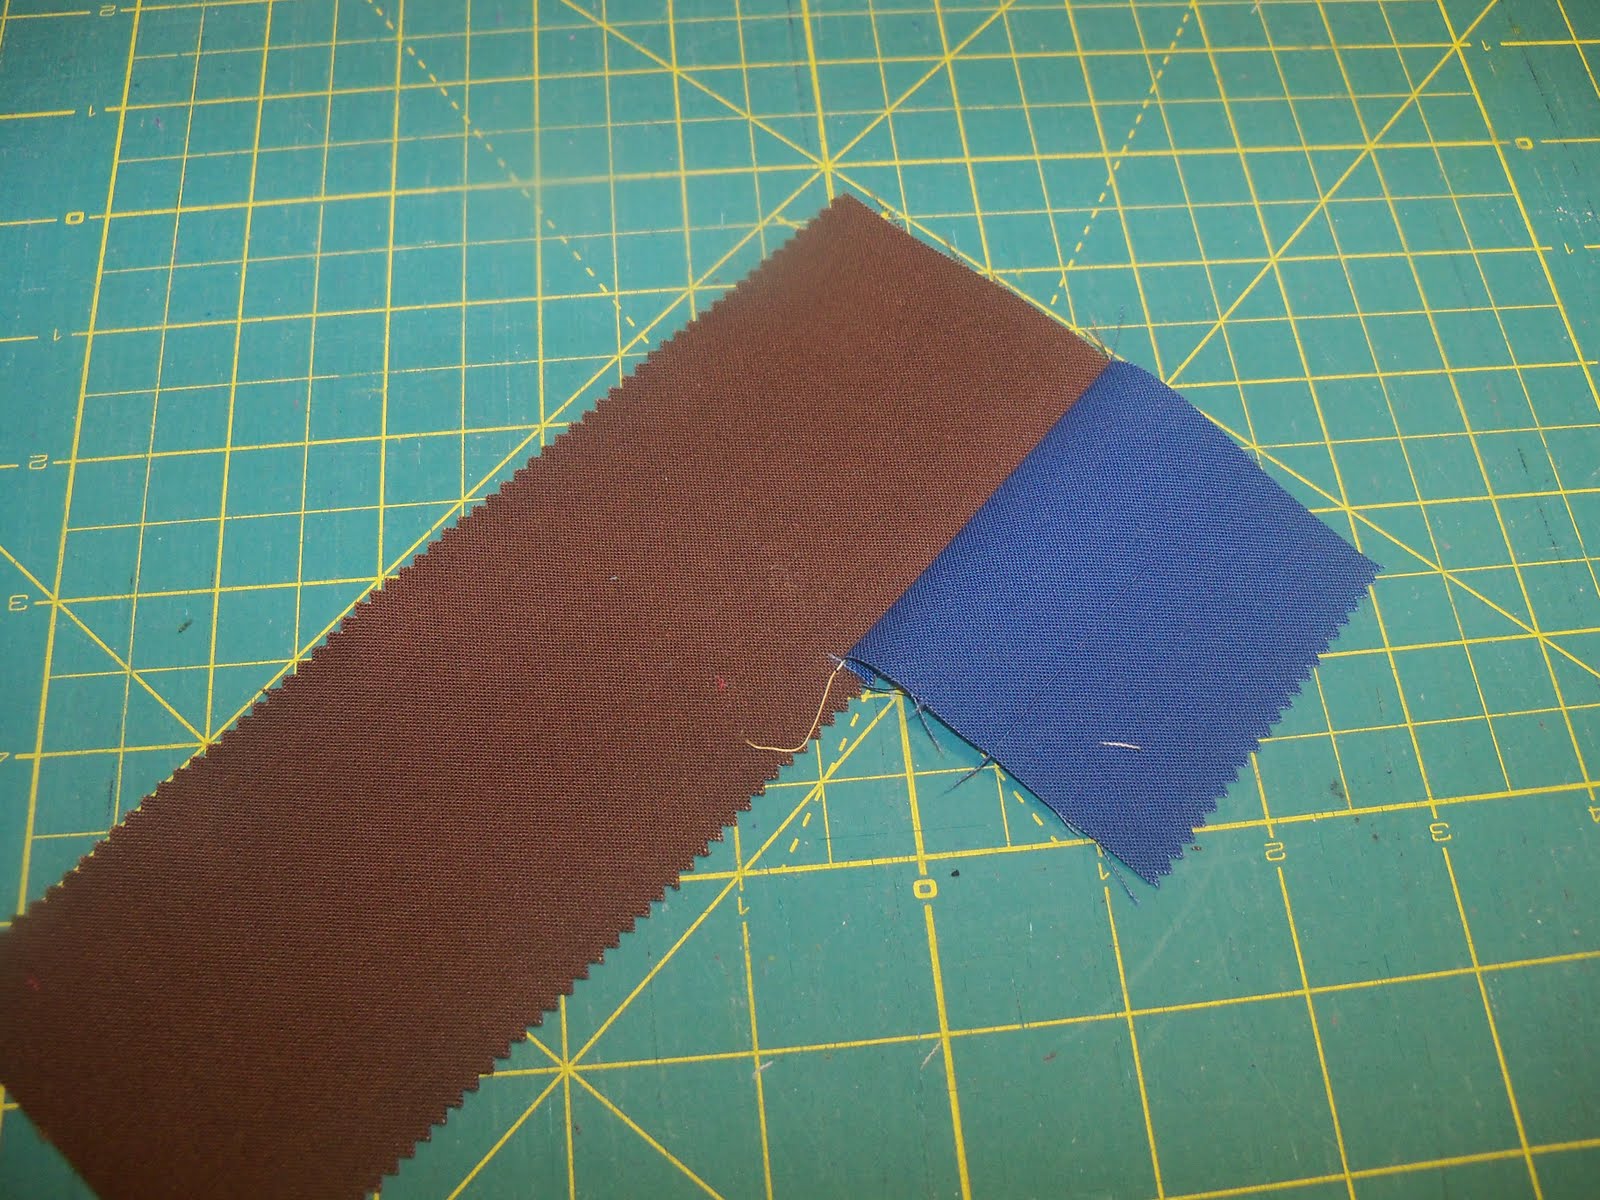
From the short edge of each of three different fat quarters, cut a strip approximately 1½” to 2″ wide. From a contrasting fat quarter, cut one 14″ square. Cut the square in half on the diagonal. Place one strip between the cut edges. Sew the strip to each cut edge.

Cut the square in half again at a different angle. Sew the second strip in between the cut. Be careful to line up your first strip on either side of your new strip.Cut the fabric in half again where the two strips intersect. Sew the last strip to either side of the cut. Press and trim to 12½” square.

Make:
2 asterisk blocks measuring  12½” square unfinished

STITCH ‘N’ SLASH BLOCKS
I made my stitch ‘n’ slash blocks from scraps of fat quarters I used throughout the quilt. These are simple improvisational blocks and perfect for scraps. Find the instructions {here}.

Make:
2 stitch ‘n’ slash blocks measuring  12½” square unfinished

IMPROV CURVE BLOCKS
Start with a square-ish piece of fabric and cut a free-form quarter circle.

Place the quarter circle over the corner of another piece of fabric, aligning it so the edges are ½” off the side of the second piece of fabric.  Cut along the edge of the quarter circle.  Then cut another free-form arc 1″ to 2″ wide above the first cut.  This is the second piece of the block.


Place the second piece over the corner of another piece of fabric.  Make sure the edges are hanging off the edge about ½” on either side. Cut along the top of the second piece.  Then cut another arc 1 to 2″ wide.  This is the third piece.Overlap them (like they were sewn together) to check your sizing.  If they are about 5 inches on a side, it is time to cut out the corner piece.  If not, add another arch.

To cut the corner piece, place the last arc about 2″ away from the corner of a piece of fabric (mine is only an inch here and it was pretty tight).  Cut along the top of the arc and then up to the edge of the fabric. This is what your pieces should look like.

Place the first and second pieces right sides together.  Place the corners so they over lap by ¼ inch. Stitch slowly along the edge with a ¼” seam.  Lift the top fabric and line it up with the bottom fabric as you go. Repeat for all remaining fabric arcs. Press seams towards the first corner piece.  It may be a wonky mess, but we are going to trim it up.

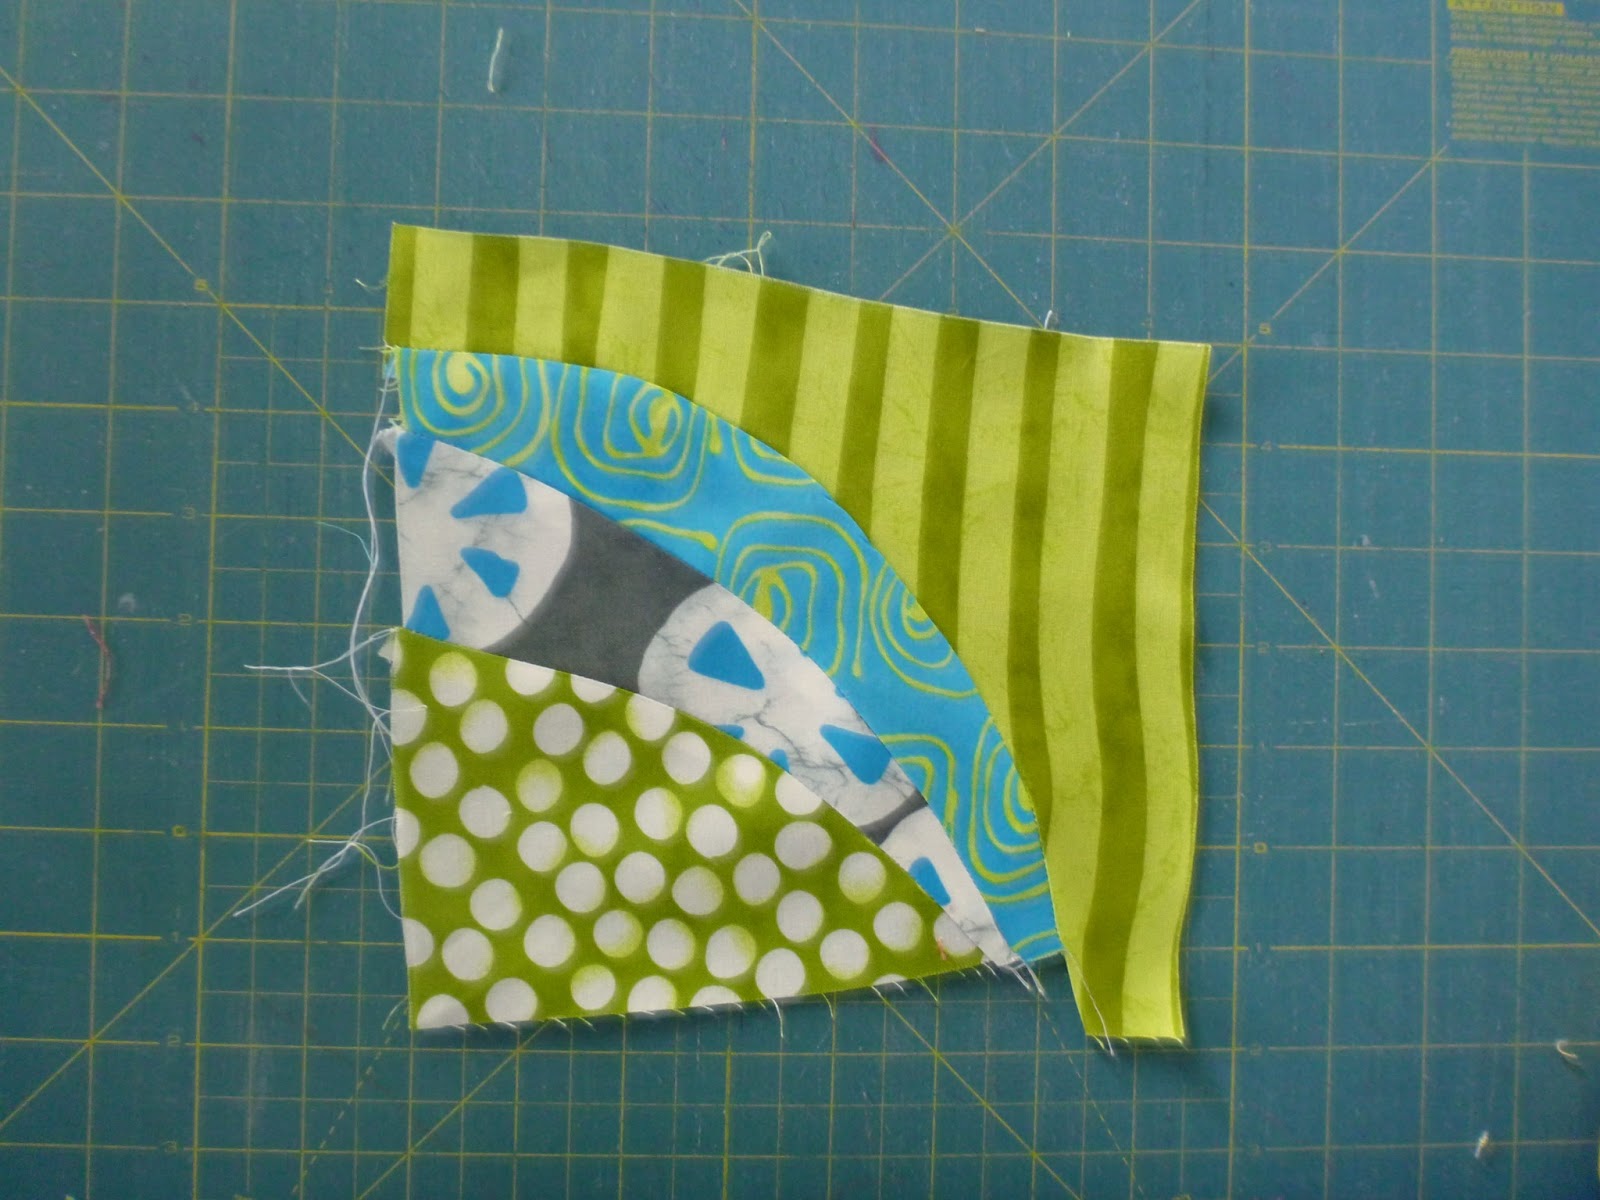
Square up block to 6½”. Make three 6½” curved blocks and join all four together into one 12½” block. 

Make:
2 improv curve blocks measuring  12½” square unfinished

WONKY HOUSE
For this block, I am going to give you some some general guidelines to get you started towards making your own unique house.  Feel free to improvise, use your imagination, play around, make some mistakes and make your own house masterpiece.   There are only two rules:  keep using at least a ¼ seam and trim the finished block to 12½” square so it will fit with the other blocks.   Let’s go!

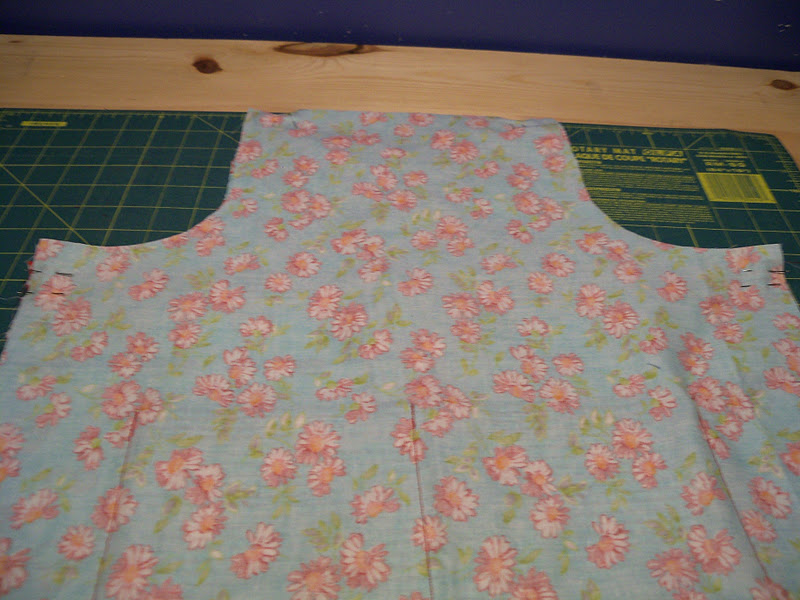
Start by picking fabric for the components of the house. Each section starts out as a square or rectangle and you can introduce a bit of wonkiness as you piece the compenents together. First create the body of the house by combining a square of fabric with two contrasting rectangles of background fabric.

Create a roof for your house, once again combing a rectangle with two squares. Attach the squares as dog-ear corners and be sure that the roof rectangle is wider than your house.

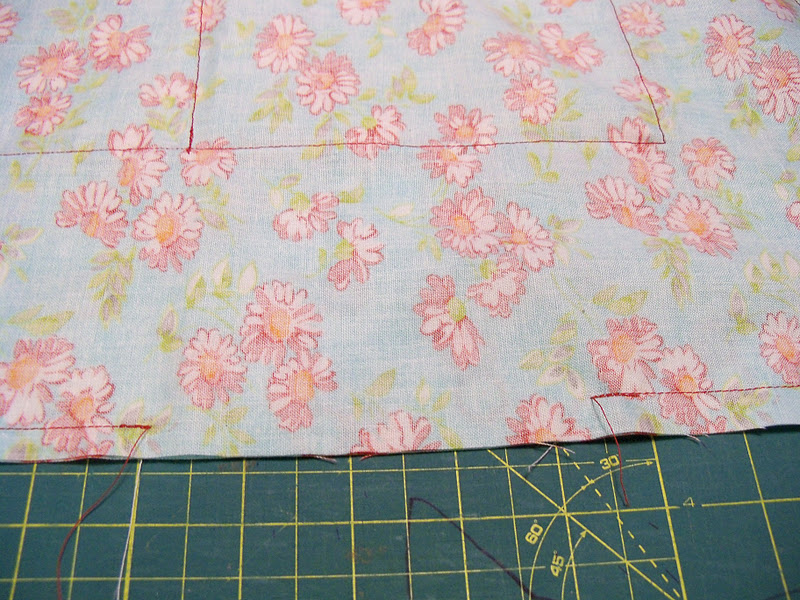
Combine the roof and house body with a strip of background fabric and a strip of fabric for grass. Trim to  12½” square.

Make:
1 wonky house block measuring 12½” square unfinished

WONKY TREE
To create a wonky tree block, repeat the same procedure as with the wonky house but instead switch up the square for a triangle. I made two trees for my block.

Make:
1 wonky tree block measuring 12½” square unfinished

WONKY LOG CABINS
Log cabins start with a center square and you add rectangles to each side of the square (these are your logs). Make it wonky and mix and match the fabrics or use the same print for each log around the square. See the tutorial on my blog {here}.

Make:
2 – wonky log cabin blocks that measure 12½” square unfinished

WONKY STAR
Wonky star blocks also start with squares. For each block, you need {1} 4½” square for the center, {8} triangles cut from four 5″ squares for the points, and {8} 4½” background squares.  When choosing fabrics for the star, use contrasting colors for the points. My fellow Moda Bake Shop Chef Angela Mitchell has a {great tutorial for wonky stars}. Follow her instructions and your stars will finish at 12″ – perfect for this quilt.

Make:
2 – wonky log cabin blocks that measure 12½” square unfinished

WONKY FAN BLOCKS
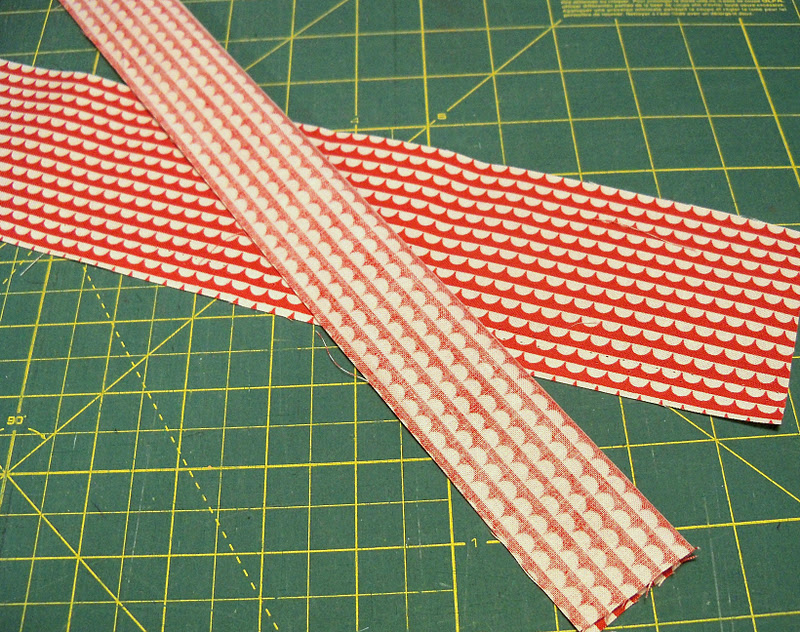
Cut a 12½” square for the background of the fan block. The fan blades can be as tall or as short as you would like, but a good rule of thumb is for the blades to be two thirds the size of the finished block.  In our case that would be 12 x 2/3 = 8 inches tall.  Remember that this is a wonky block, so the measurements don’t have to be exact. Find a piece of fabric about 8 inches tall and cut the straight edge at an angle.


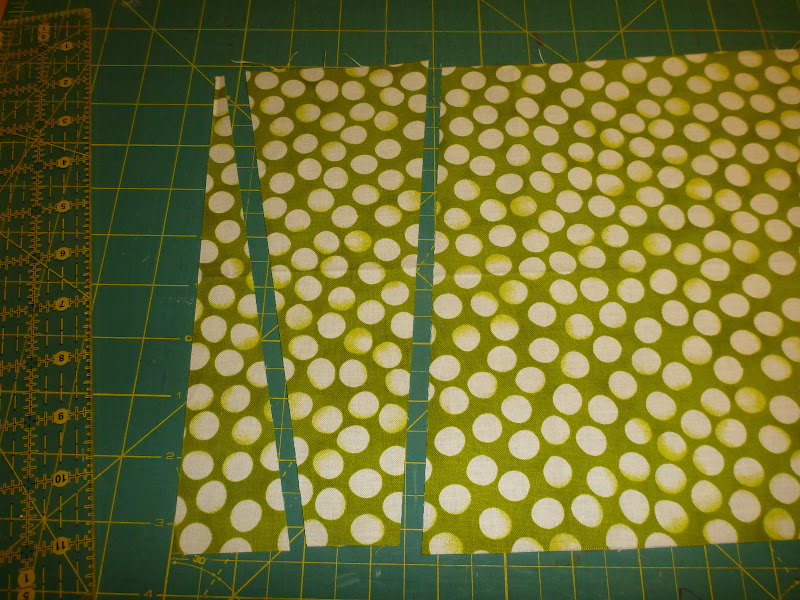
Move the ruler over and angle it until you have another wedge shaped piece.  Cut. Repeat as desired. If I am making multiple fans I like to stack 3-4 layers of fabric together to speed cutting. The blades can be fairly rectangular or quite pointed.  The points should be at least 1/2 inch wide or you will have problems with bulky seams.  A good rule of thumb is for the pointy ends to be between 2 and .5 inches wide and for the tops of the blades to be 3-6 inches wide.  Each fan will need 6-9 blades, depending on the width of the blades.

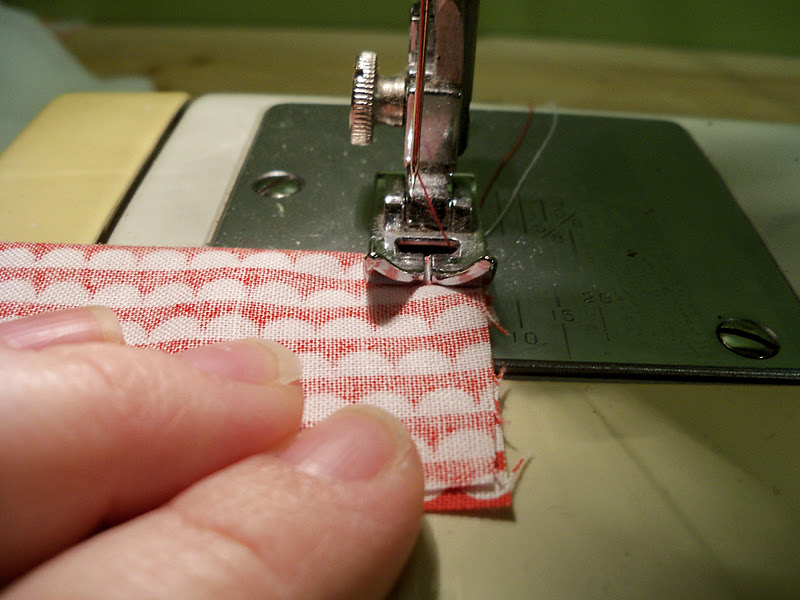
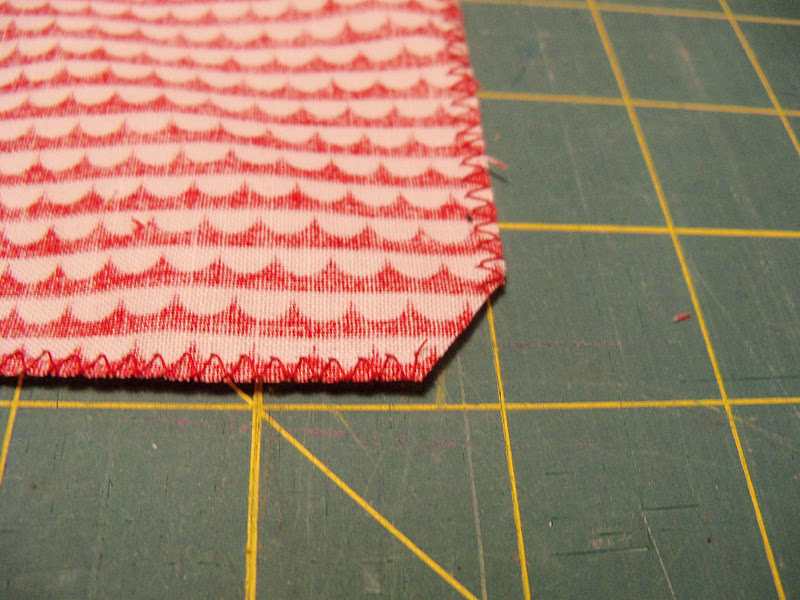
Place two blades right sides together and stitch from top to bottom with a 1/4 seam allowance.  Press the seam to the side. Repeat until your fan is large enough to cover the background fabric from edge to edge.  If the top edge of the fan is uneven trim it even with scissors.  Remember, this is Wonky – don’t get out a plate or compass to make it perfect!

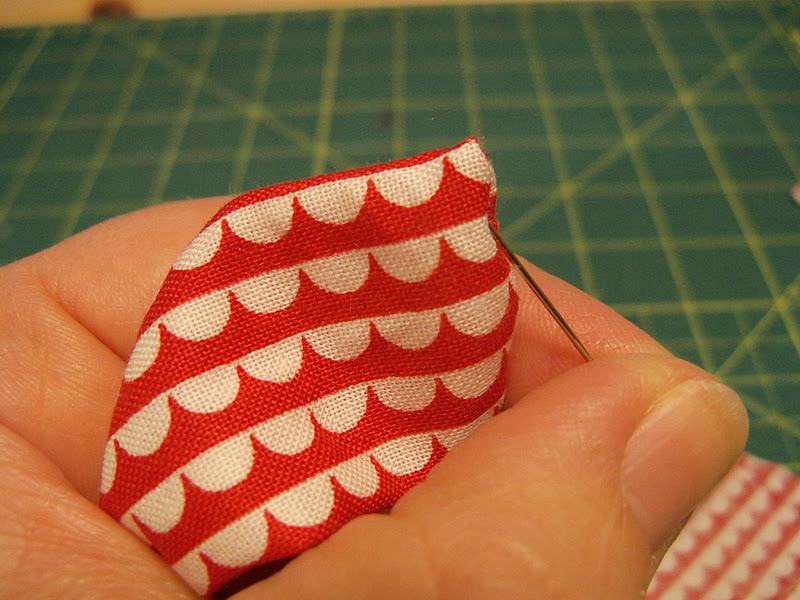
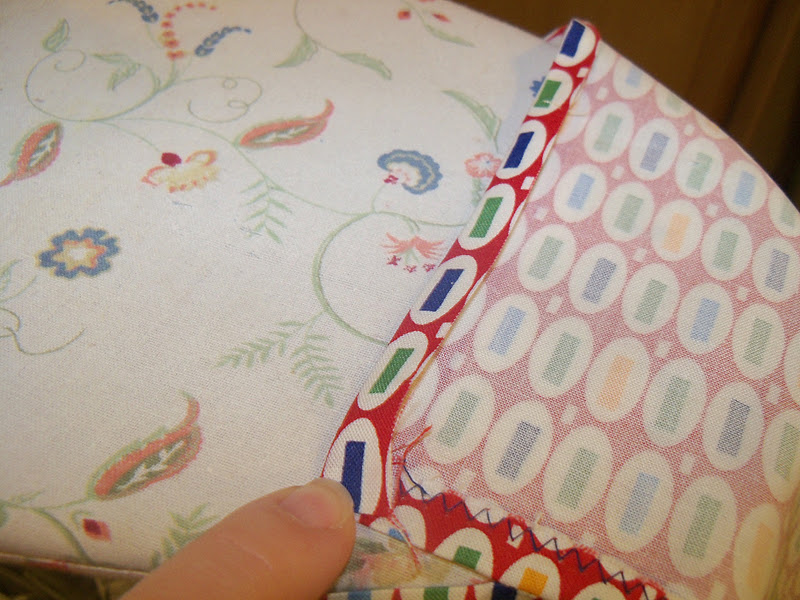
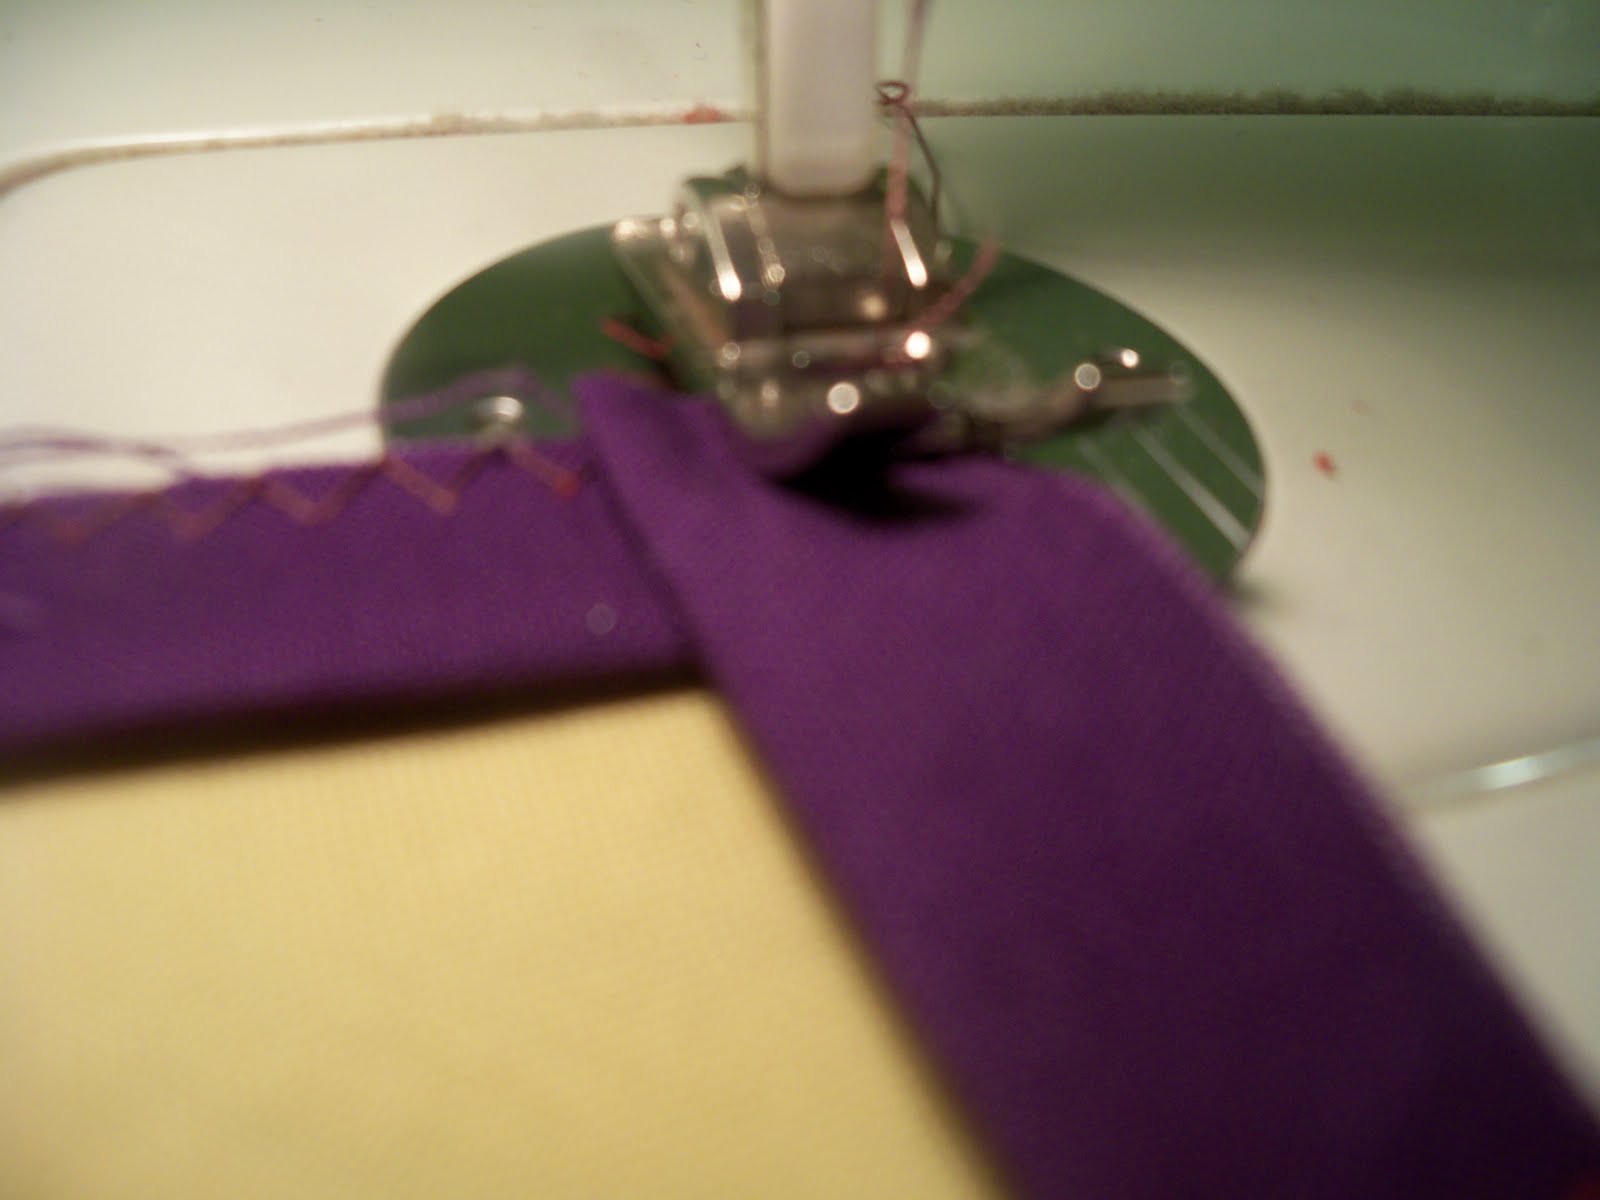
Press under the top edge of the fan 1/4 inch. Pin to the background fabric. Zig-zag along the edge or use your favorite decorative stitch. You can also do needle turn applique if you choose. Yeah!  Fan are blades attached!

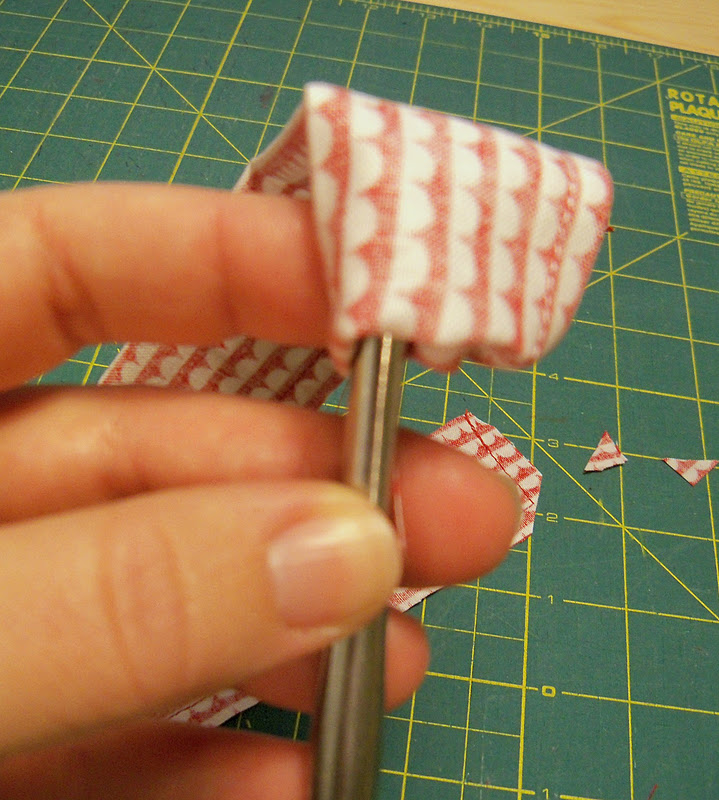
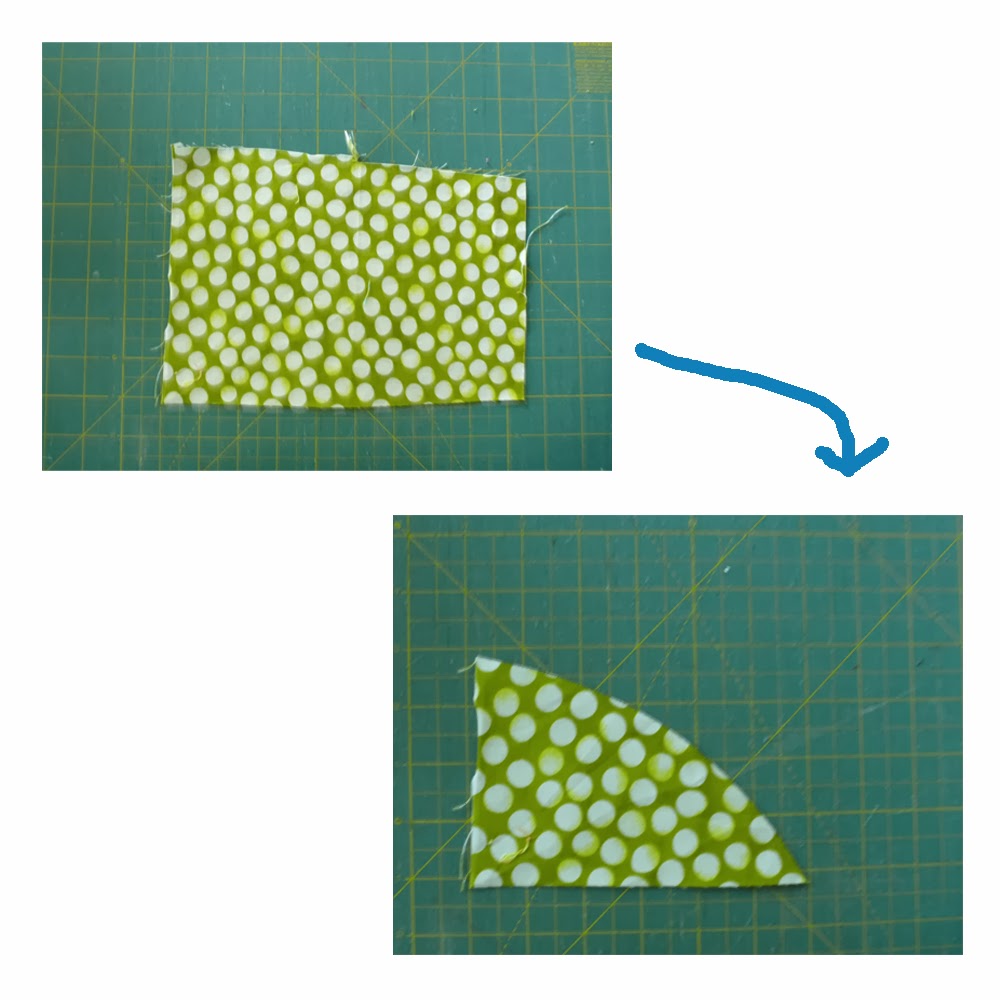
Now we need to cover up the bottom edge of the blades and add the corner round piece.  Find a squarish piece of fabric that is at least 1 inch longer than the distance between the corner of the background fabric and the start of the blades. Lay the square over the corner of the block so that it over laps the background fabric by at least 1/4 inch.  Make a notch with scissors at least 1/2 inch above where corner square overlaps the fan blades. Repeat on the other side.

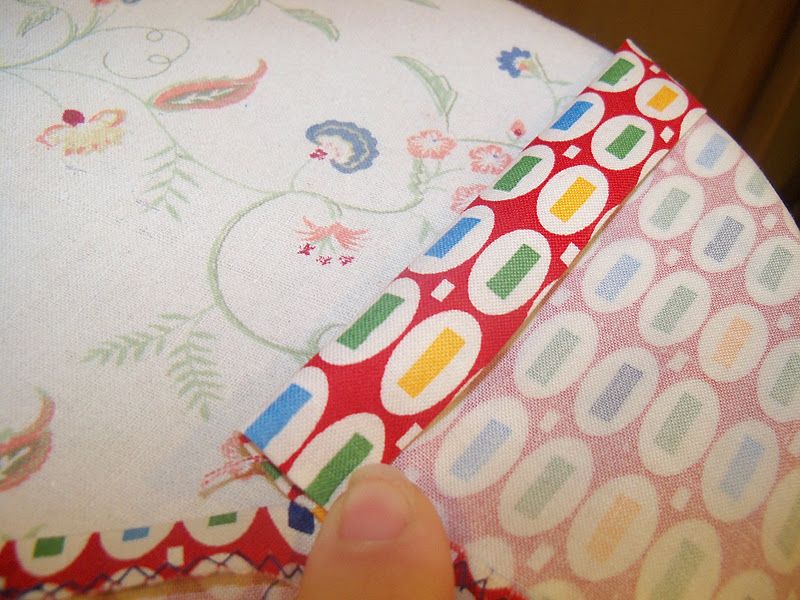
Cut a curve between the two notches.  Ok – kind of scary to make a free form curve, but you can totally do it.  Trust me, it is very freeing. Press under the curved edge of the corner piece about 1/4 inch. Pin the corner round piece in place – be sure that it covers the edge of the background fabric – and stitch along the edge.

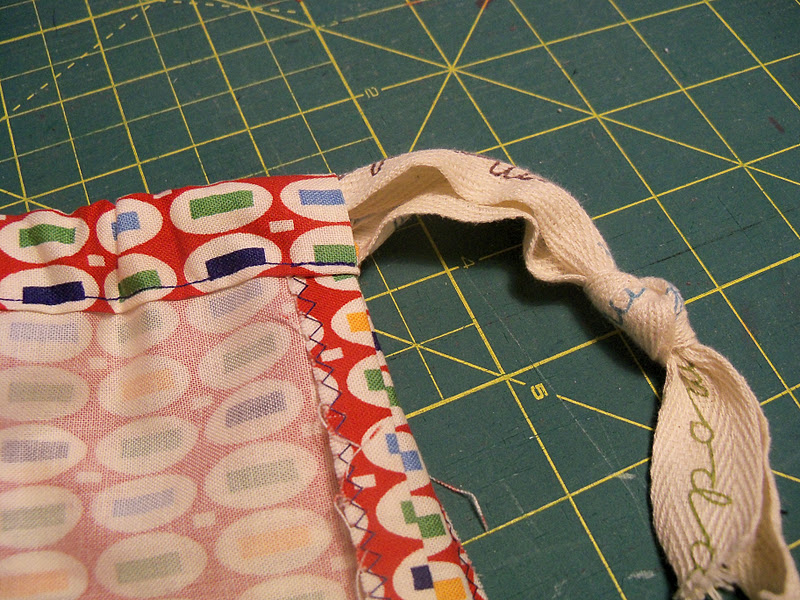
Trim the block to size by flipping it over and cutting off the excess fabric along the edge of the background fabric. You did it!!!  One wonky fan block.

Make:
4 – wonky fan blocks that measure 12½” square unfinished

BORDER 

From your fat quarters, cut strips of fabric that are between 1½” and 3½” wide and the length of the fat quarter.  Do not use a ruler to make the cuts.   Don’t try to make the strips perfectly straight – angled and a bit wavy is what we are going for.  Sew the strips of fabric together until you have a panel that is at least 12½” inches wide.  Press seams to the side.  Use steam and starch if necessary to press flat. Square up the panel to 12½” wide by however long your strips were.  Sew the panels together until you have two panels that are 12½” x 36½” and two panels that are 12½” x 48½” inches.

Make:
2 – wonky strip-pieced border panels that measure 12½” x 36½”
2 – wonky strip-pieced border panels that  measure 12½” x 48½”

SASHING AND BINDING
From your sashing and binding fabric, cut 14 strips measuring 2½” x WOF. Set aside 7 strips for binding. Sew remaining 7 strips end-to-end and cut sashing strips:

4 – 2½”x 12½” strips
2 – 2½” x 64½” strips
2 – 2½”x  48½” strips

Create binding using your preferred method with the strips you set aside.

QUILT ASSEMBLY 

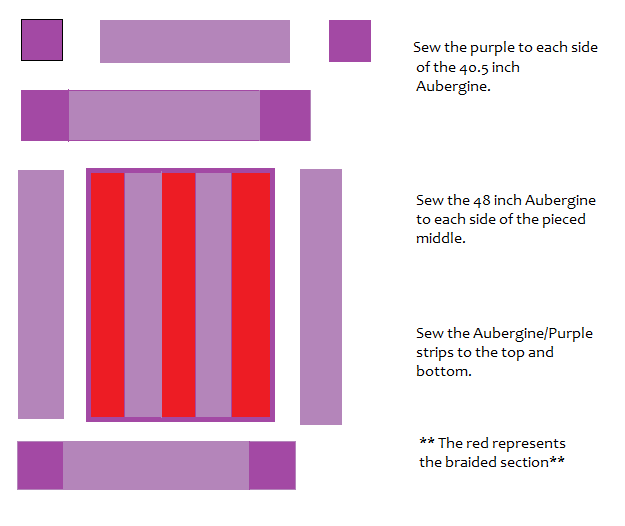
Sew the 12½” improvisational blocks together in a 3×4 grid as shown. Sew the top and bottom borders together by first sewing a corner fan to a 12½” strip.  Attach that to a 12½” x 36½” border piece.  Attach another 12½” strip and fan to the end.  Sew a 64½” strip to the bottom of the top border section.  Repeat for the bottom border section.

Sew the 48½”strips to the 12½” x 48½” border panels.

Sew the side borders to the middle section.

Sew the top and bottom borders on.

You did it!  Quilt and bind as desired!


One improvisational sampler quilt measuring 64½” x  76½”

Leila Gardunia
{www.sewnbyleila.blogspot.com}

Reversible Child’s Apron


Do you know a small child who likes to help in the kitchen?  My four girls certainly love to.  How about making them an apron?  
This apron is fully reversible with a large pocket on both sides.   
It has ties at the neck and waist making it fully adjustable and fits children ages 4-8.
But do you know what the best part is?  It only takes 3 fat quarters to make! 
Come on, let me show you how!
 
I used prints from Ruby by Bonnie and Camille.

 Three Fat Quarters:

-One for the front of the apron
-One for the back of the apron
-One for the ties and pockets
 
Cutting:
Trim the fat quarters for the front and back to 18 x 21 inches.  If you have to cut them a bit smaller to square the fabric up it isn’t a problem at all, just make sure they are the same size.  I like to lay the front and back apron fabric on top of each other as I cut to make sure they are the same size.

Cut a piece of paper 4.5 x6.5 inches in size.  Use a bowl to draw a soft curve in one corner.  Cut off the corner following the line.  This is your pattern piece for the apron.

 Place the pattern piece in the upper left hand corner of the fabric.  Pin.  (You can pin and cut through the front and back apron fabric at the same time if you wish.)

 Cut along the pattern.

 Repeat on the other side of the apron.  This is the main body of the apron.

With some careful cutting all of the pockets and ties can be cut out of one fat quarter:
First:  cut two 2.5 x 18 inch strips for the waist ties
Second:  cut two 2.5 x 14 inch strips for the neck ties
Third:  cut two 7 x 12 inch rectangles for the pockets


Sewing:

Fold each of the 2.5 inch wide tie pieces in half length wise.  Press and pin if desired.

Sew along one short end and the long side of the tie with a 1/4 inch seam.  Remember to back stitch at the beginning and end of the stitching.

Trim off the corners of each tie.

Turn the tie right side out.  I used the handle of a spoon to poke the sewn end of the tie back into the casing.

Continue to push the end up into the casing and pull the casing along the spoon handle until you see the end of the tie poking out.  Grab the end of the tie and pull it out.

Iron the tie flat and use a pin to pull the corners of the tie out if necessary.

Repeat for all of the waist and neck ties.

Next, take the 7×12 pocket pieces and zig zag along each edge.

Trim about a 1/4 inch off of the bottom corners.

Turn over the bottom and side edges a quarter of an inch and press.

Turn under the top edge 1/4 of an inch and press.  Turn the top over another inch and press again.

Fold the pocket piece in half and press down the middle until you have a nice sharp crease.

Top stitch along the edge of the top fold.  Repeat this process for both pocket pieces.

Lay the top hemmed rectangular pocket in the middle of the bottom section of the apron and pin.

Starting at the hemmed edge, stitch along the outside edge of the pocket about 1/8the of an inch from the edge.  Stop with the needle down 1/8th of and inch from the corner, lift the presser foot and turn the fabric 90 degrees.  Continue stitching along the other edges.  Do Not Stitch along the top hemmed edge.

When the outer edge stitching is completed, find the pressed line in the middle of the pocket.  Starting at the top, stitch along the line, back stitching at the top and bottom of the pocket.  Repeat for the other side of the apron.

Next pin the shorter neck ties to the top of one apron piece.

Pin them just slightly farther than 1/4 of an inch from the sides.  Use at least 2 pins so that the ties do not sift during sewing.

Pin the longer waist ties slightly more than 1/4 inch below the curved corner of the apron.

Secure the ties with multiple pins to the center of the apron so that they don’t flop around and get caught in the side seams by accident.  I speak from experience.  😉

Yea!  It’s looking like an apron now!  You should have two apron pieces, each one with a pocket and one with the ties pinned in place.

Place the two apron pieces right sides together and pin all the way around.

Starting at the bottom, stitch along the edge of the apron using a 1/4 inch seam allowance (the edge of the presser foot).

Back stitch over the ties to give the seam extra strength.  Be careful turning the corners not to stitch along the sides of the ties.

Stop and back stitch about 6 inches short of the start of the seam.

Make small clips along the curved edge.  This will help the fabric lay flat when the apron is turned right side out.

Turn the apron right side out and iron the edges.  Pin the opening shut.

Top stitch about 1/8 of an inch from the edge of the apron.  This gives the apron a nice flat finish and closes the hole at the bottom.

I like to tie the neck ties in a double knot with just enough room that they can pull it on and off by themselves.

One super cute reversible apron for your favorite child!

I think this apron would be brilliant with a boyish fabric on one side and a girly fabric on the other.
 Happy sewing and cooking!

Leila Gardunia
{sewnbyleila.blogspot.com}

Charming Christmas Ornaments

Hi!  It is Leila from Sewn.  I took a break this week from writing tutorials for the We Can Do It! Skill Builder Sampler to make some simple Christmas ornaments.  I think it is a fun way to incorporate some of my favorite fabrics into our Christmas decorations.  Let me show you how I made them.

A few charm squares (I am using Rouenneries Deux by French General)
Heat and Bond Iron-on Adhesive
Wooden Die Cuts
String or Ribbon
Glue gun or glue


Buttons, ribbons, lace, fabric scraps…

Trace around the wooden shapes on the paper side of the Heat and Bond.  If you are using a asymmetrical shape – like a letter – trace the front and back of the shape.

Rough cut around the outlines and iron onto the back of your chosen charms.  I was able to get two ovals onto one charm.

 Cut out the shapes just inside the lines.

Peel off the paper backing and iron the fabric directly onto the wooden shape.  I didn’t even take off those miserable stickers.   Flip over the wooden shape and iron the other piece of fabric onto the backside also.

I wanted to spruce my ornament up with a little button flower, so I ironed some Heat and Bond to a scrap of green fabric from my Amish Braid quilt and free form cut some little leaves and a stem.

Place the leaves as desired and iron onto the ornament.  Glue a button on for the flower.  You can keep your ornament plain or go as crazy as you want with extra embellishments.

When you are done decorating your ornament, take a piece of string or ribbon, place the ends together and glue to the back of the ornament.    If you can’t find your glue gun, regular glue works well too.  🙂

Tie a little bow and glue it on top of the string ends.  Or place a button over the loose ends to cover the raw edges of the string.

As many charming ornaments as you desire – one charm pack will make more than 20!  This is also a great way to use up extra charms or small scraps from other projects.  Feel free to stop by my blog and see some other ornaments that my girls made!

Leila Gardunia

{sewnbyleila.blogspot.com}

Simple Drawstring Bag

Have your kids lost their lunch bags yet?  Mine have.  Not permanently lost, mind you, just lost in the morning when I am rushing to make lunches.  My solution:  more lunch bags.   🙂   You will be able to make two simple drawstring bags out of one fat quarter and some ribbon in about a half hour.  I do have to admit that some lunches are a tight squeeze into these bags, so if you tend to use Tupperware, or pack large lunches, you many want to make your bags larger.

One fat quarter of fabric (18 x 22 inches).
About 48 inches of 5/8 inch ribbon

 Cut the fat quarter into two 8.5 x 21 inch rectangles.  Each rectangle will make one drawstring bag.

**If you want to make a wider drawstring bag, cut 1/3 of a yard into two 12 x 22 inch pieces**

Zig zag along the long edges of the rectangle to prevent fraying.  I set my stitch length to 2 and my width to 3.5.

Fold the rectangle in half, right sides together, so that the two unfinished edges are touching.  On one side, measure down 2 inches and mark with two pins.  Pin both sides as needed.

 Starting at the pins, stitch down to the bottom of the fabric with a 1/2 seam allowance.  Back stitch at the top and bottom.  On the other side, stitch from the unfinished top down to the bottom.

 Clip off the bottom corners at an angle.

 Press the seam allowances open.  This is how the side that was started 2 inches down should look.

Turn under the unfinished top 1/4 inch and iron.

Turn down again approximately 3/4 inch.  Iron and pin in place.

Remove the table from the machine to make it easier to sew around the top of the bag.

Starting at the notch, sew an 1/8 of an inch away from the turned over edge.  Back stitch at the beginning and end.
Pin the longest pin you have through one end of approximately 24 inches of ribbon.
Thread the safety pin and ribbon through the open notched side of the bag.  Push the pin through until it exits the other side.
Pull the ribbon through until it is even on both ends and knot.

Pull the ribbon to test out it’s gathering skills.  Trim ribbon if necessary.

Two cute drawstring bags, perfect for carrying lunches or a variety of “special stuff.”

Leila Gardunia
{sewnbyleila.blogspot.com}

Amish Braid Quilt

Hi!  I am Leila Gardunia from Sewn by Leila and today I will show you how to make your own Amish-inspired quilt.  Bella Solids are perfect for a project like this and the precut Jelly Roll makes it come together lickity split. Let’s get started!

1 Jelly Roll of Dark Bella Solids
1 yard Bella Purple
2 yards Bella Aubergine for the top
3 yards Bella Aubergine for the backing

Cutting:
Cut 30 jelly roll strips roll into 7.5 inch long segments.

Out of the scraps cut three 2.5 inch squares.


Out of the Purple cut:

  • four 10.5 inch squares (corners)
  • six width of fabric (WOF) strips 1 inch wide (flange)
  • seven WOF strips 2.5 inches wide (binding)
Out of the Aubergine cut:
  • two 10.5 x 40.5 inch rectangles (top border)
  • two 10.5 x 48 inch rectangles  (side border)
  • two 8.5 x 48 inch rectangles  (inner strips)

To cut the 48 inch long rectangles, carefully fold your fabric selvage to selvage.  Square up the right hand side at the 0 inch mark.

Draw a line at the 24 inch mark with chalk or washable pen.

Carefully move the fabric to the right and place your marked line on the 0 inch mark.

Cut on the left at the 24 inch mark.  You now have a piece of fabric 48 inches long.  Refold the fabric (cut ends together) and cut two 8.5 and two 10.5 inch wide strips.

Piecing:

The Braid

Take one 2.5 inch square and line it up with the end of one of the 7.5 inch strips.

Sew together.

Open and press.

Lay another 7.5 inch strip perpendicular to the first and sew together.

Keep sewing strips on alternating sides until the braid is 48 inches long.

Fold the braid in half and line up the folded end at the 0 inch mark at the end of the cutting mat.

Square off the end at the 24 inch mark.  The braid is now 48 inches long.

Keeping it folded, carefully square up the sides.

The braid should measure 8.5 inches wide.  Repeat for all three braid sections.

The exposed sides of the braid are cut on the bias and prone to stretching.  To avoid unnecessary handling and stretching, carefully fold the braid into a bundle until you are ready to continue sewing.

Piecing the Middle
Sew the three braid and two 8.5 x 48 inch Aubergine pieces together length wise.  Alternate the strips (Braid, Aubergine, Braid, Aubergine, Braid).

The Flange

Sew the 1 inch lengths of Purple fabric together.  Press seams open.  Then press the strip in half lengthwise.  Cut the strip into two 48 inch and two 40.5 inch pieces.

Attach the flange to each side of the pieced middle.  Line up the raw edge of the flange with the edge of the middle section.  Using a wide stitch, zig-zag along the edge.

When you attach the next side, simply overlap the ends and sew along the side as before.  All of the loose ends will be enclosed when the borders are added.

The Borders

Sew the 10.5 inch Purple squares to each side of the the two 10.5 x 40.5  inch Aubergine strips.  Press in towards the Aubergine.

Sew the 10.5 x 48 inch strips of fabric to each side of the flanged middle section.  When you are done a neat 1/4 inch flange will nicely frame the middle.  Press toward the Aubergine.

Sew the Purple/Aubergine strips to the top and bottom.

You did it!


Quilting
Now is the time to put on your creative thinking hat.  This is a project that really lets the quilting shine.  I quilted the middle strips with cables and the sides with simple piano key lines, but the sky is the limit.

One beautiful 60 x 68 inch Amish-inspired quilt.

If you are new to quilting and want to learn more, stop by my blog and check out the We Can Do It! Skill Builder Sampler.  With weekly quilt block tutorials covering all of the basic quilting skills, you will be a pro in no time.  🙂

Happy Quilting!

Leila

{Sewn by Leila}