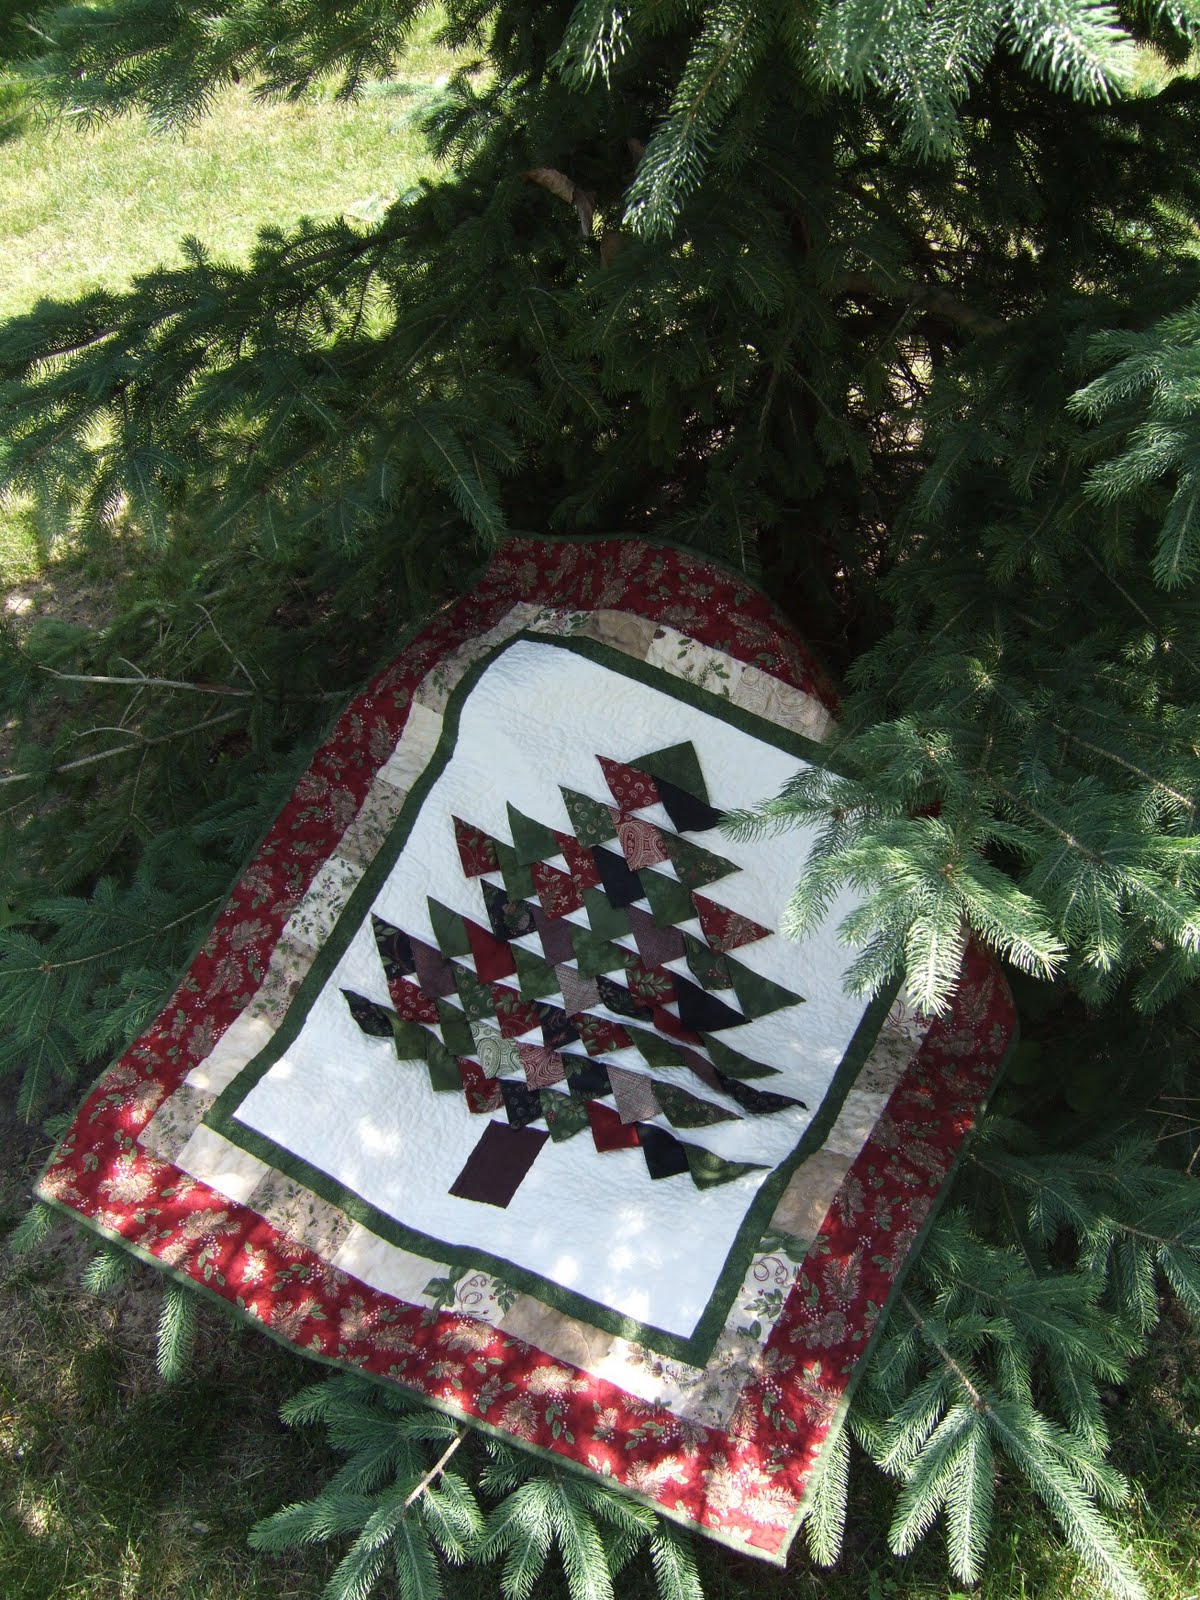
Hey everyone! I’m Cara from CaraQuilts and I’m back with an easy Christmas decoration. Yes, I’m already thinking about Christmas. I find it sneaks up on me too many years, so let’s get a head start now!
I love prairie points and it just seemed natural to make a tree out of them.
Like any pattern, please read through it before starting. If you have any questions at all, just e-mail/message me over at my blog and I’d be happy to help! Oh, and make sure to let us know if you like the pattern! 🙂

2 charm packs – Northwoods Botanical
1 Bella solids jelly roll – Snow
1/2 yard outer border – Red 6377 13

Optional buttons for decorations of the tree

Cutting:
From the jelly roll:
Cut (2) 2 1/2” x 4” strips
Prairie Points
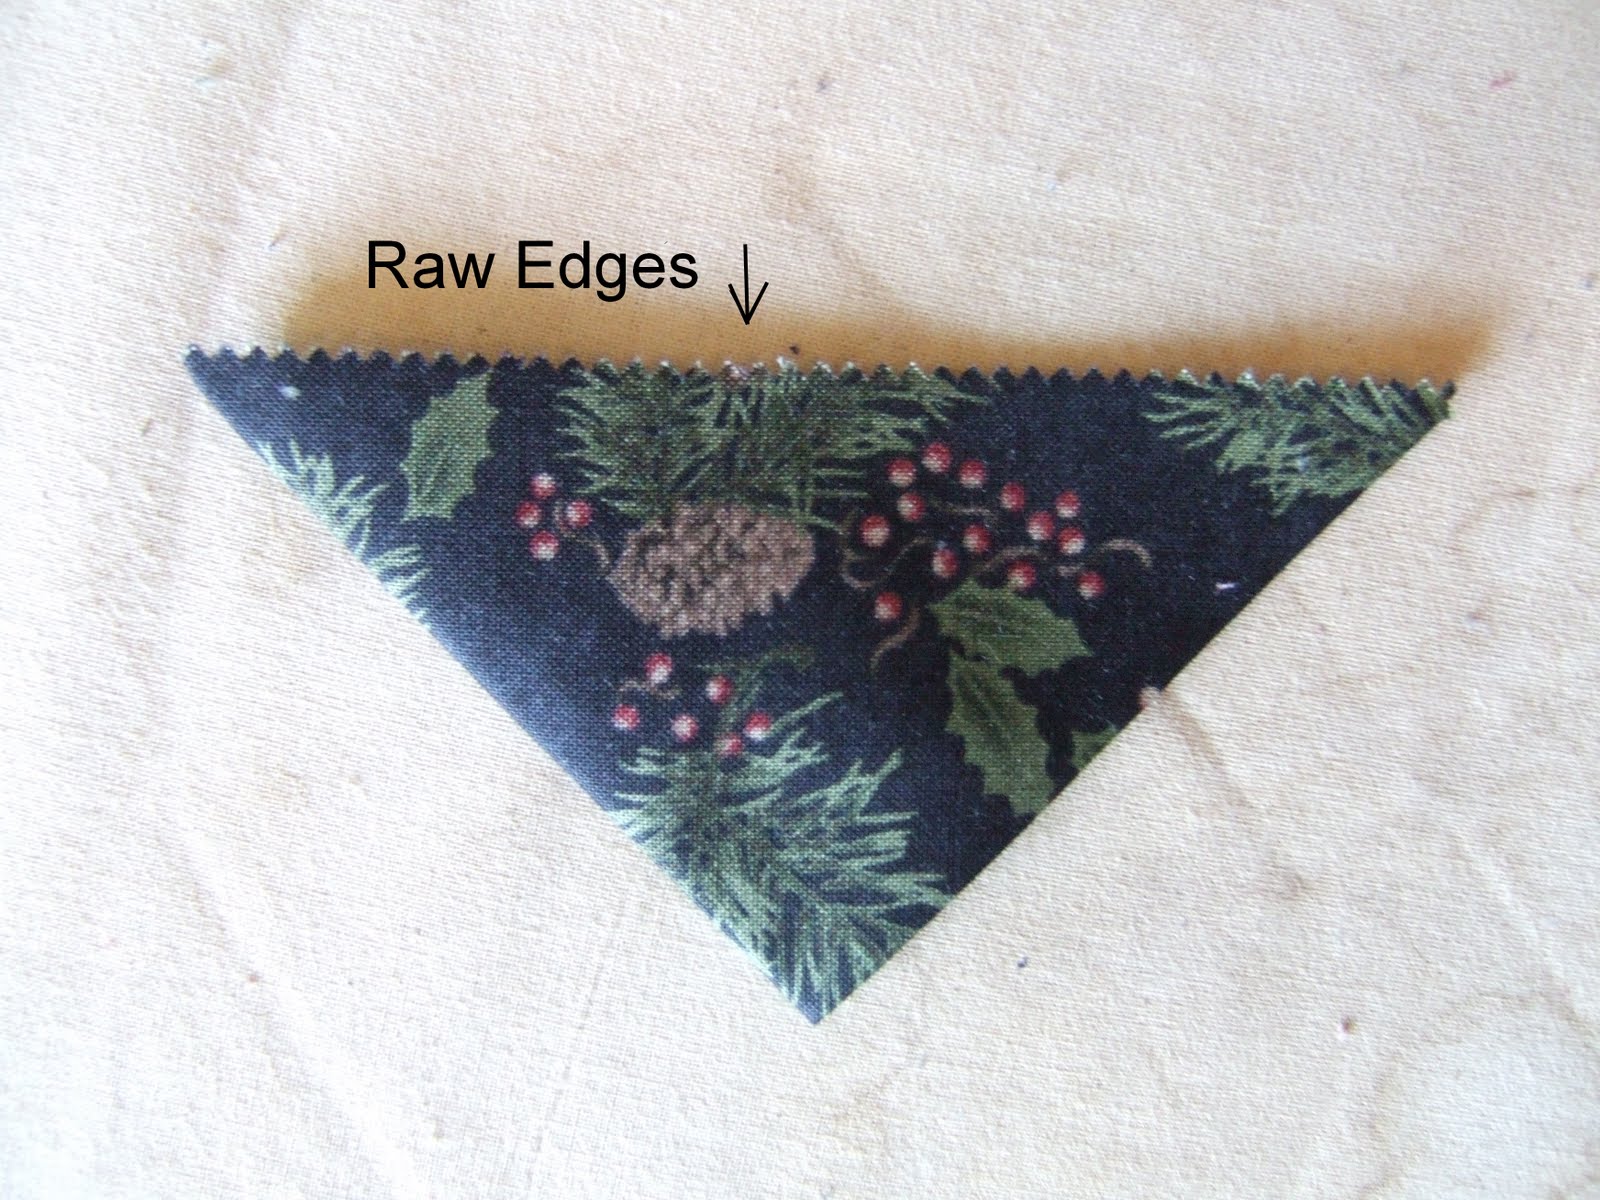
To make a prairie point, take one 5” charm square (Diagram 1) and fold in half diagonally, wrong sides together.
Press (Diagram 2).
Fold in half again so all of the raw edges are on one end and press (Diagram 3).
If your iron has a steam shot, use it now! From now on I’ll refer to prairie points as pp.


Repeat so that you have 55 prairie points (pp). I removed all of the cream/beige colored squares, but if you like the look of them mixed in, by all means use them. Using them will result in a multicolored scrappy second border, instead of the beige/cream.
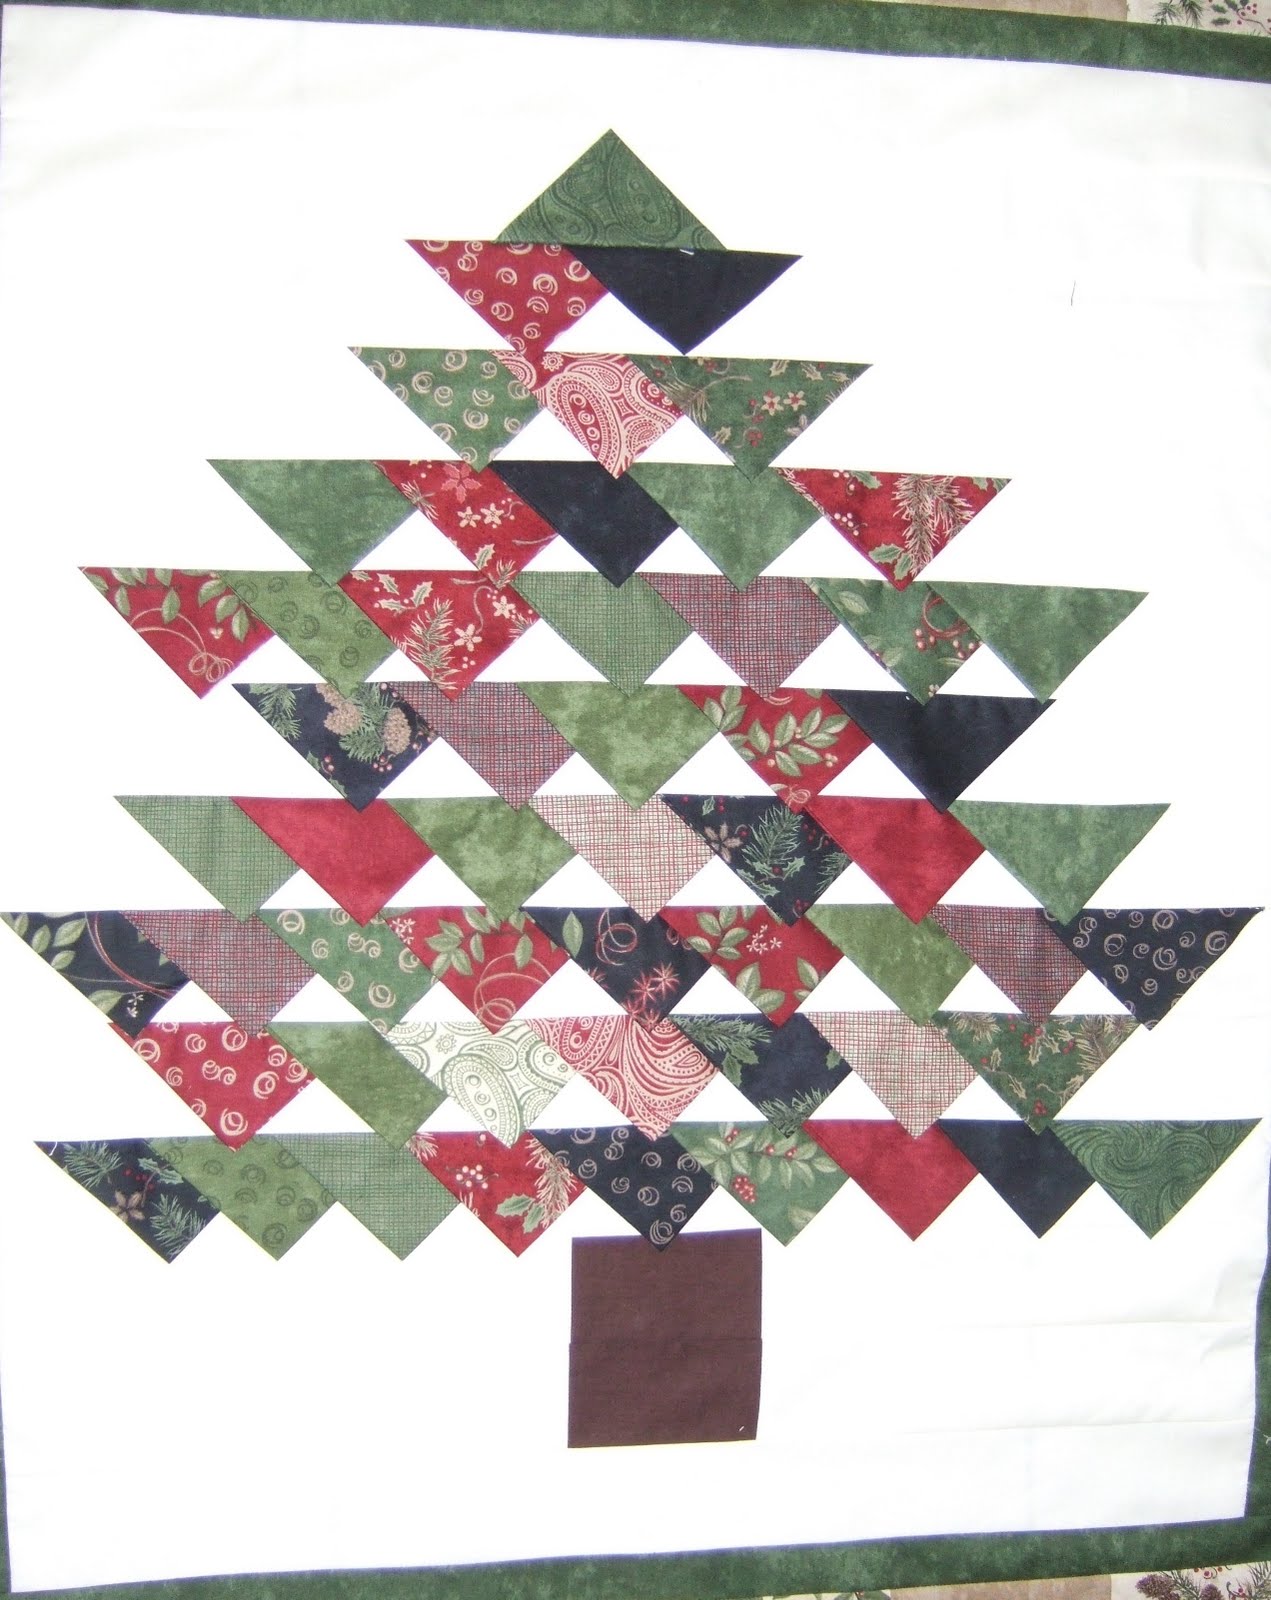
Making the “tree”
Fold all of the tree jelly roll strips in half and finger press so you can see a faint line.
Line up one pp with the tip on your centerline.
Stay stitch in place. I used a narrow zigzag to hold in place. Stay stitch all strips with the pp. Make sure that you have caught all raw edge layers of the prairie point. If not, it will fray when washed.

For the second row, line up the 2 pp with the half way mark in the middle empty space between the pp.
For row 3, line up a pp on the half way mark. Add a pp to both sides, lining up the top edge point about half way on the previous pp. Tuck the pp on the right underneath the center one and so on.

Press well.
Stitch rows together, being careful to not sew the prairie points from the previous row into the seam. I flipped mine up so they were out of the way. Pinning is important here, even if you normally don’t do much pinning.

Press well. The top prairie point is pressed up and the rest are pressed down.
Add one 24 1/2″ x 2 1/2″ strip to the top of the tree.
Let’s make the trunk of the tree. Take the 2 1/2” x 4” strips and stitch a 12 1/2″ strip to either side. Repeat with the second 2 1/2” x 4” strip. Press the trunk strips in opposite directions – one toward the trunk and one away – so that they snap together when you stitch them. Stitch together and then stitch to the bottom strip of the tree. Press well.
Attach one more 24 1/2x 2 1/2″ strip to the bottom of the tree. Press.
Trim up the center section. Make sure there is at least 1/2″ past the points and that the top point is centered. Trim the block to 24 1/2″ x 29″ if necessary.
Borders
Measure your top well and often so that your borders will fit. Pinning is important here because of the weight of the top. A walking foot wouldn’t hurt either, but it isn’t necessary.
Border #2
Take all the cream/beige from one charm pack and two from the second, for a total of 14 charm squares. Trim these to 2 1/2” x 5”. Stitch rectangles end to end to create two 6-strip borders for the short side and two 8-strip borders for the long side. All of the strips will be a bit longer then necessary. I trimmed the excess off, but if you want them all exact make your seam a bit larger than 1/4″.
Attach the long sides first. Press towards the center. Attach the short sides and press towards the center.
Border #3
Cut (4) 4 1/2” x WOF strips. Attach strips to the short sides first. Press away from the center. Add the remaining borders and press away from the center.
The top is done!
Now for those words we either love or hate: Baste, Quilt, and Bind!


After quilting, I tacked the top prairie point down by lifting the point and catching the top layer of fabric on the underside of the prairie point. I stitched it a couple of times and knotted it off so it would not flop down.

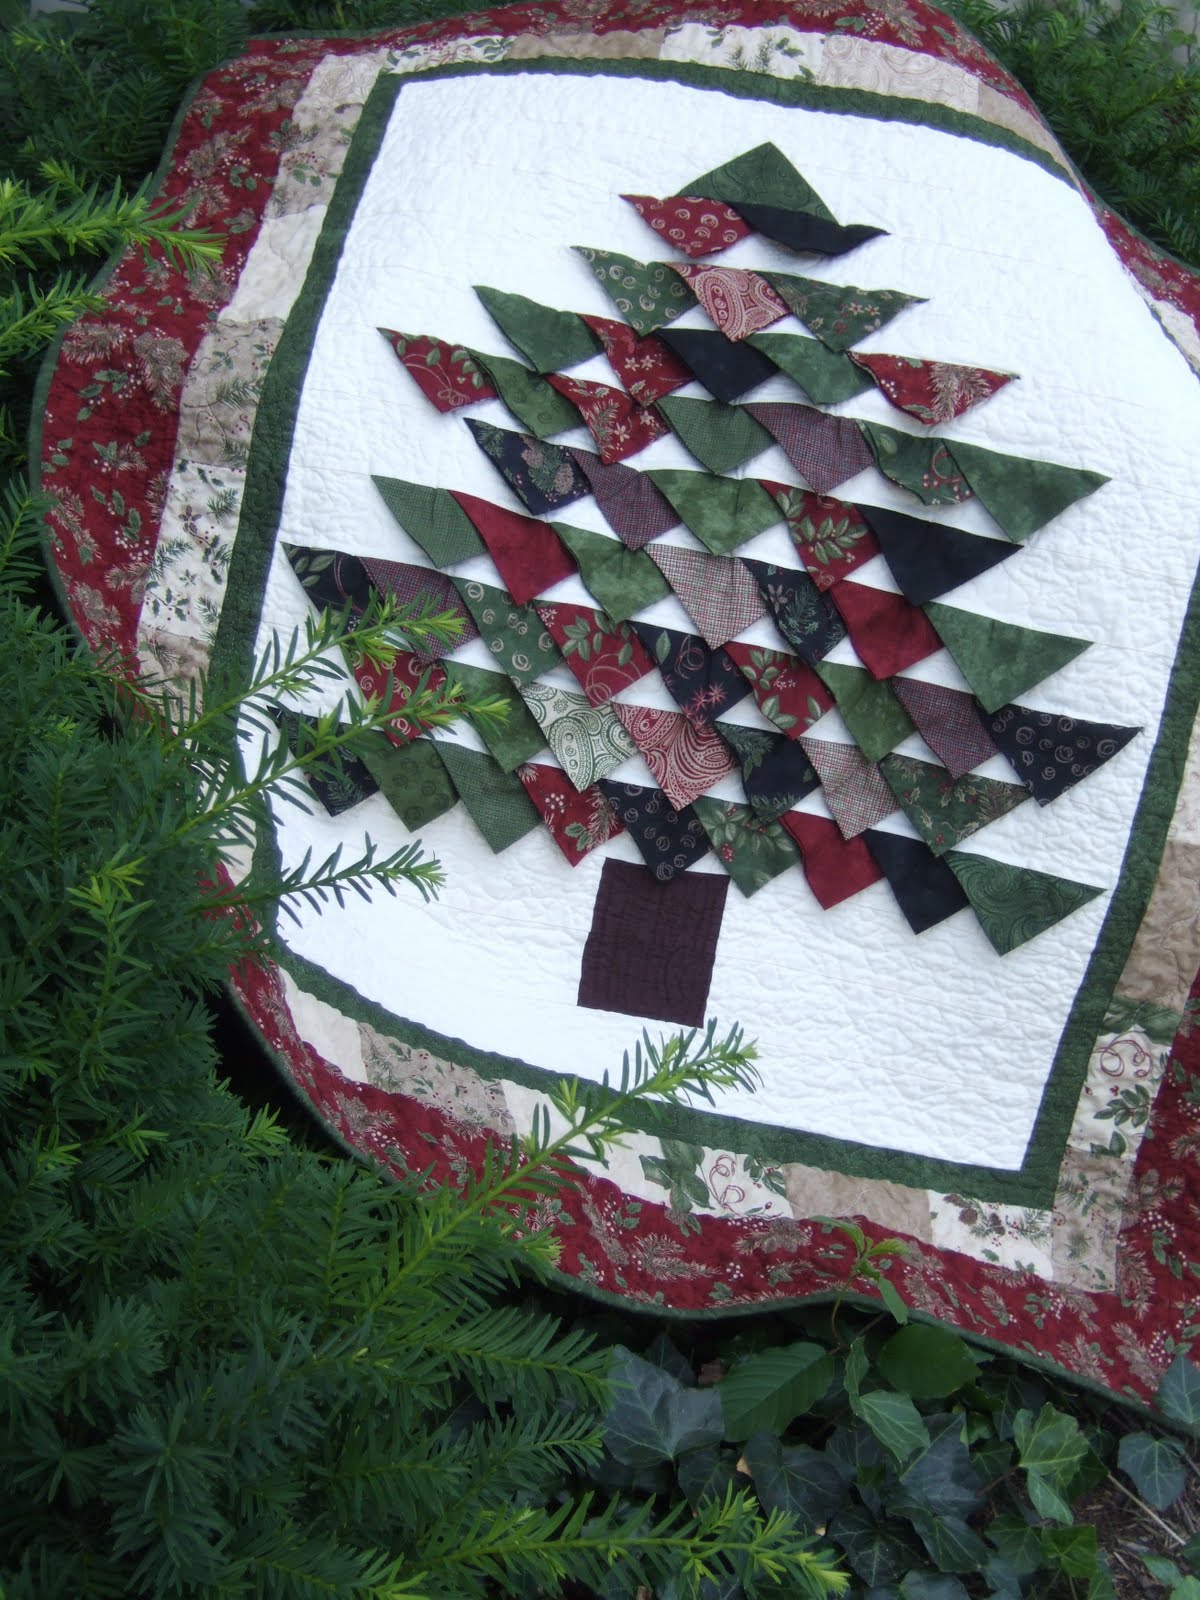
One 38 1/2″ x 43″ tree!
I’d love to see your wall hanging. Add your project to the Bake Shop’s Flickr page!
Cara Wilson of CaraQuilts
![]()
