
![]()
Hello! My name is Erica and I blog over at Kitchen Table Quilting. I wanted to share this tutorial with you because (a) I love the fabric and I cannot get enough of those sweet little bunnies and (b) because this is a great way to make a quilt that is much easier than it looks!

2 jelly rolls of Posy by Aneela Hoey
1/2 yard Bella Lilac
1/2 yard Bella Tea Rose
1/2 yard Bella Petal Pink
1/2 yard Bella Green
1/2 yard any print or solid for binding (you could also use leftover jelly roll strips)
Batting that is 62″x72″ or larger
2 Yards Snuggles in White


Unroll your jelly rolls and separate them into groups:
- 16 strips for the A Triangles. Cut each strip into an 11″ piece, a 13″ piece, and a 15″ piece.
- 36 strips for the B Triangles. Cut a 30″ piece from each strip and set the remainder aside for the D Triangles.
- 6 strips for the C Triangles. Cut each strip into 2 15-ish” pieces (you can cut these a little bigger if you want a little more room for error). Set aside the remainder for the D Triangles.
- Cut a strip that is 6.5″ by width of fabric (which I will refer to as WOF) and keep these folded in half.
- Cut a strip that is 10.5″ by WOF (keep these folded in half too).
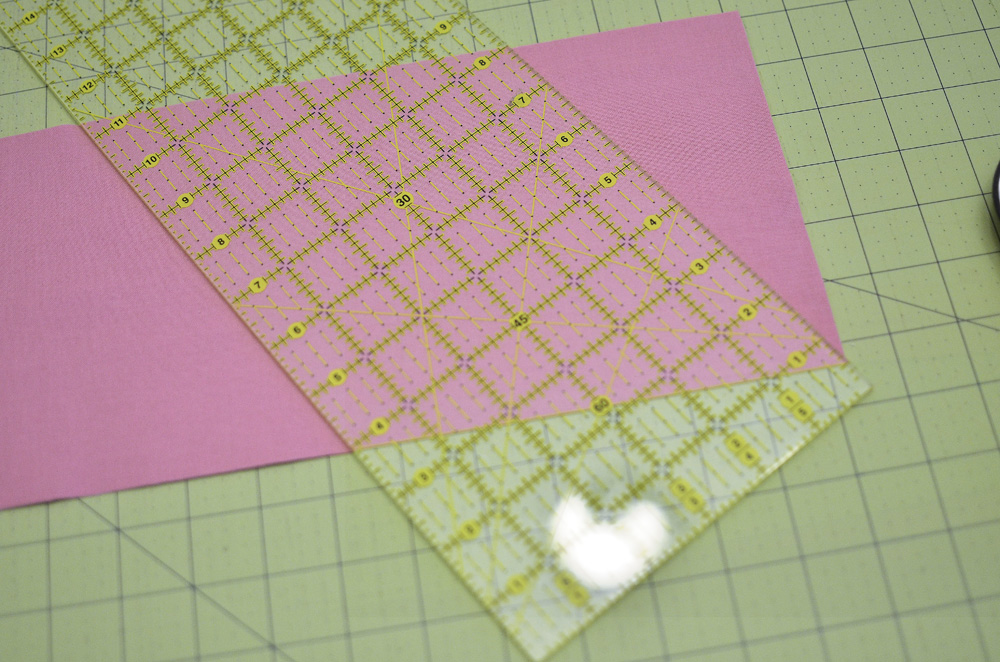
To make the triangles with your ruler, place your folded fabric on your cutting mat with the raw edge to the right (trim your selvage if you haven’t already). Align the 60 degree line on your ruler with the bottom of the fabric and the right side of the ruler with the bottom corner of the raw edge. Cut along the ruler.


Just like in step three, cut the fabric into equilateral triangles. You should be able to get 3 blocks out of each of these 12.5″x30″ pieces. Continue until you have at least 16 triangles.

To make the C Triangle, take your solid strips that are 10.5″xWOF. Cut into equilateral triangles just like in the previous two steps. You only need a total of 12 of these blocks, so cut three triangles from each color or whatever suits your needs.
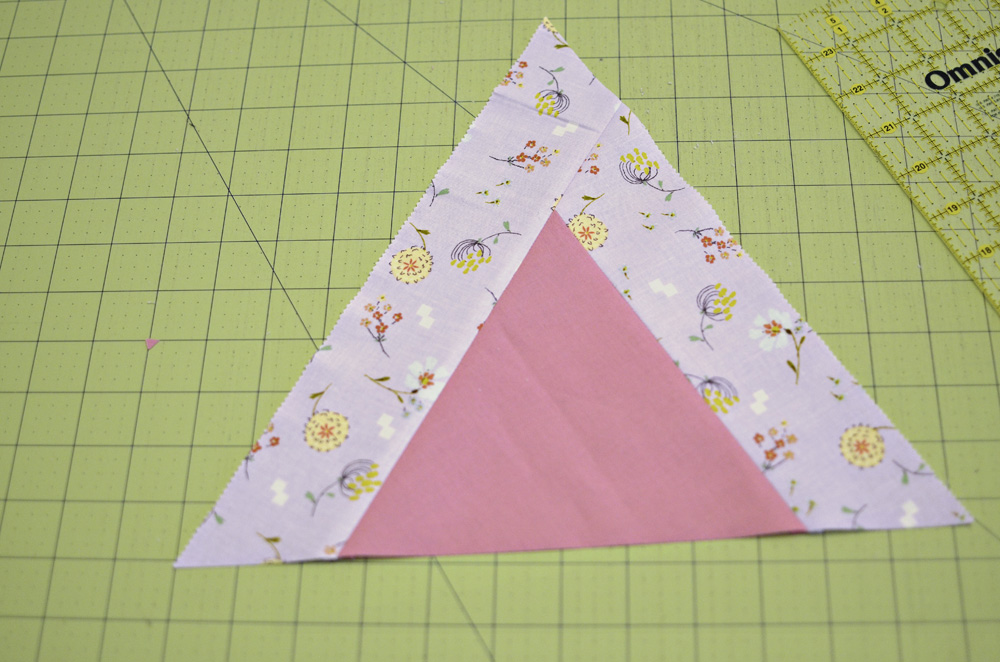
I managed to forget to take a photo of this step, but it is just like making the first part of the A Triangle. Take your 15″ inch jelly roll pieces and attach to one of the triangle sides. Press and trim the triangle and you’re done.
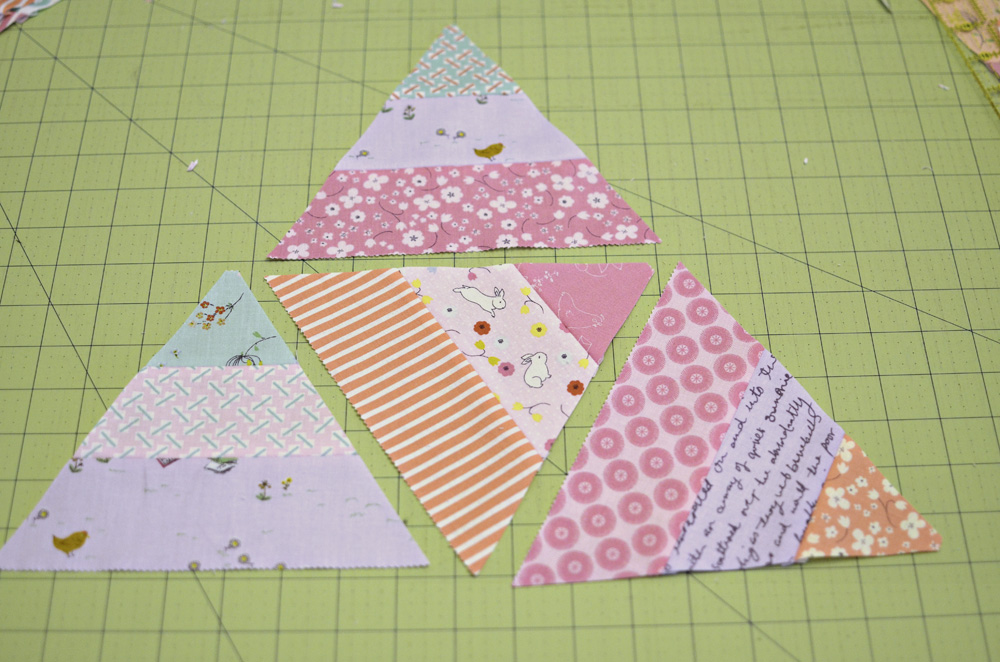
For the D Triangles, take your remaining streps for the B and C triangles. Separate into groups of 3 and sew together along the long sides.

Cut into equilateral triangles just like before.


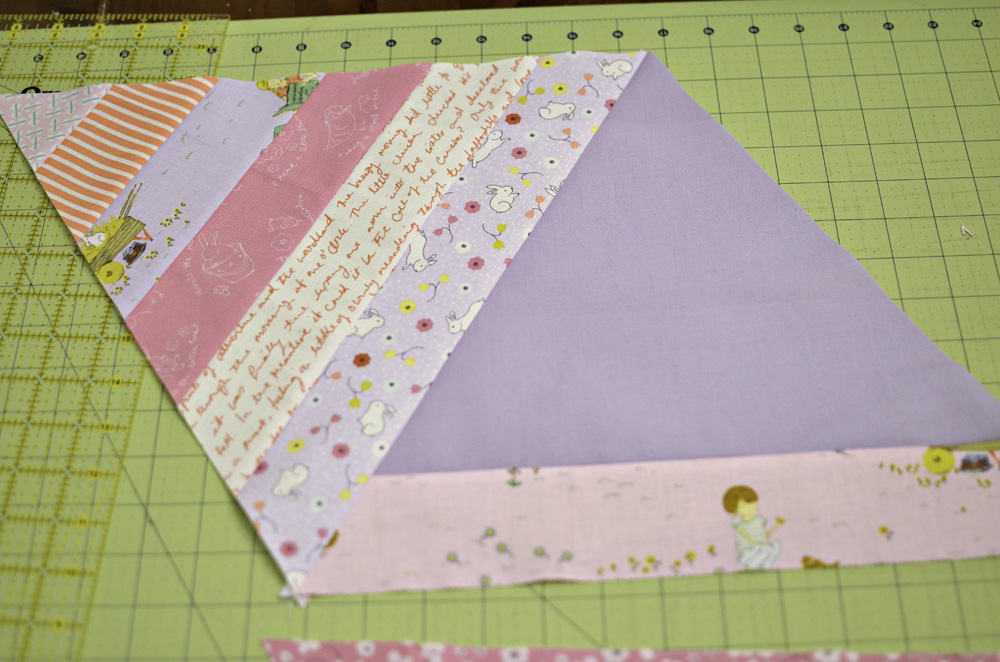
You should be able to get 2 triangles out of each of these. Take 4 triangles and arrange them into a larger triangle (it doesn’t matter which way they are turned, I tried to vary between blocks).
Sew together the bottom three triangles.


And then sew on the top triangle. Each the A, B, C, and D triangles should finish the same size. Make at least 8 of these triangles.

Arrange your triangles on your floor (if you are me) or on your design wall (if you are lucky). I alternated mine roughly A, B, C, A, B, D, A, B, C, etc. Sew together into diagonal columns. Please excuse my poor Photoshop skills, but I hope this illustrates my point.

And then piece the sets together to create a diagonal.


And then start to shift them so that they are offset a little bit. There is no right or wrong way to do this. The more they are offset, the more waste you are going to have at the edge of the quilt, but you want to move them enough that it is obvious you did it on purpose 🙂 I moved my columns up or down by 2-3″.

Sew your columns together (this will feel weird because nothing will line up, but let go and enjoy that that the points aren’t supposed to match!).

And then square up the quilt so that all of the sides are even.


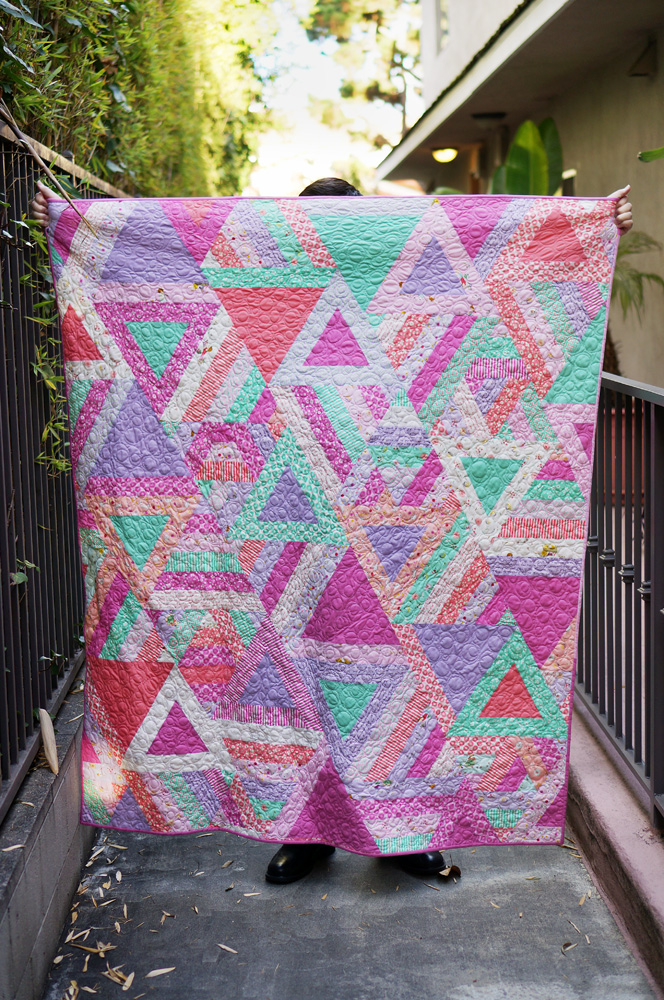
This yields a wonderfully cozy lap-size quilt. Mine finished 55″x65″, but yours may vary a little depending on how much you offset your columns.

Erica Jackman
{kitchentablequilting.blogspot.com}
![]()
