Meandering Path Quilt


Hello Everyone! My name is Ellie from Craft Sew Create. I am so excited to be sharing my first Moda Bake Shop project!  I have been crafting and sewing since I got my first sewing machine in middle school. But I am currently obsessed with quilts! I absolutely fell in love with Lauren + Jessi Jung’s BOTANY fabric and knew I wanted to make a simple, modern quilt out of it.
 
One Botany by Lauren + Jessi Jung Layer Cake
One Botany by Lauren + Jessi Jung Charm Pack
1/2 yard Botany fabric for binding
3 yards Botany fabric for backing
Batting

 
Step 1:
{Cutting}
Take the entire Layer Cake and cut each square in half.
 
You will have two 5″ x 10″ rectangles.
Cut 1/2″ off of each 5″ side of the rectangle. Your rectangles will now be 5″ x 9 1/2″. {You can cut the 1/2″ off before you cut the squares in half, it will save time…I just didn’t get that picture, lol!}

That’s it! Now the fun begins.

Step 2: 
{Layout}
I like to lay my quilt squares first so I can get the colors right where I want them. This is layout I liked the best, feel free to move yours around a bit. There are seven rows where the 5″ x 91/2″ rectangles are laid out vertically, and two groupings where the rectangles are laid out horizontally with an alternating Charm Square. Some of the vertical rows have Charm Squares at the top and bottom so that the rows can be variegated.

Here is an illustration so you could see the layout. From left to right the quilt has two vertical rows, a horizontal grouping row, three vertical rows, a horizontal grouping row, and then two vertical rows.  

Step 3:
{Sew the Rows}
 Use a 1/4″ seam for the whole project. The first row has a Charm Square, 7 vertical rectangles and then a Charm Square. 
The second row has 8 vertical rectangles.
 
Next is the horizontal grouping row. Each row has one Charm Square and one 5″ x 91/2″ rectangle. Alternate between having the Charm Square on the left and on the right. There are 16 rows.
Don’t forget to press your seams along the way! I like to press mine open.
Step 4: 


{Sew the Rows Together}
                    

When you sew the rows together be sure to match the corners. 
On the outside rows and center row you can match the corners when you pin the row on like this.

Voila! Your quilt top is complete! 
 Now it’s time to Baste….
Quilt…
(I quilted the vertical rows with a vertical stripe and quilted the horizontal grouping rows in a stipple. I love the contrast and how it allows the different rows to stand out.)
…and Bind!


You’re done, yay! Let me know if you make it, I’d love to see pictures! If you have any questions or to show me some pics, email me at craftsewcreate@gmail.com.


One beautiful 60″ x 72″ Meandering Path Quilt!


Missy’s Fall Garden Quilt


Louisiana has suffered a long, hot, humid summer. Anything reminding us of cooler fall weather was needed, so here came the idea of creating a Fall Quilt Garden from the Moda designs of Sandy Gervais, called “Awesome”. This quilt uses every one of the 42 swatches from the Layer Cake and provides a variety of fall flowers scattered in field of soft white.

Hi, my name is Jamie with L’ Fair Quilts, and I hail from the most southern part of Louisiana — further south than New Orleans! I am a baby boomer closing in on retirement age (although no plans to leave a 36 year career in finance — yet) and very excited to expand my quilting hobby. I have been watching the internet quilt world from afar and decided it was time to jump in head first. I started a blog this past January, and created a “hobby” pattern/quilt line under the name L’Fair Quilts (a play on my last name).
I hope you enjoy my first Moda Bake Shop submission and look forward to coming back again every so often to share my love of quilting.

  • 1 Layer Cake, “Awesome” by Sandy Gervais (contains 42 – 10″ x 10″ swatches)
  • 2 1/4 yards solid background, Moda Bella Snow (#9900-11)
  • 1 1/4 yards orange solid by Sandy Gervais for inner border and binding
  • 1 3/4 yards large print by Sandy Gervais for outside border (#17541)
  • 4 1/2 yards backing


CUTTING AND PREP WORK:

From Layer Cake:

  • Cut each 10″ x 10″ fabric swatch into four 5″ x 5″ squares, yielding 42 sets of flower petals.


From Background Fabric:

  • Cut 9 – 2″ strips, subcut to 168 – 2″ squares
  • Draw a diagonal line on each of the 2″ squares
  • Cut 15 – 3 1/2″ strips, subcut to 168 – 3 1/2″ squares
  • Draw a diagonal line on each of the 3 1/2 squares, and another line 1/2″ apart (for snacks later in another project).

From Orange Solid:

  • Cut 14 – 2 1/2″ strips for inner border and binding, pieced diagonally to make inner border and binding:
  • Subcut to 2 – 2 1/2″ x 63 1/2″ for sides
  • Subcut to 2 – 2 1/2″ x 58 1/2″ for top and bottom
  • Use remaining for binding


From Large Print:

  • Cut 8 – 6 1/2″ strips, pieced diagonnally to make outside borders
  • Subcut to 2 – 6 1/2″ x 67 1/2″ for sides
  • Subcut to 2 – 6 1/2″ x 70 1/2″ for top and bottom


SEWING INSTRUCTIONS:
Sew a 2″ background square to the top right hand corner of each 5″ square.


Trim each corner as pictured below and press open the background square.


Sew a 3 1/2″ background square to the top left hand corner of each 5″ square, then run a second stitch along the other drawn line.


Cut between the lines, press open (and don’t forget to save those trimmed leftovers for snacks in future projects). If you have a chance to visit my blog later on, you may even find the quilt top I made with my leftovers!


Assemble each of the 42 flowers, sewing the top two petals, then the bottom two — helpful hint: don’t cut the thread between the top and bottom. When you sew the top and bottom together, the thread keeps the intersection in tact for a perfect matching of seams.


Open the center intersection (clip the little thread first) and press counter-clockwise.


Assembly:

  • For the top, layout is 6 flower blocks across and 7 rows down.
  • Add side inner borders, then add top and bottom inner borders.
  • Add side outside borders, then add top and bottom inner borders.
  • Layer top, batting, and backing …. quilt as desired!

A finished quilt measuring 70″ x 79″, with each finished flower measuring 9″.

Jamie in Louisiana
http://www.babyboomerquiltingbee.blogspot.com/

Twin Nine Patches


Kathe Dougherty pieced this doable nine-patch, drawn from an old quilt that made clever use of simple nine-patch blocks. She created sets of twin nine-patches (fraternal twins, not identical). The blocks come from a single layer cake!

1 layer cake, Arnold’s Attic
2/3 yd small calico in a dark color (#8160-24), edge triangles
2 yd Ohio Autumn (#8167-14), border
5/8 yd small calico (#8160-15), binding


{Cutting}

Blocks finish to 6″.

For each nine-patch, cut 9 squares 2 1/2″ x 2 1/2″. You can get 16 squares from each layer cake. Arrange and piece squares on design wall as shown to match the twins.

You need 36 of Fraternal Twin A (lighter blocks in blues and greens).
You need 25 of Fraternal Twin B (darker blocks in oranges and browns).


{Edge Triangles}

Cut 5 squares of the dark print 9 3/4″ x 9 3/4″. Cut each square into 4 triangles, with 2 diagonal cuts. You’ll need 20 triangles.

Cut 2 squares of the light print 5 1/8″ x 5 1/8″. Cut each square into 2 triangles, with 1 diagonal cut. You’ll need 4 triangles for the corners.

{Border}

Cut 2 strips 9 1/2″ x 69 1/2″ for top and bottom borders.
Cut 2 strips 9 1/2″ x 51 1/2″ for side borders.


{Piecing}

Piece as photo indicates. Baste, quilt, and bind.

69″ x 69″ quilt

Snuggly Squares Baby Quilt


Hi, my name is Melissa Corry and this is my first Moda Bake Shop tutorial. To say I am excited would be a huge understatement! I am a huge fan of the MBS and have made lots of tutorials from this site. I am so honored to have one of my designs here. I tried to put some of me into this tutorial and hope you get to know me a bit through making this quilt. So get ready to have a few laughs (I hope), make an adorable quilt, and above all, enjoy some Happy Quilting! If you ever want to stop by my stomping grounds you can find me over atwww.happyquiltingmelissa.blogspot.com


Quilt Top

1 Lily and Will Layer Cake – That’s right, a whole quilt out of one layer cake. Pretty simple, huh?


Quilt Back

1 1/4 yards of a coordinating print


A quick side note before we start. I tried to make this tutorial very beginner friendly. If you are not a beginner feel fee to simply skim the instructions for what you need. If you are a beginner and you happen to have questions please don’t hesitate to ask. You can email me at happyquiltingmelissa (at) gmail (dot) com. I will try to answer all of your questions asap.

STEP 1 – CUTTING
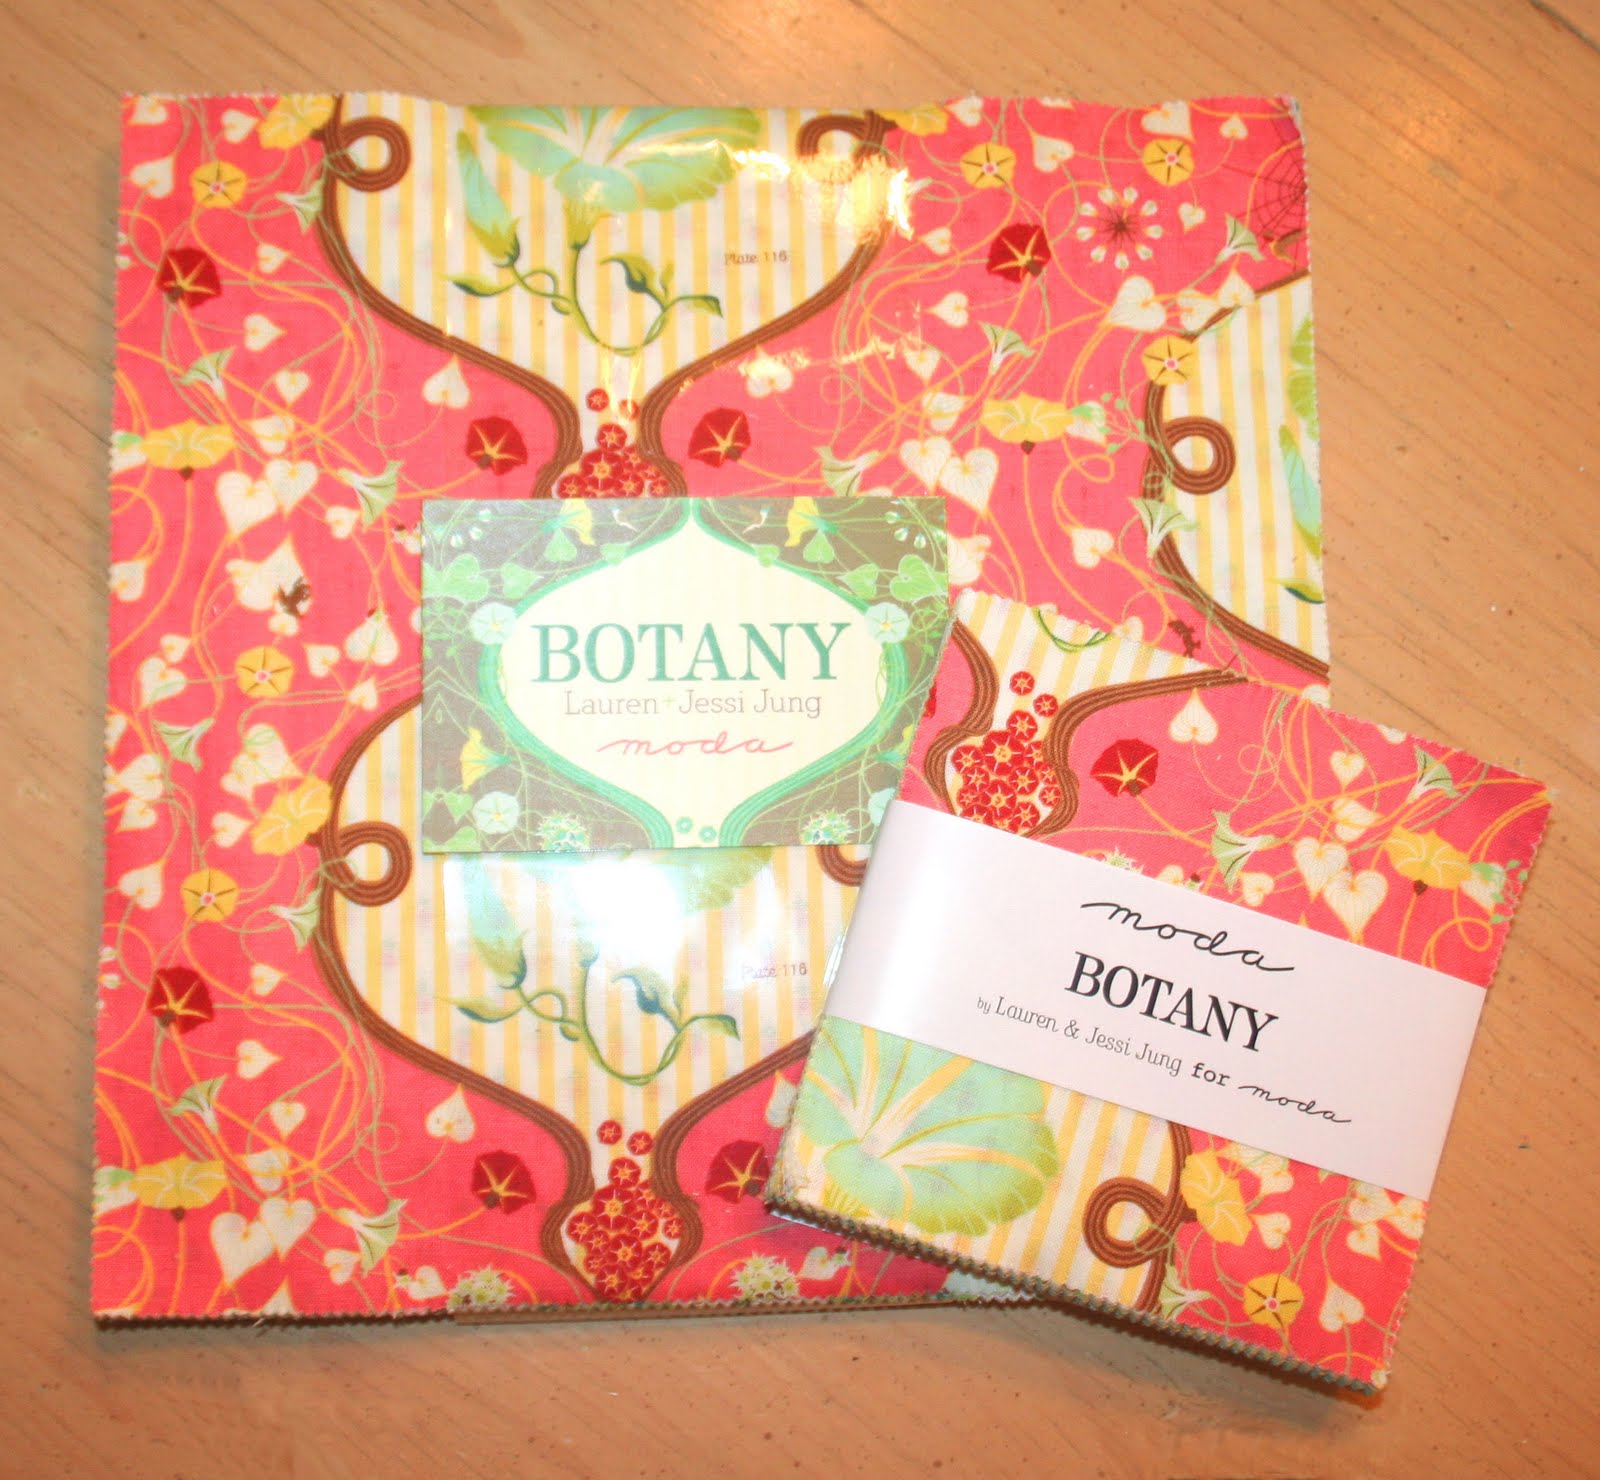
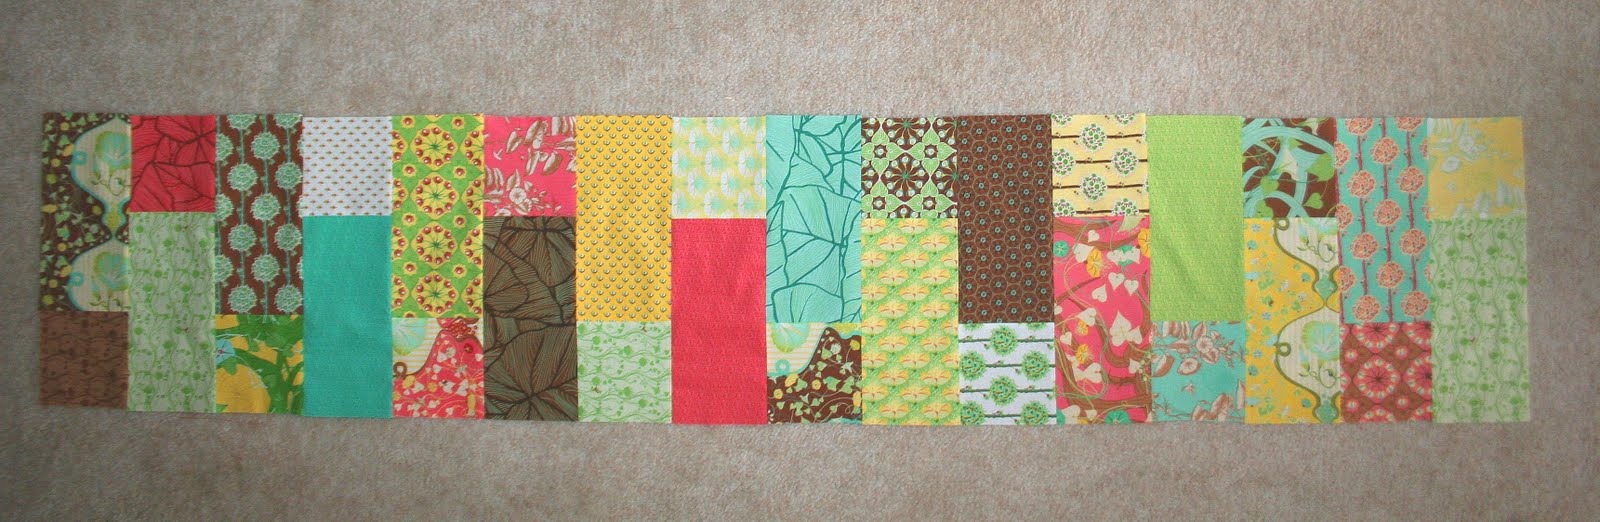
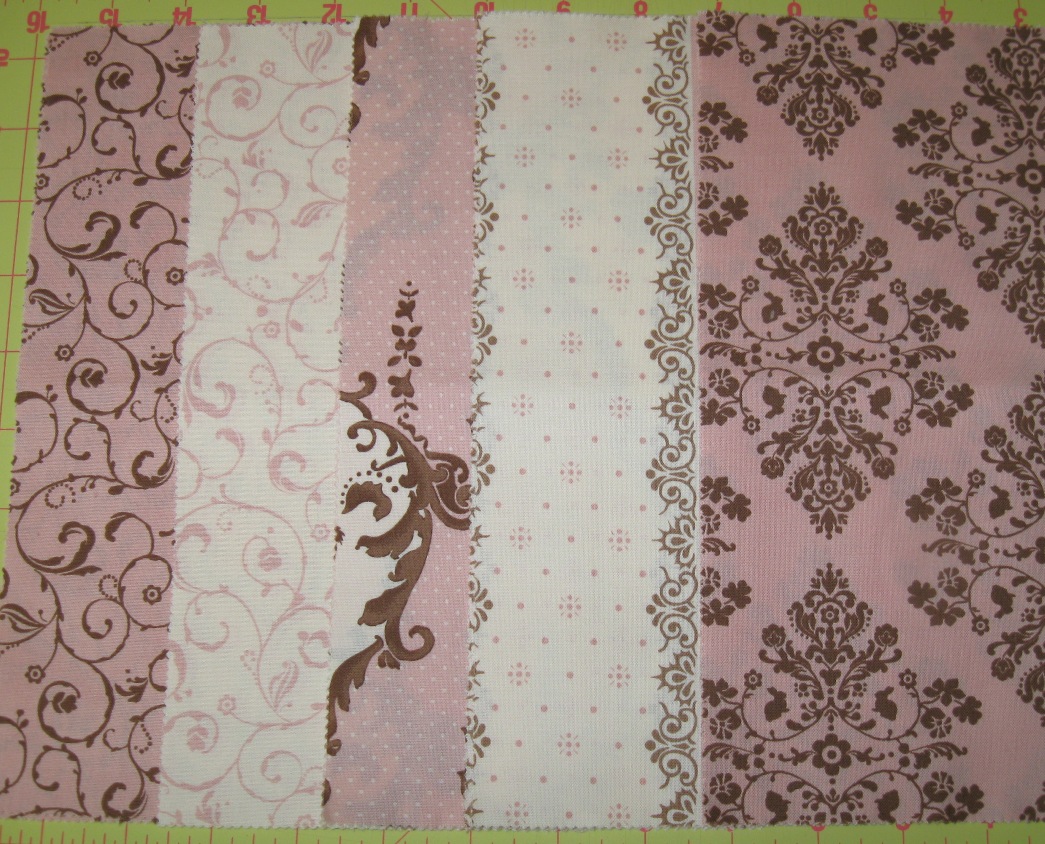
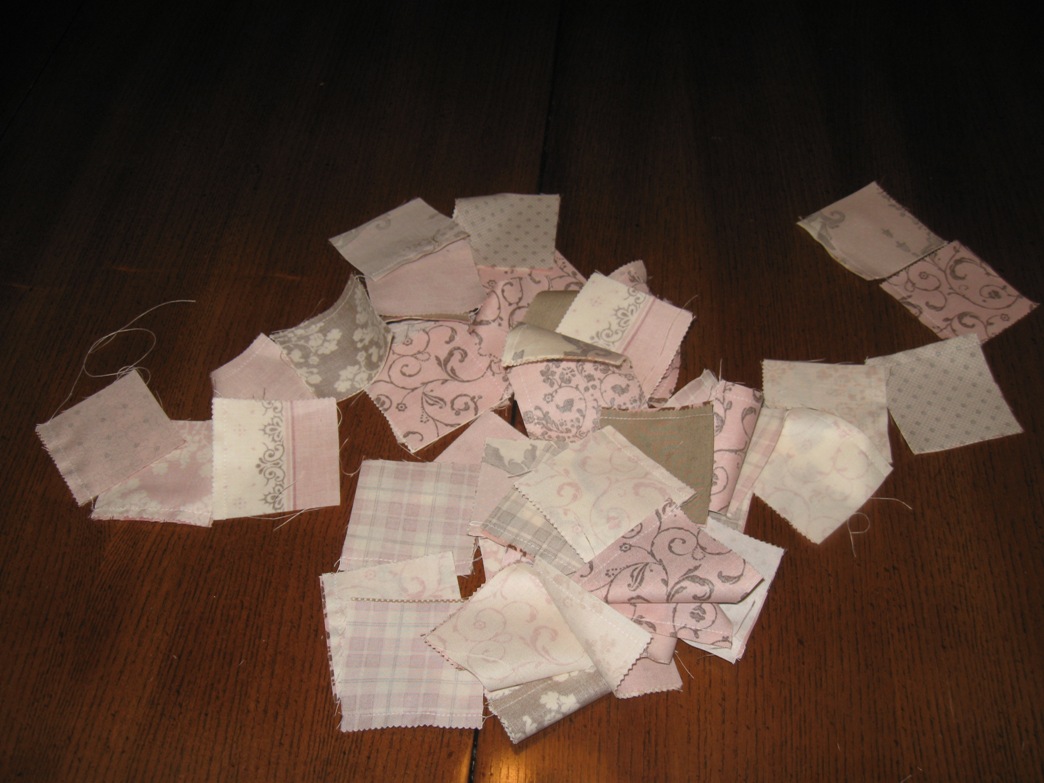
We are going to start by cutting out the sashing for each of the 25 blocks and a few of the small squares. Pull the following pictured 25 prints out of your layer cake. There are 2 of each print except for the pink print on the side. You will only need one of the pink small flower print for the center block.

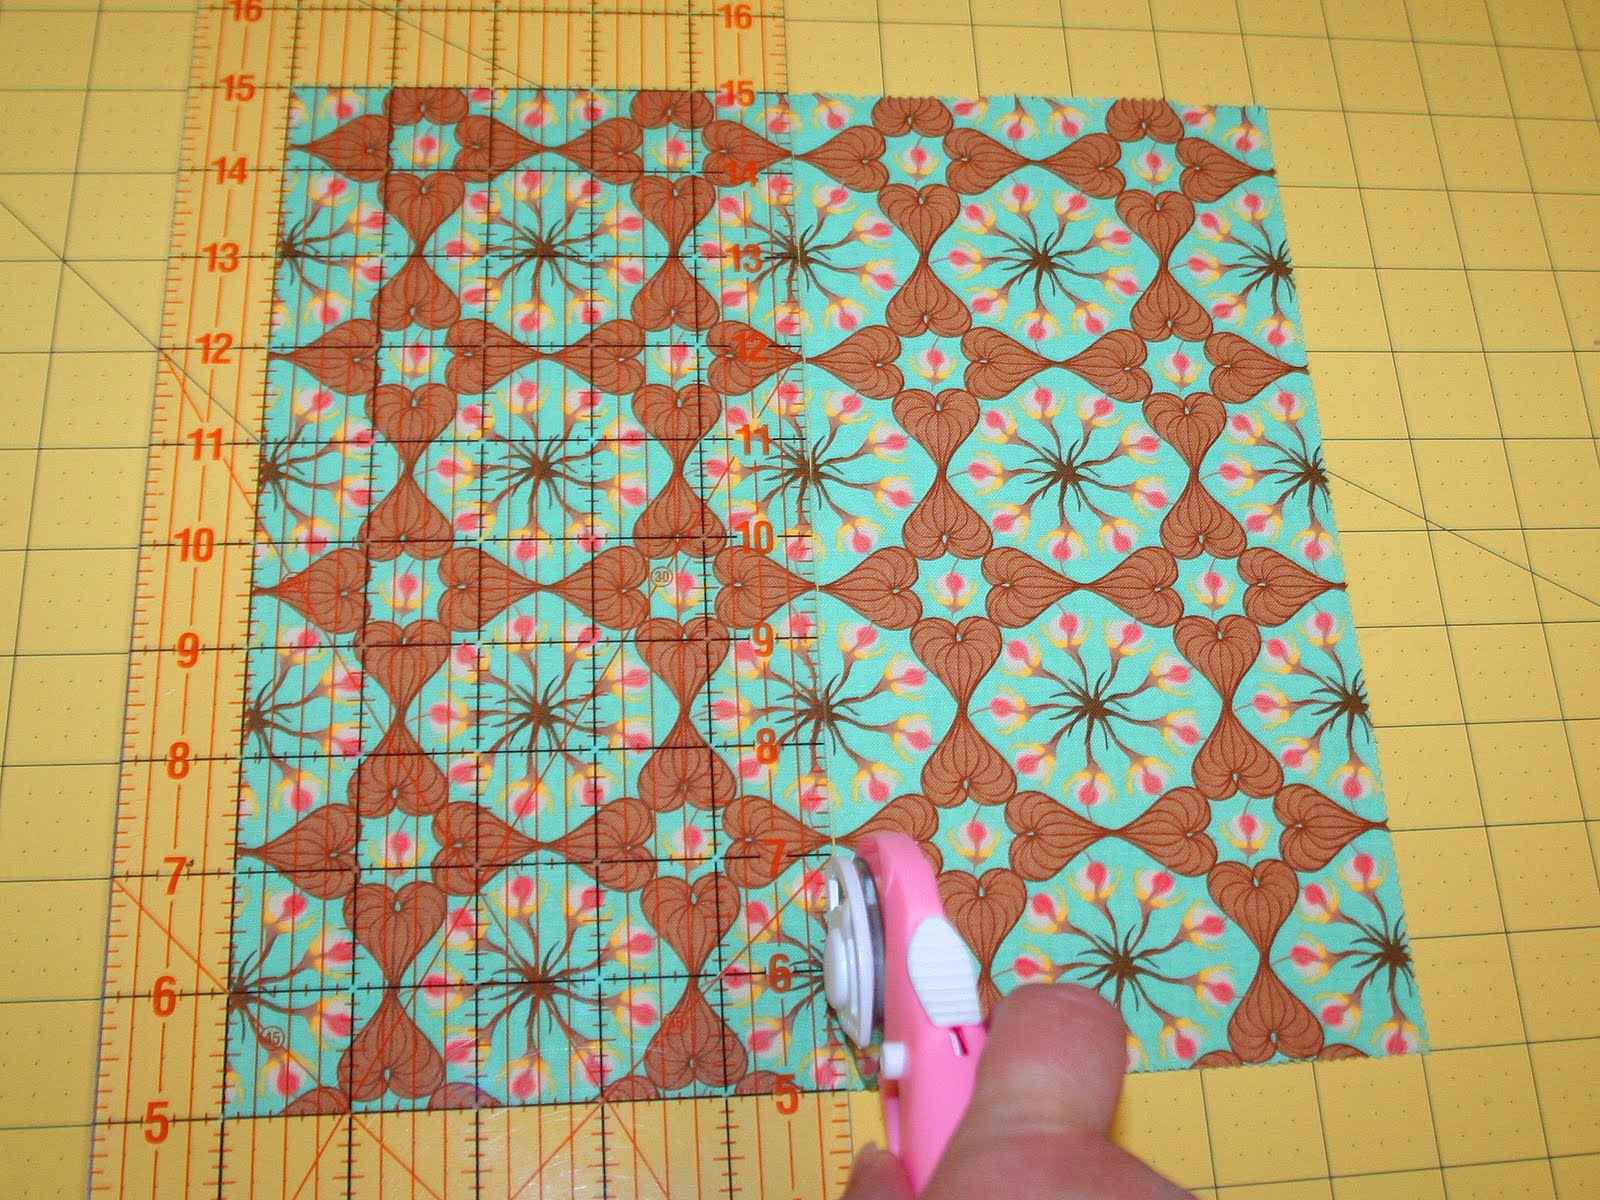
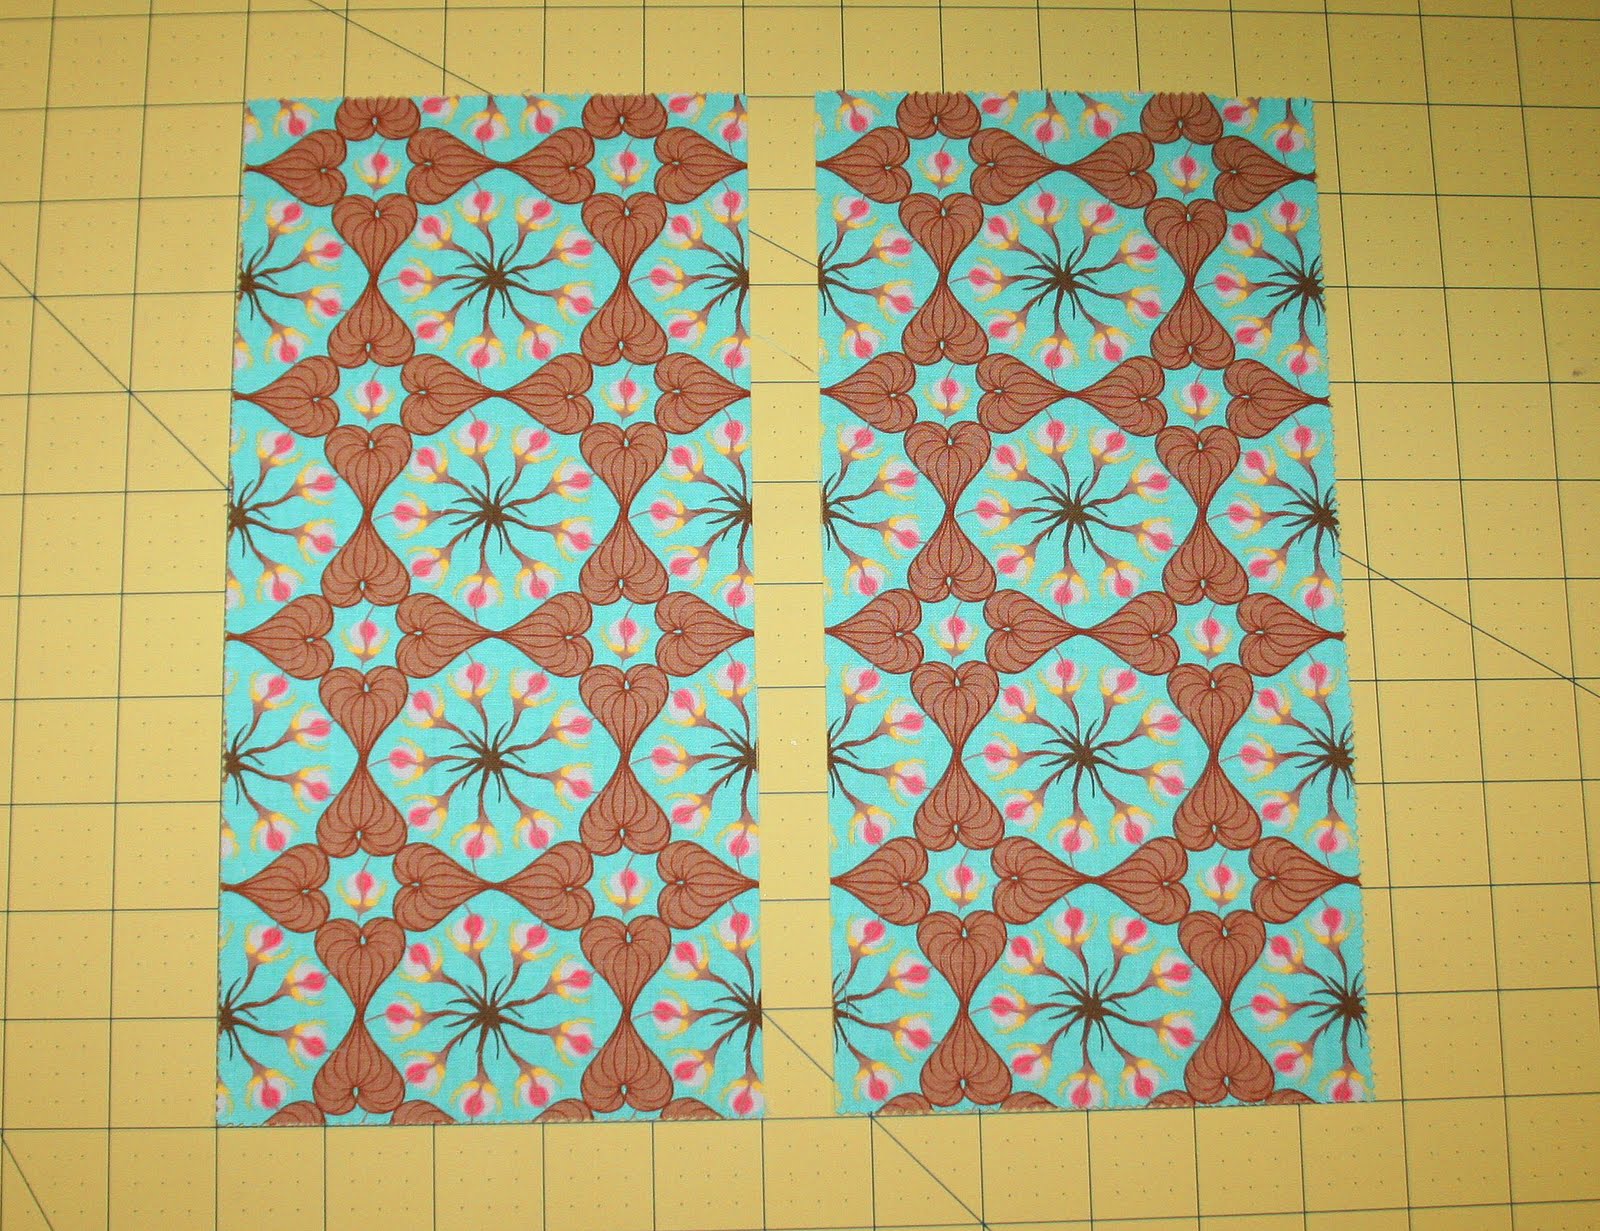
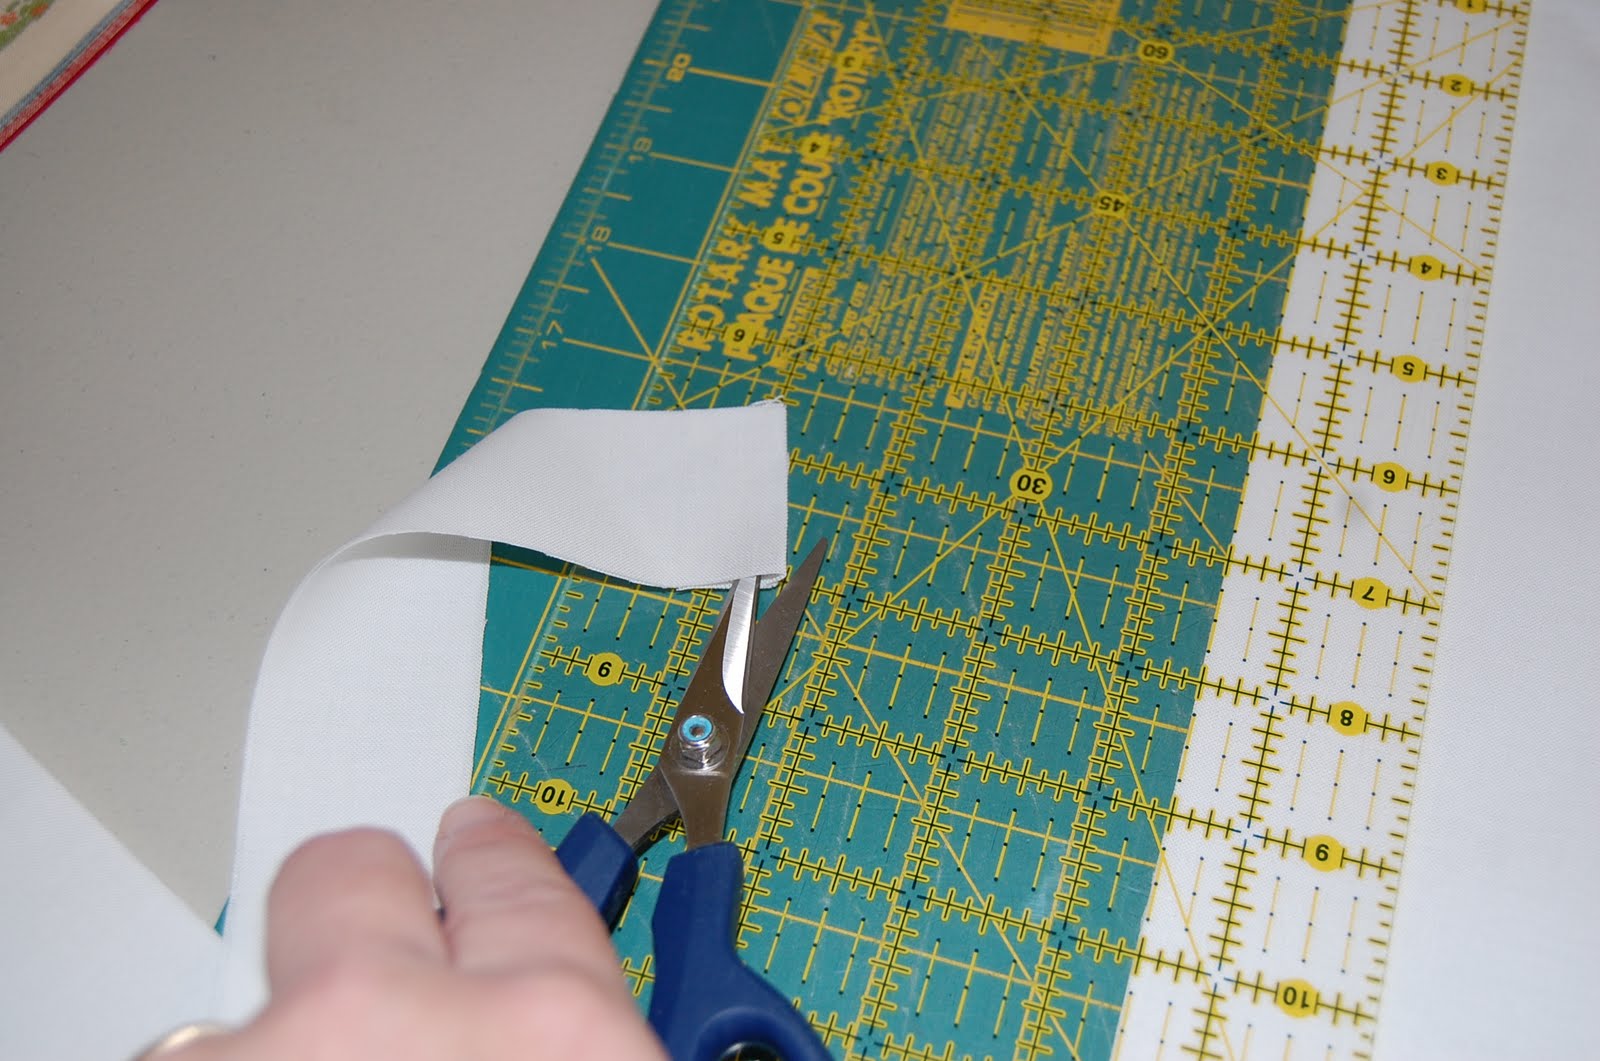
So do you have your 25 cake slices? (I am going to keep referring to them as that, just so you know) Great, use the diagram below to cut them. Now don’t go and cut all 25 stacked together. You will never end up with straight lines. In the same sense, cutting one at a time will take you all day. I would suggest cutting around 3-5 pieces at a time, depending on how confident you are with your cutting skills.


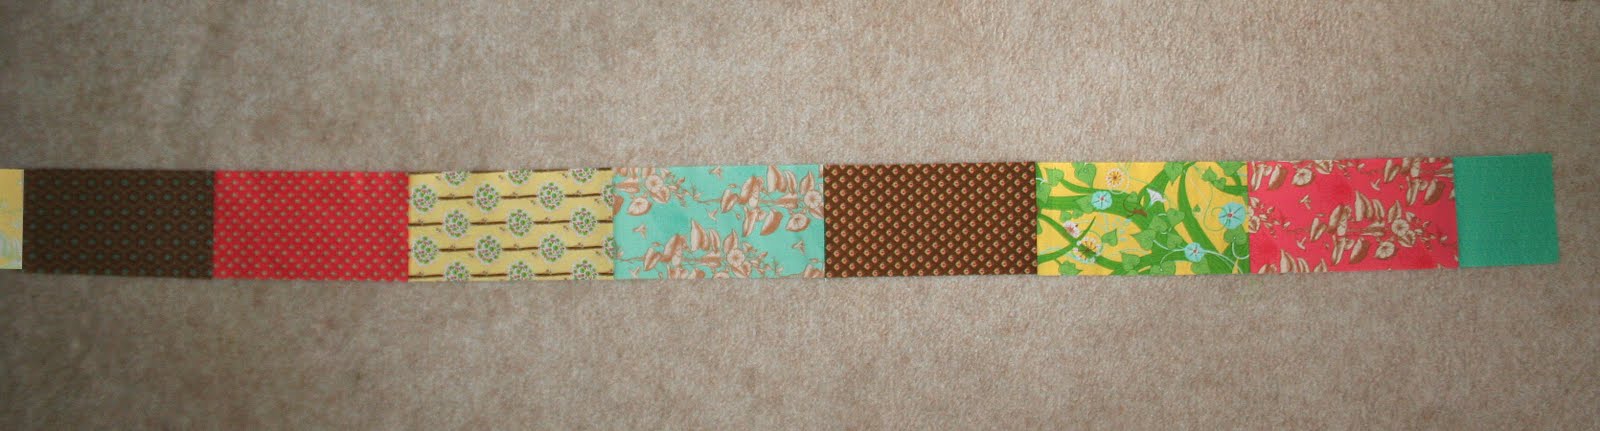
Now that the biggest cutting part is done, the rest will be “cake” (tee hee hee). Next we are going to cut the fabric needed for our binding strip. Go ahead and pull out the following pictured 6 slices of cake. That’s 2 prints, 3 of each.


Cut the 6 prints using the following guide. This will be simple compared to what you have already cut.


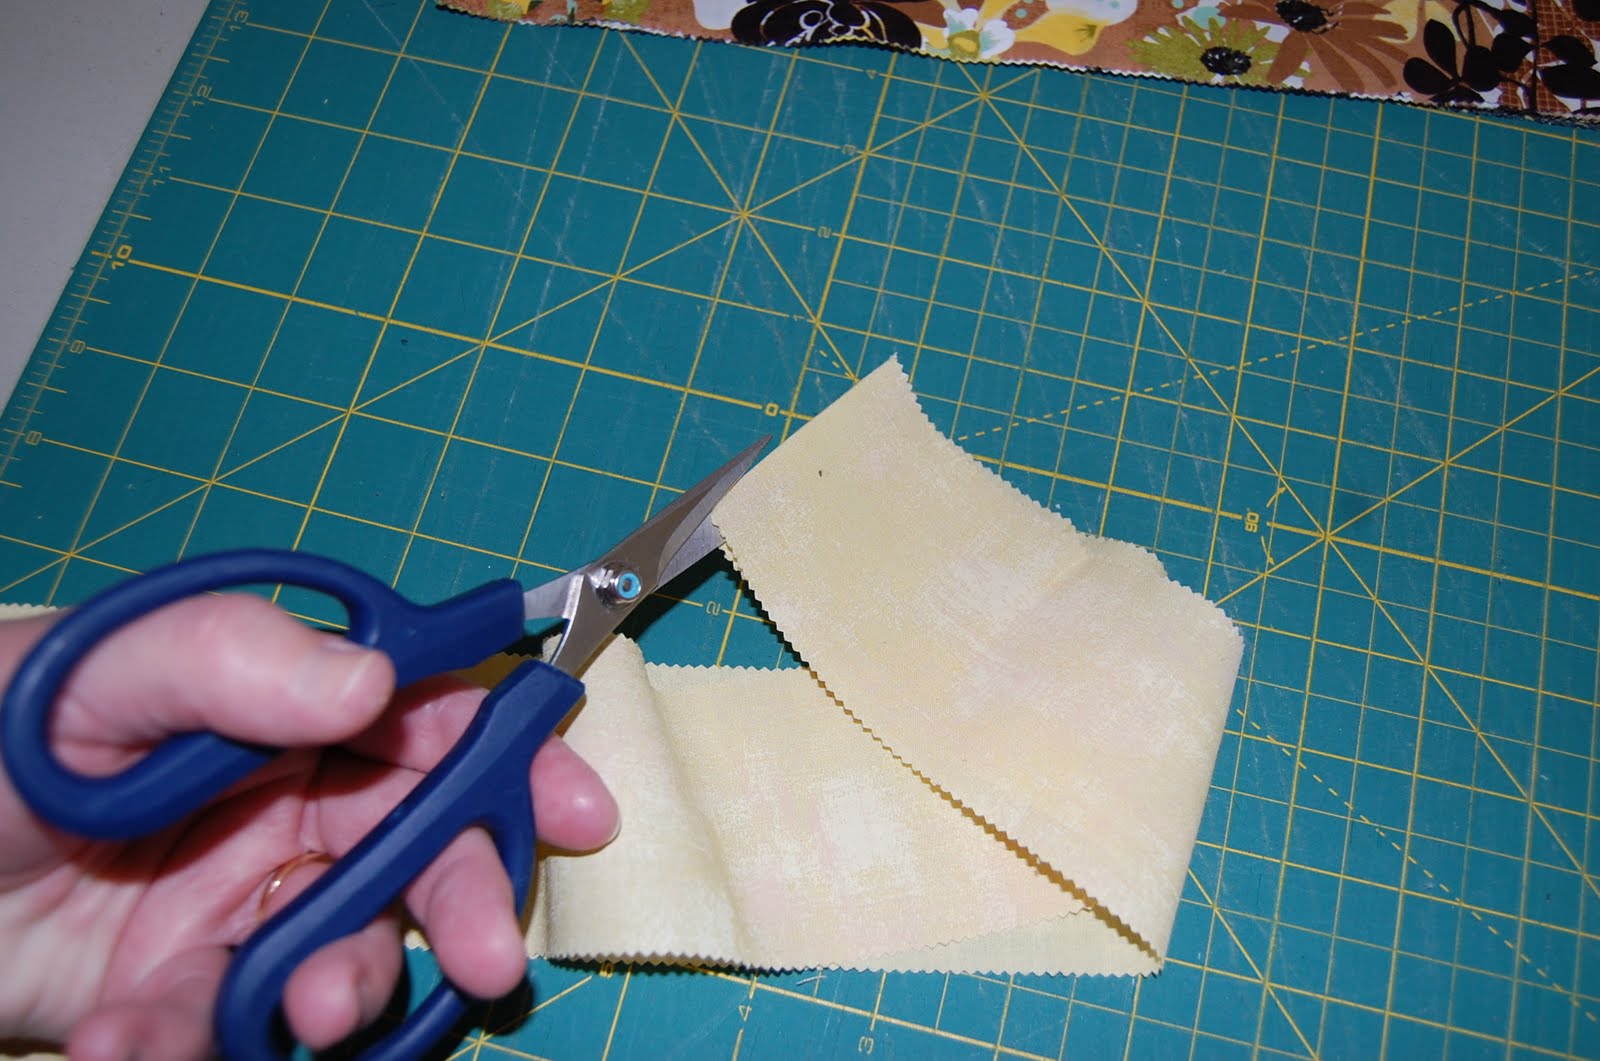
Now this next cutting might seem a little silly but I always feel the larger the scrap piece the better. So we are moving on to the small squares and so that we have the exact amount we need you are only cutting one piece of cake right now. So pull out one small pink flower print.


Go ahead and cut it according to the following diagram. (Or just look at the picture above, I forgot to take a picture of it before I cut it, oops 🙂 Isn’t it nice to have a big scrap piece?


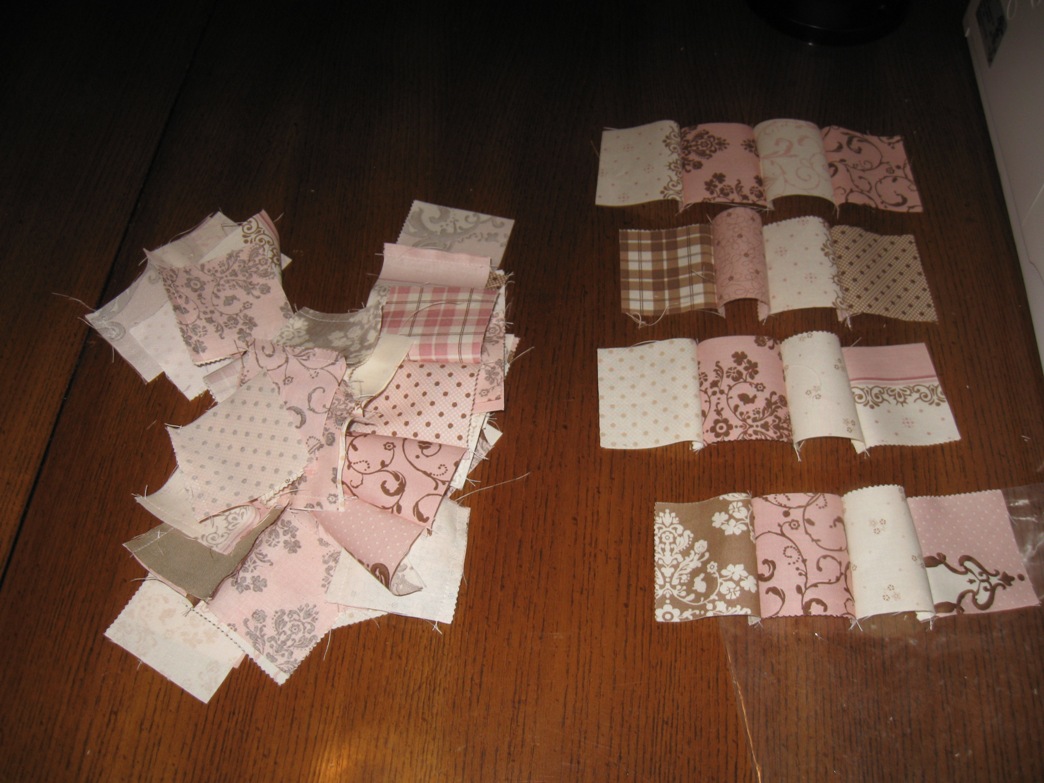
Now we are going to cut the remaining small squares needed for our quilt top. You should have the following 10 pieces of cake left, 2 of each print.


Cut the 10 pieces of cake using the following diagram. Once again, don’t cut them all at once. Taking a little extra time to cut always saves time down the road. And yes, now you have a few more lovely scraps.


So that’s it. All of the cutting is done. You should have the following stacks: binding pieces, long sashing pieces, short sashing fabrics, and small squares (or 2 stacks of small squares if you don’t want one super tall stack).


STEP 2 – PIECING THE BORDERS

So I can hear you asking already, why are we starting with the borders. I will tell you why. Because when you finish putting all of your blocks together you will be super excited. Your quilt will be practically finished and you are just going to want to see it all laid out and nice. This is not the time to be sewing a bunch of 2 1/2″ squares together. So we do it first so they will be waiting anxiously for you.
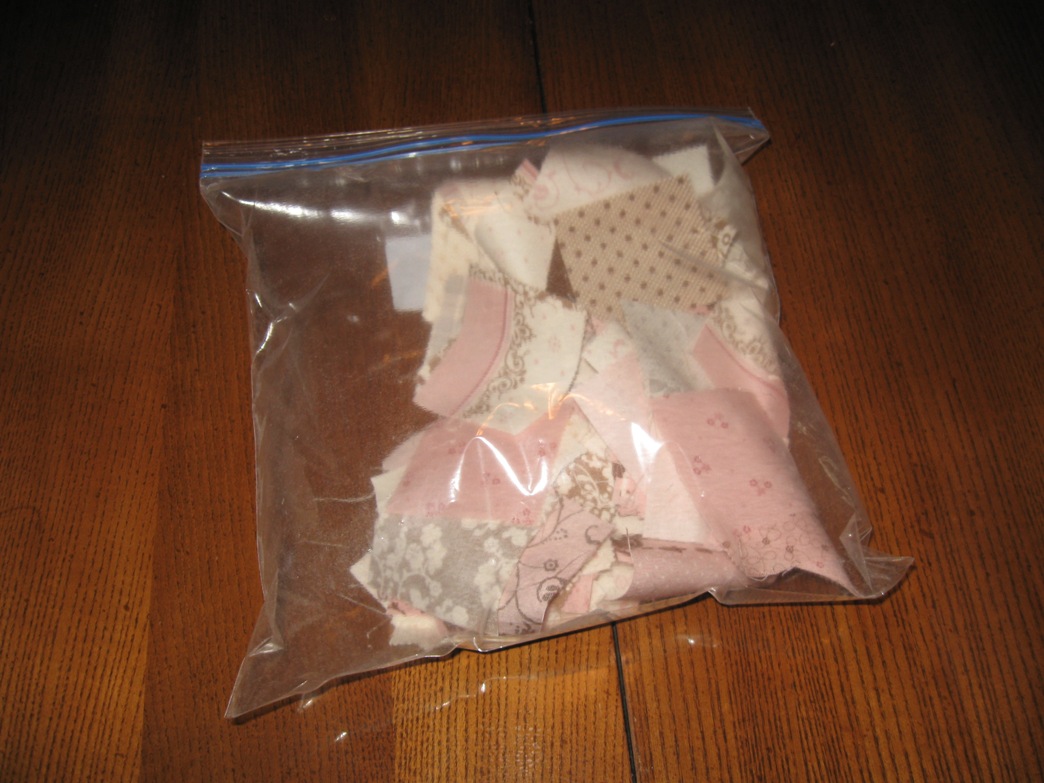
Take all of your 2 1/2″ squares (you should have 184 of them) and mix them up. You want to make sure you get a good random look on your borders. I like to do this by putting them in a zip lock bag, blowing some air in it, sealing it, and then shaking it up. Like the following picture. This is what works for me, if you can randomly pick from a pile, go right ahead. Whatever way works for you.


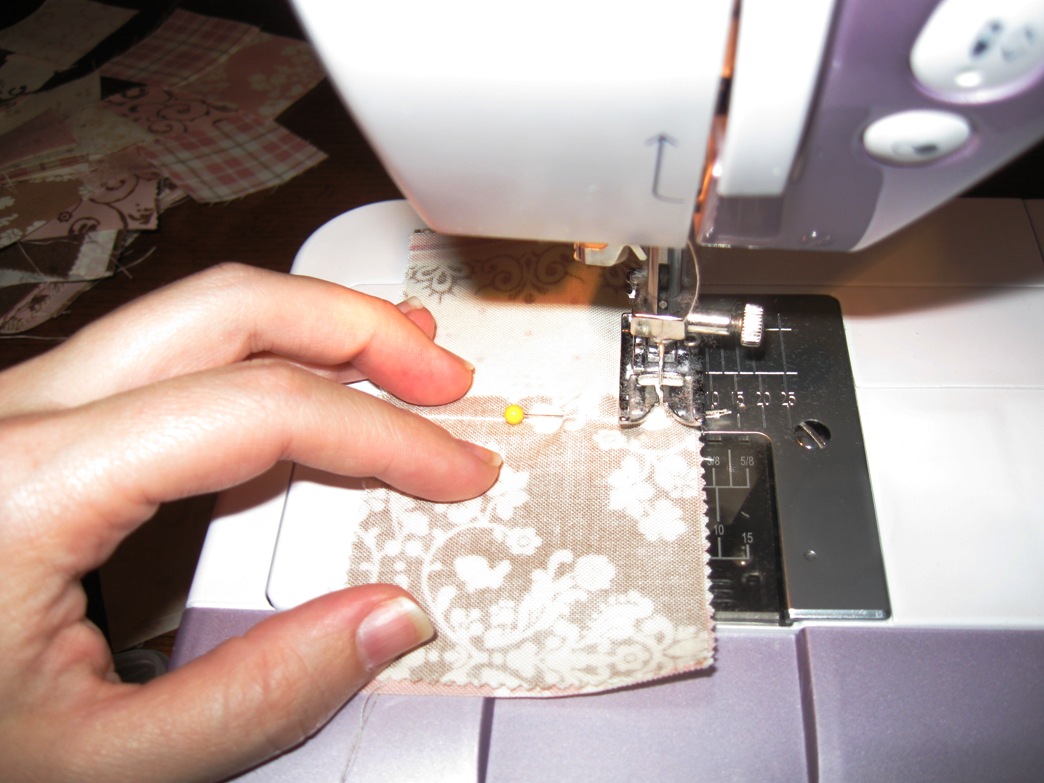
We will begin by chain piecing the 2 1/2″ squares for the border pieces together (note, you will have extra squares). To do this, pick 2 squares out of the bag, if they are the same, throw one back and pick again. This might be cheating the random factor but I just don’t like the same print next to itself. Place the 2 pieces right sides together, and sew a 1/4 seam down one side. It doesn’t matter which. Note, I don’t use pins on small squares but if you are just starting feel free to use pins. Don’t cut your thread, this is where the chain stitching begins. Just keep feeding the sets of squares through your machine until you have stitched 42 sets.


This is what it should look like: 42 squares all linked together in a fun little pile.


Now go ahead and cut the threads between each square. I always find it is easiest to lay them out in a long row and then cut. I just figure there is less chance of me accidentally cutting the material.


Take 2 sets of 2 squares and set them aside for future use.


Now take your remaining 40 sets of 2 and chain stitch them into sets of 4. Meaning take a set of 2 and place it right sides together onto another set of 2 and then sew 1/4″ seam so you create 4 blocks in a row. Continue this process with all 40 sets. Once again, I try to make sure that I am not putting similar prints next to each other. Just my personal preference 🙂


Go ahead and cut your threads again. Now you should have 20 sets of 4 squares. Set aside 4 sets of 4. We will use them in a few minutes. (Well I guess that depends on how fast you sew.)


Bet you can’t guess what is next. Chain stitch your remaining 16 sets of 4 into 8 sets of 8.


Cut and you now have 8 sets that are 8 squares long. I stopped taking pictures here as I figured you were getting the hang of it.

Take your 8 sets of 8 and chain stitch them into 4 sets of 16. Cut your threads and you now have 4 sets of 16 squares.

Now this is where those blocks that we set aside come in. Chain stitch a set of 4 squares to each row of 16 squares. Cut your threads. Now you have 4 rows of 20 squares.

Last but not least, you are going to retrieve your 2 sets of 2 you set aside. Sew them onto 2 rows of 20 squares. Now you have 2 rows of 20 blocks (your short borders) and 2 rows of 22 blocks. (your long borders.)


Easy enough right. Go ahead and press your borders now. I find it is easiest to just press them all in one direction. Go ahead and set your borders aside to wait patiently for your blocks to be done.

STEP 3 – PIECING THE FOUR PATCH SQUARES

Go back to your bag of squares. Once again, you are going to be chain stitching into sets of 2. Just in case you need a reminder, right sides together, and try to avoid putting similar fabrics together. Go ahead and stitch the remaining 100 squares to make 50 sets of 2squares. Oh ya, you got this chain stitching thing down!


Here is your pile of 50 sets of 2. Go ahead and cut them so they are ready to press.


I am going to tell you how I like to press. I like to press my seams to one side. This way when I make the 4 patch square I can “nest” my seams nicely. If you prefer to press your seams open please do so. It will work just as well.


Now you should have a stack of 50 sets of 2’s nice and pressed. Don’t they look pretty!


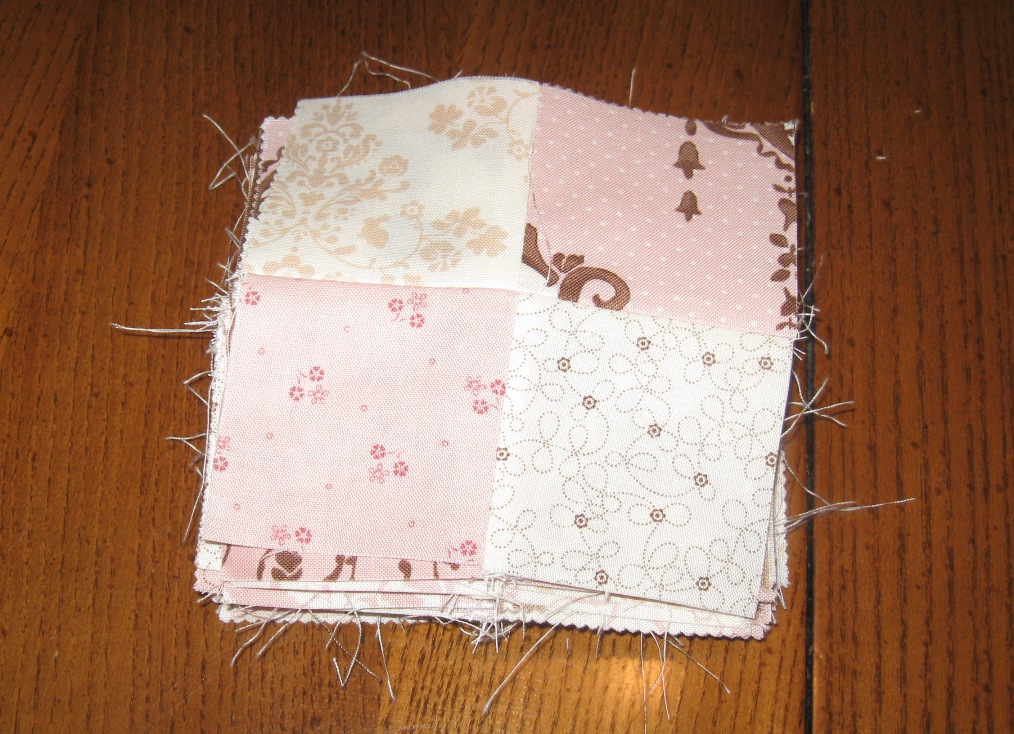
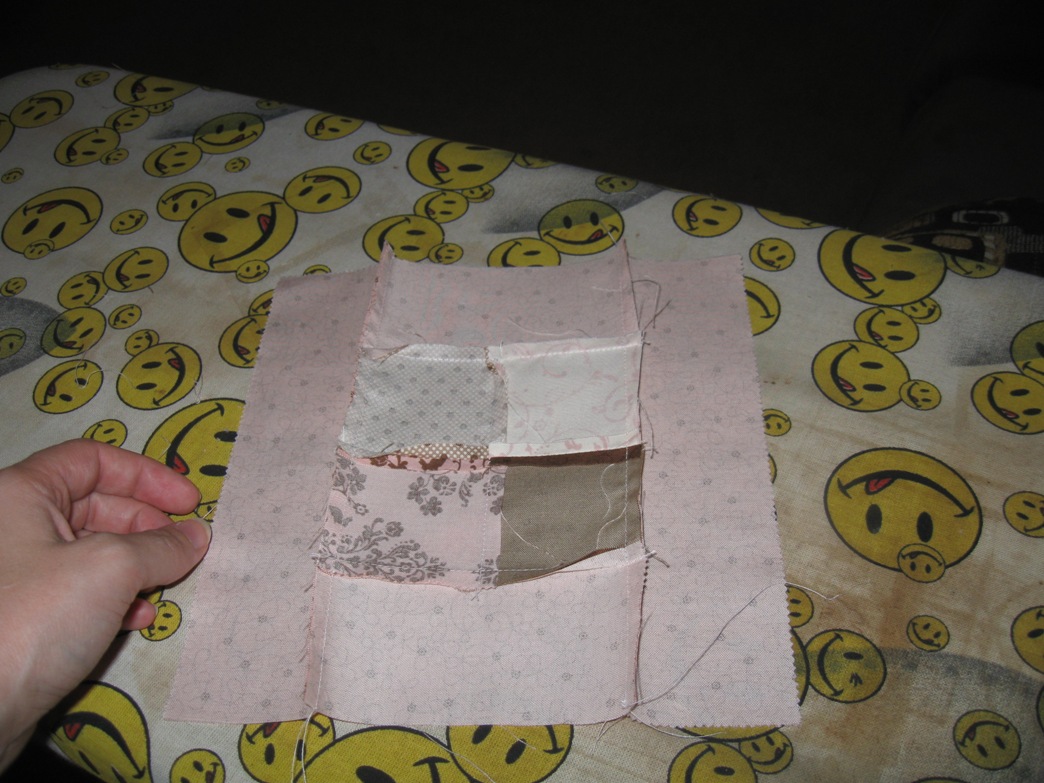
Next we are going to create your center blocks of 4. Now your first tendency is going to be to line up the edges, but fight that, remember that in this case, lining up the center seam is far more important than the ends. Now that that has been said, on to the blocks. Place 2 sets of 2 right sides together and “nest” your seams. Meaning, the two should rest right together, side by side, so that when you sew, you get a beautiful perfect point of 4 blocks in the center. Pin your blocks together at the seam. I like to pin all 25 sets of blocks first and then sew. This way my chain stitching goes faster. Chain stitch your 25 sets using your 1/4″ seam. Oh, and don’t sew over pins, it is a bad habit, and a hard one to break, believe me, I know!


Go ahead and cut your threads and then press your seams. I like to press these seams open so that I don’t get bulk issues in the center.


Continue this process with your 25 blocks. Now you have 25 adorable 4 square blocks. Way to go!!


STEP 4 – PIECING THE SASHING’S

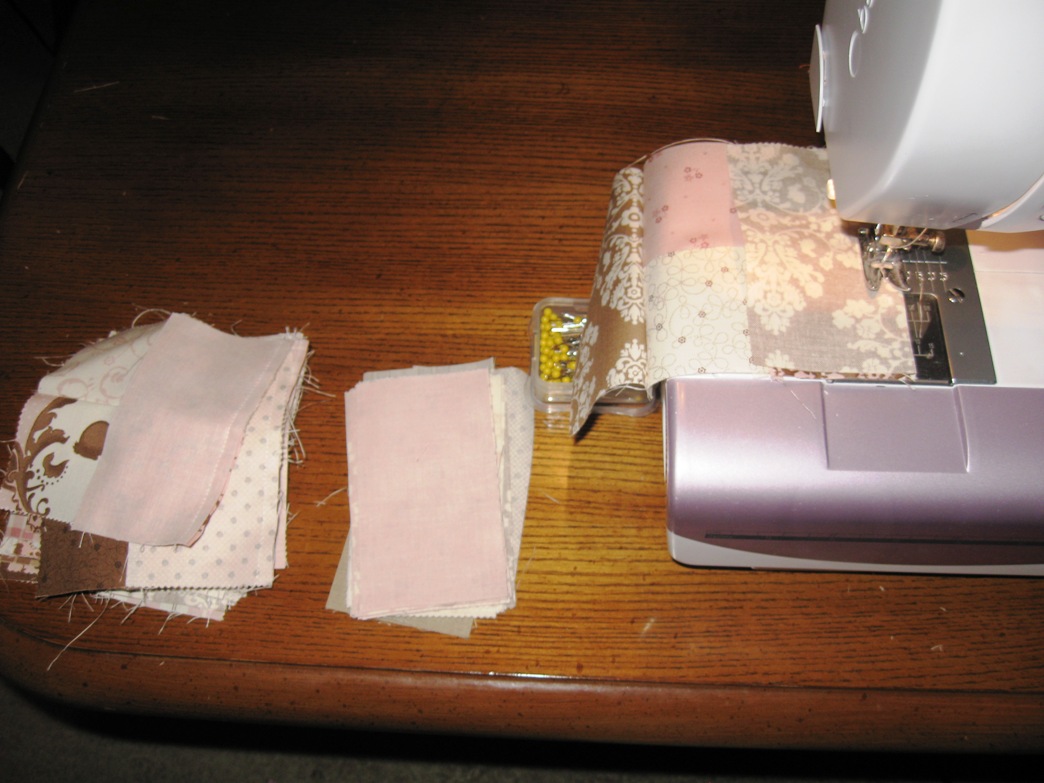
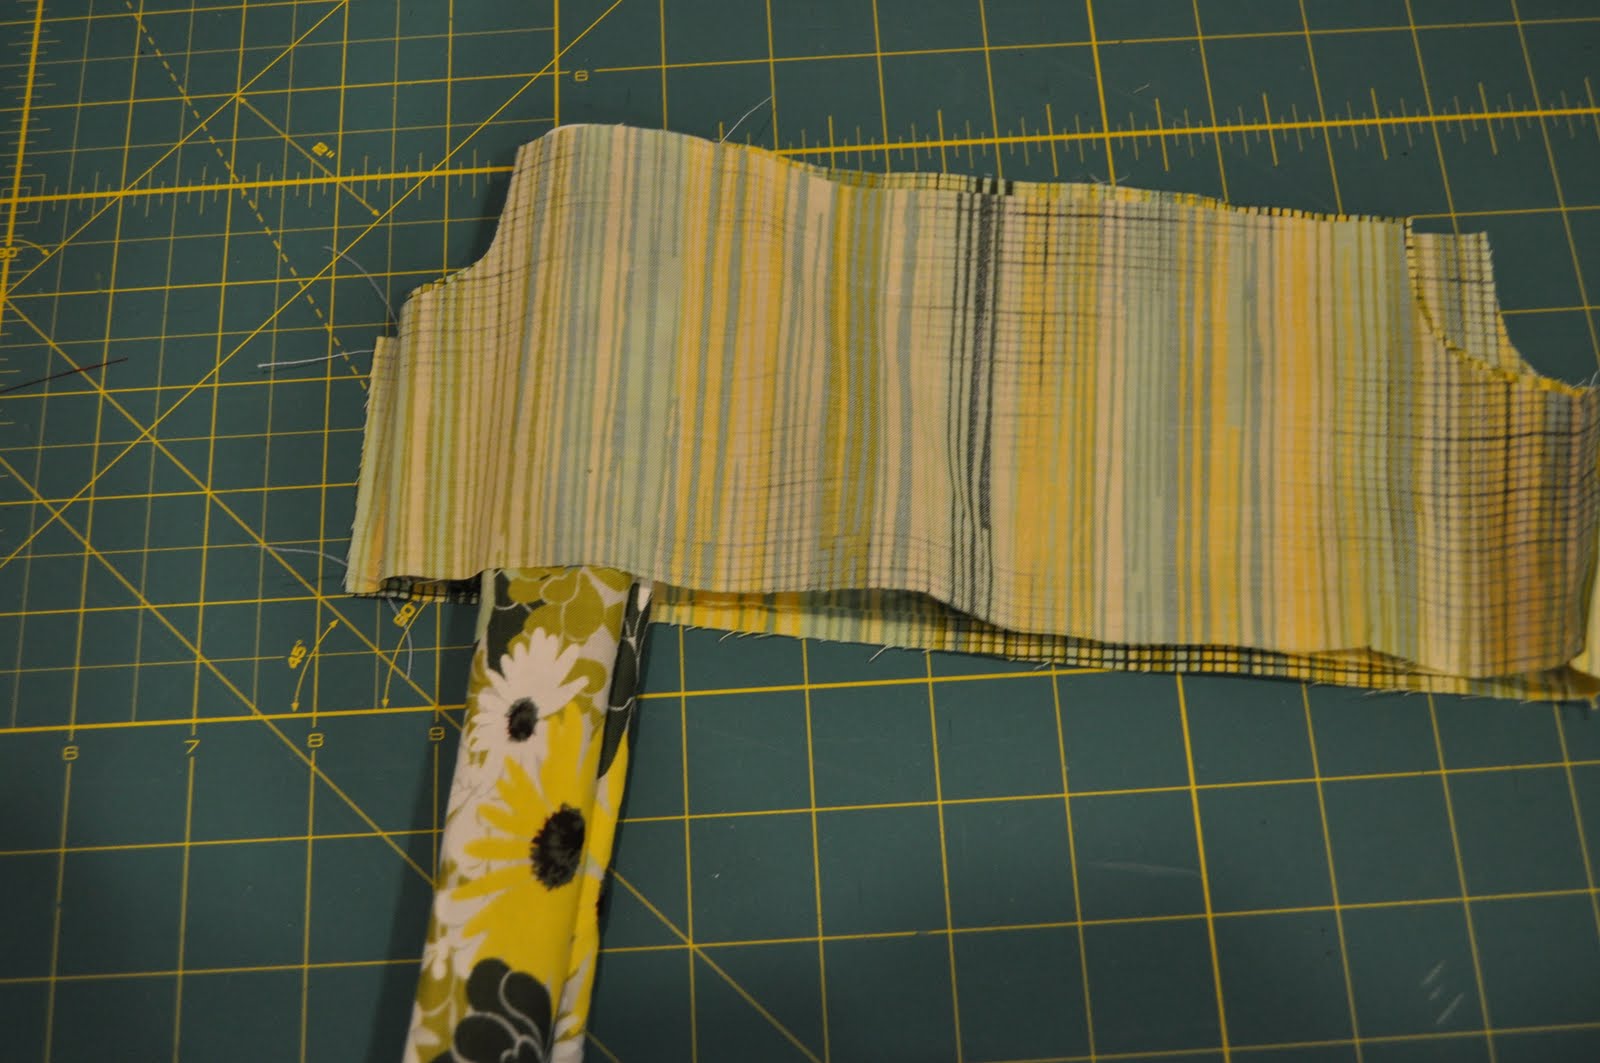
We will start the sashing by sewing on the short sides first. These are the short sides, the 4 1/2″ x 2 1/2″ rectangles.


Line up one sashing, right sides together, along the side of a 4 patch block and sew a 1/4″ seam. Set the matching sashing in a pile next to you. Continue chain stitching all of the first sashings for the 25 blocks.


You should have a pile of 4 1/2″ x 2 1/2″ rectangles and then a long line of 4 patch blocks with one sashing on, attached to the side. Go ahead and cut the threads of your chain stitching.


Now we are going to repeat the process on the opposite side of your four patch block. Take care to make sure you are matching up the same sashing prints. Otherwise you are going to get a much more random look 🙂 Chain stitch your 25 blocks and then cut your threads.


Once again, I like to press my seams out here. If you have a different preference, go right ahead and press them as you prefer.


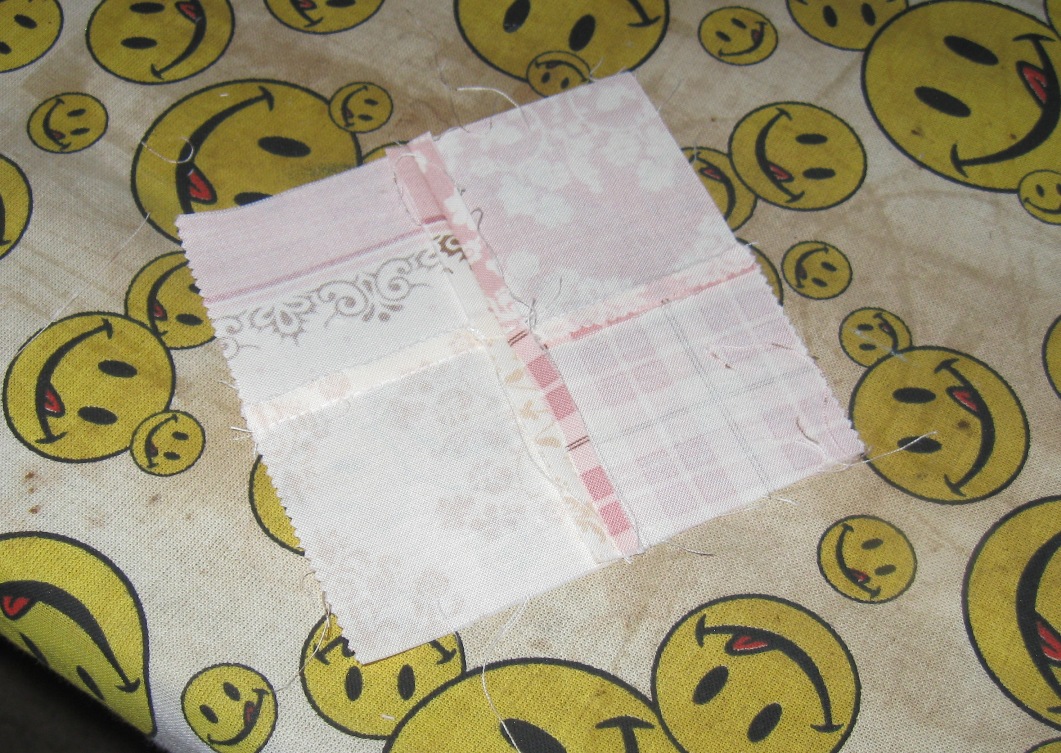
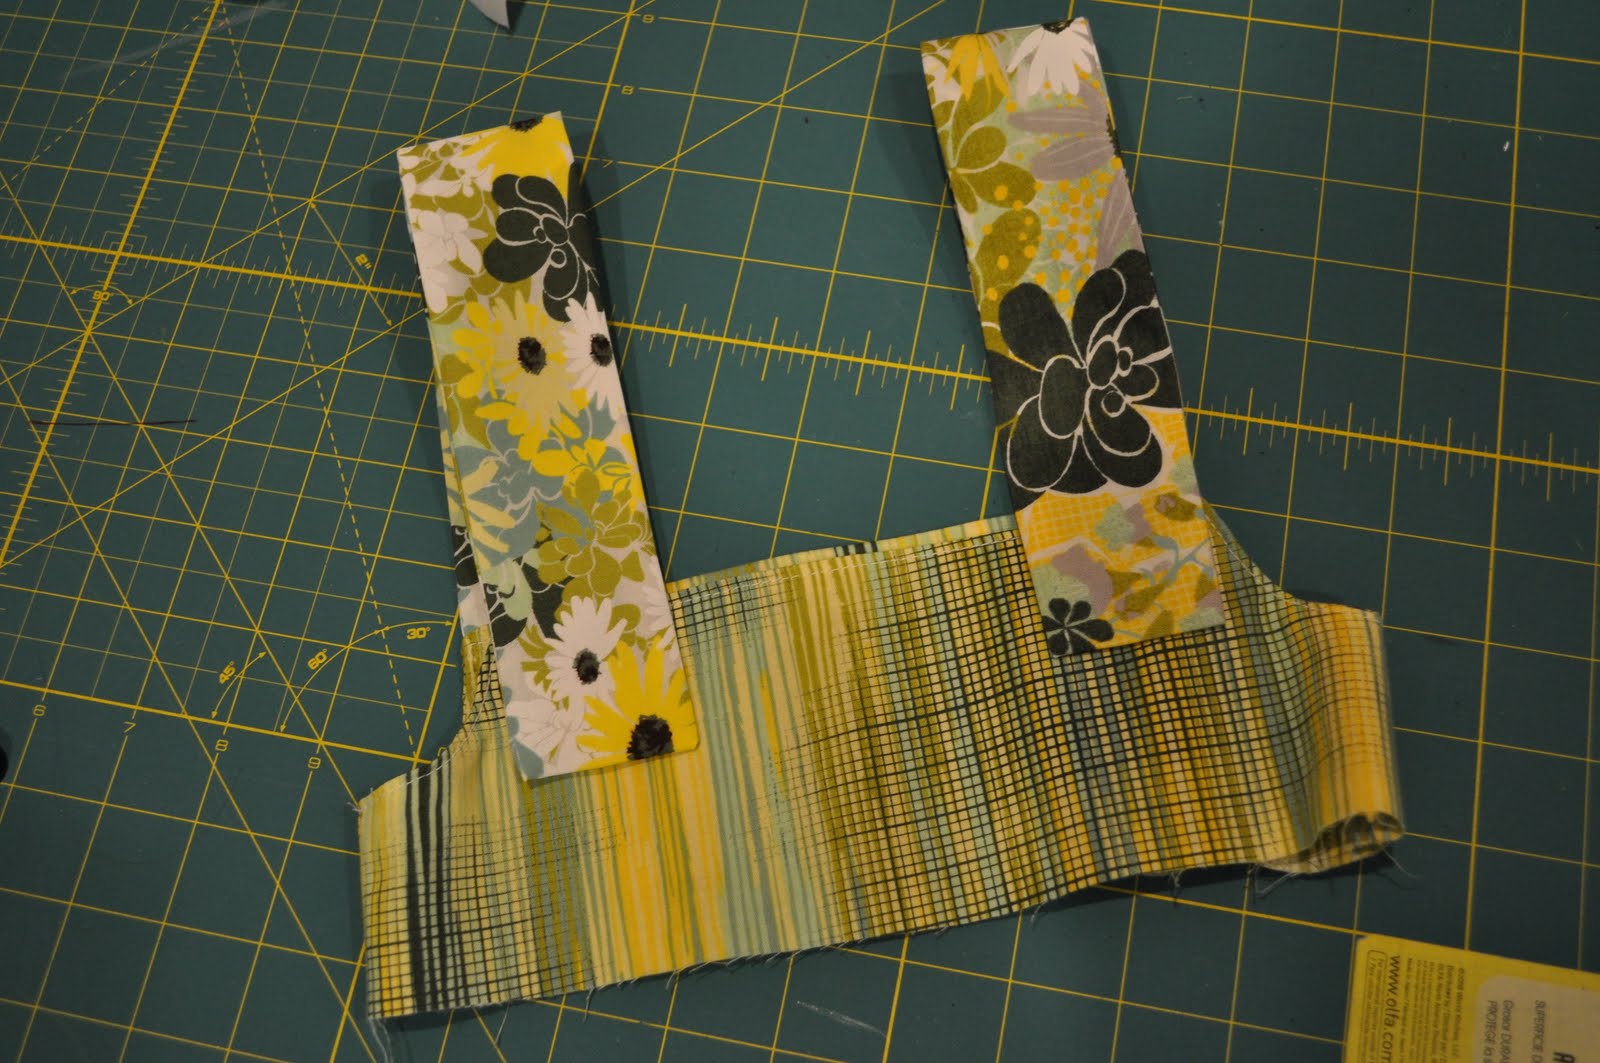
Now we will add the longer sashing aka the 8 1/2″ x 2 1/2″ rectangles. And once again, make sure to match your print 🙂 …Unless you like random, who am I to squash creative genius? Repeat the same process as the short side sashings, adding one side first to all 25 blocks and then the second side to the 25 blocks.


Okay, this is where I have I wish I could alter a picture. I pressed these seams out but I wish I would have pressed them open. So Press them OPEN. It will avoid bulkiness.


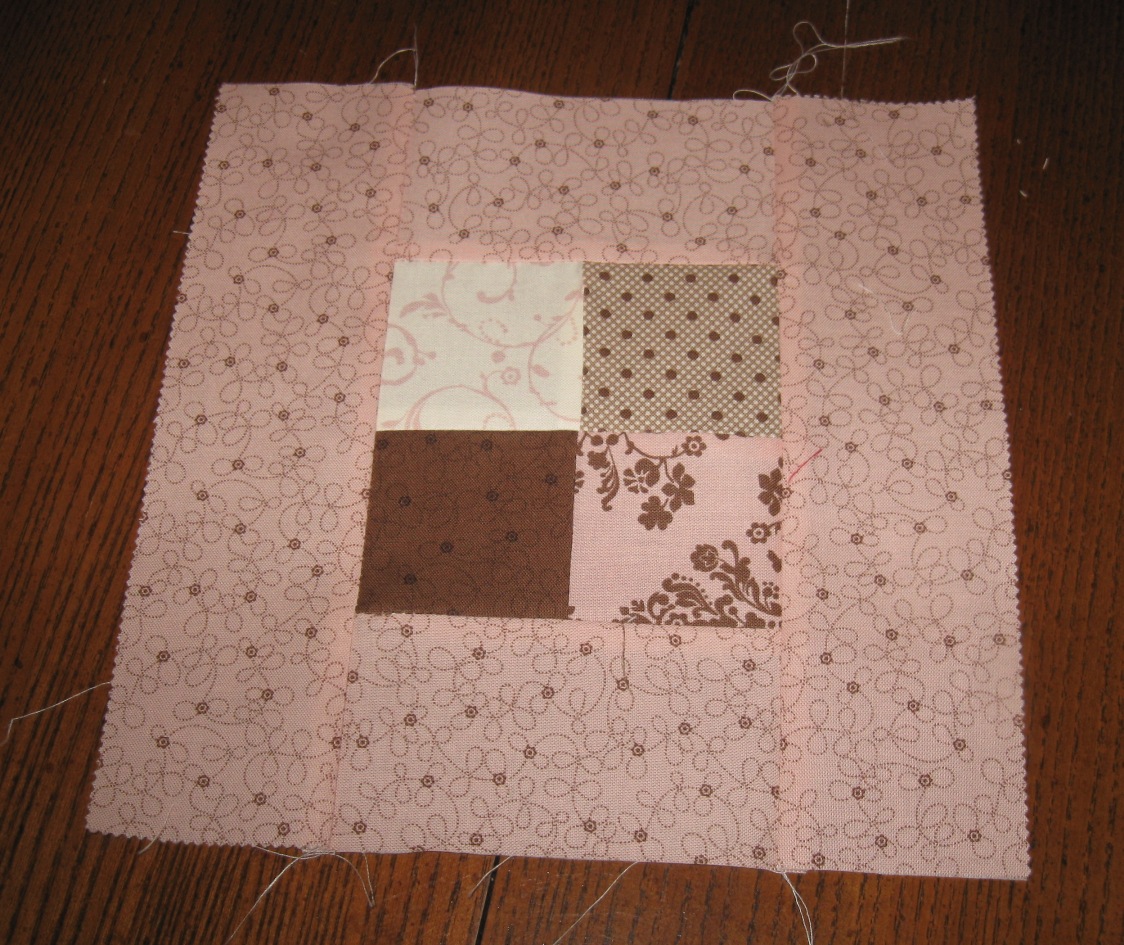
So now you should have 25 amazing blocks, with amazing center points, and amazing beautiful prints! By the way, you are pretty amazing too, and the rest of this you will fly through! Your getting close! … and I use exclamation points too much 🙂


STEP 5 – PIECING THE BLOCKS TOGETHER

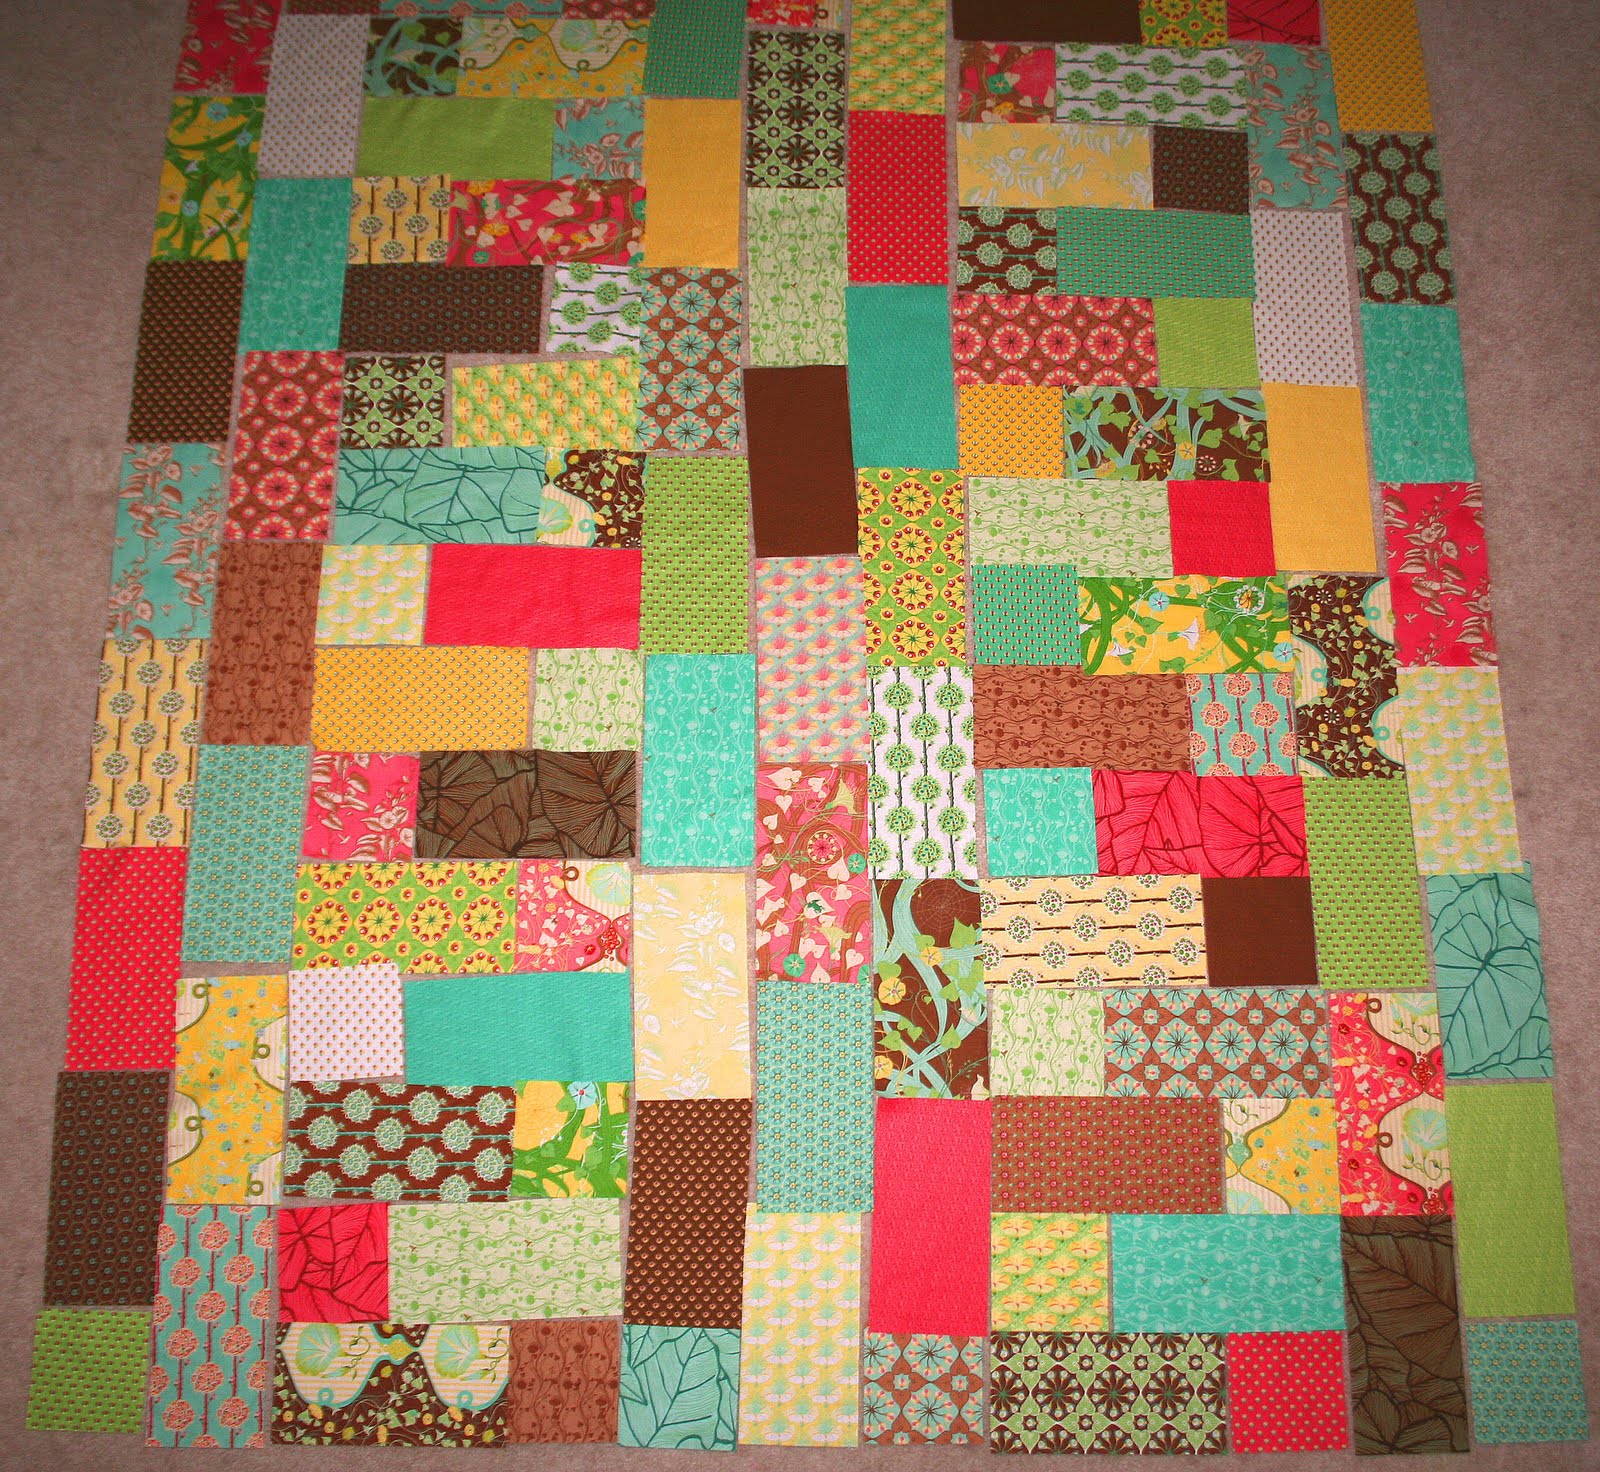
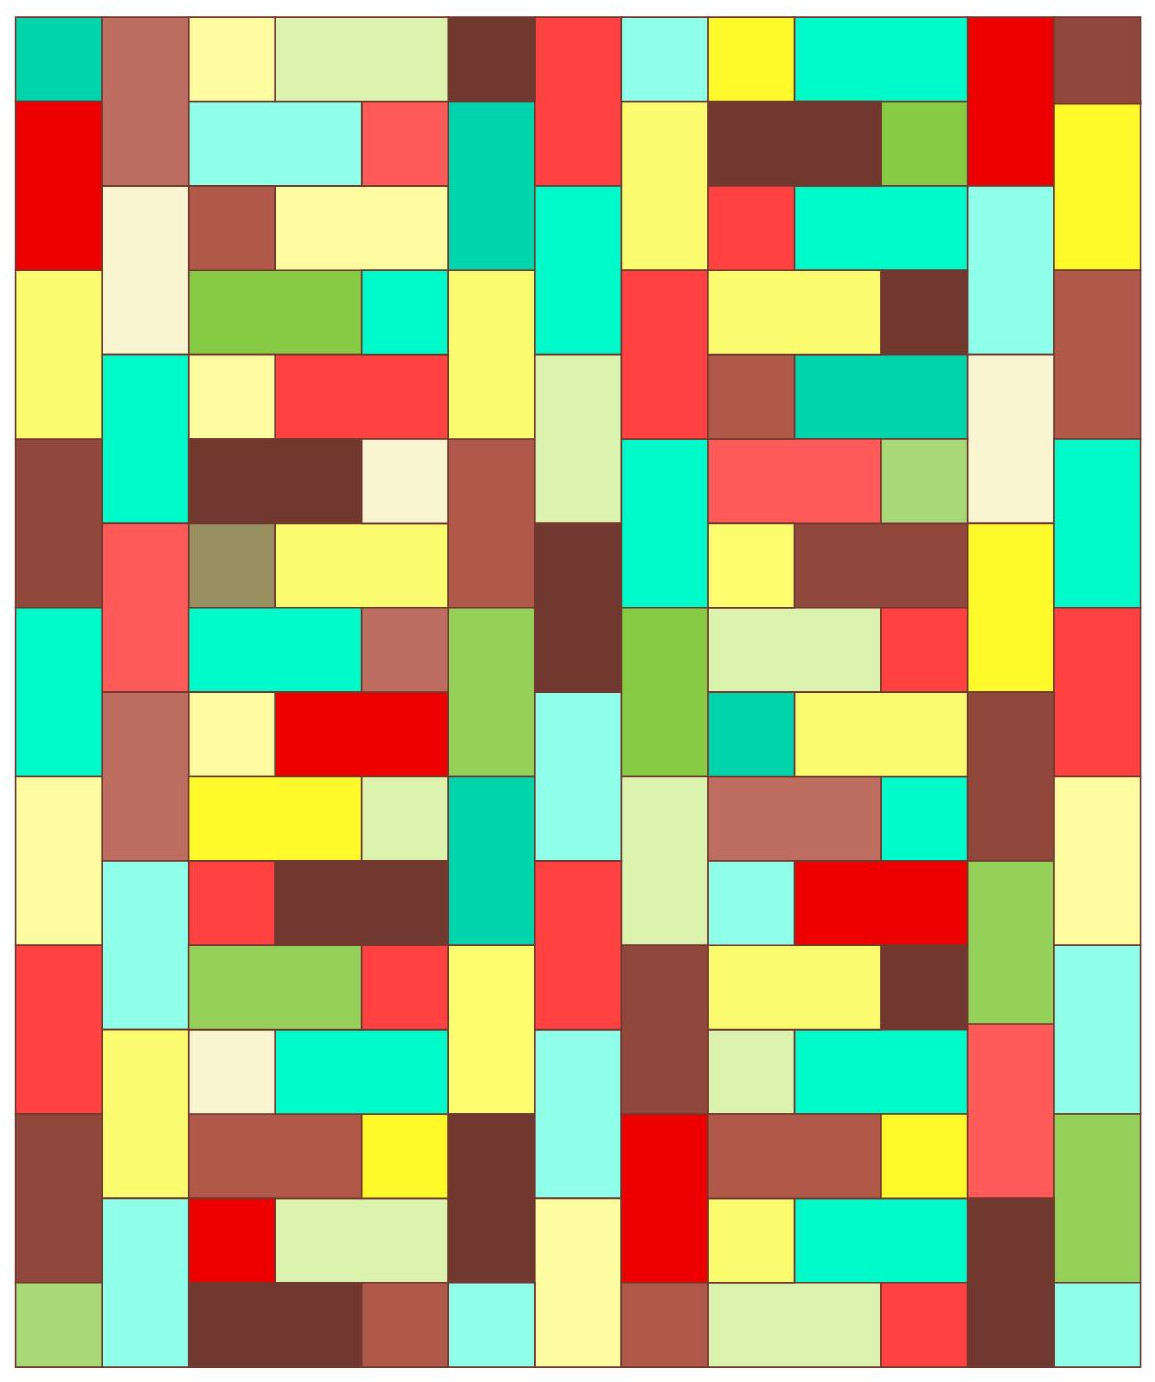
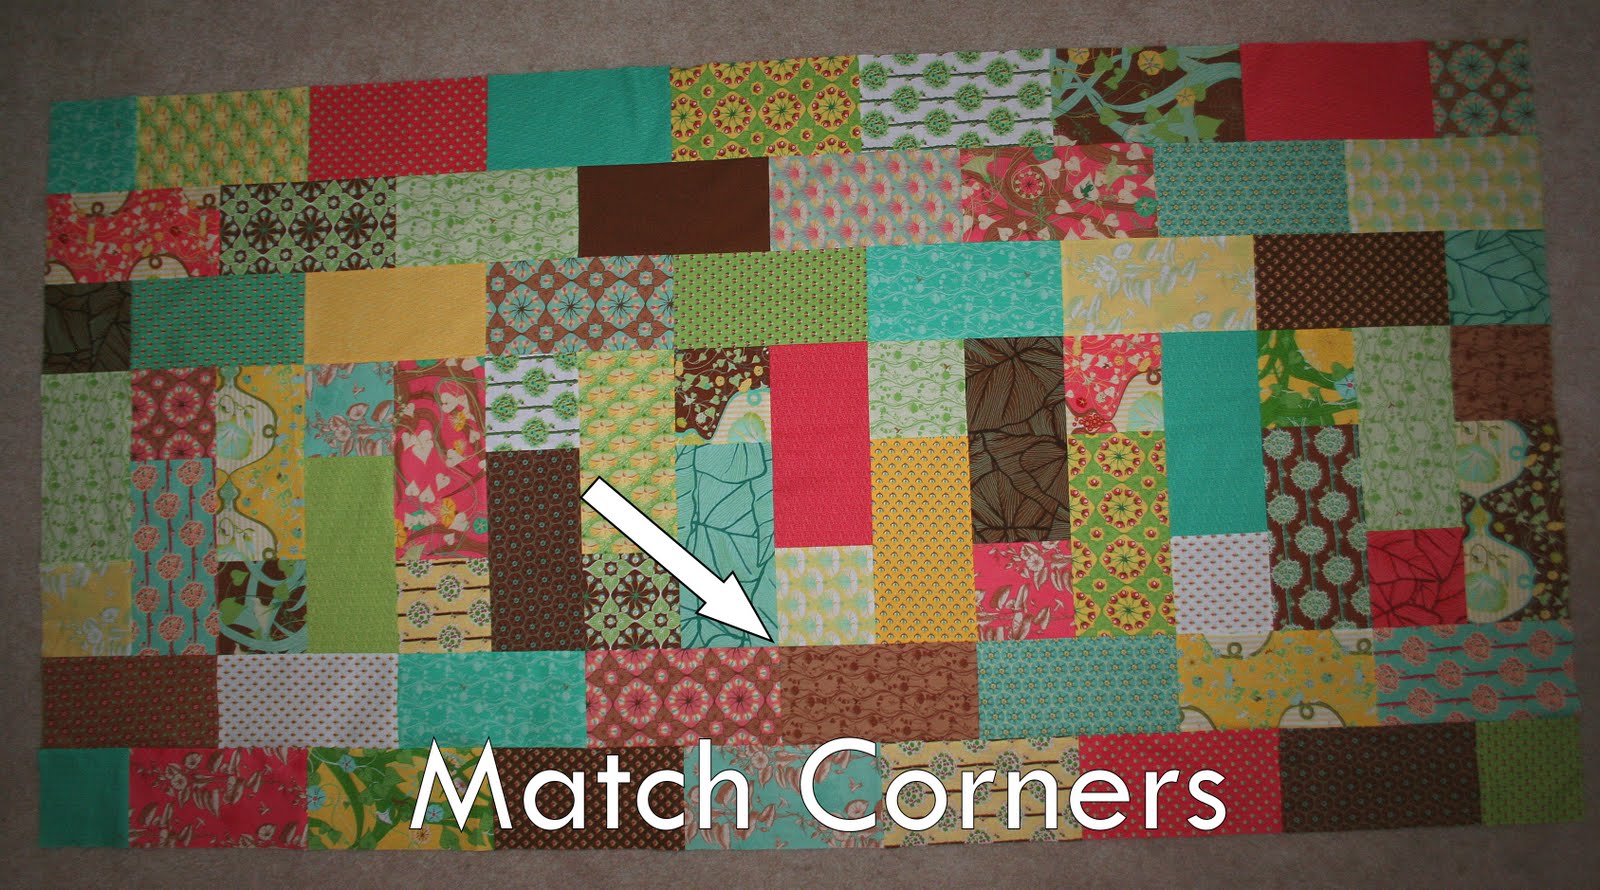
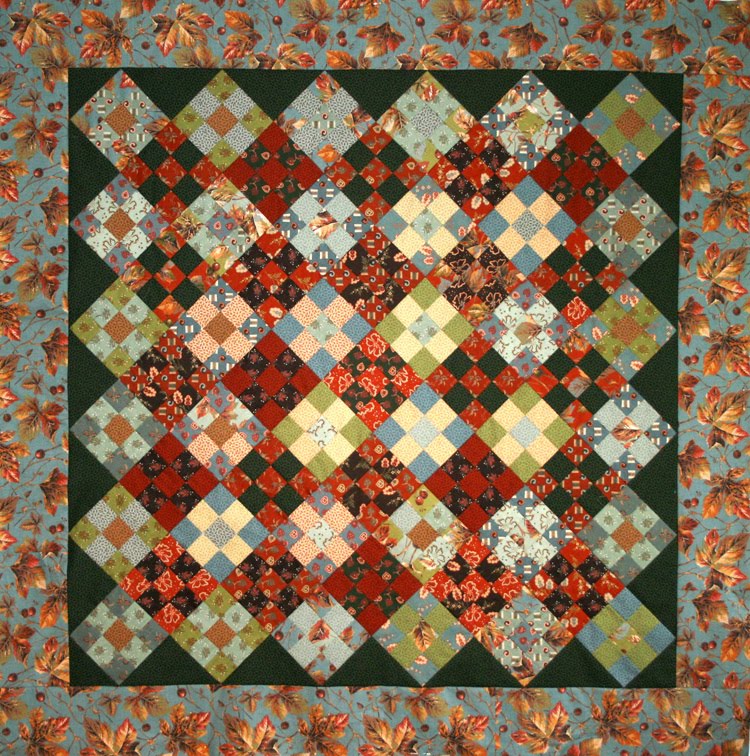
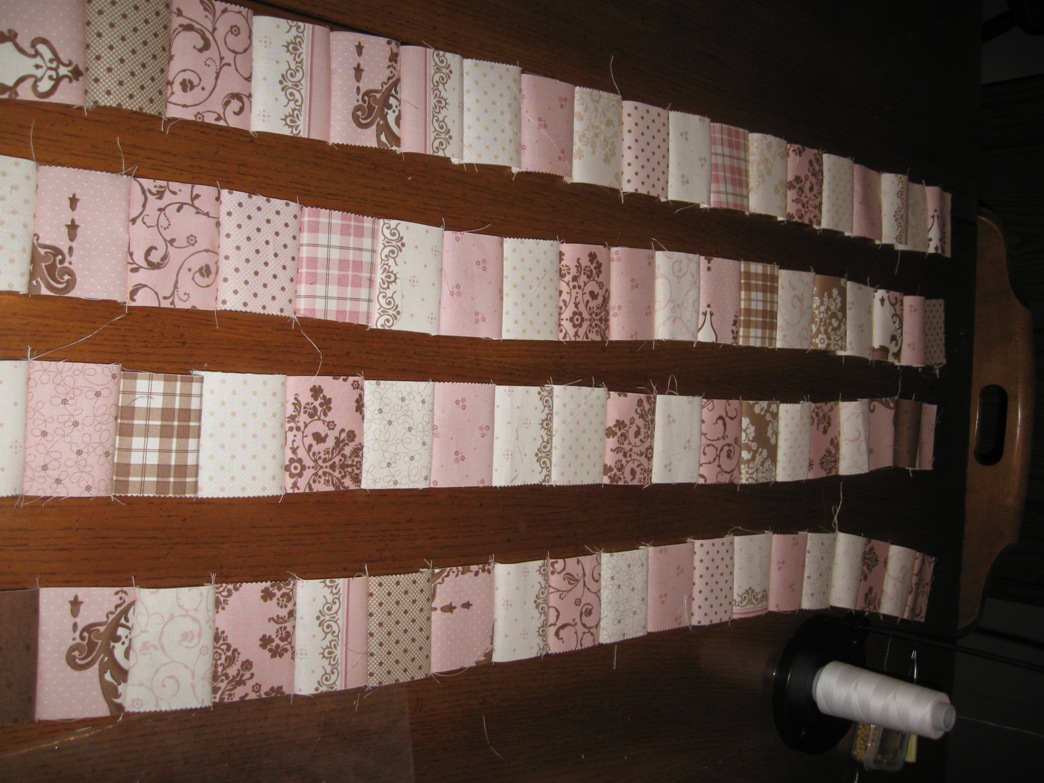
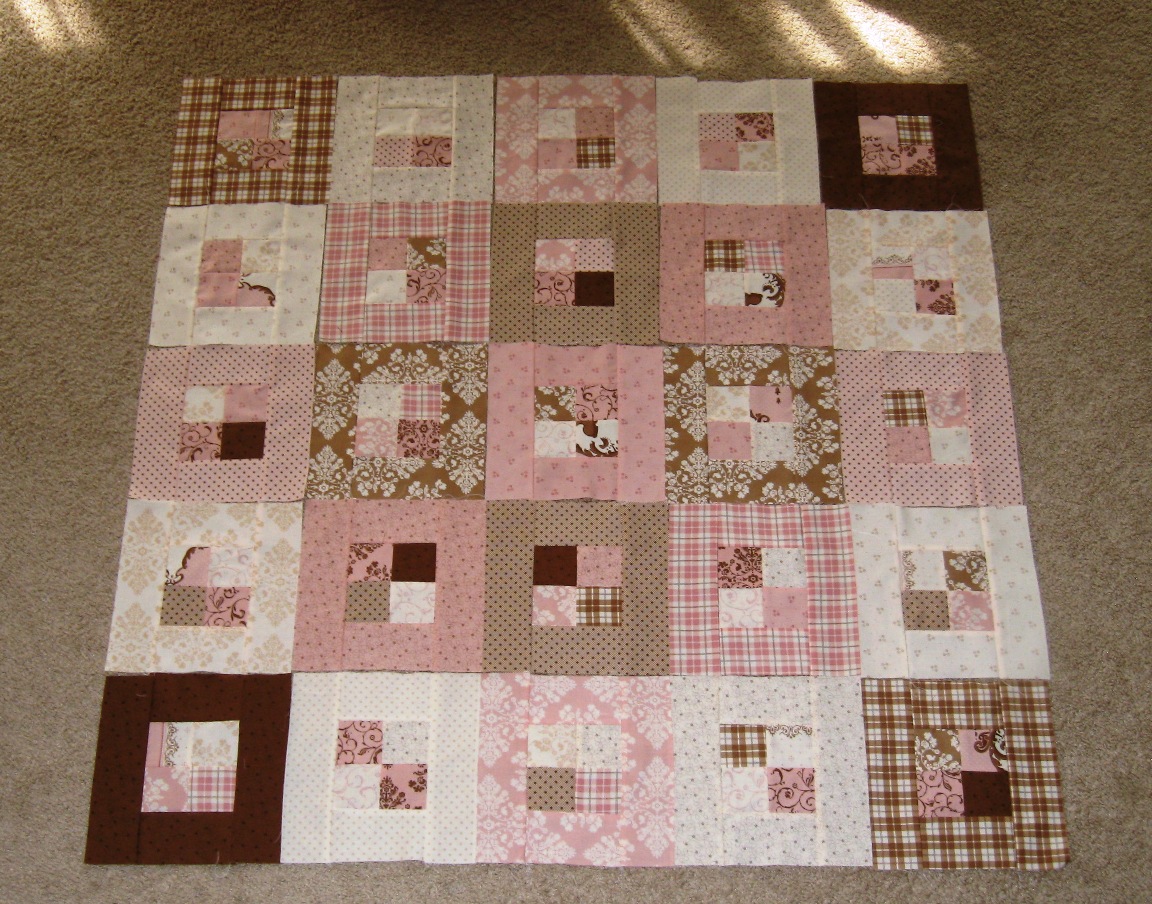
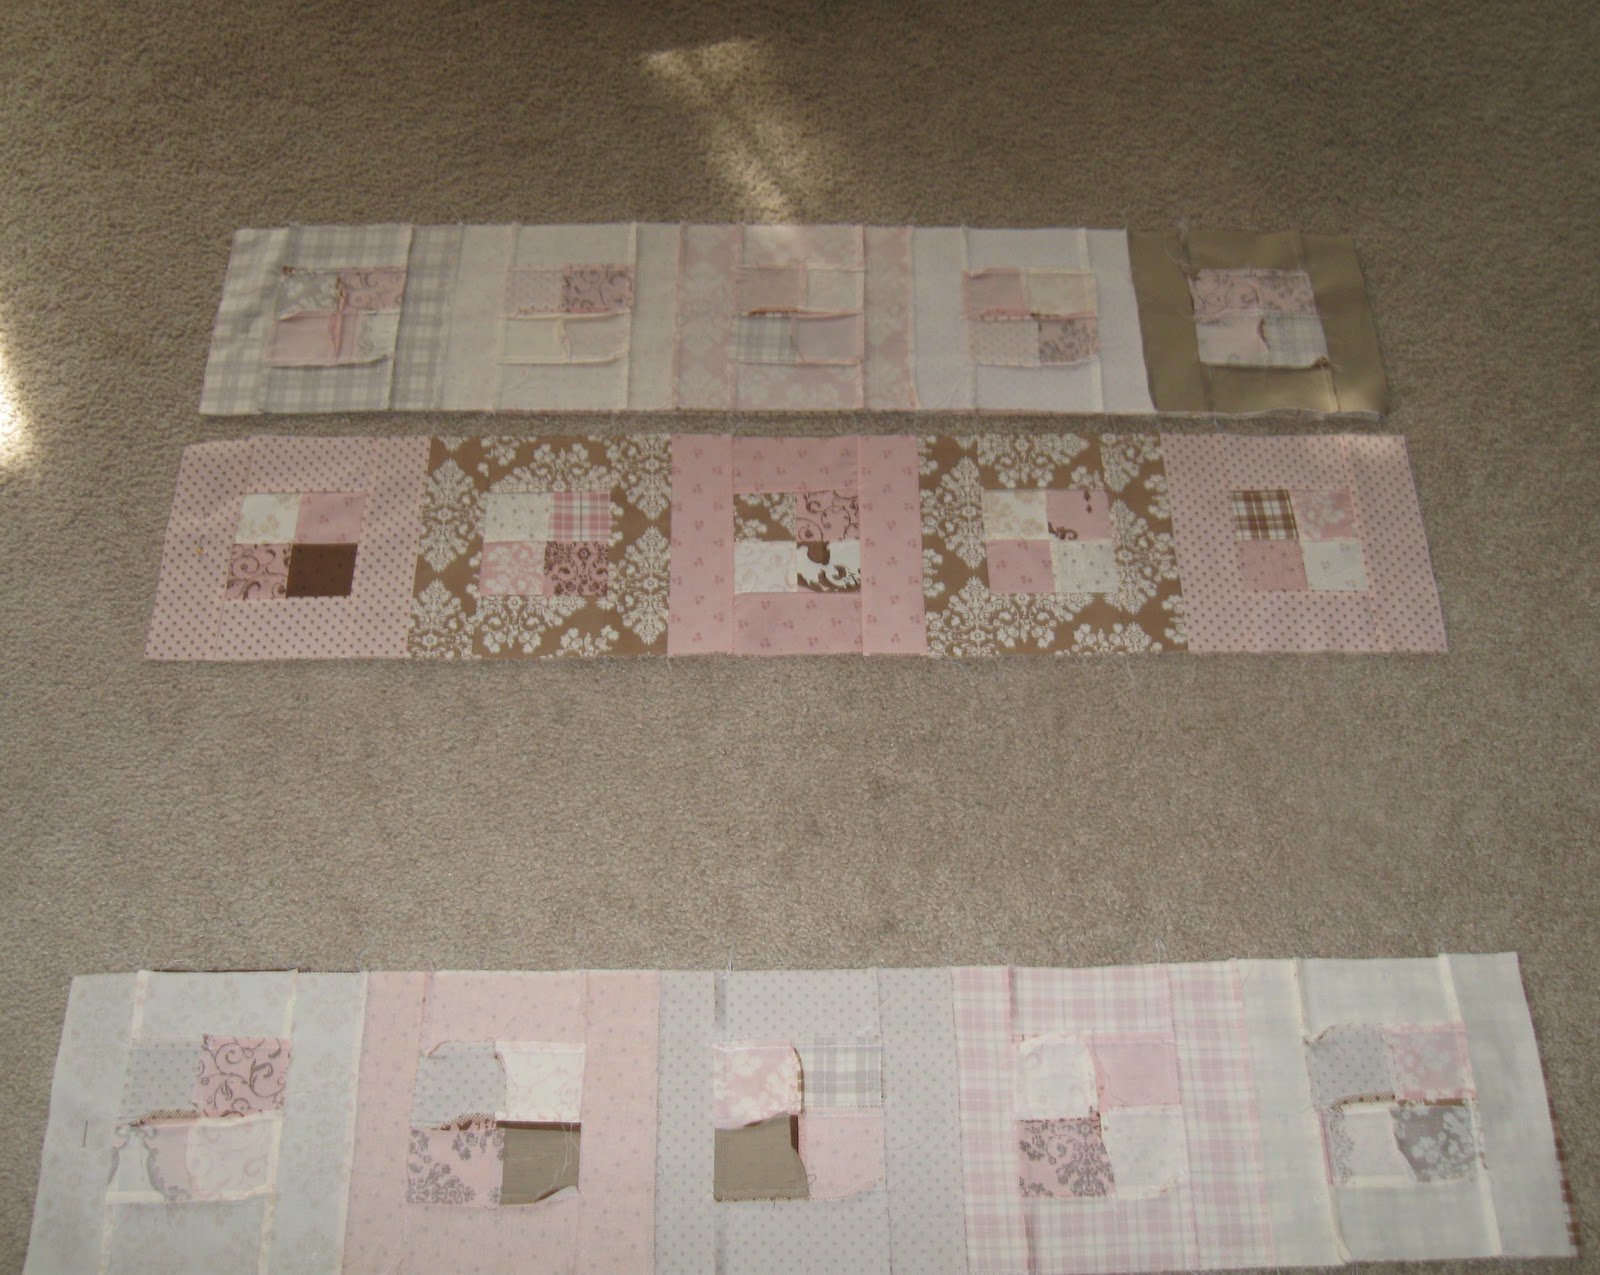
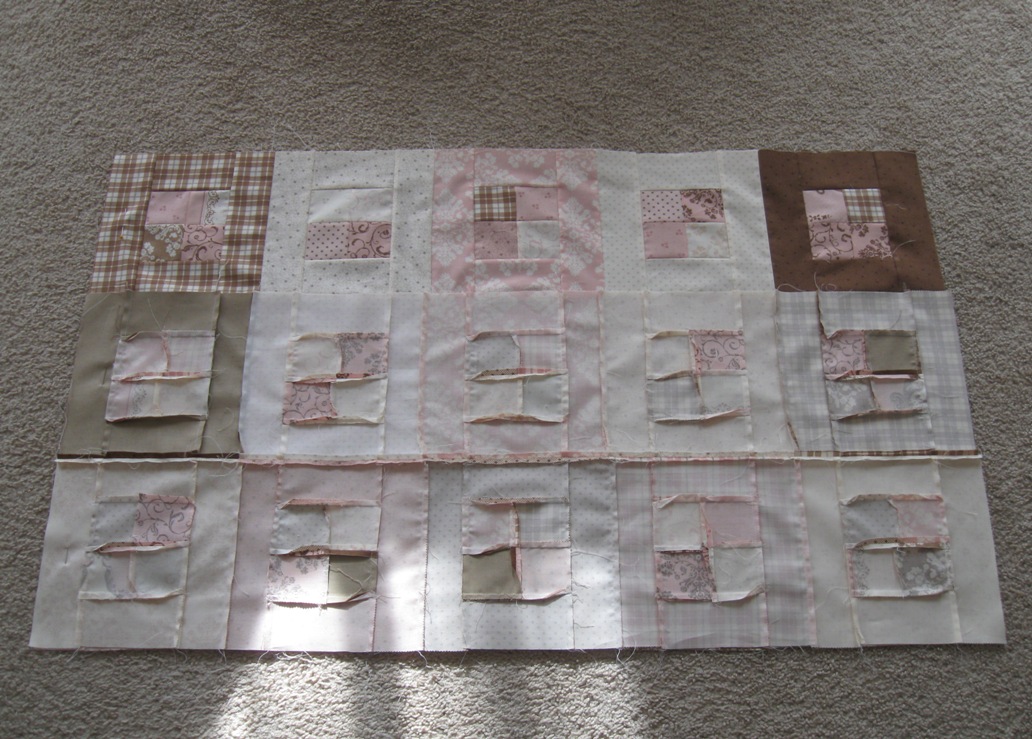
Lay out your blocks according to the following picture. I know it is kind of hard to see the prints but look closely. Or, if you don’t want this exact layout, play around with it until you get the perfect layout for you. Oh how I wish I had one of those nifty felt walls so I didn’t always have to do this part on my floor. Oh well, some day . . .


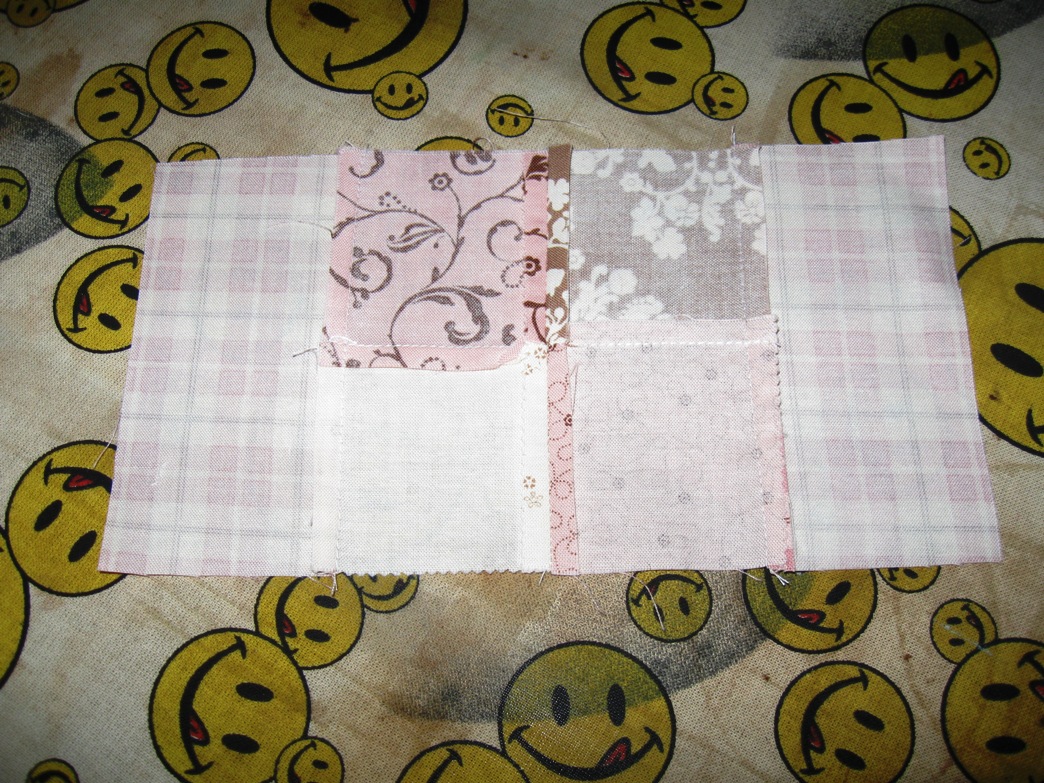
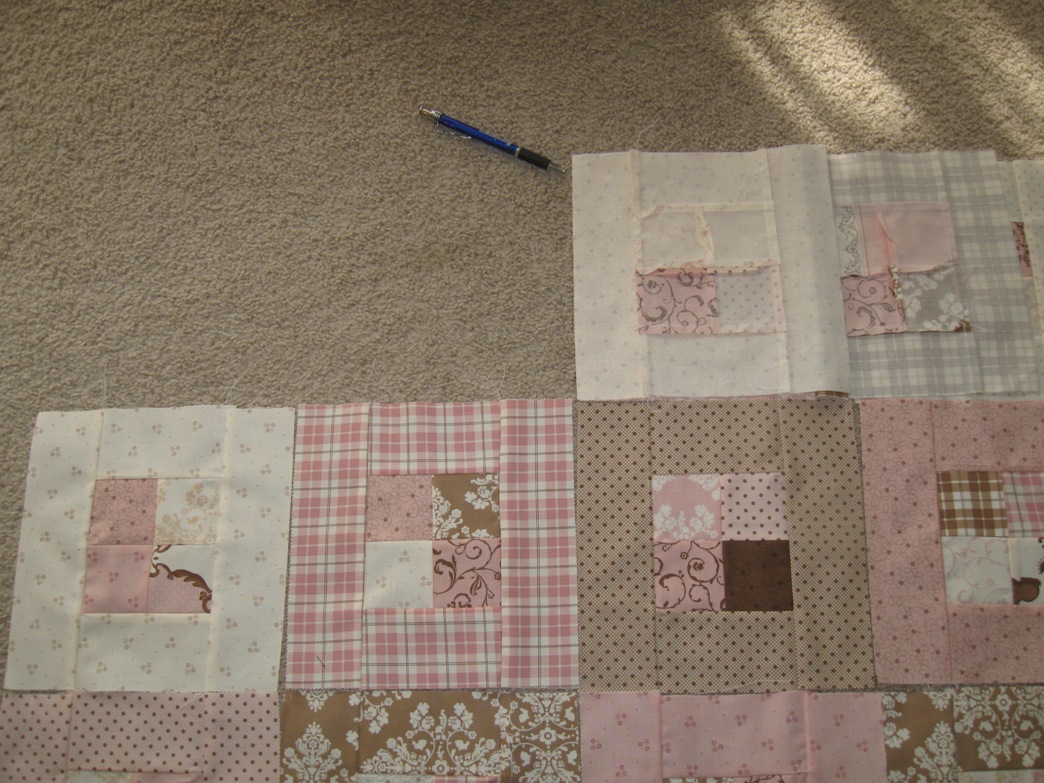
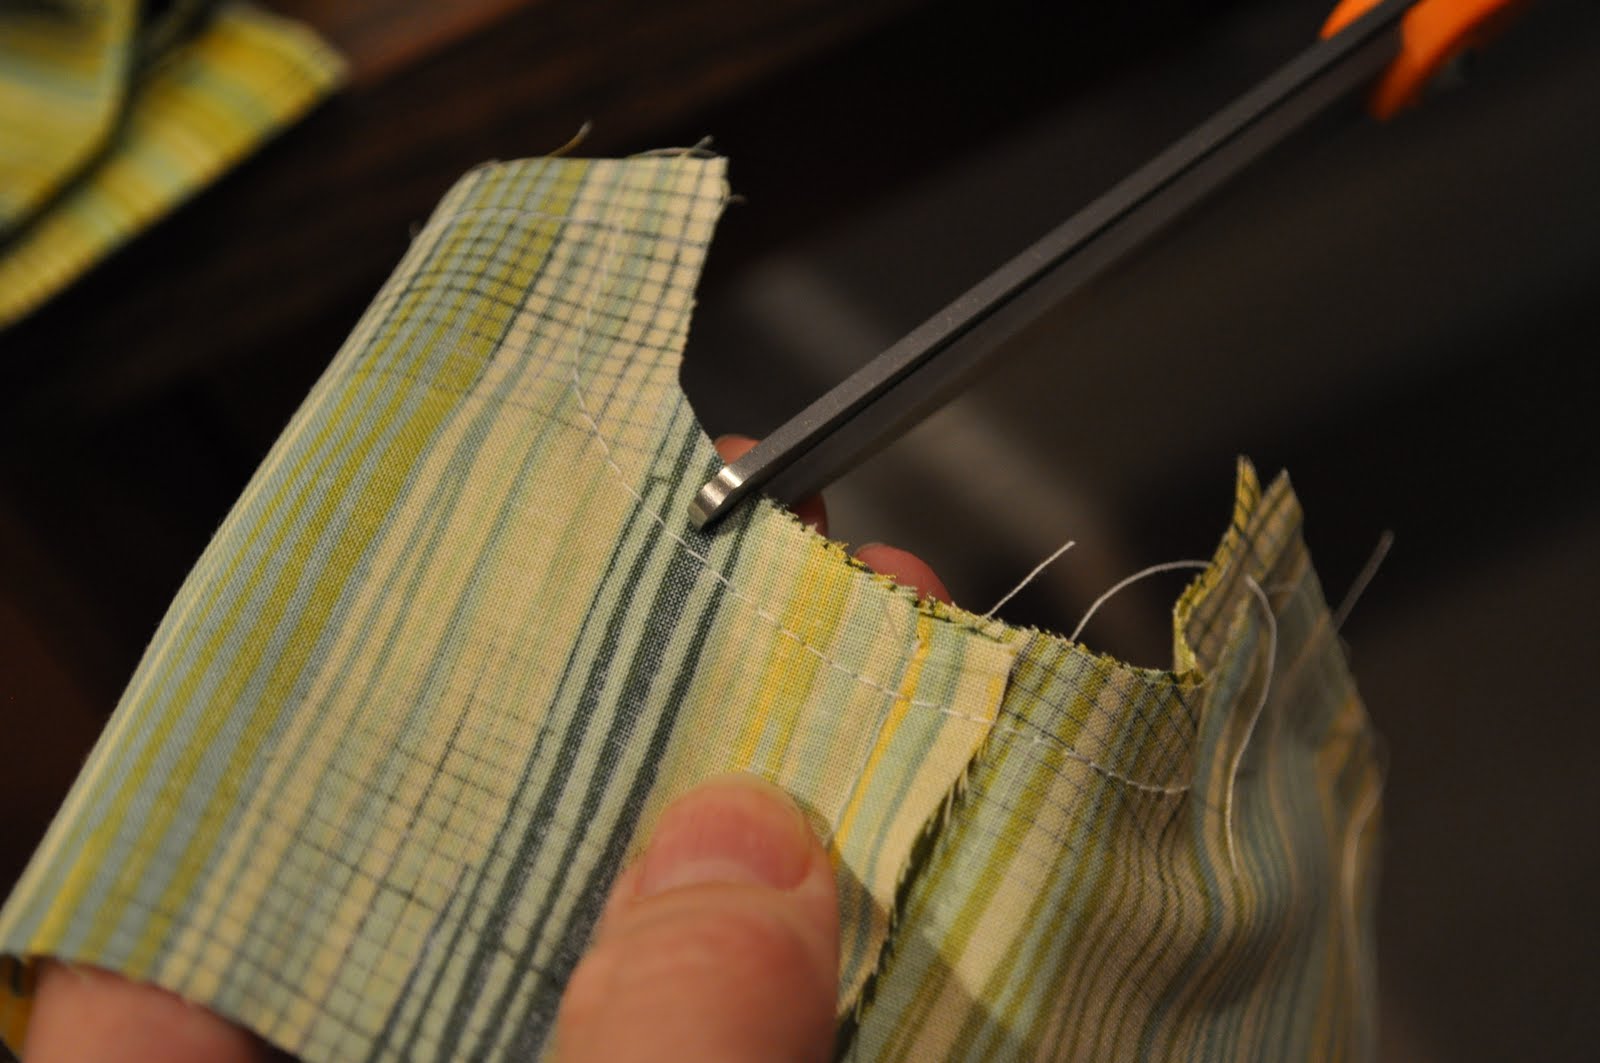
Now, this is where I abandon chain stitching. Mostly because I really, really, liked this layout and didn’t want to have to try and figure it out again, and once you start picking up several blocks it is easy to forget where they go back. Go ahead and lay the first block in the first row on top of the second block. You’re just basically going to flip it over on top of the second block. Don’t spin it or anything. Stitch a 1/4″ seam along the side where the pen points.


Now lay the first and second block (that are sewn together even though they aren’t in the picture, sorry, my bad) onto the third block and sew a 1/4″ seam where the pen points.


Continue this process with the fourth and fifth blocks until you have the entire first row sewn together. Go ahead and press your seams one direction. But remember which direction because the next row you will press in the opposite direction. This helps to get rid of bulk issues and also makes it so you can nest your seams when you sew your rows together.


Oh, and just a side note, I like to put a pin in my first block of each row. This is just something I learned along the way and it really helps to keep me straight when I get things turned around with sewing and ironing and such.


So go ahead and continue this process with the remaining 4 rows. Make sure again to press each row the opposite way of the row before. So basically left, right, left, right, left. (Do you feel like you are in the army now?)


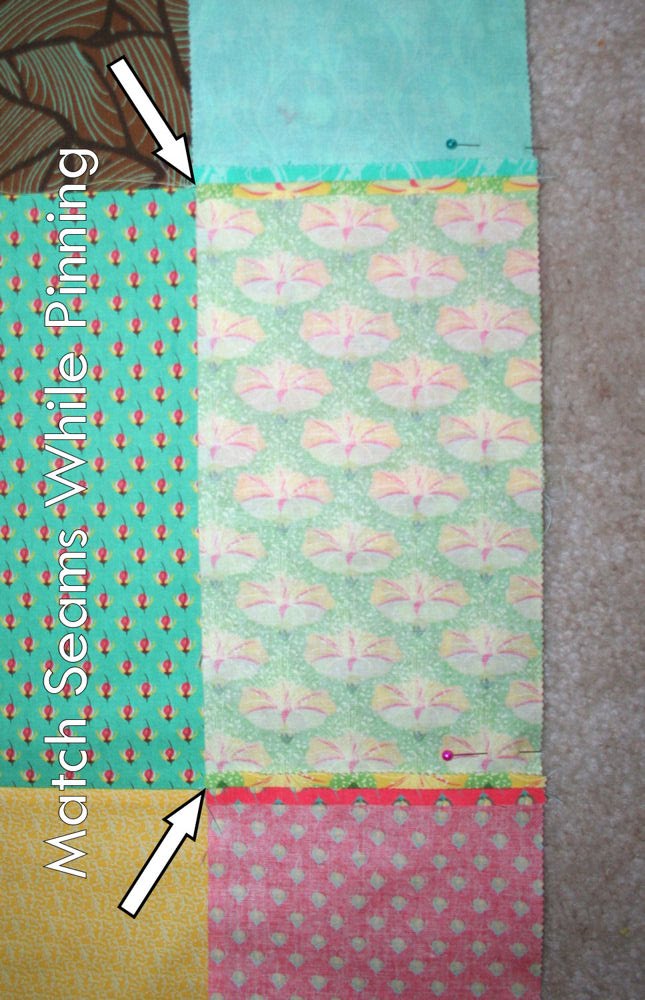
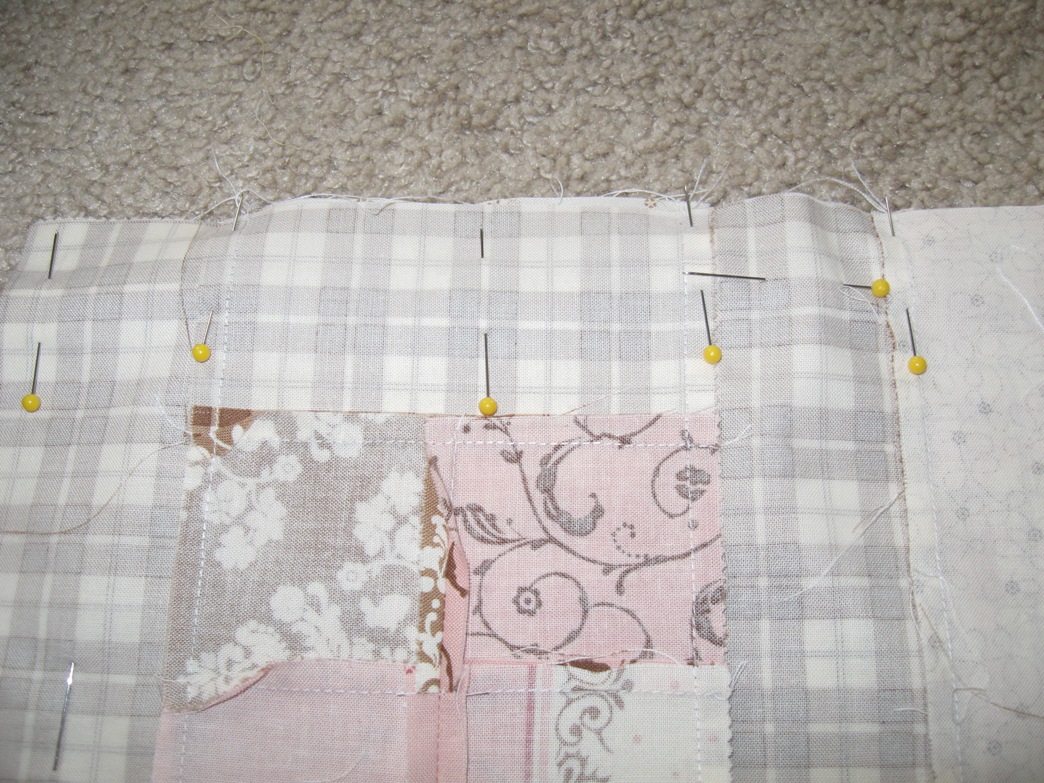
Now you are ready to sew your rows together. Oh, this is getting exciting! Go ahead and lay row 1 over onto row 2. Do the same with row 4 onto row 5. You are going to pin the top of each row so that when you open it, row 1 will be on top of row 2 and row 4 will be on top of row 4. (Sorry, I should have put the pen in there again, I hope this makes sense.)


You are going to pin these like crazy! Once again, focus on your seams and not on the sides. I like to nest the block seams first (where the 2 blocks are sewn together) and then go back and pin the rest of my seams second. If you have extra bulk go ahead and smooth it down and then put in a vertical pin. This will help take care of those little bulky issues.


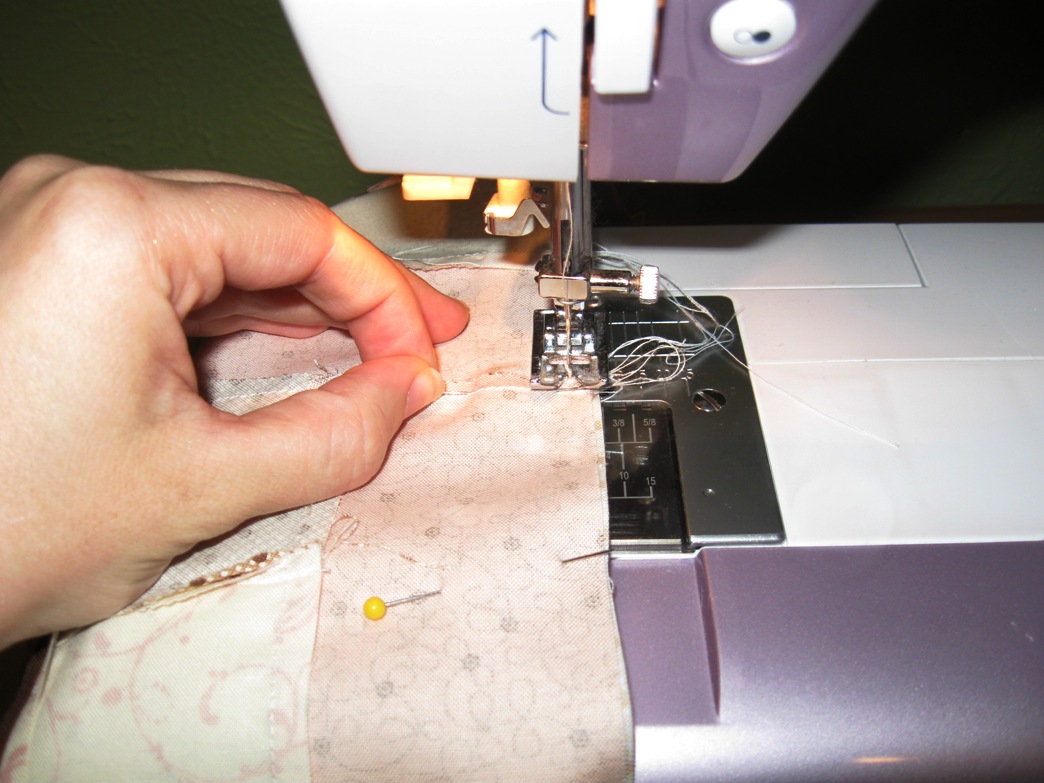
Sew the rows together. Make sure to take your pins out as you go. I like to take them out, just before I would run over them. This way my seams don’t shift.


Press your seams (I pressed them open, but you can press them any old way you like). Lay your quilt back out again, use those pins in the first block to help. Now lay row three up onto the now sewn together row 1 and 2. This time you are going to pin the bottom (or the intersection of row 2 and 3). Once you got it all pinned, sew your 1/4″ seam. I know it is tempting to fly right over those pins but trust me. It takes less time to pull them out than to replace your needle.


Press again. Lay your quilt out again. Now fold rows 4 and 5 that you sewed previously onto rows 1,2, and 3. Pin along the intersection of row 3 and 4. Sew and press.


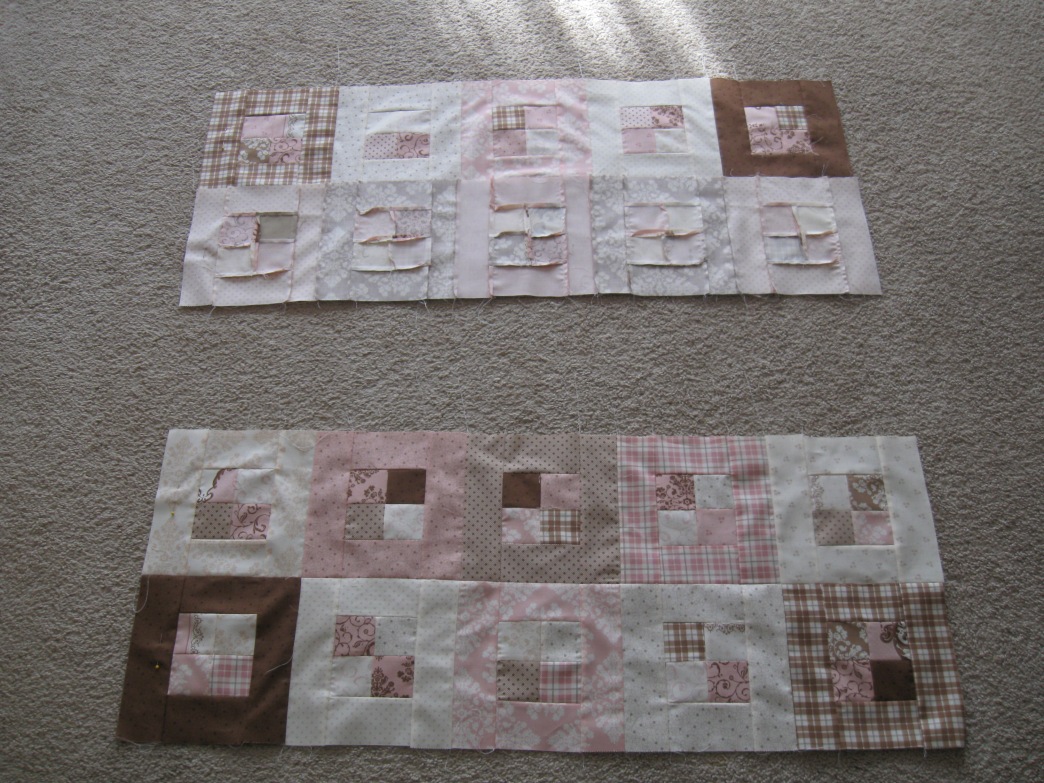
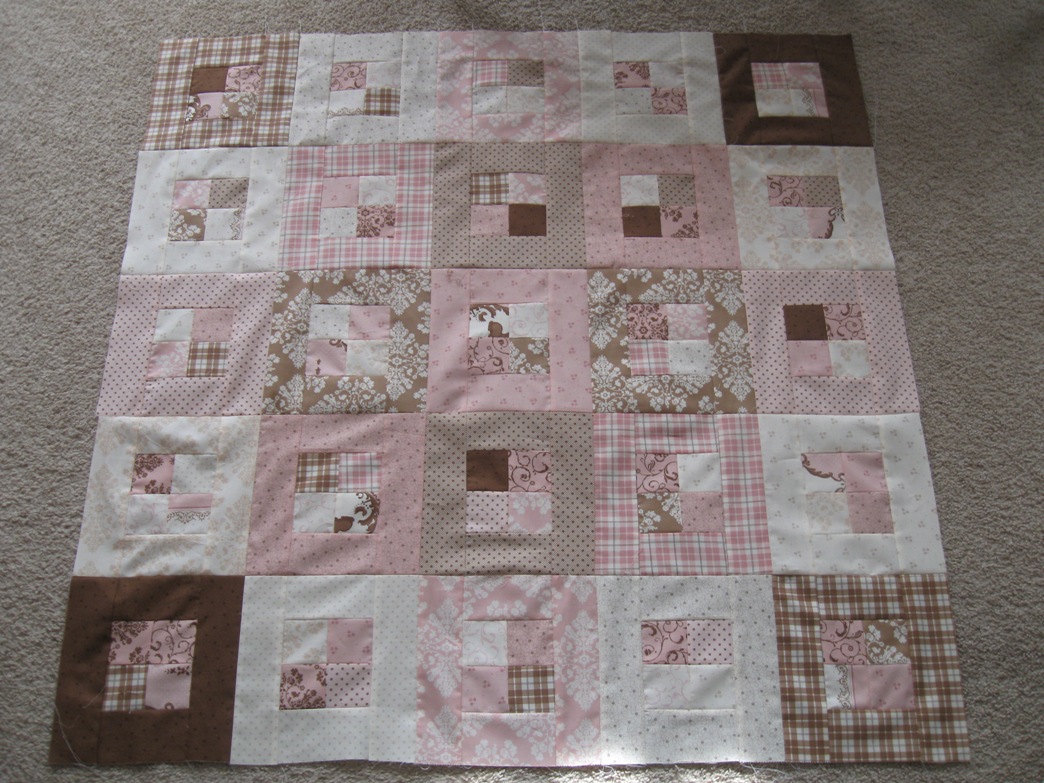
And there it is!! Your 25 blocks all sewn together. Aren’t you happy now to know that your borders are already done and you don’t have to go back to chain piecing?


STEP 6 – ADDING THE BORDERS

Lay out your borders: short rows on the top and bottom and long rows on the sides. Make sure that none of your corners end up being the same. It would be a pity to avoid that the entire time and then miss it on the last step.


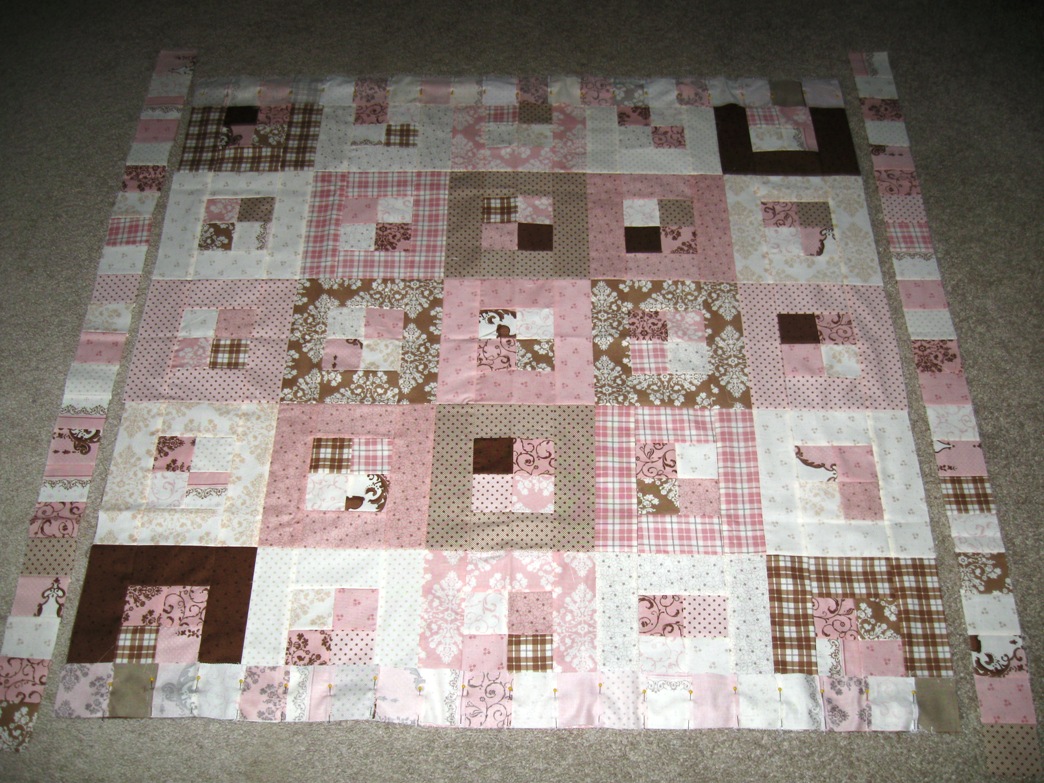
Lay your short rows onto your pieced blocks on the top and bottom of your quilt. Once again, pin like crazy. I pinned along each seam making sure it matched up with the seams of the blocks. Stitch 1/4″ seam. Press towards your border. (I know, less pictures and more directions, but you are a pro by now, you are probably skipping these words all together 🙂


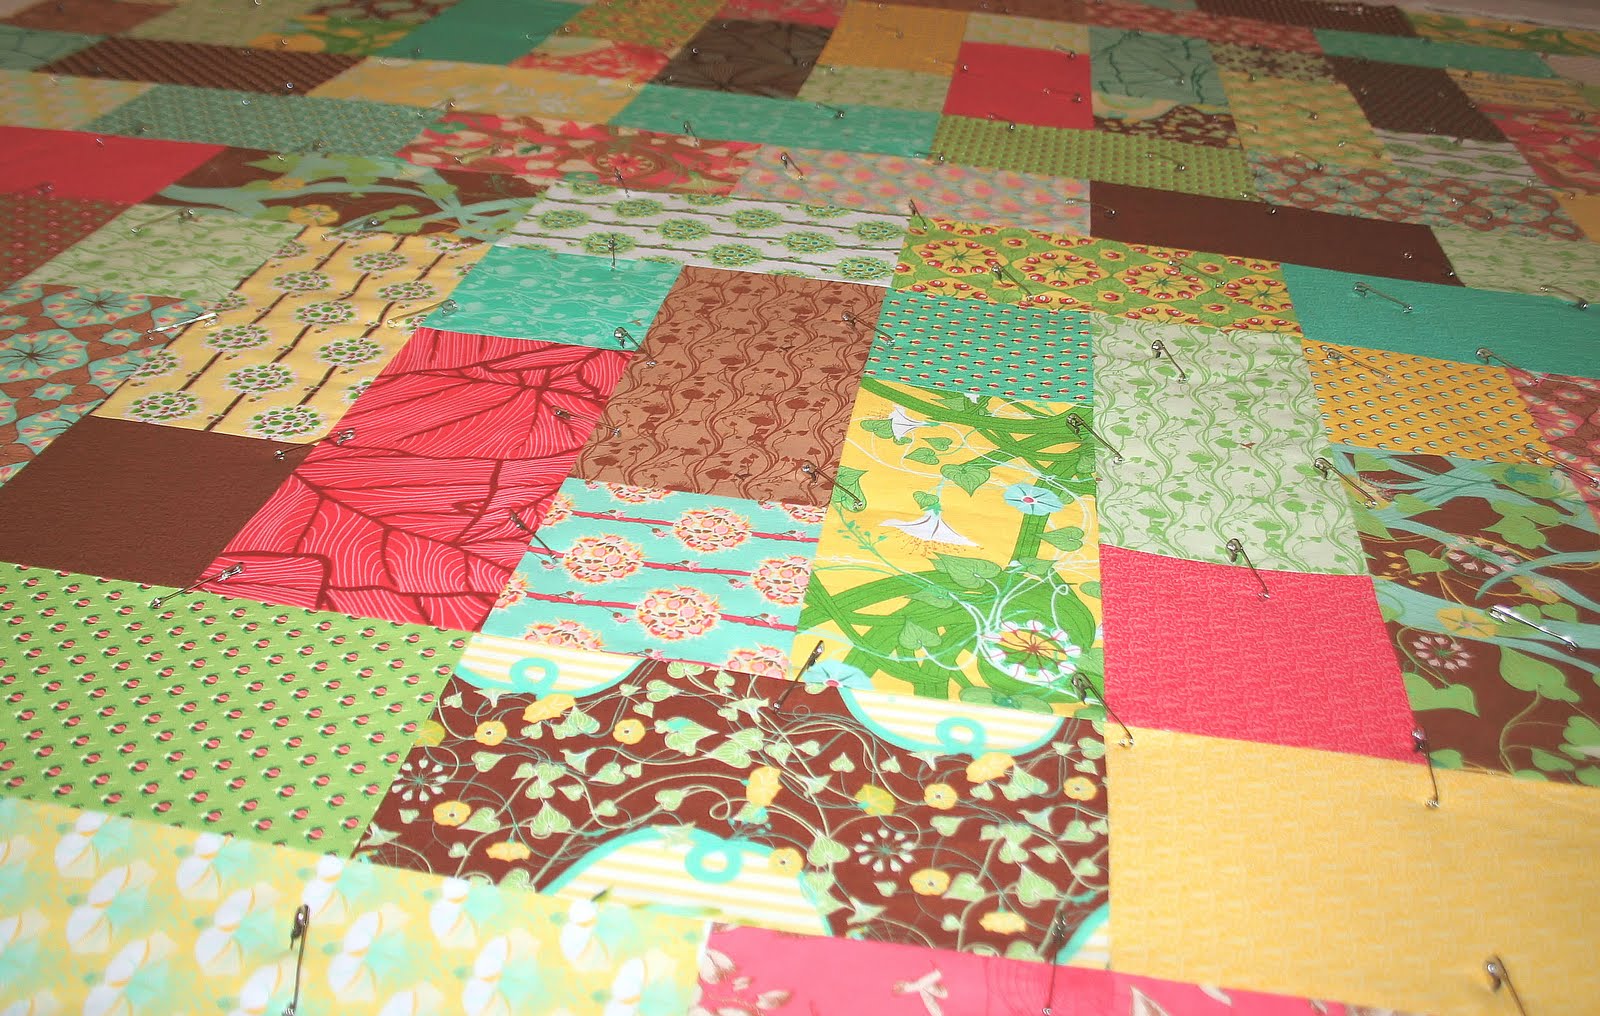
This is where you are now. Only 2 sides to add and then you are done!! Attach the long sides the same way as the short sides. Pin like crazy, sew, and press towards the border.


Now give the entire quilt top another nice pressing on the top. Stand back and admire!


STEP 7 – FINISHING YOUR QUILT

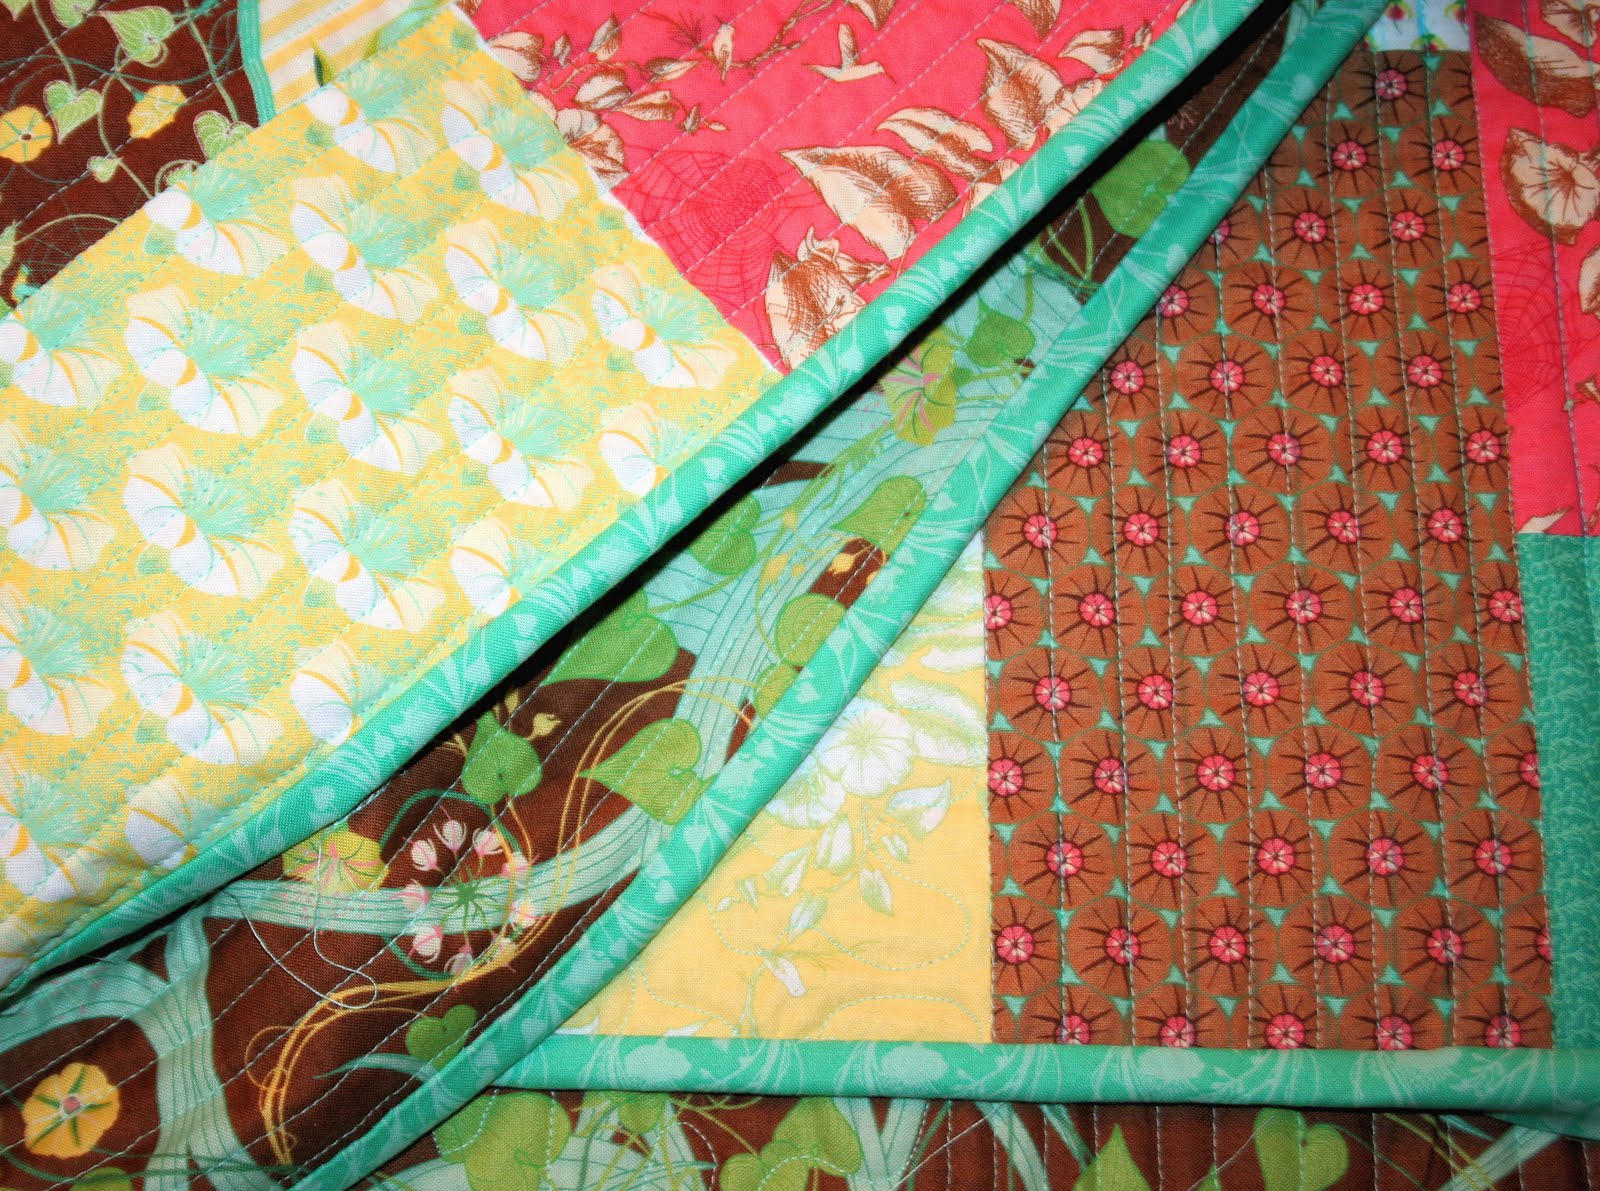
First you are going to make your binding strip. I know, backwards again. But like before, I find that once I finish quilting my quilt I just want to get it finished asap and I hate having to go back and create the binding strip. So I do it first. Go ahead and pull out those binding pieces (the 2 1/2″ x 10″ rectangles) and create your binding strip. I know that isn’t a whole lot of help if you have never made one but if you don’t know how, check out this amazing tutorial here on the Bake Shop to learn: http://www.modabakeshop.com/2010/08/binding-with-jelly-roll.html
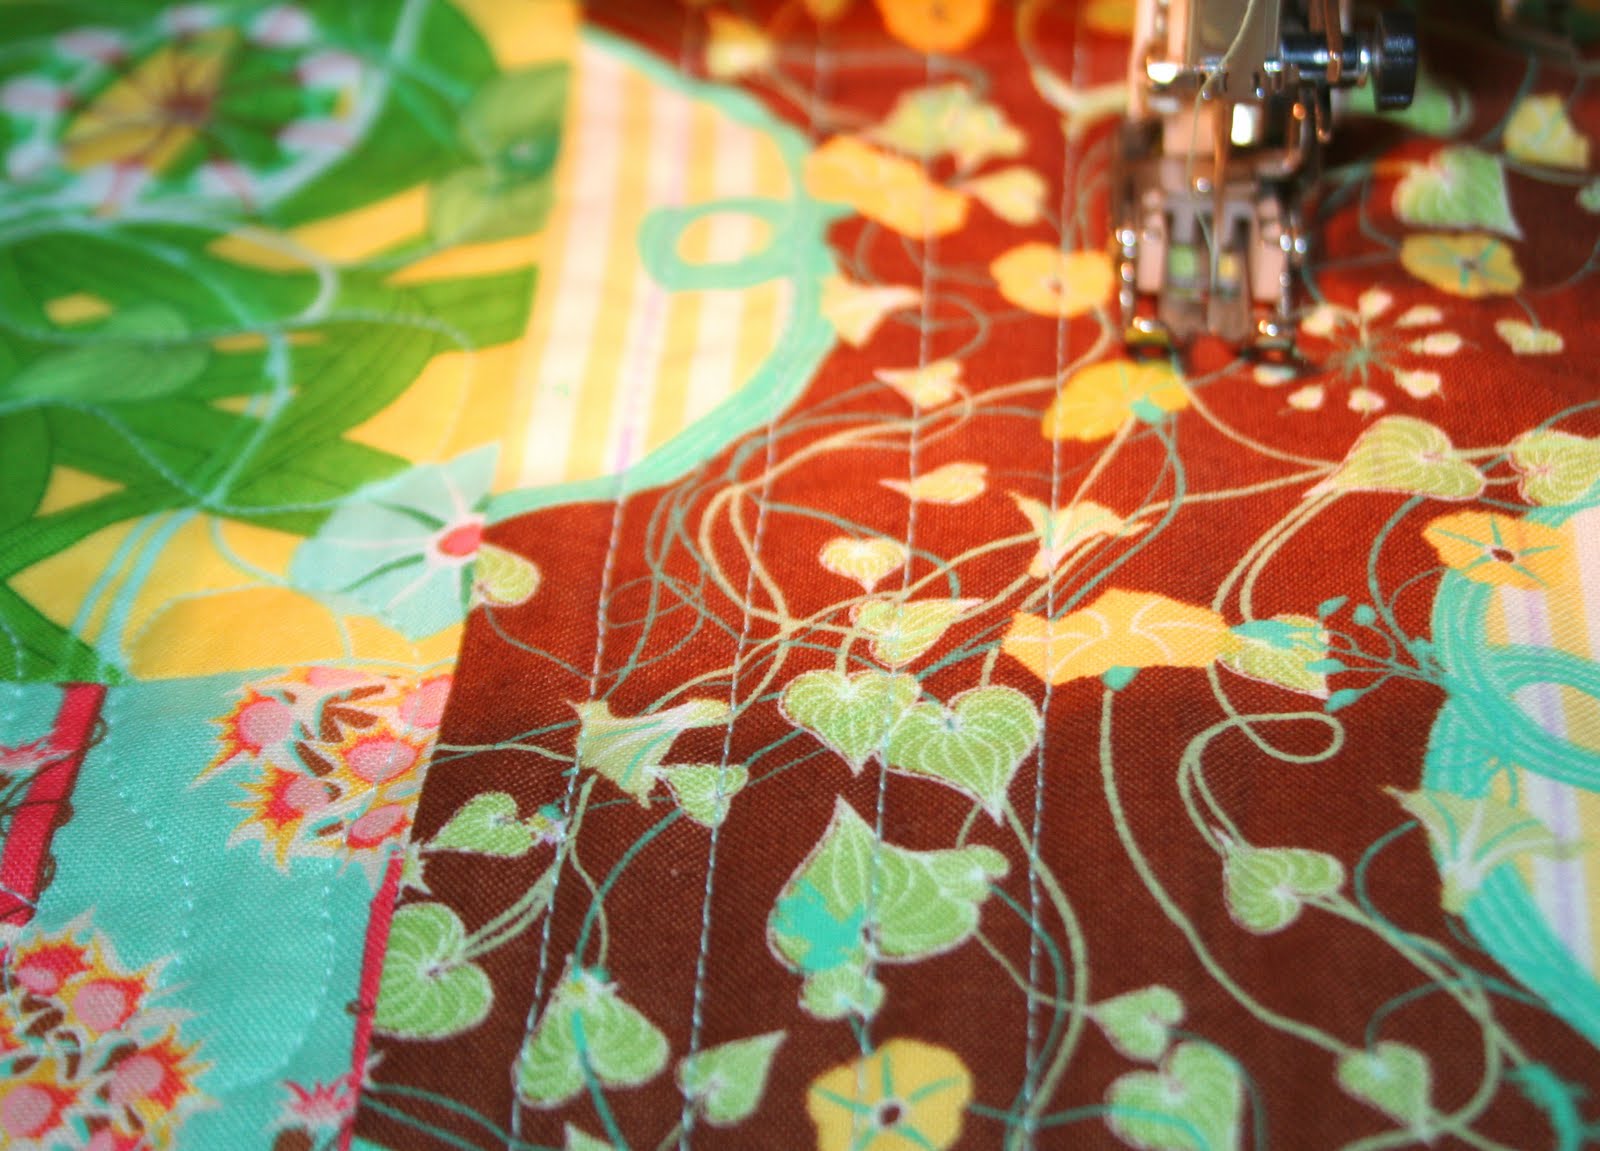
Now you are ready to baste, quilt, and bind. Once again, I know that doesn’t really help if you don’t know how. Unfortunately, it would be a tutorial in itself to teach the techniques. So go ahead and surf around for free motion quilting tutorials. Believe me, there are hundreds, that’s how I learned 🙂

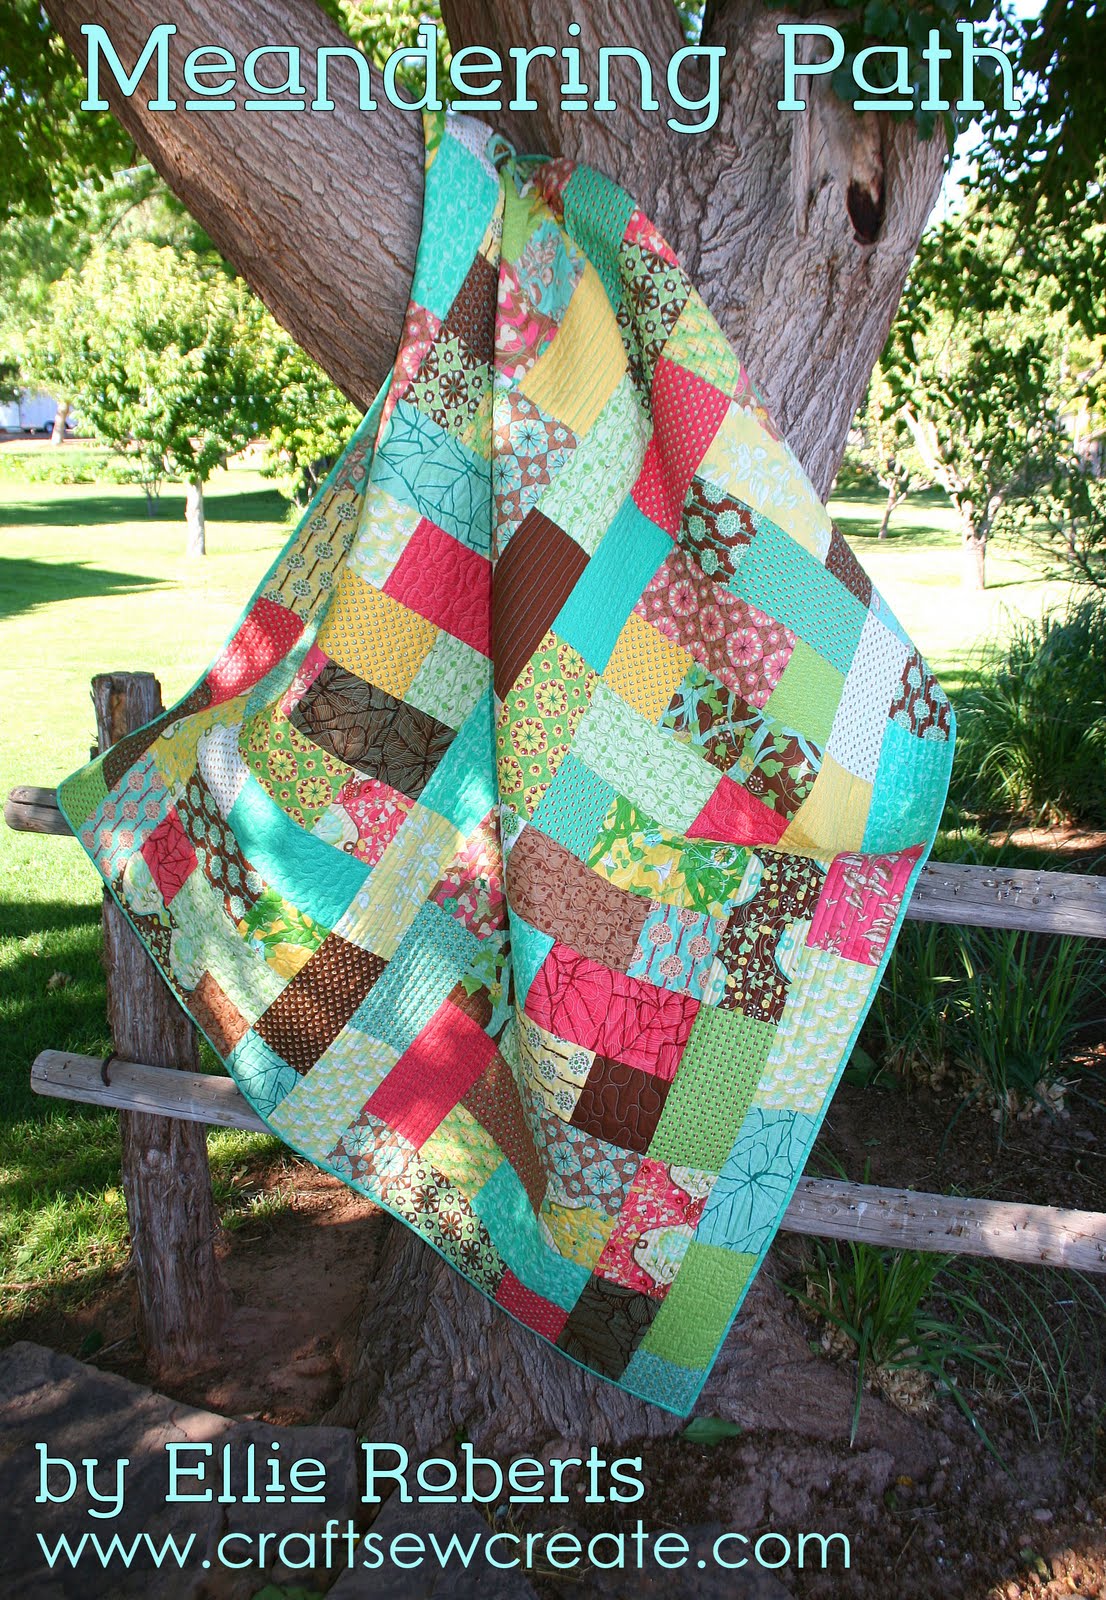
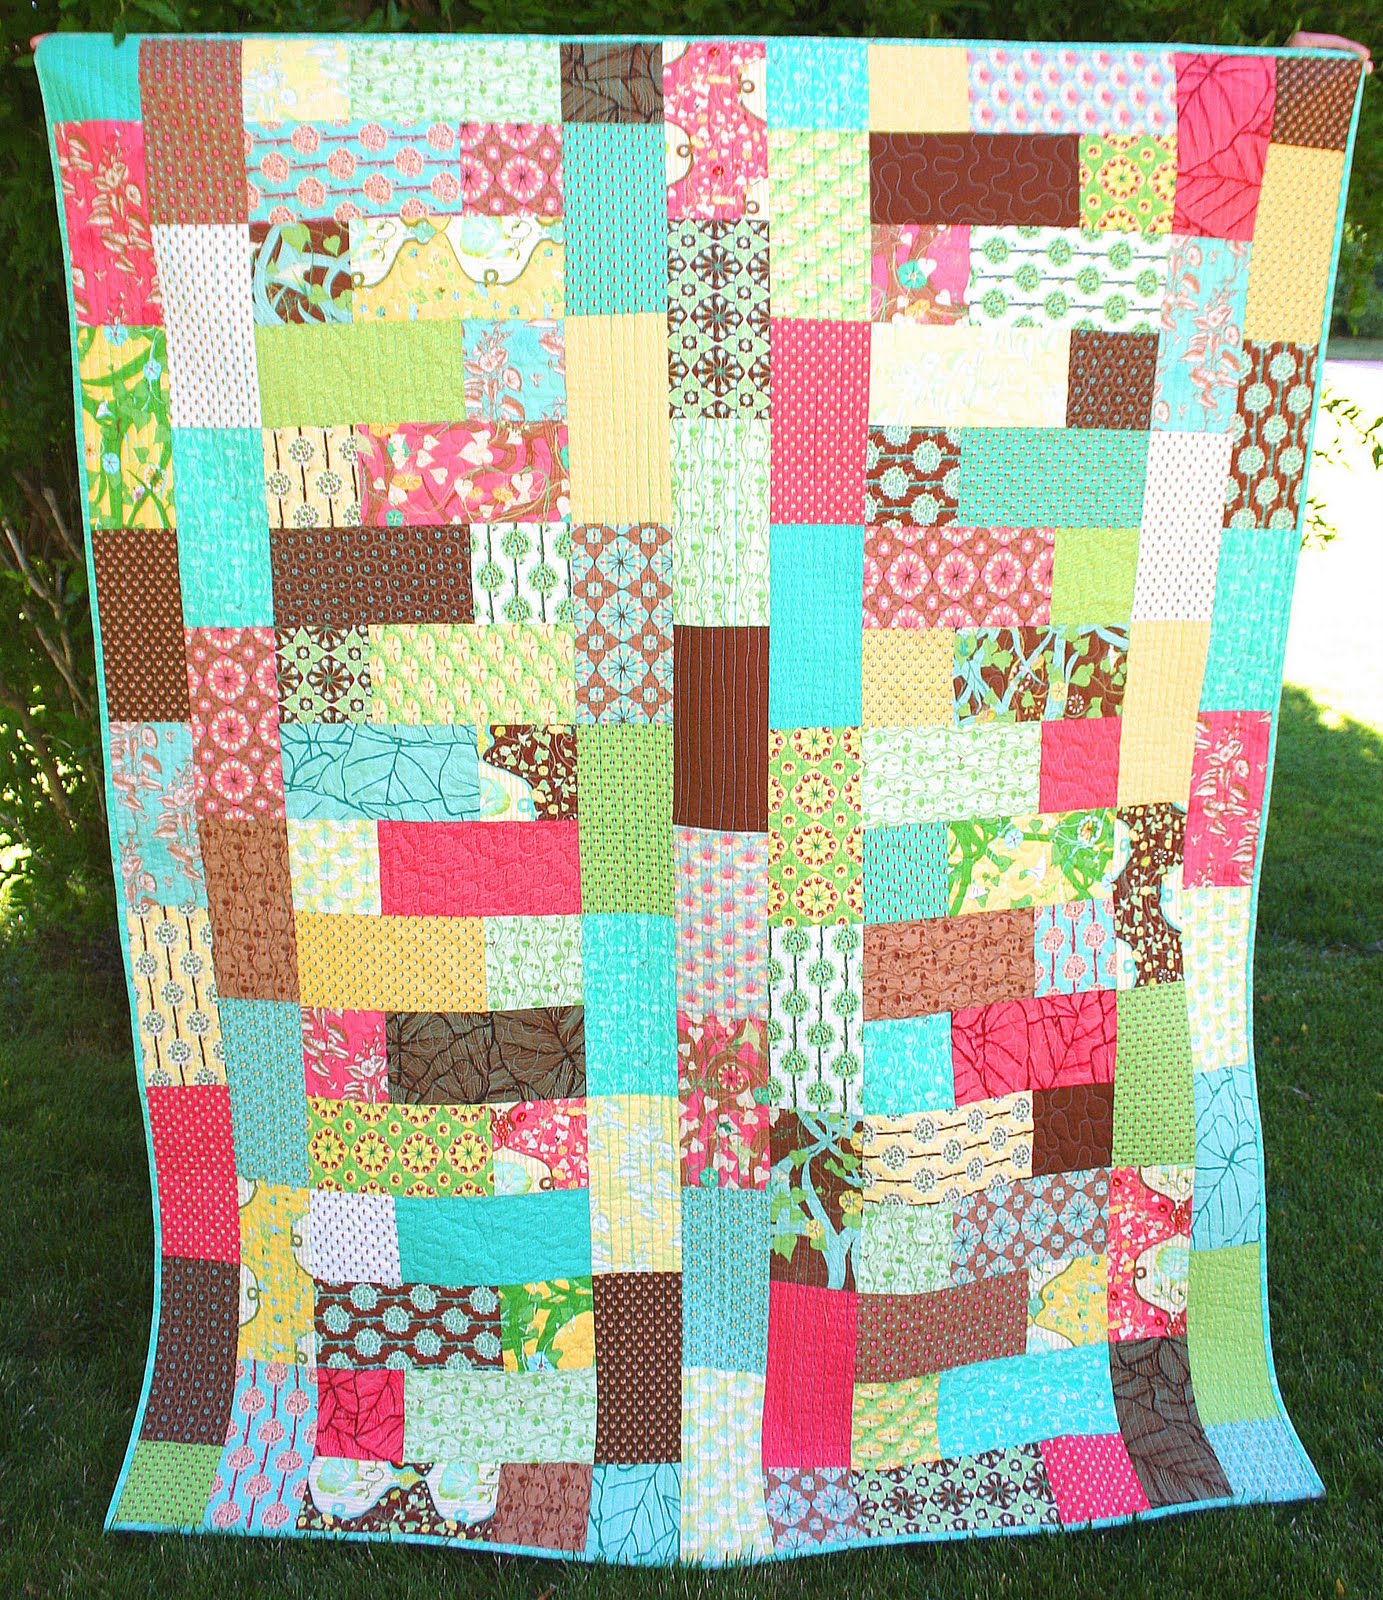
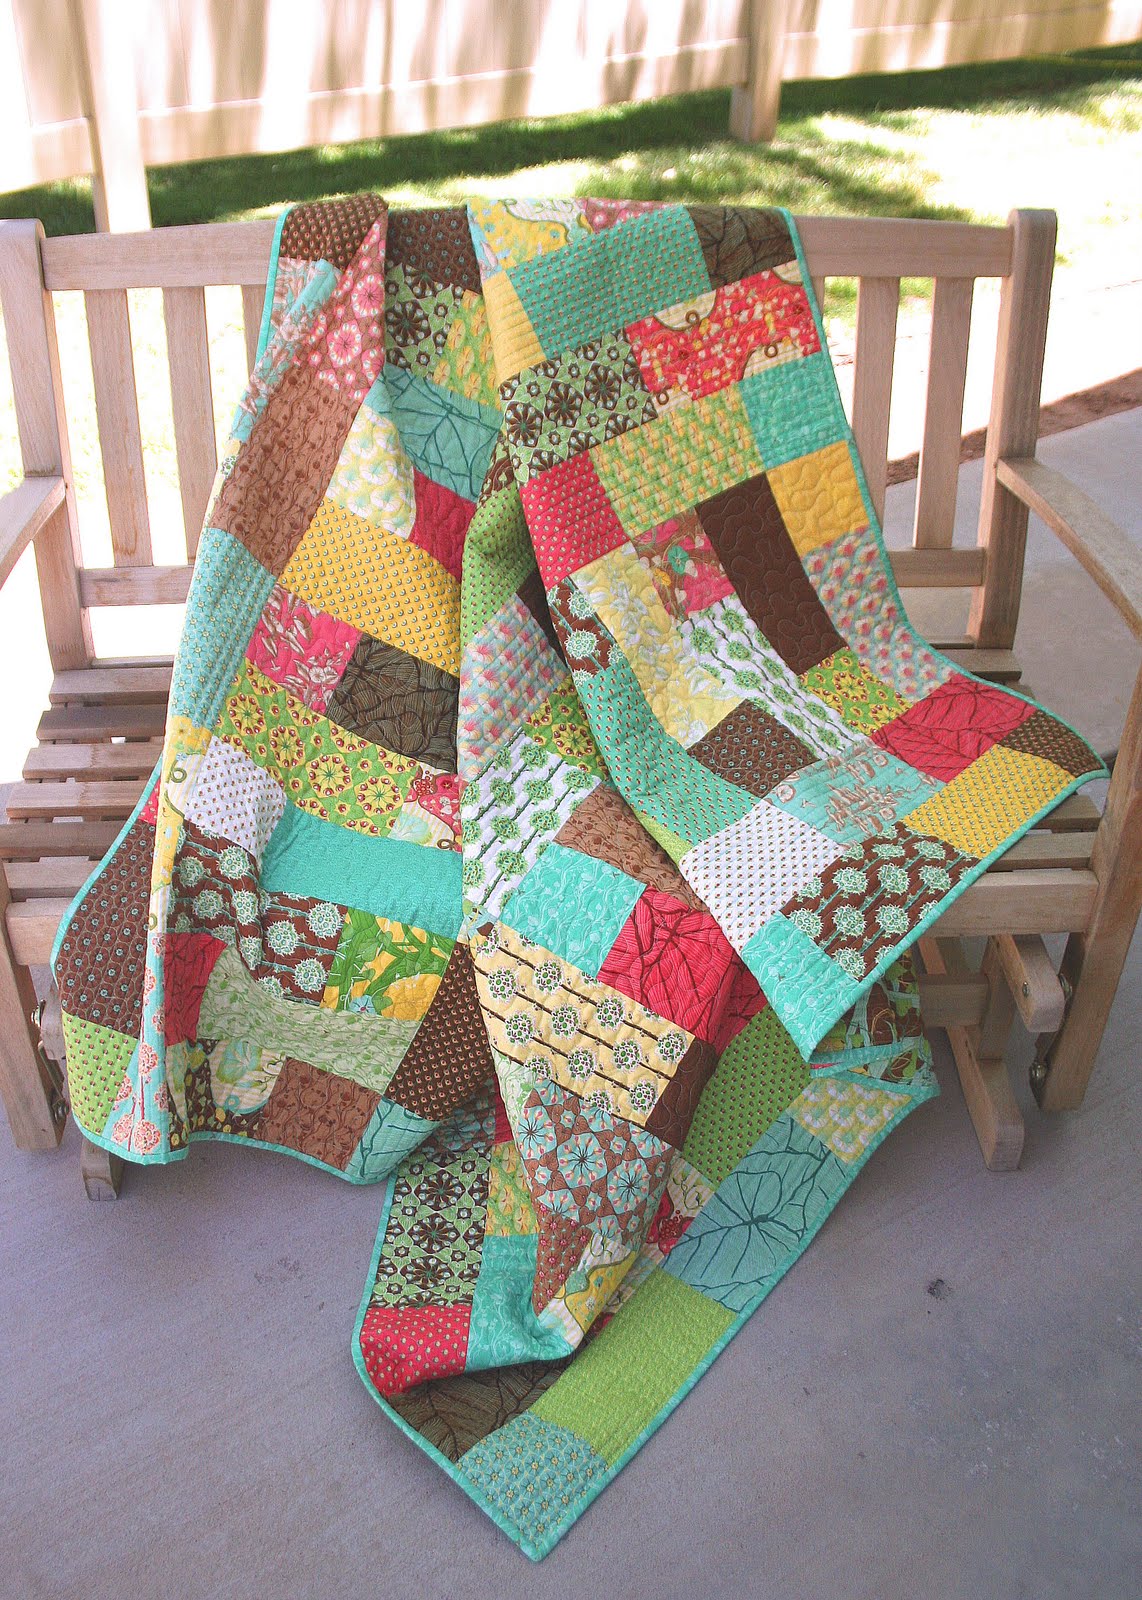
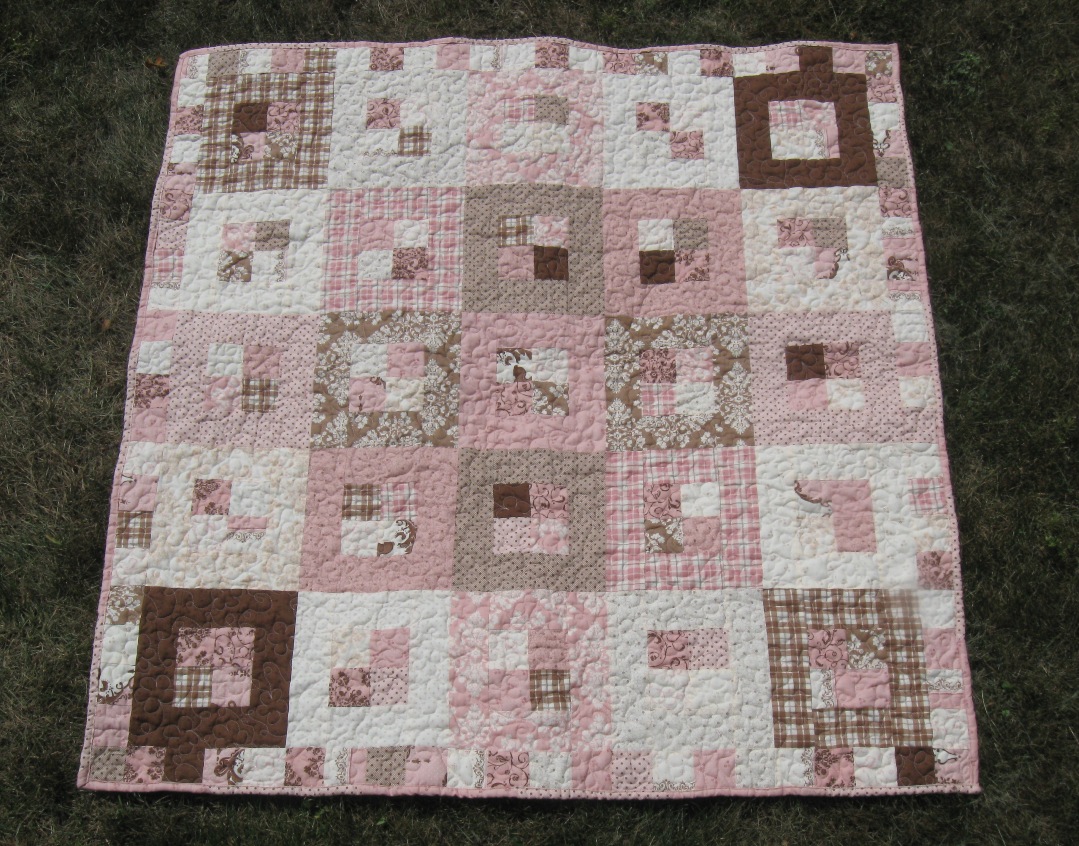
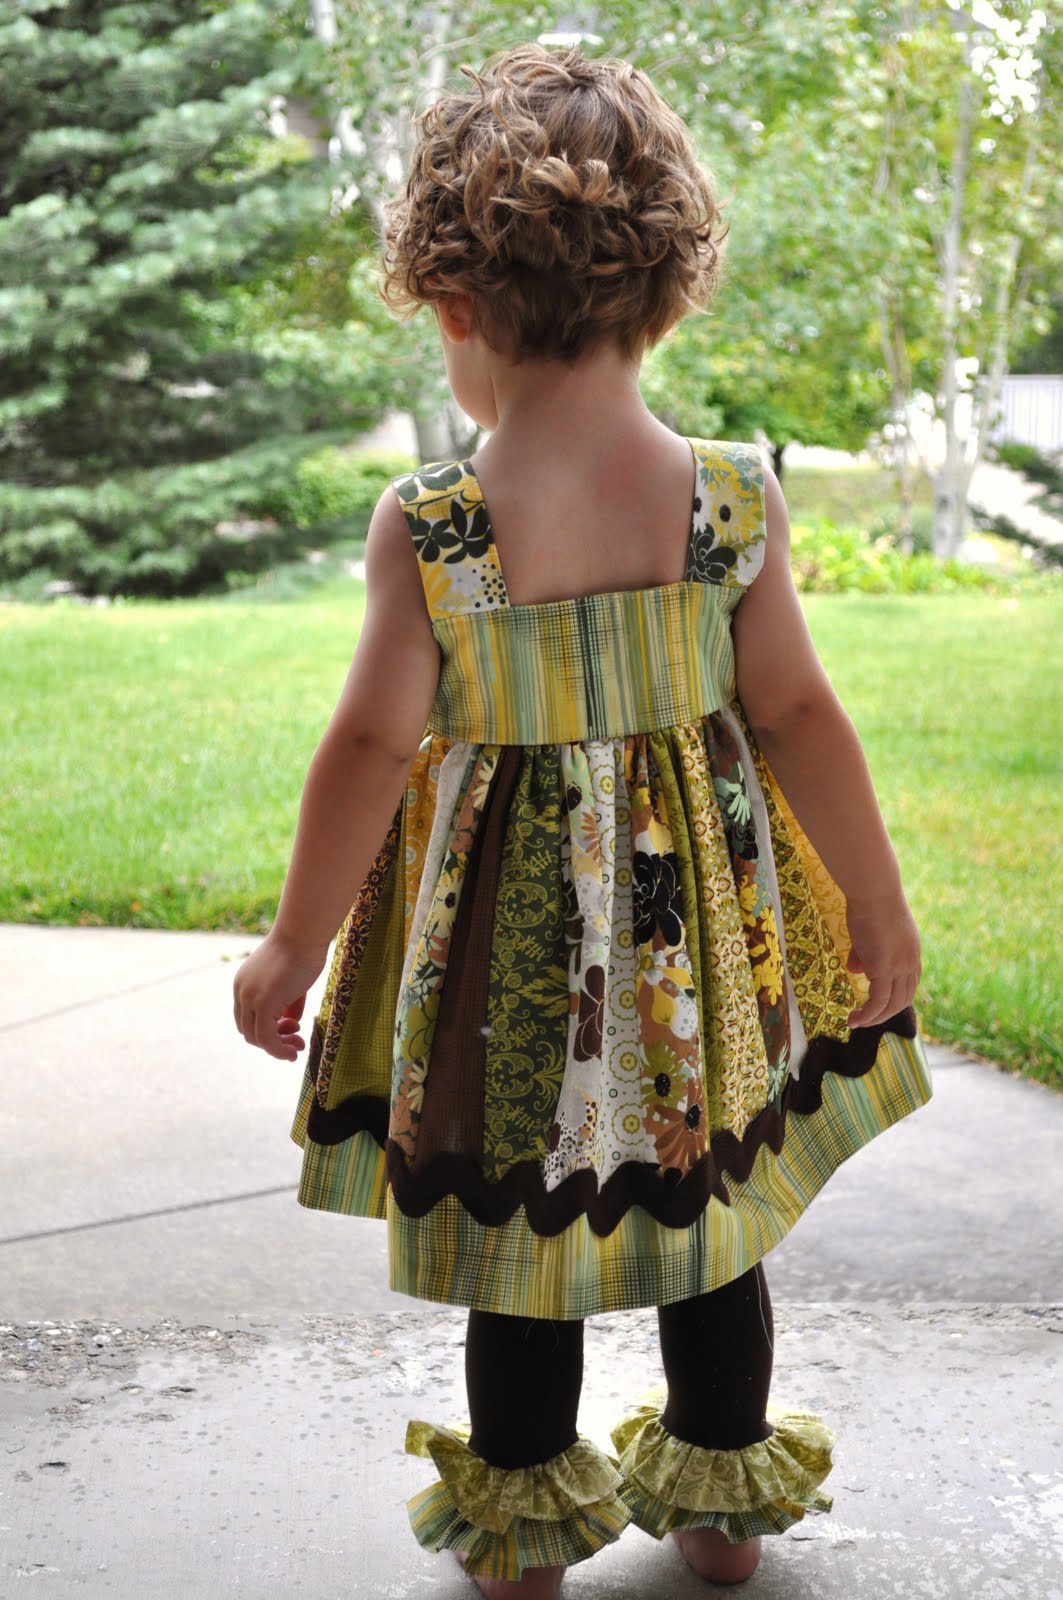
You’re done!! You should have something that looks along the lines of this. Now just sit back and enjoy your Snuggly Squares Baby Quilt!


One adorable quilt measuring 42 x 42 (Baby not Included). Happy Quilting!!


Thanks to Madeline for being such a perfect little model and thanks to her mom for being willing to let me take pictures of her beautiful little girl.

Melissa Corry

Organic Style

Hello from Fresh Cut Quilts!  It is my pleasure to bring you this simple, yet elegant pattern. This pattern makes a 69″ square lap sized quilt.  I chose to back this quilt in Moda’s Snuggle Solids, because it makes every quilt so cuddly and warm on a chilly day. With fall just around the corner and the winter holidays right after, it will be the perfect quilt to make for your home or for your loved ones this year.

I have partnered with Craft Town Fabrics to make kits available for purchase. Please visit their website to purchase a kit for this darling project!
I hope you enjoy!

Kari Ramsay
Fresh Cut Quilts Pattern Co.


1 Origins Jelly Roll (or Jelly Roll of your choice)You will use (30) 2 1/2″ strips
1 1/4 Yards Bella White Solid or White Graph Paper from Origins
1 1/3 Yards Refresh Dot 30236-11 for outer border
1 yard Onyx Grunge 30150-99 for the circle accents and inner border
1/2 yard Graph Paper Kelp 30239-17 for the binding
4 1/2 yards Snuggle Solid in Cream, Brown or Black for the backing


Heat n’ Bond Lite or Wonder Under fusible web, thread to match circle accents, one 16″ pillow form optional for the extra block, an Olfa circle cutter, or EZ Circle Cutter can be most helpful for cutting perfect circles.


Cut (6) Inner Border Strips 2 1/2″ x WOF (Width of Fabric)
Cut (7) 6″ x WOF Outer Border Strips
Cut (25) 1 1/2″ x WOF White Bella Solid Then cut in half at the fold to yield (50) 1 1/2″ x 20″ pieces

Sort the Jelly Roll strips into 5 groups of (6) 2 1/2″ strips each.  This may help keep the colors sorted for the blocks.

1. Cut all 30 of the Jelly Roll Strips in half at the fold to yield (60) 2 1/2″ x 20″ strips

2. Sew 1 white strip to one side of each of the  2 1/2″ x 20″ Jelly Roll roll strips, then press toward the darker fabric.  Be careful to keep this long strip straight to avoid curvy strips.

3. Sew one Jelly Roll strip to the white strip, and press.   Continue by adding a Jelly Roll strip to each white strip and alternating until there are six “dark” 2 1/2″ strips and five white 1 1/2″ strips sewn together.  The block should begin and end with a dark 2 1/2″ strip.

4. Press the blocks and trim to 17 1/2″ square.

5. Sew the blocks together alternating horizontal and vertical stripes.  You will have one extra block leftover which would make a perfect 16″ throw pillow!

6. Measure the quilt top and using that measurement, trim and then sew the inner border strips to the top and bottom of the quilt top. Measure the quilt top vertically and use that measurement to trim and then sew the side inner borders to the quilt top.

7.  Prepare the circles for appliqueing to the border strips.  For instance, if you are using fusible web as I chose to do, iron the fusible to the wrong side of the circles and then trace the circle and cut them out.  If you are hand or invisible machine appliqueing the circles prepare them as you normally would, then proceed to step 8.

8. Layout the circles on the outer borders in a way you think is desirable. Fuse or pin the circles to the borders.  

9. Pin and sew the borders to the quilt top. Then sew the circles to the borders.
Quilt and bind as desired!

I had mine quilted in canary yellow thread by Wendy Nabhan of Eagle Mountain Quilting


1 lovely Lap Quilt Measuring 69″ x 69″

Kari Ramsay

Blog
Fresh Cut Quilts Pattern Co.

Lawn Chair Quilts


Lawn Chair Quilts
Yield TWO 48″ x 75″ finished quilts
by Monica Solorio-Snow of Happy Zombie

Great quilt for the beginner quilter, and fun for the experienced quilter. No triangles or biased edges… no points to be perky, and no seams to meet up. Perfect for a retreat project – fun and fast. Especially fun if you’re enjoying a quilt retreat with a picnic on the lawn.

Instructions are based on 42″ – 44″ width of fabric
All seams ¼”
Picnic not included

  • 1 Jelly Roll of It’s a Hoot by MoMo (or 32 – 2½” strips)
  • 2 Jelly Rolls of Moda Bella Solid (or 4⅝ yard of yardage, cut into 64 – 2½” strips)

For each quilt:

  • 54″ x 81″ batting
  • ½ yard binding
  • 2¼ yard backing

1. Divide It’s a Hoot strips into color groups:
16 strips of pinks, reds & yellows with 32 strips of solid
16 strips of blues & greens with 32 strips of solid

2. Working in one color group at a time, set aside one color group to be assembled after completion of first color group.

3. Join a solid strip to each side of the It’s a Hoot print to make a 3-piece unit. Press to the print. Make 16.

4. From each of the sixteen 3-piece units, cut:
2) 12½” x 6½” units
2) 6½” x 6½” units
1) 3½” x 6½” units (from eight 3-piece units only)

5. With assorted print units, assemble row as per diagram. Press. Make 8 rows.

6. Join rows to complete the quilt top, alternating each row in an opposite direction. Press. Layer, baste, quilt and bind.


7. Repeat steps 3 – 6 for second color group quilt.

Please note:
The photographs show an extra row because I had leftover fabric and had enough to make an additional row.  I had added the row on after I wrote the instructions, and my apologies for not noting that.   
The pattern, illustrations and measurements do not include the additional row.  Of course free free to add the row if you have left over and extra batting/backing/binding. 

Yield TWO quilts – or one if using one of the tops as your backing.
Happy summering!

Monica

Knotty Jumper with Ruffled Leggings

1 jelly roll – Origins
1 yard of coordinating fabric

2 yards of jumbo rick rack


The following instructions and measurements are for a size 18-24 month knotted jumper and the ruffled leggings. 

Begin by cutting your strips into fourths.  Align them in a color combination you prefer and sew them together.  I sewed 32 strips to form this skirt.  Press your seams open when finished.

Prepare the bottom of the dress by cutting a piece the same length as all your sewn strips and 5 inches tall.  Fold it in half and press it.  Sew it onto the bottom of the strips.  The folded edge will become the bottom of the dress.  (Optional: Sew on the rickrack so that is covers the seam where the strips and the bottom fabric meet.)
Make the straps by taking one full strip and folding it in half.  Sew the edges, but leave an opening to invert it.  Clip your corners, invert, and press.

Cut 4 pieces from this pattern included in the Printer Friendly PDF.  Take two of the pattern pieces and place them right sides together. Sew the sides only – not the cut out area for the arm. Repeat this with the other two pieces.

Now you essentially have two loops of fabric.  Place one inside of the other with the correct sides facing each other. 
Insert your straps as shown.  Now sew the two layers together all around the top (along the opening for the arms and across the top).  

Cut slits along the curved seams and clip your corners.  Invert and top stitch.
You should have this.
Next you’ll join these two parts.
Sew two gathering stitches along the top of your skirt.  Pull the threads and adjust the fabric until it matches the circumference of the top of the jumper.  Sew them together and then sew a zigzag stitch on the inside of the seam.

Sew two button holes for the straps to pull through. 

For the leggings, cut one jelly roll strip in half.  Hem one side and sew a gathering stitch on the other side.  I recommend marking a line on the leggings with a water soluble pencil to help you sew it on straight.

Sew them onto the leggings as shown (as though it’s upside down).  When you’re finished you can iron the ruffles down to help them settle.


1 Knotted Jumper with Ruffled Leggings.  Depending on the size of the jumper you make, one jelly roll could make 2-3 jumpers.

Feel free to visit me anytime. Thanks!
Cheri Heaton