Beach Ball Baby Quilt

Hi! This is Jess from The Elven Garden with my first recipe for Moda Bake Shop. I wanted to challenge myself to see if I could make a quilt using just a jelly roll (Sphere by Zen Chic), and I came up with the Beach Ball lap/baby quilt. It does use a fat quarter of background solid as well, but other than that a jelly roll is all you need!

This quilt is made using large equilateral (60 degree) triangles, arranged so they form hexagons across the quilt top. The layout options for the hexagons are unlimited – if you would like to have a play with some other layout options, you can download and print triangular graph paper here. This quilt measures 45″ x 50″, but you could easily make it bigger by using additional jelly rolls.


One Jelly Roll of Sphere by Zen Chic
One Fat Quarter (or quarter yard) of Bella Snow
1/2 Yard Binding fabric
2 1/2 Yards backing fabric
50″ x 55″ piece of batting

All seam allowances throughout the tutorial are a scant quarter inch, and I have pressed my seams open at all stages.

Begin by sorting the jelly roll into colour sets, separating the lighter value prints (in this case the grey and white based prints) from the darker ones.

STEP 2:
Next, split each colour into sets of three strips. Some of my strip sets included one strip with a contrast in colour or value.

STEP 3:
Sew each of these strip sets together along the long edge. For the strip sets with one contrasting strip, make the contrasting strip the central strip in the set, as this will form a continuous ring within the hexagons. Press your seams open.

Each strip set should measure 6.5″ wide by width of fabric.

STEP 4:
Cut each of the strip sets into equilateral triangles using either a 60 degree triangle ruler:

Or using the 60 degree line on your ruler, lining up the line on your ruler with the bottom or top of the strip set.


Continue down the strip set, flipping the strip set or ruler as you go. You will end up with 9 triangles from each strip set.


STEP 5:
To avoid trimming off the sides of the quilt, and losing some of the width of the quilt, I added setting triangles at the end of each row. To make these, cut strips the same width as your strip sets (6.5″) from your fat quarter of background fabric. Make a 60 degree cut with your ruler, and then make a vertical cut, 4″ in along the long edge, and 1/4″ from the shorter side (see below). If you would prefer to give yourself more wiggle room when squaring your quilt, you can make the setting triangles a little wider (4.25″ in from the long side).

Continue along the strip, cutting a total of 16 setting triangles. 


STEP 6:
At this stage, you could lay out your pieces and start piecing the rows together. I found it easier to piece together my darker coloured triangles into half-hexagons first, as it was much easier to switch them around on my design wall until I found a layout I liked. It also makes it easier to keep your triangles in the correct order as you are sewing the rows together. 

Do not sew the light value (grey and white) prints in this way.


When sewing these half hexagons together, match up the seams along one edge and pin at each seam (I pin the side of the seam that will be sewn first). 


You will end up with three half-hexagons from each strip set. Do not trim off the little triangles formed at the outer corners, as these are very useful when aligning your triangles when sewing the rows together.


STEP 7: 
Lay out your pieces into rows according to the photo below, or as desired (here I have 8 rows of 12 triangles, plus a setting triangle at the end of each row). If you place them carefully, the light value triangles will form partial hexagons that appear to be sitting behind the coloured hexagons.


When sewing the triangles into rows, you will need to offset the pieces slightly to account for the seam allowance and produce a straight row. It is helpful to use the little ‘tags’ of fabric produced by pressing your seams open when lining up your pieces. In the photo below, you can see these ‘tags’ on the bottom left and top right of the half-hexagons. 

When the pieces are placed together ready to be sewn, they will cross each other at an angle like so (the seam to be sewn is at the right of the photo):

If we look more closely at these pieces, you can see how the ‘tags’ where the seams have been pressed open allow you to line up the two pieces.


STEP 8:
Once your rows are sewn, sew your rows together in pairs, carefully pinning each of the points where your seams meet, so that your points will meet up. Because there are a lot of bias edge in the quilt top, it is possible to ease (or slightly stretch) some of your pieces to make the points meet.

Continue sewing the rows together in pairs, until you have a complete quilt top. 


STEP 9:
Baste, quilt and bind as desired! To make your backing, cut two 15″ by width of fabric strips from one end of your backing fabric. Join these end to end to make one long 15″ wide strip. Remove the selvedges from the remaining backing fabric, and join the long strip you just made to one side of the backing fabric using a 1/2″ seam. 


One lap quilt, 45″ x 50″

Jess Frost
{theelvengarden.blogspot.com}

Candy Circle Quilt


Hi there, this is Cheryl from Meadow Mist Designs and I am so excited to share my first project for Moda Bake Shop!  I love the cute Moda candy packs and all of Fig Tree & Co.’s fabric lines so I was thrilled to combine them to make the Candy Circle baby quilt.  With just four mini charm packs (or just one charm pack), a focal print fabric, and some background fabric, you can have a cute baby quilt ready to gift.


4 mini charm packs (also called candy packs) or 1 charm pack:  Mirabelle by Fig Tree & Co.

3/4 yard of a focal print: Mirabelle Breeze 20225
5/8 yard of a background fabric (3/4 yard if you include the optional pieced backing): Bella Solids White Bleached
3/8 yard for binding: Mirabelle Bark 20227
1 and 1/4 yards for backing: Bella Solids Green Olive (for a 2″ overhang)


Step One – Cutting the Fabrics
*Note: if you cut each strip in each step you may have a few extra pieces cut.

Candy Squares

1)      If starting with a charm pack, cut each (5” x 5”) charm square into 4 (2.5” x 2.5”) patchwork squares for a total of 168 squares (2.5” x 2.5”) (if starting with candy packs, skip to step 2)

2)      Select 132 of the 168 squares (2.5” x 2.5”) to use in the front of your quilt.  Pick squares with good contrast with the background.  You can use the leftover squares for a pieced backing.


Focal Fabric
1)      Cut 3 strips 4.5” x WOF strips

      a)      Cut each strip into 4.5” x 4.5” squares (9 per strip) for 24 squares (4.5” x 4.5”)
These 4.5” x 4.5” squares are the “full focal blocks”.


2)      Cut 4 strips 2.5” x WOF
a)      Cut 2 strips into 2.5” x 4.5” rectangles (9 per strip) for 12 rectangles (2.5” x 4.5”)
b)   Cut 2 strips into 2.5” x 2.5” squares (16 per strip) for 28 squares (2.5” x 2.5”)
  

Background Fabric (abbreviated bg in this pattern)
1)      Cut 8 strips 2.5” x WOF
a)      Cut 4 strips into 2.5” x 4.5” rectangles (9 per strip) for 28 rectangles (2.5” x 4.5”)

      b)      Cut 4 strips into 2.5” x 2.5” squares (16 per strip) for 64 squares (2.5” x 2.5”)

  
Step Two: Assembling the Blocks

The Candy Circle quilt contains 6 types of blocks.  Using the following amounts of fabric pieces and following the sewing pictures, sew pieces into rows and then rows together into blocks.  Press all seams open.

Full Focal Blocks:
24 focal print squares (4.5″ x 4.5″)

1/4 Focal Blocks
Using 16 bg squares (2.5″ x 2.5″), 16 bg rectangles (2.5″ x 4.5″), and 16 focal print squares (2.5″ x 2.5″), make 16 1/4 Focal Blocks

3/4 Focal Blocks
Using 12 bg squares (2.5″ x 2.5″), 12 focal print squares (2.5″ x 2.5″), and 12 focal print rectangles (2.5″ x 4.5″), make 12 3/4 Focal Blocks

Full Patchwork Blocks:
Using 48 focal print squares (2.5″ x 2.5″), make 12 Full Patchwork Blocks


3/4 Patchwork Blocks
Using 72 patchwork print squares (2.5″ x 2.5″) and 24 bg squares (2.5″ x 2.5″), make 24 3/4 Focal Blocks

1/4 Patchwork Blocks
Using 12 bg squares (2.5″ x 2.5″), 12 bg rectangles (2.5″ x 4.5″), and 12 patchwork squares (2.5″ x 2.5″), make 12 1/4 Patchwork Blocks


Step Three: Assembling the Quilt Sections

The quilt contains 4 quilt sections, each section containing 25 blocks in a 5 rows x 5 columns arrangement.  Each section contains the following number of blocks:


Arrange the 25 blocks in a 5 by 5 block arrangement as shown below:


Sew blocks together into rows (pressing seams open) and then sew rows together pining at each intersecting seam (pressing seams open).


Repeat 3 more times for a total of 4 quilt sections.  (Alternatively, you may layout the full 10 x 10 block arrangement for the whole quilt, sew the blocks into rows, then sew the rows together).

Sew the 4 quilt sections together (pressing seams open).

Optional Pieced Backing

Select 22 patchwork squares
Cut 2 additional strips 2.5″ x WOF of the background fabric

Sew the 22 patchwork squares into a row, then sew the 2.5″ x WOF background strips onto either side of the patchwork row.

Slice the backing yardage (I made my cut about 2/3 of the way across the fabric) and sew the patchwork section into the background yardage.  


Step 4: Finishing the Quilt

1)    Layer the quilt top, batting, and backing and baste the quilt.

2)    Quilt as desired.  I quilted the focal fabric areas in a straight line lattice, quilted the background areas using a small pebble design, and quilted the patchwork squares with straight line quilting.

3)    Bind the quilt using 5 strips 2.5” x WOF (for straight, not bias binding).  More information on binding can be found here.

Thank you so much for joining me in my first Moda Bake Shop tutorial.  I would love to see what you make with the pattern, please add your quilts to the Moda Bake Shop flicker group and the Meadow Mist Designs flicker group.  Visit this page on my blog (www.meadowmistdesigns.blogspot.com) to see the quilt pattern rendered in other colors including a holiday version.

Cheryl Brickey
{
Meadow Mist Designs}


Main Squeeze Quilt


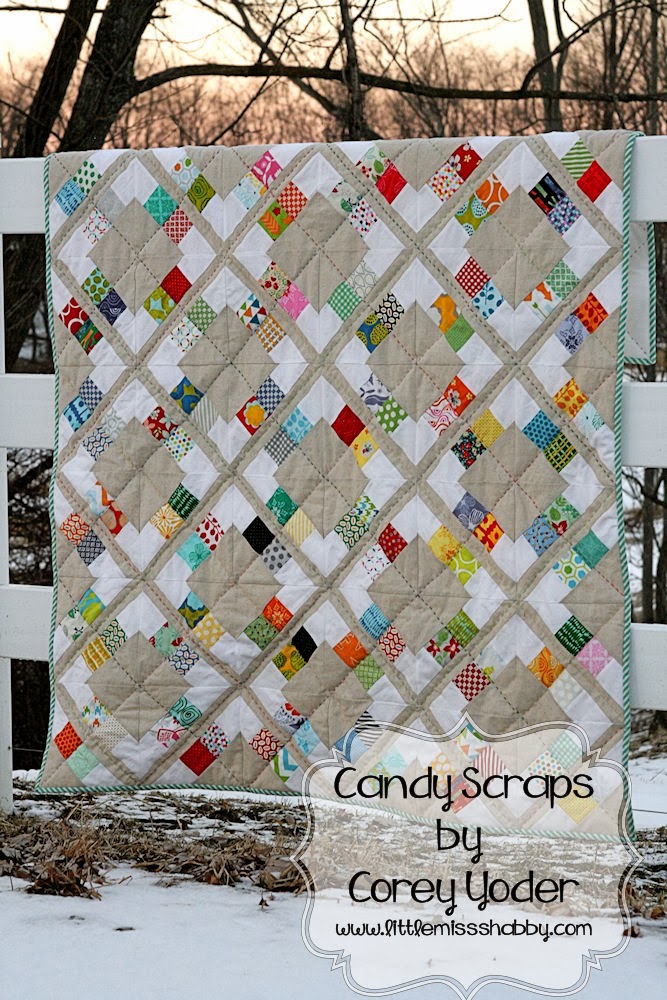
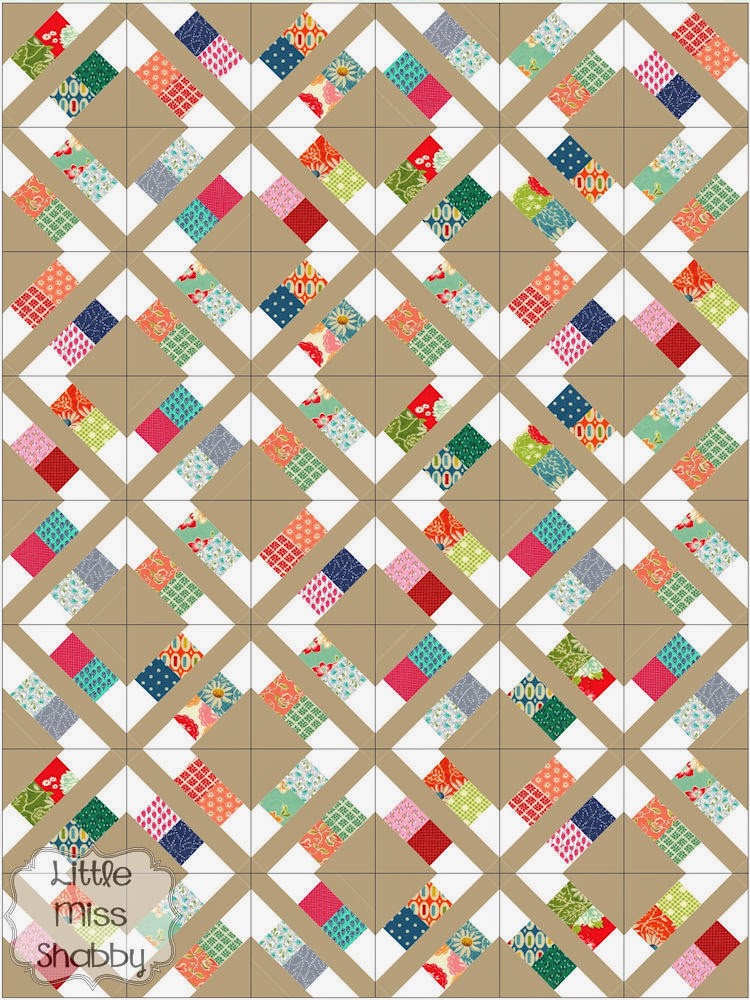
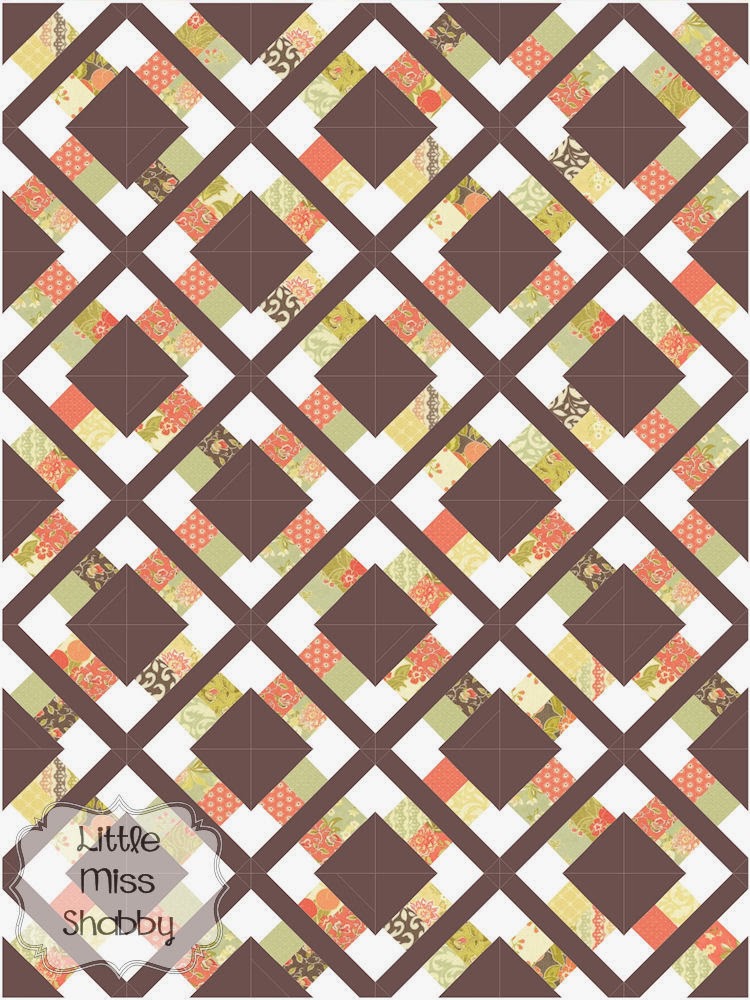
Hello Moda Bake Shop readers! I am a new chef here, and I am honored to be a part of the Bake Shop. I blog at Live. Love. Create. and love bright, bold colors and modern designs. My quilt design was named Main Squeeze based on the X and O blocks it creates, like a “hugs and kisses” quilt. This pattern yields a large throw sized quilt, 60 by 80 inches when finished.

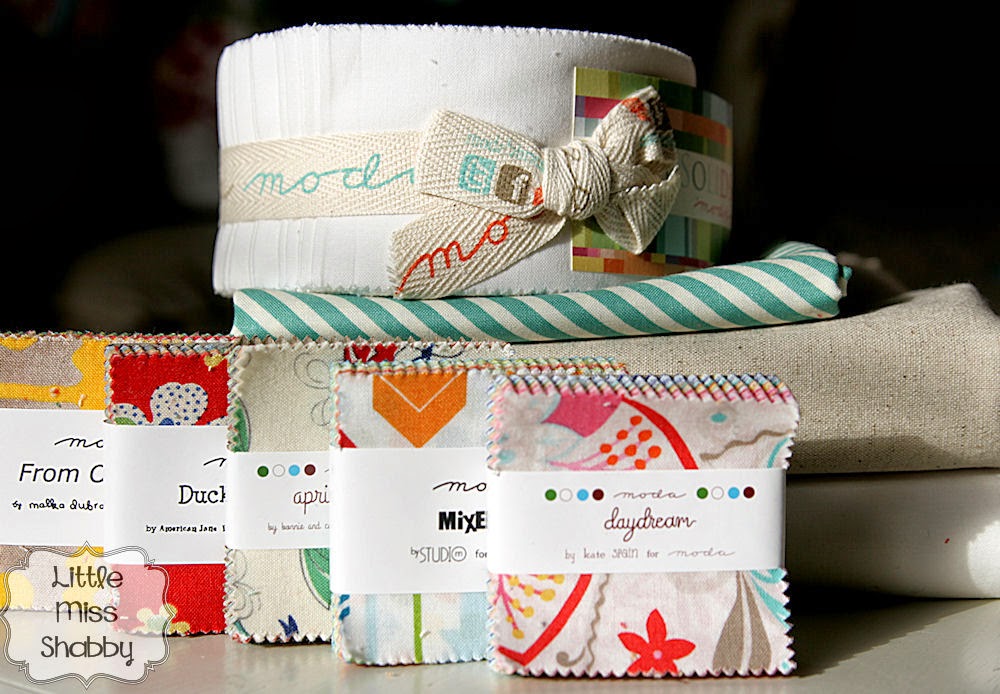
19 Fat Quarters of coordinating colors, I am using Sphere by Zen Chic.
3 1/4 yards solid or print for background fabric, I used Moda Bella white
3/4 yard solid or print for binding, I used Sphere by Zen Chic
4 1/4 yards coordinating solid or print for back, again I used Sphere by Zen Chic

Step 1:  From your background fabric, cut

12 – 10.5 inch squares
24 – 5.5 inch squares
48 – 6 inch squares
24 – 2.5 inch squares

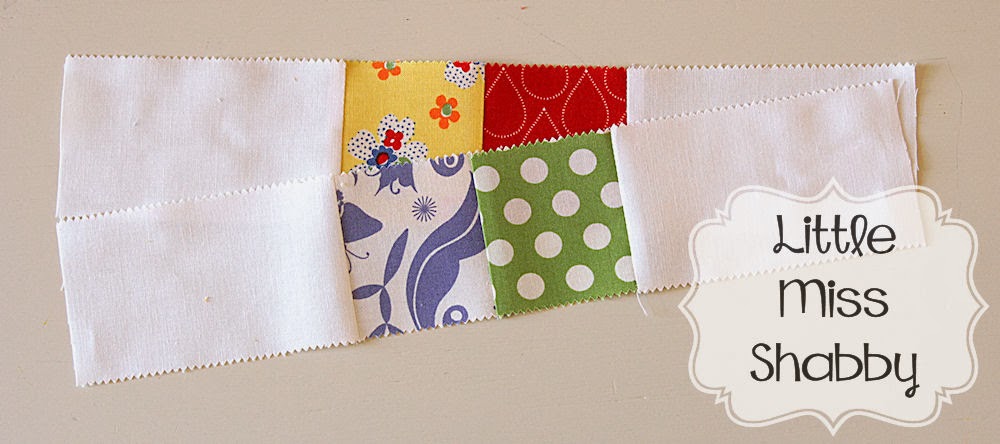
Step 2:  For the rings, I labeled each ring with the letters A-J, then labeled the half-square triangles number 1 and the “gem” square number 2. The blocks I call “gem blocks” are the squares that just have the small triangle in the corner, as seen below.

So the first ring on the top left of the quilt will need two different fat quarters, fabrics labeled A1 and A2, and so on.  Each ring in my quilt was made up of the same color fabric in two different prints, and the amount needed is based on this layout. You can download a printout of this quilt, so you can test your color combinations here. I think it would also look great if the “gem” blocks are a contrasting color to give each ring some pop.

From your 19 fat quarters cut the following.

A1: (6) 6 inch squares            
A2: (2) 5.5 inch squares              
B1: (2) 6 inch squares
B2: (2) 5.5 inch squares
C1: (8) 6 inch squares
C2: (4) 5.5 inch squares
D2: (1) 5.5 inch square
E1: (8) 6 inch squares
E2: (4) 5.5 inch squares
F1: (2) 6 inch squares
F2: (2) 5.5 inch squares

G1: (6) 6 inch squares
G2: (2) 5.5 inch square
H1: (8) 6 inch squares
H2: (4) 5.5 inch squares
I1: (6) 6 inch squares
I2: (2) 5.5 inch squares
J1: (2) 6 inch squares
J2: (1) 5.5 inch square

To keep everything organized, I kept all my fabric and blocks labeled with sticky notes throughout the quilt top assembly, like in the picture below.

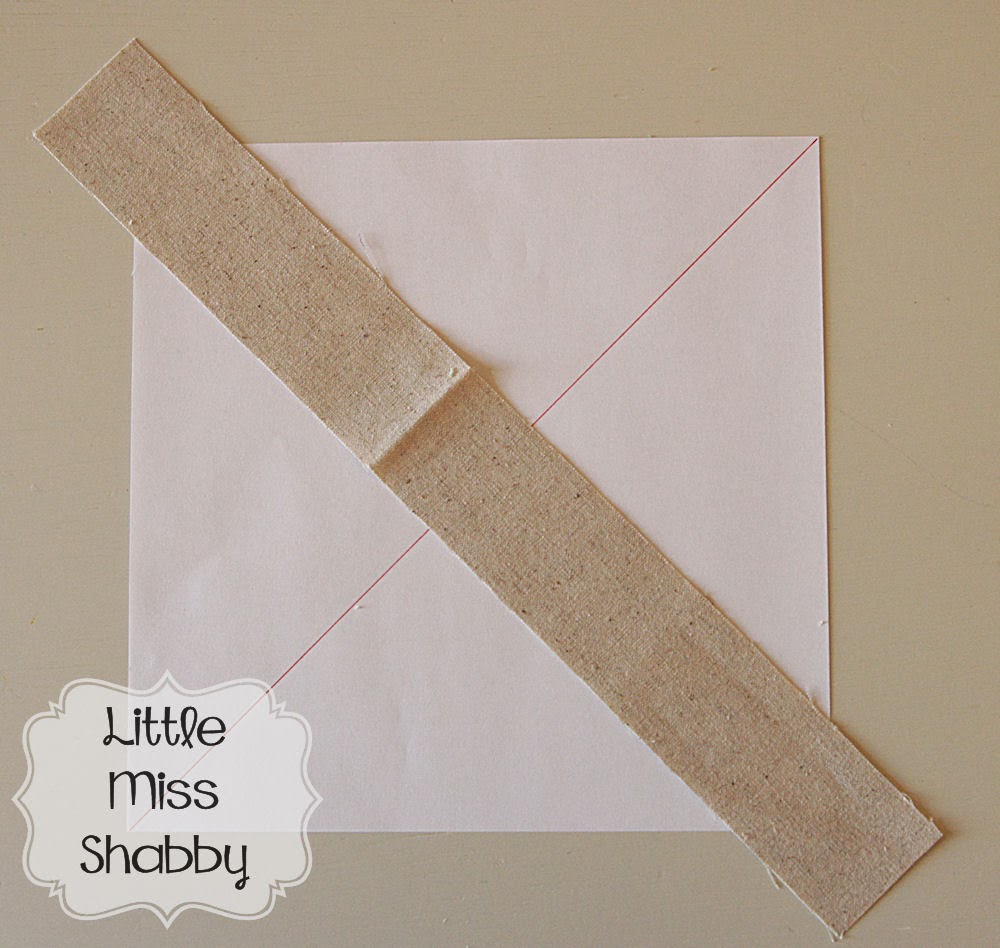
Step 3:  Sew your half-square triangle blocks. Take one 6-inch background piece and lightly draw a diagonal line from one corner to the opposite corner on the back. Repeat this for all your 6-inch background pieces.

Step 4:  With the right sides together, place one background piece and one A1 square together. Sew a scant 1/4 inch away from the line you drew on your background piece, and repeat on the other side. Your block should look like this when both sides are sewn.

Repeat for all remaining blocks labeled 1.

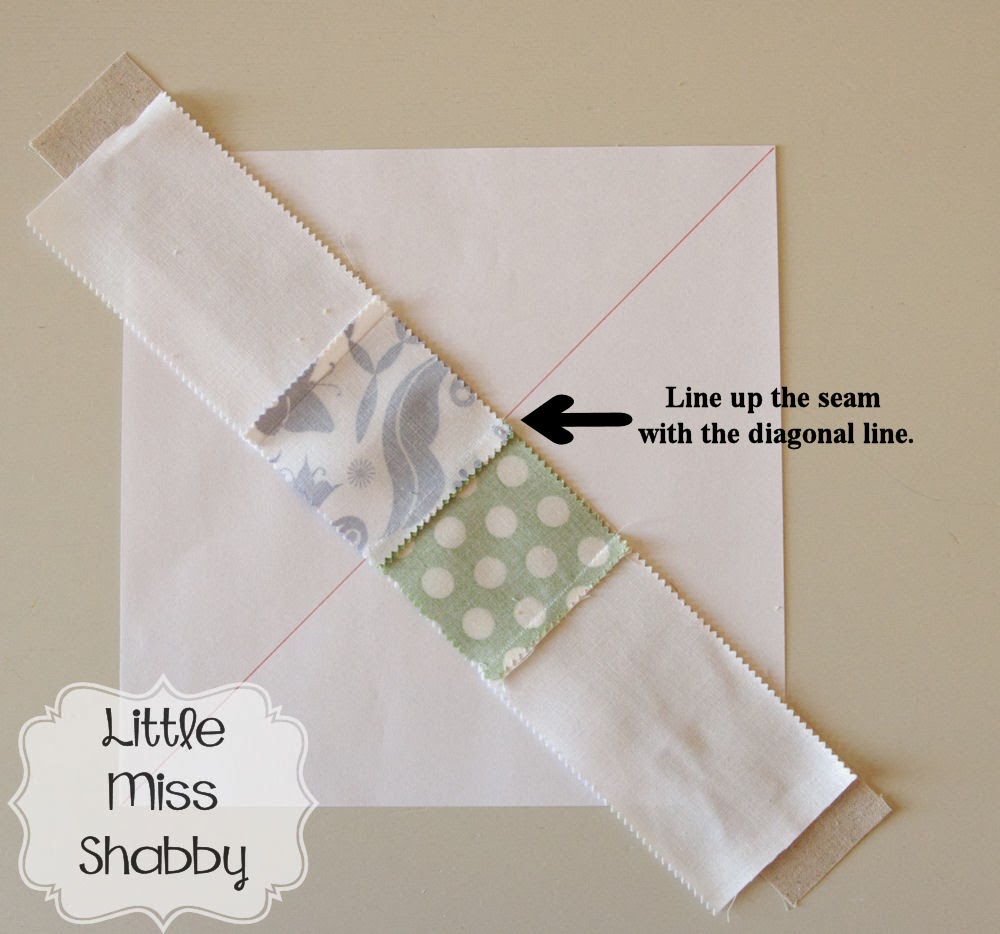
Step 5: Cut your half square triangles in half diagonally, on the line you initially drew. Press the seams to the darker print.

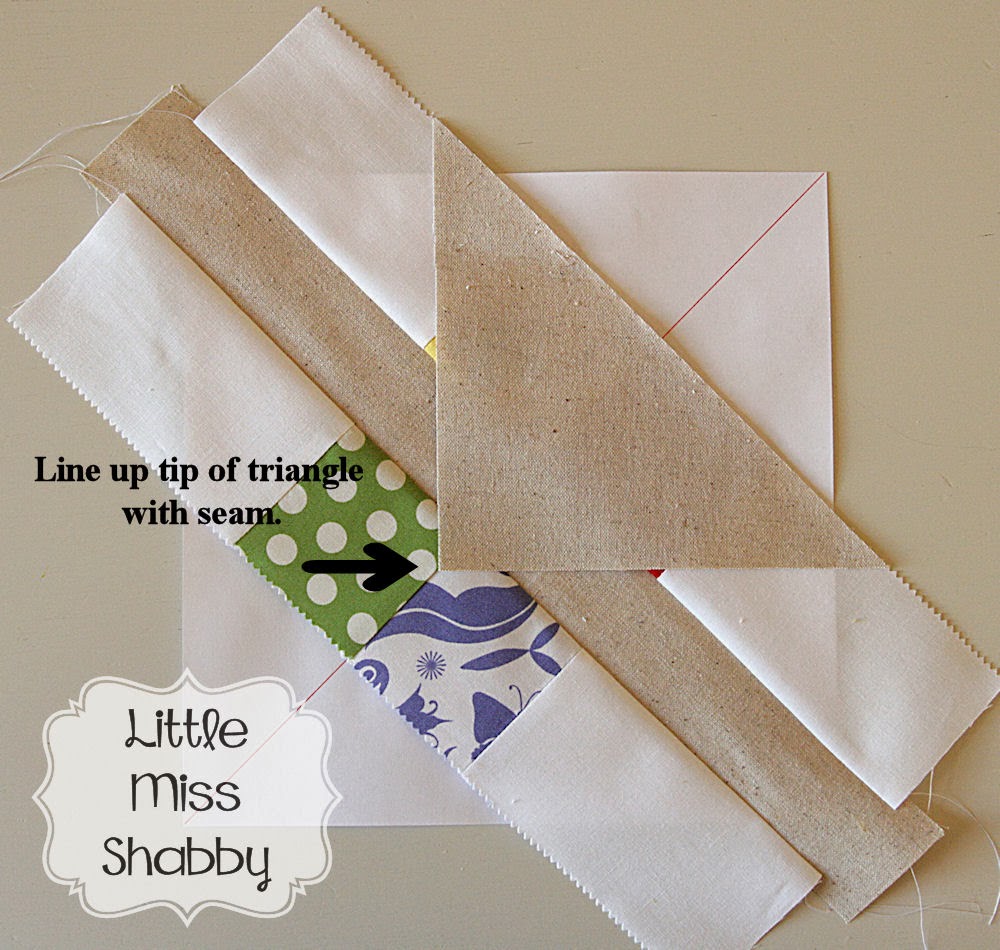
Step 6: Carefully trim your half square triangles to 5.5 inches. I line up my blocks with the seam on a 45 degree line on my mat, with a little bit of overhang on each side. I like to cut from all four sides to yield a more accurate cut, but be careful, you will not have much waste!

Step 7: Take your 2.5 inch background pieces and again lightly draw a line from one corner to the other.

Step 8: Place one 2.5 inch background piece in the corner of one 5.5 inch A2 block. Sew just off of the line, on the side closer to the corner.

Note: If you sew directly on the line you drew, when you press your block out you will lose a tiny amount from each block.

Step 9: Trim excess fabric 1/4 inch from the seam. You can also opt to leave this fabric on for extra stability. Press the seam toward the background fabric.

Repeat steps 8 and 9 for all of your blocks labeled 2.

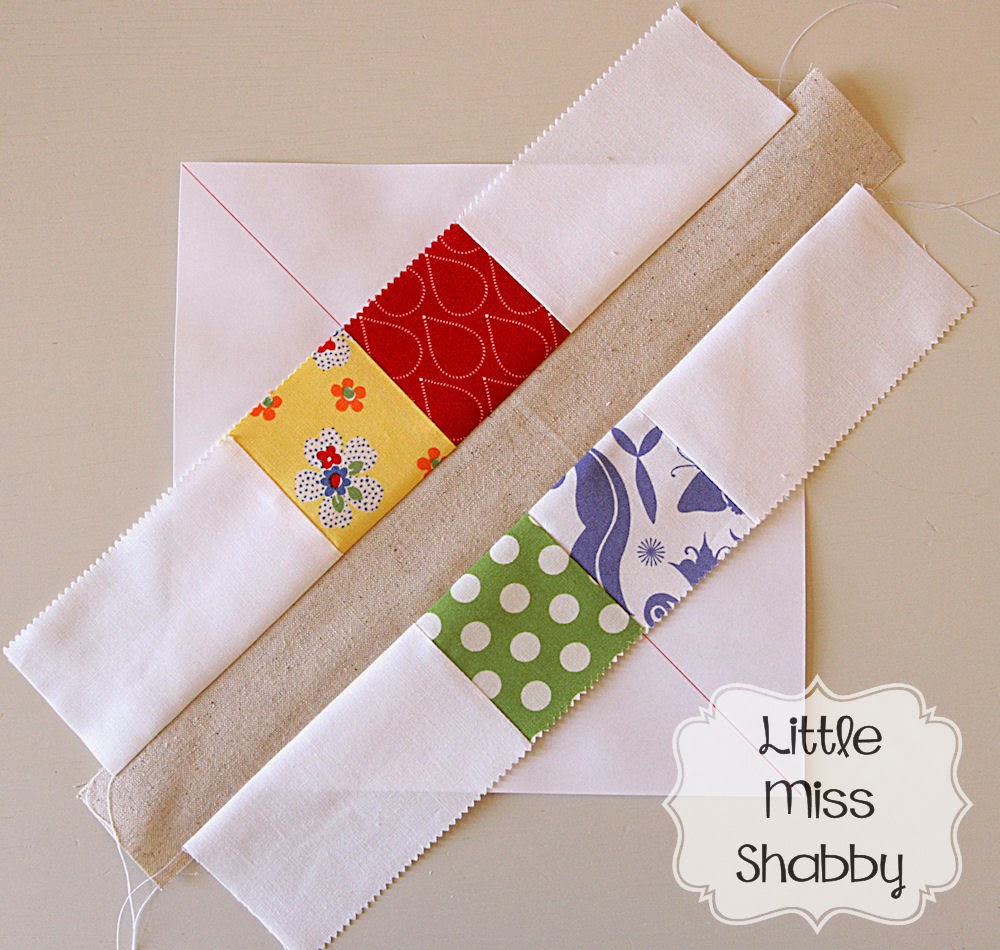
Step 10: Grab four of your A1 half-square triangles (HSTs) and sew together to create a “V” block. I pressed the seams to the side, alternating the direction so I could nest the seams. Repeat with four B1 HSTs, and four C1 HSTs.

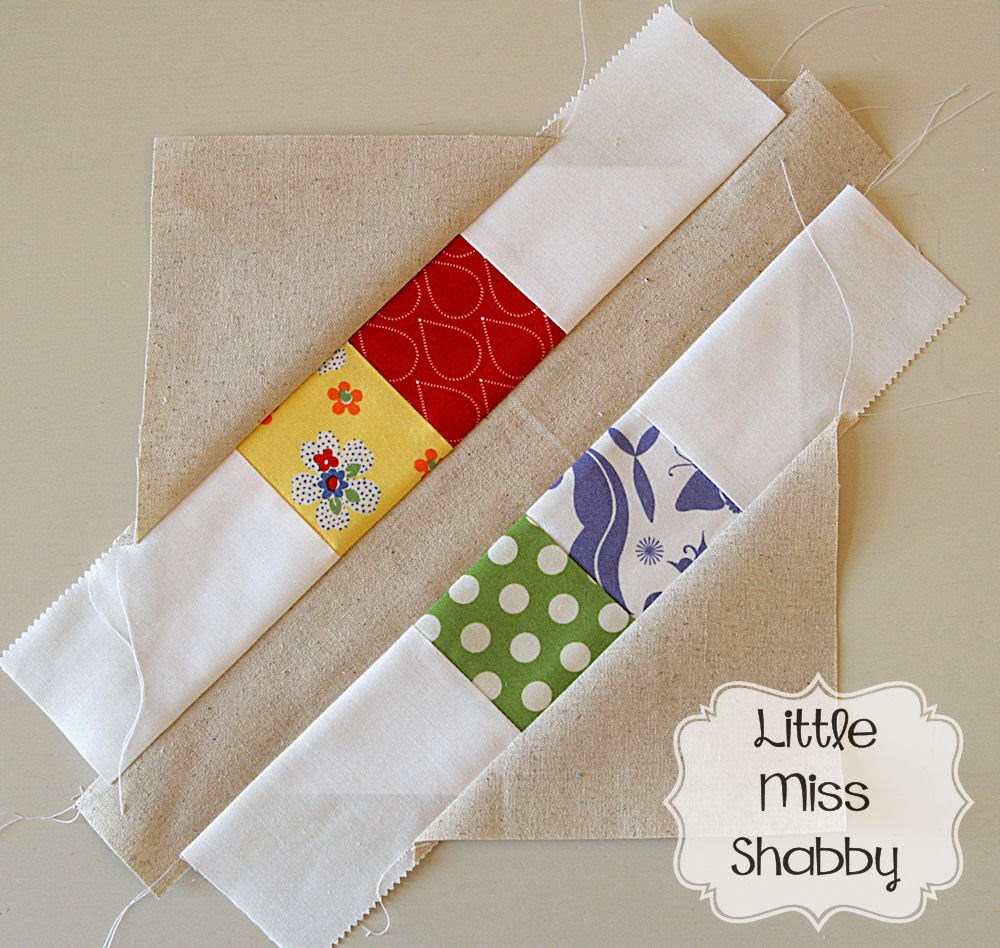
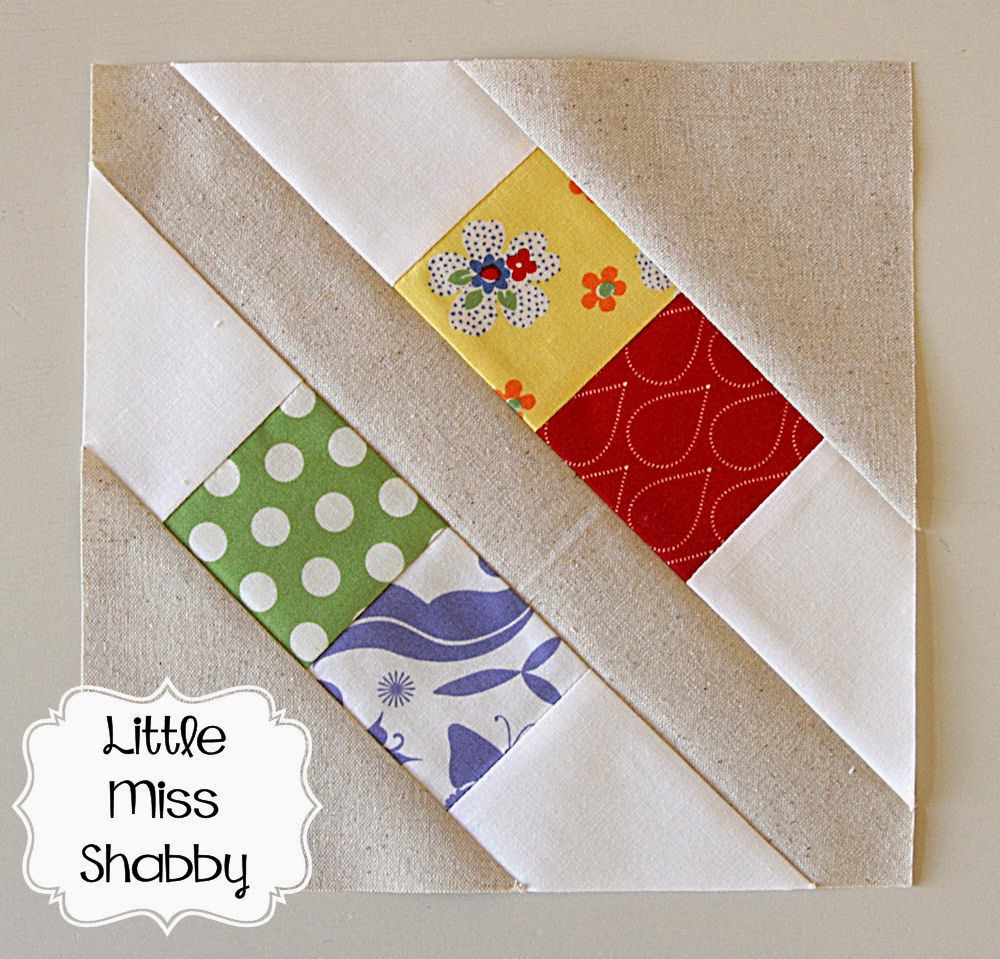
Step 11: Take one A2 block, one B2 block and two 5.5 inch background pieces and sew together to form a bow tie block, like the following diagram. I pressed seams to the side, alternating the direction so I could nest the seams. Repeat for one block with a B2 and C2 block and one block with a C2 and D2 block.

Step 12: Arrange your first row according to the diagram below and sew together. If you are pressing your seams in order to nest them together, you want to press the first seam (between your A1 “V” block and A2/B2 bow tie block) to the right.

Step 13: Repeat step 10 with four A1 HSTs and eight C1 HSTs. Layout your “V” blocks with your 10.5 inch background pieces according to the diagram below.

Step 14: Make one “V” block each using your A1, C1, and E1 HSTs. Make one A2/E2, one C2/E2, and one C2/F2 bow tie block. Arrange these blocks to form your third row according to the diagram below.

Step 15: Make two E1 “V” blocks and one F1 “V” block. Arrange them with your 10.5 inch background squares according to the following diagram.

Step 16: Make one “V” block each using your G1, E1, and H1 half-square triangles. Make one G2/E2, one E2/H2, and one F2/H2 bow tie block. Arrange these blocks to form your third row according to the diagram below.

Step 17: Make two H1 “V” blocks and one G1 “V” block. Arrange them with your 10.5 inch background squares according to the following diagram.

Step 18: Make one “V” block each using your G1, I1, and H1 half-square triangles. Make one G2/I2, one H2/I2, and one H2/J2 bow tie block. Arrange these blocks to form your third row according to the diagram below.

Step 19: Make two I1 “V” blocks and one J1 “V” block. Arrange them with your 10.5 inch background squares according to the following diagram.

Step 20: Pieces your rows together and press well. I like to sew two rows together at a time. So instead of sewing them on in order, adding each row individually, I sew rows 1 & 2 together, then rows 3 & 4, etc. Then I sew one of the double rows to another double row, and end by sewing the two halves of the quilt top together. I find that it is easier to sew the top together this way so you do not have all the weight of the quilt top when you sew each row on individually.

Step 21: Cut your background fabric into two 68 inch x width of fabric pieces. Remove the selvages and you should have two pieces that are 40-42 inches wide.

I also grabbed all of my scraps and pieced them together to make a 10 inch x 68 inch patchwork piece. Without this piece your back may not be large enough, since I like to have my quilt backs measure 8 inches larger than my tops on all sides. If you would prefer not to use scraps, you need to cut one more piece of background 10 inches by the width of fabric and substitute it for the scrap strip I show below.

Sew together your back according to the diagram below.

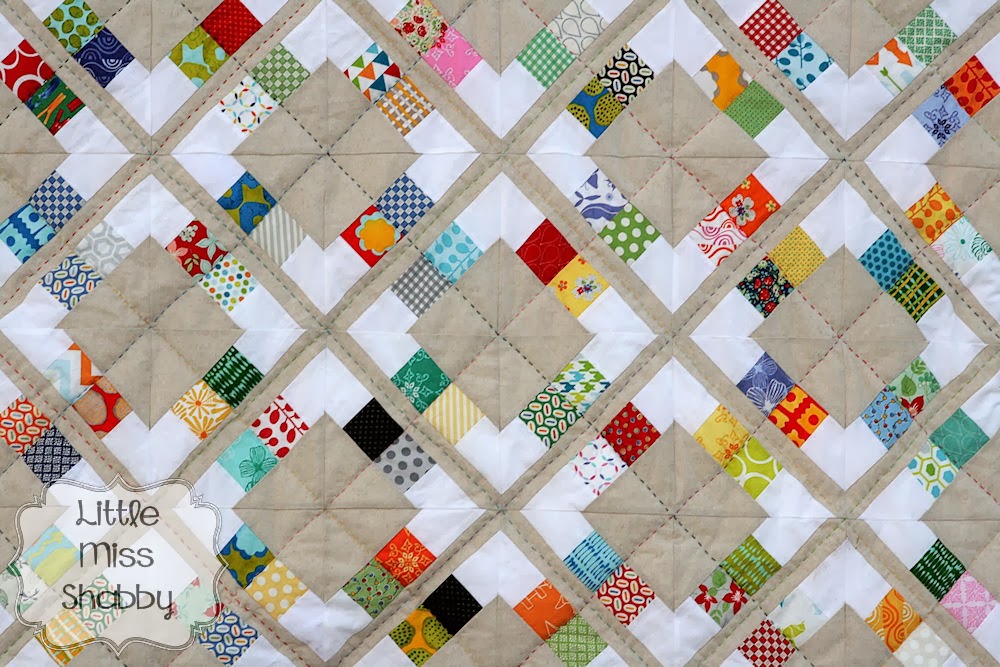
Step 22: Cut a piece of batting 64 inches x 84 inches and baste your quilt together. Quilt as desired. I straight line quilted my rings in alternating directions, like a volleyball.

Step 23: Bind and finish your quilt. You will need 290 inches of binding for the quilt. I cut 7 fabric strips that measured 2.5 inch by the width of fabric.

One generous size throw quilt, measuring 60 by 80 inches to snuggle under.

Thank you so much to Moda for letting me share my quilt! I would love to see any of your creations from this tutorial in the Moda Bake Shop Flickr group. Thank you for stopping by!

Kelly Smith
{Live. Love. Create.}

Applique Hearts Pillow


Hi All! This is Jera from www.QuiltingintheRain.com bringing you this simple Applique Hearts Pillow tutorial just in time for Valentine’s day. Depending on what fabrics you use, the pillow can be used year round. This pillow has an easy envelope enclosure, making this a quick and fun weekend project that you can complete in a few hours.

Also, I wanted to share that I have a quilting book coming out this year, so come check out my blog for details (or for some great tutorials!), or follow me (and my corgi, Paige) at Quilting in the Rain’s Facebook to see my latest quilts and projects. Thank you so much for stopping by! Let your creativity rain!

  • 1 yard Moda Solids Prairie Cloth in Buff (this material is home decor weight but has a linen/canvas feel to it) 
  • 1 Bella Solids charm pack in Porcela, plus one scrap for the colored heart
  • Clear glue that works on fabric
  • Coordinating thread
  • 20″ square pillow insert


1. From the prairie cloth, cut one 21″ square. For the back of the pillow, cut two 15″ x 21″ rectangles (these will be made into the envelope closure).

From the charm squares, cut hearts of varying shapes and sizes. I think the variety and imperfection of the heart shapes adds character to the pillow. To cut a big heart, simply fold a charm square in half and crease it with your finger so it stays folded. Then, use fabric scissors to cut the arch of ‘half of a heart’ along the folded edge. When you unfold it, you will have a heart shape.

To make smaller hearts,  repeat but cut two hearts from one charm square. 

I started by cutting approximately 8 big hearts, and then filled up the pillow with smaller and medium sized hearts. Also, from your scrap fabric cut one medium-size colored heart.
2. Next, arrange the hearts on the 21″ square.
3.Use clear glue that works on fabric to temporarily hold the hearts in place. Use very little glue as this is just an alternative to using pins and is meant to be temporary. For each heart I put the tiniest drop of glue and then spread it with my finger to make a very thin layer.
This is the glue I ended up using but i’m sure Elmers would work just as well. I just recommend getting a clear adhesive.
4. Sew the hearts in place using a regular presser foot. I simply guided the edge of my presser foot along the heart to sew a 1/4″ seam allowance, using a straight stitch setting.
If you’ve never done this before, to get around the curves of the heart you will need to stop and pivot the fabric quite often. To do this, simply stop sewing with the needle in down position, lift the presser foot and pivot the fabric underneath to follow the curve. You’ll get the hang of it. 🙂 
5. Along the length of a 15″ x 21″ rectangles,  turn the edge 1/4″ under, press, then turn under 1″, then press again. Stitch along the fold to keep in place as shown below. Repeat on the other rectangle as well.

6. With right sides facing together, take one rectangle and align it along the left side of the pillow cover. The finished seam you created from the previous step should be facing toward the right. Pin to keep in place, then sew a 1/2″ seam allowance along the perimeter as illustrated by the dashed line below. Start and end your stitch with a back-stitch.

Repeat with the other rectangle, but align it on the right side of the pillow.

Clip the corners to rid of bulk and then turn right side out through the envelope opening.

7. Lastly, rub your hands up and down the pillow to help ruffle-up the edges of the hearts. The semi-freyed and ruffled hearts adds texture to the pillow. The freying will not go beyond the stitch. 

And there you have it! A beautiful, applique heart pillow!


One fabulous 20″ x 20″ pillow

Thanks again for checking out my tutorial! Come visit me at www.QuiltingintheRain.com or follow me on Facebook at QuiltingintheRain. You can also find me on Instagram.

Let your creativity rain! 🙂

Jera Brandvig
{www.QuiltingintheRain.com}

Candy Scraps Quilt


Hello all!–I am excited to be sharing another quilt pattern with you here on Moda Bake Shop.  My name is Corey; you will usually find me blogging over at Little Miss Shabby.
I am always drawn to a great scrap quilt–they are probably some of my favorite quilts.  Moda’s mini charm packs are a perfect way to create a scrap quilt.  If you prefer a less scrappy quilt, this quilt could also be made using one regular charm pack and one mini charm pack.  Check out the end of the tutorial to see the quilt made using Mirabelle by Fig Tree Quilts.


*5 Moda Candy packs (I used From Outside In, Ducks in a Row, April Showers, Mixed Bag, & Daydream)
1 White Solid Jelly Roll
2 1/4 yard Linen Mochi Dot Unbleached Linen (32911-11)
3 1/8 yard Backing
1/2 yard Binding (I used April Showers, Teal Stripe, 55083-12)
56″ x 72″ batting

*For a less scrappy version choose one regular charm pack & one Moda Candy pack, cut each 5″ square into (4) 2.5″ squares


(48) 8 1/2″(trim a regular sized piece of paper to the correct size) pieces of copy paper; draw a diagonal line from one corner to another

A variety of 8 wt. Perle Cotton if hand quilting

Cutting Instructions

From the Jelly Roll:
Use 22 strips, cut (192) 2 1/2″ x 4 1/2″ rectangles (cut 9 from each strip)

From the Linen cut:
(16) 1 3/4″ x WOF strips; subcut (48) 1 3/4″ x 14″ strips
(7) 6″ x WOF strips; subcut (48) 6″ squares, cut diagonally once to make 96 triangles

Block Construction

~All sewing is done right sides together using a scant 1/4″ seam allowance~
Begin by sewing together the mini charm pack squares in pairs.  You will need a total of 96 pairs.  Press toward the darker fabric.

Sew a 2 1/2″ x 4 1/2″ rectangle onto each side of the units made above as pictured below.  Press to the white.
Center a 1 3/4″ x 14″ linen strip across the unmarked diagonal.  Tip: use a little bit of temp. spray adhesive to keep it in place.
Place a mini charm strip right sides together with the linen strip.  Center as illustrated.  Using a small stitch length, sew the strips together.  You will be sewing the strips onto the paper.  Press away from the center.
Sew another mini charm strip to the other side of the linen strip in the same manner.
Sew a triangle onto each side.  Center as illustrated.  Press away from the center.
Your block should now look like this:
Trim the block even with the 8 1/2″ paper.  Remove the paper to complete the block.
Make a total of (48) 8 1/2″ blocks.
Layout the blocks 6 blocks x 8 blocks.  Sew together, pressing the seams of adjacent rows in opposite directions.
Your quilt top is now complete and you can baste, quilt, and bind using your preferred methods.  For my quilt, I opted to big stitch, hand quilt using a variety of 8 wt. Perle Cotton threads.
A striped binding is the perfect addition to any quilt.
And, of course, as promised here is the quilt using all Mirabelle by Fig Tree Quilts:


One scrappy 48″ x 64″ Candy Scraps Quilt.  Perfect for snuggling under–my kids will attest to this! =)

For other fun quilts, tutorials, quilt alongs, and stitch alongs, visit my blog at Little Miss Shabby.

Corey Yoder
{www.littlemissshabby.com}

Mister DJ Quilt


Hello Moda Bake Shop Friends!   Melissa Corry from Happy Quilting here and I am so excited to be sharing a new quilt with you today.  My oldest son is the only person in the family that did not have a homemade bedspread.  It has been put on hold because he was insistent on have “cool” fabrics.

Sphere by Zen Chic was the perfect fit and I set out to make an equally “cool” design.  Inspired by my son’s love for music (of all varieties and volume 🙂 Mister DJ was created and can I just say,  he loves it!!!  So do you have a tween that needs a new bedspread as well??  Well, let’s show you how to do it 🙂

To make a twin sized 70″ x 89″ Mister DJ quilt you will need:

2 Sphere Jelly Rolls
2 Yards of Bella Solid Grass
5 1/2 Yards of Backing

STEP 1 – CUTTING

Begin by separating your jelly roll strips into 2 piles, one of Low Volume (or light) prints and one of High Volume (or dark) prints.

From the High Volume Strips cut 21 of each of the following strip sizes:
      2 1/2″ x 11″        2 1/2″ x 10″          2 1/2″ x 9″        2 1/2″ x 8″           2 1/2″ x 7″
      2 1/2″ x 6″          2 1/2″ x 5″            2 1/2″ x 4″        2 1/2″ x 3″           2 1/2″ x 2″
I found the easiest way to do this is to stack up 4-5 jelly rolls and cut all the even sizes from each strip and  repeat the process for 21 strips so you have a total of 21 pieces of each even size.  Then do the same for the odd sizes.  (You will have to cut a few from the scraps as you will have 40 strips and not 42)

From the LowVolume Strips cut 21 of each of the following strip sizes:
      2 1/2″ x 11 1/2″        2 1/2″ x 10 1/2″          2 1/2″ x 9 1/2″        2 1/2″ x 8 1/2″           2 1/2″ x 7 1/2″
      2 1/2″ x 6 1/2″          2 1/2″ x 5 1/2″            2 1/2″ x 4 1/2″        2 1/2″ x 3 1/2″           2 1/2″ x 2 1/2″
Once again,  stack up 4-5 jelly rolls and cut all the even sizes from each strip and repeat the process for 21 strips so you have a total of 21 pieces of each even size.  Then do the same for the odd sizes.

Now, pair each High Volume piece with the opposite size Low Volume strip.  So the 11 1/2″ goes with the 2″ and the 10 1/2″ goes with the 3″ and so on down the line.  Set these aside for the moment.

From the Bella Solid Grass yardage cut the following:
  (9) 2 1/2″ x wof (width of fabric) strips to be used for binding
  (10) 1 1/2″ x wof strips – Trim the selvage and sew 2 strips end to end to create (5) 1 1/2″ x 84 strips.
   (210) 2″ x 2 1/2″ rectangles

STEP 2 – ASSEMBLING THE STRIPS

Now with the cutting done you are ready to start assembling the blocks.   Grab the first set of your grouped fabric strips  (The 11 /2″ Low Volumes and 2″ High Volumes).  You will be sewing these into a row by first sewing the Solid Grass rectangle to the Low Volume strip and then second, adding the print strip to the Solid Grass Rectangle.

The easiest way to do this is by chain stitching.  (Meaning, not clipping your threads after each strip but continually feeding strips through the machine until you are done with your pile.)  Start by placing the Grass rectangle onto the Low Volume strip with right sides together.  Chain stitch a 1/4″ seam along the edge of all 21 of your sets.  Clip the threads between your strips.

Now, you can add the High Volume strip.  Place the High Volume strip onto the Grass rectangle with right sides together and again chain stitch a 1/4″ seam along the edge of all 21 strips.  Clip your threads.

Now repeat this process for each of your (10) grouped sets of 21 strips.  In the end you will have 210 pieced strips total.  You want the Low Volume print to always be on the top.   Press your strip sets.

STEP 3 – ASSEMBLING THE BLOCKS

With your strips all set, you are ready to start sewing your blocks together.  So take all of your strip sets and mix them up in a large pile.

Now, grab 2 random strips and place them right sides together taking care that the Low Volume print in both strips is on the top and the High Volume print is on the bottom.  Sew 1/4″ seam along the side of the strip, aligning the edges as you sew.  Chain stitch 30 of these to make 30 strip sets of 2.  Clip the threads between the 30 sets.

Now, you are going to add a third strip to the sets of 2.  Align another randomly chosen strip along the side of the second strip with the Low Volume prints on top and sew a 1/4″ seam along the edge, aligning as you go.  If you happen to have randomly chosen a strip where the Grass Rectangle is in the same spot as the strip set, take care to match the seams.  You can just align these with your fingers as shown.   Chain stitch all 30 sets.

Clip your threads between your sets and you are ready to add a fourth row.  Continue this process until you have added a total of 7 rows in each set.    Clip the threads between sets.

So now you will have 30 blocks each consisting of 7 vertical rows that have the Low Volume prints on top and the High Volume prints on the bottom.

Press the seams in the blocks to one direction.  They should now measure 14 1/2″ square.

STEP 4 – ASSEMBLING QUILT TOP

And now you can put your quilt top together!   Layout 6 rows of 5 blocks.  Play with the layout until it is pleasing to the eye.  Once you have layout complete mark the blocks so you remember which row is which 🙂  Now, sew the blocks into rows.  To do this, just place the second block onto the first with right sides together and sew a 1/4″ seam along the edge.  The place the third block onto the now sewn together first and second block with right sides together and sew a 1/4″ seam along the edge.  Continue in this fashion until all 5 blocks in the row are sewn together.  Repeat for all 6 rows.

Now place a Grass Sashing Strip that you made clear at the beginning onto to the top of rows 2, 3, 4, 5, and 6 with right sides together.  Sew a 1/4″ seam along the edge aligning the fabric as you sew.

Press all of the seams towards the sashing.  Trim the excess sashing at the end of each row.

Now sew the rows together.  This is just like making the rows only on a larger scale.  Place row 1 onto row 2 with right sides together.  Sew a 1/4″ seam along the edge.  Press the seam towards the sashing.   Now place row 3 onto the now sewn together row 1 and 2 with right sides together.  Sew a 1/4″ seam along the edge.  Press the seam.  Continue in this fashion until all the rows are sewn together.

And your quilt top is complete!!!  Great job!!!

STEP 5 – FINISHING

Now just Baste it, Quilt it, and Bind It.  I know, I make it sound so easy.  If you are new to finishing your quilt, I have created a video tutorial series that goes over the basics of each of these three steps.  You can find it at my blog 🙂   Cut your backing into 2 pieces 99″ x WOF and piece together with a 1/2″ seam.   You will use the 9 strips you cut and set aside at the beginning to do the binding.

One ultra modern, High/Low Volume  70″ x 89″ Mister DJ twin sized quilt.  Thank you so much for joining me and I hope you enjoyed the tutorial.  If you make your own Mister DJ Quilt I would love to see it.  You can add it to my Inspired by Happy Quilting Flickr group here 🙂

Have a Happy Quilting Day!!

Melissa Corry
{happyquiltingmelissa.blogspot.com}

Big Hearted Quilt


Hello again from Robin at Craft Sisters. It’s great to be back sharing a quick and easy project. This one could be fun for your February table or wall. And… adorable tucked around your littlest Valentines in the car or the stroller. I’ve made two so far in two different Moda lines but both in luscious pinks and reds. One from Sandy Gervais’, Table for Two and the other using Deb Strain’s, Surrounded By Love. The idea for this was to make a big, modern, Log Cabin-ish looking block. One Moda Candy or Charm Pack makes the heart and two half-yard pieces are used for the backgrounds.


1            Moda Candy or Charm Pack – Table For Two – heart
½ yd.     Diamond 1775611 – Table For Two – background 1
½ yd.     Rose 1775513 – Table For Two – background 2
⅜ yd.     Rose 1775613 – Table For Two – binding
1 yd.      Backing fabric
1 yd.      Low loft batting


Layout the heart
Place the 42 – 2.5″ squares from the Moda Candy or Charm Pack on a design wall or floor. 

If you are using a Charm Pack, cut 42, 2.5″ squares (obviously more color choice with charm pack). 

Audition color placement of squares until you get the color arrangement that you like. It’s fun to play with it. I ended up using darker squares to outline the heart so it would stand out in the photograph. Make the heart more subtle and pixelated looking, by mixing up the colors more.


Cut background squares, strips and complete quilt layout

Cut the squares and strips from background fabrics 1 and 2 as shown on the quilt layout map (it’s at the end of this post). 

Following quilt layout map, add background squares and strips to design wall around the heart. It always looks completely wrong to me when laid out like this, but feels great when it all comes together after sewing.


Sew squares and strips to form horizontal rows
Use a ¼” seam allowance throughout this project. It really helps in matching up squares if you sew a consistent seam width, ¼” or scant… 

Press seams in opposite direction. This avoids bulk and makes it easy to nest seams when sewing everything together.


Sew the rows together
Start sewing the rows together in the order you like, top to bottom, from center out, bottom to top. Whatever makes sense to you.

Press seams in one direction.


Make a quilt sandwich
Layer backing, batting and quilt top. Baste using pins, spray, or use fusible batting. Quilt simply or more dense, whichever you prefer. This is a good one to try your free motion quilting on because of the size.


One small but Big Hearted quilt for February or anytime. Mine finished at approx. 28.5″ x 29.5″. Hope you try this one and have fun doing it. And please stop by my blog over the weekend. www.craftsisters.com/robins-blog.html There’s a giveaway for some Table for Two background fabrics to use in this project. – Robin

Robin Nelson
{www.craftsisters.com}

Quick Honeycomb Wine Coasters


Hi there!  I’m Emily and I blog at Sew E.T.  I’ve been a long time follower of the Moda Bake Shop and many of my quilts are from tutorials found here!  I even have a binder chock-full of my favorite tutorials that I’ve printed out over the years.  

Ever since Honeycombs came out, I’ve been looking for ways to use the cuties.  I came up with this project when I needed a last minute gift for my office Christmas party. These are great for a hostess gift!  Ok, enough chit chat. Let’s make something!  


1 Moda Honeycomb (I used Color Me Happy by V & Co.) – Note: you only need 4 per coaster


7″ x 17″ Iron-on vinyl such as Heat N Bond, enough for 4 coasters


Use a 1/4 inch seam throughout

1.  Choose 4 honeycombs for each coaster.  One piece will be the bottom and the others will be showing on top when it’s all finished.  I chose all 4 from the same color group, so that way a person can remember what color they have and they’re not just pretty coasters!


2.  Optional step:  I decided to apply iron-on vinyl to just the bottom of my coasters to provide some additional protection on the tabletop.  Follow the instructions on your particular brand of iron-on vinyl.  I was able to get all 4 honeycombs side to side under the 7″ x 17″ piece of vinyl.  I put a piece of tissue paper or scrap paper under the honeycombs that are to be the bottoms, laid them out in a row face up on top, and then ironed the vinyl onto the paper and fabric, so that there wasn’t any overlap of the vinyl onto my ironing board.  Once it’s all ironed down, simply cut out along the edge of the fabric and the paper underneath comes right off the back!

Lay the bottoms down side by side over tissue paper or something to protect your ironing board.  Following directions for your vinyl, lay the vinyl over the bottoms.  Be sure to cover all the fabric!

Following directions for your vinyl, iron the vinyl down.  Mine said to have my iron at medium heat and to place the paper backing over the vinyl while pressing.

After pressing, peel away the paper from the vinyl and cut out close to the fabric edge.

The tissue paper isn’t attached and just peels right away!

Now all the bottoms are ready!

3.  Let’s go back to the remaining honeycombs that will be on the top of the coaster.  You’re going to iron them in half, wrong sides together, so the print is facing out.  Let’s call this a half honeycomb.  You’ll need 3 for each coaster.  


4.  Ok, let’s build a coaster.  Place the piece that will be the bottom right side up on your table.  Place the first half honeycomb on the bottom piece, lining up the edges.  The second half honeycomb stacks on top, slightly overlapping the first one.  See the photo for placement.  The last half honeycomb stacks on top of both the first and second.  You’ll slip one edge of the third half honeycomb underneath the edge of the first one so they are all interlocked.  Be sure the edges are all lined up with the bottom piece!  Pin these in place.


5.  I bet you saw that Moda put a fancy plastic template in your honeycomb bundle.  Do you see the little holes in each corner?  Those clever people placed those holes 1/4″ from the edge so you know when to stop sewing and pivot your needle.  They’re so nice 🙂  Place this template on top of the whole pinned up coaster, lining up the edges as best you can.  Use a marker to dot each corner through the template.  


6.  Let’s sew it together!  Now at your sewing machine, you’ll start along one edge, sewing 1/4″ seam on the top side of this little bundle.  Stop at the dot you made and pivot your needle so you can continue on each side until you meet your starting point and secure your threads.  Now you have a coaster – almost.


7.  I iron lightly before I turn it all right side out.  You’ll need something pointy to crisp up your corners.  Once you have it all turned right side out, you can press again, but don’t iron directly onto the vinyl if you did that part!   You should see a hole in the center of the top if you wiggle the fabric around.  That’s where your wine glass stem will come out, with the half honeycombs all snuggled around the base.  


8.  Pour yourself some red, white, or pink and snuggle your coaster over the bottom of your glass.  Ta-da!  Make one or twenty, but people will think you’re pretty clever.  Did I hear somebody say mimosas? 😀


4 or more awesome wine glass coasters!  

Thanks for checking out my tutorial.  I’d love to see pictures of any that you make at the Moda Bake Shop Flickr group.  Happy sewing!

Emily Thompson
Sew E.T.

Recipe Updates and Corrections

Dear Readers,

We so enjoy bringing you a wide array of talented Chefs whose beautiful designs showcase our fabrics. Occasionally mistakes are made in the instructions or templates. We do our best to correct the recipes as soon as we hear of an error and we appreciate you bringing them to our attention.

When recipes are updated, you will now see a new version date next to the Printer Friendly file link.

We have also added this note and file version date to the Printer Friendly Files for new and updated posts:

Happy Sewing,

Patchwork Pot Holder


Hi everyone! My name is Hilary and I blog over at Young Texan Mama. I am really excited about sharing my first project with you over here at the Moda Bake Shop. I love working with pre-cuts and this is a simple and quick project that uses the adorable Moda Mini Charm Packs.

1 – Moda Candy Mini Charm Pack
2 – Fat Quarters
1 – 6.5″ x 6.5″ piece of cotton batting
2 – 6.5″ x 8″ piece of cotton batting
         or
1 – 6.5″ x 8.5″ piece of batting & 1 – 6.5″ x 8.5″ piece of Insul-Bright batting

Cutting:
Out of one Fat Quarter cut the following:
2 – 6.5″ sqaures
1 – 6.5″ x 8.5″ rectangle

Out of your 2nd fat quarter:
3 – 2.25″ x 22″ strips (they don’t have to be exactly 22″ just cut them from the long side of your fat quarter).

Step 1: Select 9 mini charms to be the main panel of your pot holder, and 3 mini charms to be the accent of the larger piece.

Stitch the 9 minis into 3 rows of 3. I like to chain piece my squares over sewing one at at time.

Press your seams in alternating directions, then sew the 3 rows into a 9 patch block. I like to press the seams between the rows open to reduce the bulk. You’ll be left with a 6.5″ square.

Step 2: Take your 3 remaining minis and sew into a row of 3. Press your seams in one direction, you’ll be left with a 2.5″ x 6.5″ strip. Sew this strip to one of your 6.5″ squares of fabric from your FQ.

Step 3: Using your 9 patch block, a piece of 6.5″ batting, and the remaining 6.5″ fabric square, make a quilt sandwich & quilt as desired.

 I like to baste the layers together with a couple of safety pins to keep the layers from shifting while quilting.

I quilted my piece with diagonal lines through the points of the squares, but you can quilt it however you want. I think it would look cute with loops or an all over meander. 

Step 4: Take your pieced 6.5″ x 8.5″ rectangle, your 2 – 6.5″ x 8.5″ pieces of batting (or Insul-Bright), and your 6.5″ x 8.5″ rectangle. Sandwich the 4 layers together, baste  with safety pins, and quilt. I used 2 pieces of cotton batting for the interior of my pot holder.

I’ve never had problems with 2 layers of cotton batting not being enough insulation, but if your worried, then a layer of Insul-bright would definitely protect your hand from heat. 

Step 5: Sew your 3 binding strips together, end to end, so you end up with on long strip. Press the seams open to reduce the bulk. Fold binding in half, wrong sides together, and press. Cut a 4 inch piece of binding for your loop, and cut a 6.5 inch piece of binding for the top of your square panel.

Take the 6.5 inch strip and sew it to the top edge of the main panel with a 1/4″ seam allowance. Once sewn, fold it around to the back and stitch in place. I like to machine bind mine, but if you prefer you can hand stitch it down.

This is what your main piece will look like when you’re finished. Set it aside. 

Step 6: With your mini charms facing up, baste your 2 panels together with a 1/8″ seam allowance. That will prevent shifting when you sew your binding on. Sew slowly because you’ll be sewing through several layers of fabric.

Take the 4.5″ piece and fold the ends to the center and press, creating a double fold binding. Sew along the open long edge to close it together. 

Pin and baste the loop you just created to the back of the 6.5″ x 8.5″ quilted panel. 

Step 7: Take the remainder of your binding and stitch it to your potholder with 1/4″ seam allowance. Again, sew slowly because you will be sewing through several layers of fabric. A walking foot might be beneficial for this step. 

When you get to the loop, make sure it is laying flat on the back of the pot holder. 

Step 8:  When you get back around to your starting point, make sure you have enough binding so that the 2 edges overlap about 3/4″. (I had already trimmed out the remainder of my binding at this point.)

Fold over the raw edge of one strip, and then tuck the other one inside. That way when you sew it together there are no raw edges showing. Fold the edges flat and continue sewing your seam, making sure to back-stitch where you started.

Step 9:  Once it is stitched down, fold binding to the back and pin or clip in place. If you pin, try not to sew over your pins because it could break your needle and mess up your machine. I learned that the hard way when I first learned how to sew.

Again when you get to the loop, make sure it is laying flat.When you get back around to your starting point back-stitch to secure the stitches, and you’re done!

When you’re finished you are left with 1 super adorable pot holder to spice up your kitchen!   
There are enough mini charms in a pack to make 3 pot holders, but you’ll need more of your other materials. 
I hope you enjoy making this pot holder as much as I did, and if you make it I’d love for you to share it to the Moda Bake Shop Flickr group. Thanks so much for stopping by!

Hilary Smith
{www.youngtexanmama.com}