
I really enjoy decorating for each holiday and lately I’ve been making seasonal banners to hang on the mantel above my fireplace. I especially LOVE Valentine’s Day and thought I’d share my most recent design with you. Below you will also see a few of the other banner’s I’ve made.

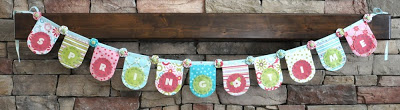
Valentine Banner
Spring Time Banner
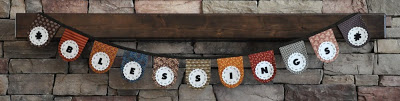
Thanksgiving Blessings Banner

Christmas Banner

- 1/4 yard cut of 11 fabrics from Moda’s “Giddy” Collection by Sandy Gervais for Banner Flags, Yoyo’s, and Covered Buttons
- 1/4 Yard Red Plaid for Non Bias Binding Strip
- Moda Wool Basics (Brown, Snow & Pinkie Coral)
- Aunt Lydia’s Crochet Thread (Size 3-Scarlett #0006)
- Heavyweight Heat N’ Bond

3/4″ Covered Buttons by Dritz (need 12)
Orange Yoyo Maker by Clover (make 12)
Assorted Red Buttons by Buttons Galore (need 44 or more)


Part One: Making 11 Banner Flags
1. Choose 11 fabrics from Moda’s “Giddy” Collection by Sandy Gervais
2. Open each 1/4 yard piece of fabric and press.
3. Leave each 1/4 yard folded and lay it out on the cutting board then using a rotary cutter and acrylic ruler, cut off the selvage edges. Then cut a rectangle from each of the 11 fabrics measuring 5 1/2″ x 7″ you will get two rectangles per fabric and two rectangles measuring 2 1/2″ x 5 1/2″ after squaring up the ends as seen in picture below. The leftover rectangle measuring 2 1/2″ x 5 1/2″ I cut into four 2 1/2″ x 2 1/2″squares (per fabric) for a total of 44 little 2 1/2″ squares. FYI: I fussy cut the striped print because I wanted the stripes to be perfectly horizontal instead of vertical.
4. Print and cut out the Banner Flag Pattern.
5. Lay Banner Flag Pattern on each set of 2 like fabrics with the curved edge just touching one edge of fabric as seen in picture.
6. Cut the fabric along the curved edge of pattern. Repeat for remaining 10 fabrics.
7. Take one set of like fabrics and match with right sides together. Repeat for remaining 10 fabrics.
8. Sew outer edge of each curved flag seam using a 1/4″ seam allowance, starting from top right side down and around the curve and back up to the top left side. I like to chain stitch the pieces to save on thread.
9. Do NOT sew the top edge of curved flags (unfinished edge will be sewn into binding).
10. Clip Curves before turning right side out.
11. Turn right sides out and press.
Part Two: Making the Wool Circles and Letters

Ingredients:
- 6 Ivory wool scalloped circles ( 3 3/4″ )
- 5 Brown wool scalloped circles ( 3 3/4″ )
- 11 Pinky Salmon Wool Letters (1-H • 1-U • 1-G • 4-S’s • 1-& • 1-K • 1-I • 1-E)
- Aunt Lydia’s Size 3 Crochet Thread in Scarlet Red
I used my Sizzix Big Shot Shape Cutting Machine to cut out the wool letters and the wool Scalloped Circles. The Sizzix Big Shot Shape Cutting Machine (see links provided) is readily available and the scalloped circle is also available for purchase from the Sizzix Website but the letters I used are a much older set that I’ve had for a many years now. I’ve included a few fonts that are similar to the font I used. Check out the “Printer Friendly Format” that you can use to download the patterns for the letters and the banner flags along with the project tutorial.
Steps for Using the Sizzix Big Shot Shape Cutting Machine:
1. First lay down the acrylic cutting pad then place the Scalloped Circle Die facing up.
2. Center and place wool or fabric or paper on top of the cutting die.
3. Place the second acrylic cutting pad on top of the stack.
4. Rotate handle to roll the stack through the Sizzix Big Shot Shape Cutting Machine. Remove top acrylic cutting pad to expose the cut piece of wool, fabric, or paper.
5. The steps for cutting the letters is basically the same as the scalloped circle except that you will need to make sure that your Heat N’ Bond paper is facing up so after the letters have been cut they will face the right direction after taking off the paper.
6. Make sure that you have all the pieces stacked in the correct order before rolling through the cutting machine.
7. After you roll the stack through the cutting machine remove the acrylic cutting pad to expose the cut wool letters.
8. Separate the letters from the rectangle of wool then remove the paper backing.
9. Place a letter in the center of each scalloped circle making sure to follow the color order of the circles. Fuse the letters to the scalloped circles following the directions on the Heat N’ Bond
packaging.
10. Use the size 3 crochet thread to sew on the scalloped circles. The circles are stitched through both layers of the fabric flag. Make sure the beginning and ending knots are hidden on the inside of the flag. Sew this before the banner flags are attached and sewn into the binding strip.
Part Three: Making the Binding Strip
1. Cut 3 Strips measuring 2 1/2″ x Width of Fabric for a total of approximately 120″ of binding FYI: Normally I would make bias binding strips but the plaid fabric is printed to appear as it would if you were to cut bias strips so just cut them on the straight of grain to retain that bias look.
2. Sew seams together to create one continuous strip.
3. Lay strip lengthwise on ironing board.
4. Fold fabric in half: length to length and press.
5. Open. Take bottom raw edge and fold toward pressed center. Press fold. Repeat for the opposite edge and press fold.
6. Now fold pressed edges together to encase the raw edges of binding inside.
7. Give binding another good press.
Part Four: Putting Together the Banner
1. Take your Binding Strip and find the center by folding it end-to-end. Then mark the center with a pin.
2. Find the Curved Flag that goes in the middle of banner. In this case, it’s the letter “K”.
3. Open the binding strip. The flags will be sandwiched in between the opening of the binding strip. Place the center of the center flag in the center of the binding strip.
4. Close binding strip over the flags and pin each in place.
5. The Spacing between each flag is 1″.
6. Make sure flags are in correct order H • U • G • S • & • K • I • S • S • E • S.
7. Sew a narrow seam along the edge of binding strip to encase the flags inside.
Part Five: Embellishing the Banner
12 Covered Buttons (Size 3/4″)
This part of the tutorial is totally optional, although it does add a lot of cuteness and pizazz to the banner. You so want to do it, right? It did take me several hours to make the yoyo’s, the covered buttons, and then to attach them to the banner. Plus, I had to sew on the 44 red buttons but, it was totally worth it!
FYI: I bought my set of 300 buttons at the craft store a few years back but you can get the same set of buttons HERE.
To make the 3/4″ covered buttons for the centers of the yoyo’s I used some of the plaid fabric in brown, red and pink. Follow the directions on the package for making covered buttons.
I also used the leftover fabric to make the 12 yoyo’s that are sewn in between each flag. I used all of the fabrics and one of the brown fabrics I used twice. Follow the directions inside the Yoyo package for making the yoyo’s.
1 Hugs & Kisses Valentine Banner but you could make a 2nd one too!
Happy Valentines Day
Hugs & Kisses,
Kim Walus
*Please set page scaling to “none” in order for the templates to print at the correct size!*
![]()
