
![]()
I am so delighted to be back baking for Moda. My favourite quilting block is the eight pointed star and I just had to use Oliver + S City weekend to make it shine.
I thought it would be wonderful to make this quilt using only applique in order to give the block a mosaic effect and the illusion that there is sashing between each diamond.
The beauty of this pattern is that the diamonds can be placed in different layouts as long as the design is kept within the boundary of each star point.

1 x City Weekend Jelly Roll by Oliver + S
1 1/4 yards Robins Egg Bella Solid 9900-85
1 1/2 yards White Bella Solid
Fusible Webbing
Ruler with 45 degree marked angle.
Template Plastic

Step 1 – Colour Selection.
 |
| Jacaranda Blue x 8 |
 |
| Orange x 4 |
 |
| Pale Green x 3 |
 |
| Pale Yellow x 4 |
 |
| Pink x 6 |
 |
| Yellow x 6 |
@font-face { font-family: “Courier New”; }@font-face { font-family: “Wingdings”; }@font-face { font-family: “Cambria”; }@font-face { font-family: “Apple Casual”; }p.MsoNormal, li.MsoNormal, div.MsoNormal { margin: 0cm 0cm 0.0001pt; font-size: 12pt; font-family: “Times New Roman”; }p.MsoListParagraph, li.MsoListParagraph, div.MsoListParagraph { margin: 0cm 0cm 0.0001pt 36pt; font-size: 12pt; font-family: “Times New Roman”; }p.MsoListParagraphCxSpFirst, li.MsoListParagraphCxSpFirst, div.MsoListParagraphCxSpFirst { margin: 0cm 0cm 0.0001pt 36pt; font-size: 12pt; font-family: “Times New Roman”; }p.MsoListParagraphCxSpMiddle, li.MsoListParagraphCxSpMiddle, div.MsoListParagraphCxSpMiddle { margin: 0cm 0cm 0.0001pt 36pt; font-size: 12pt; font-family: “Times New Roman”; }p.MsoListParagraphCxSpLast, li.MsoListParagraphCxSpLast, div.MsoListParagraphCxSpLast { margin: 0cm 0cm 0.0001pt 36pt; font-size: 12pt; font-family: “Times New Roman”; }div.Section1 { page: Section1; }ol { margin-bottom: 0cm; }ul { margin-bottom: 0cm; }
Step 2 – Cutting diamonds.
- Cut 16” Strips from the 4 Orange strips.
- Cut 2 1/4″ matching strip of fusible webbing. Iron to back of strips.
- Trim strips to 2″ width.
- Cut 16 x 2″ diamonds.
- Cut 2 x 16” + 4 x 9” strips from the 6 Yellow strips.
- Cut 2 1/4″ matching strip of fusible webbing. Iron to back of strips.
- Trim strips to 2″ width.
- Cut 16 x 2″ diamonds.
- Cut 22” strips from the 5 Pink strips.
- Cut 2 1/4″ matching strip of fusible webbing. Iron to back of strips.
- Trim strips to 2″ width.
- Cut 24 x 2″ diamonds.
- Cut 16” strips from the 8 Jacaranda Blue strips.
- Cut 2 1/4″ matching strip of fusible webbing. Iron to back of strips.
- Trim strips to 2″ width.
- Cut 32 x 2″ diamonds.
- Cut 24″ strips from the 4 Pale Yellow strips.
- Cut 2 1/4″ matching strip of fusible webbing. Iron to back of strips.
- Trim strips to 2″ width.
- Cut 24 x 2″ diamonds
- Cut 24″ strips from the 3 Pale Green strips.
- Cut 2 1/4″ matching strip of fusible webbing. Iron to back of strips.
- Trim strips to 2″ width.
- Cut 16 x 2″ Diamonds
 |
| Trim to 2″ width after fusible webbing has been ironed on. |
 |
| Cut 2″ diamonds. I used the Jan Krentz Fast 2 Cut ruler |
 |
| Diamonds ready to go |
Place same colour diamonds into separate plastic bags.
Step 3 – Background.
- Cut 1 x 42″ square from Robins Egg solid.
- Cut 4 x 5 1/2″ white strips for borders the length of the fabric (1 1/2 yards long ).
- Measure across the middle of the quilt and add side borders. Then, measure across quilt again and add top and bottom borders.
- Make sure quilt is square and then fold into 1/4’s. Press. Then, fold on the diagonal. Press. This will give you lines to lay the template on for placement of each star point.
Step 4 – Make the star point template.
There are 8 points in the star. To make one point take a piece of template plastic (you might need to join two together) and cut out a 45 degree diamond with the following dimensions:
Across the width= 24″, Through the centre 10″ and each side 13″ long.
The picture below shows a paper version of the plastic template.
 |
| Each section is a 2 1/4″ 45 degree diamond. A 2″ diamond fits in each section with a 1/8″ border. |
Step 5 – Position the diamonds.
- After you have pressed guidelines onto the quilt, lay the plastic template with one tip exactly in the centre of the quilt and the other tip lined up with the one of the pressed markings. Trace around the template with something that will wash out.
- Draw the other 7 points in exactly the same way until you have a completed star.
- Peel the paper of the fusible webbing and place the diamonds evenly within each point outline. Don’t forget to leave a space of 1/8″ border around each diamond including the outside. (Hint – position four star tips so they overlap the background and border).
 |
| Example of the spacing around each diamond |
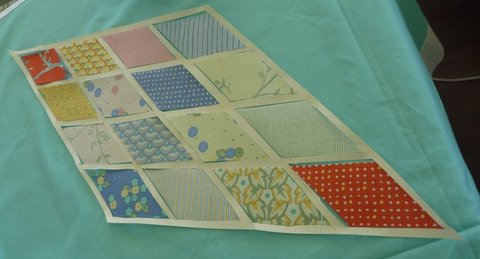
For each point starting from the inside:
- 1 x Orange diamond
- 2 x Pale Green diamonds
- 3 x Pale Yellow diamonds
- 4 x Jacaranda Blue diamonds
- 3 x Pink Diamonds
- 2 x Yellow Diamonds
- 1 x Orange Diamond
Once you are happy with their placement, press the diamonds to the background and continue with the opposite point. (Hint – Just to make sure that you have accurately placed all the diamonds, layout the whole design before pressing).

Step 6 – Applique the diamonds.
- Applique each diamond.
I chose to machine applique all the diamonds using a matching fine thread and straight stitch.

Step 7 – Quilt and Bind your masterpiece.
- Baste your quilt and quilt as desired. I suggest not over-quilting, as the star design should be the feature.
- Use the remaining turquoise strips and some left over robins egg solid to make the binding. Cut the strips into 22″ pieces and join to make a scrappy finish.
- The left over strips from the project can be added to the backing or to another project.

One Razzle Dazzle quilt just made for a weekend in the city.
Quilt Size : 51″ x 51″
Here is another one I made using Kate Spains 12 Days of Christmas. The beauty of this design is that you can space the diamonds any way you want to as long as it remains within the boundary of each point.

![]()
