
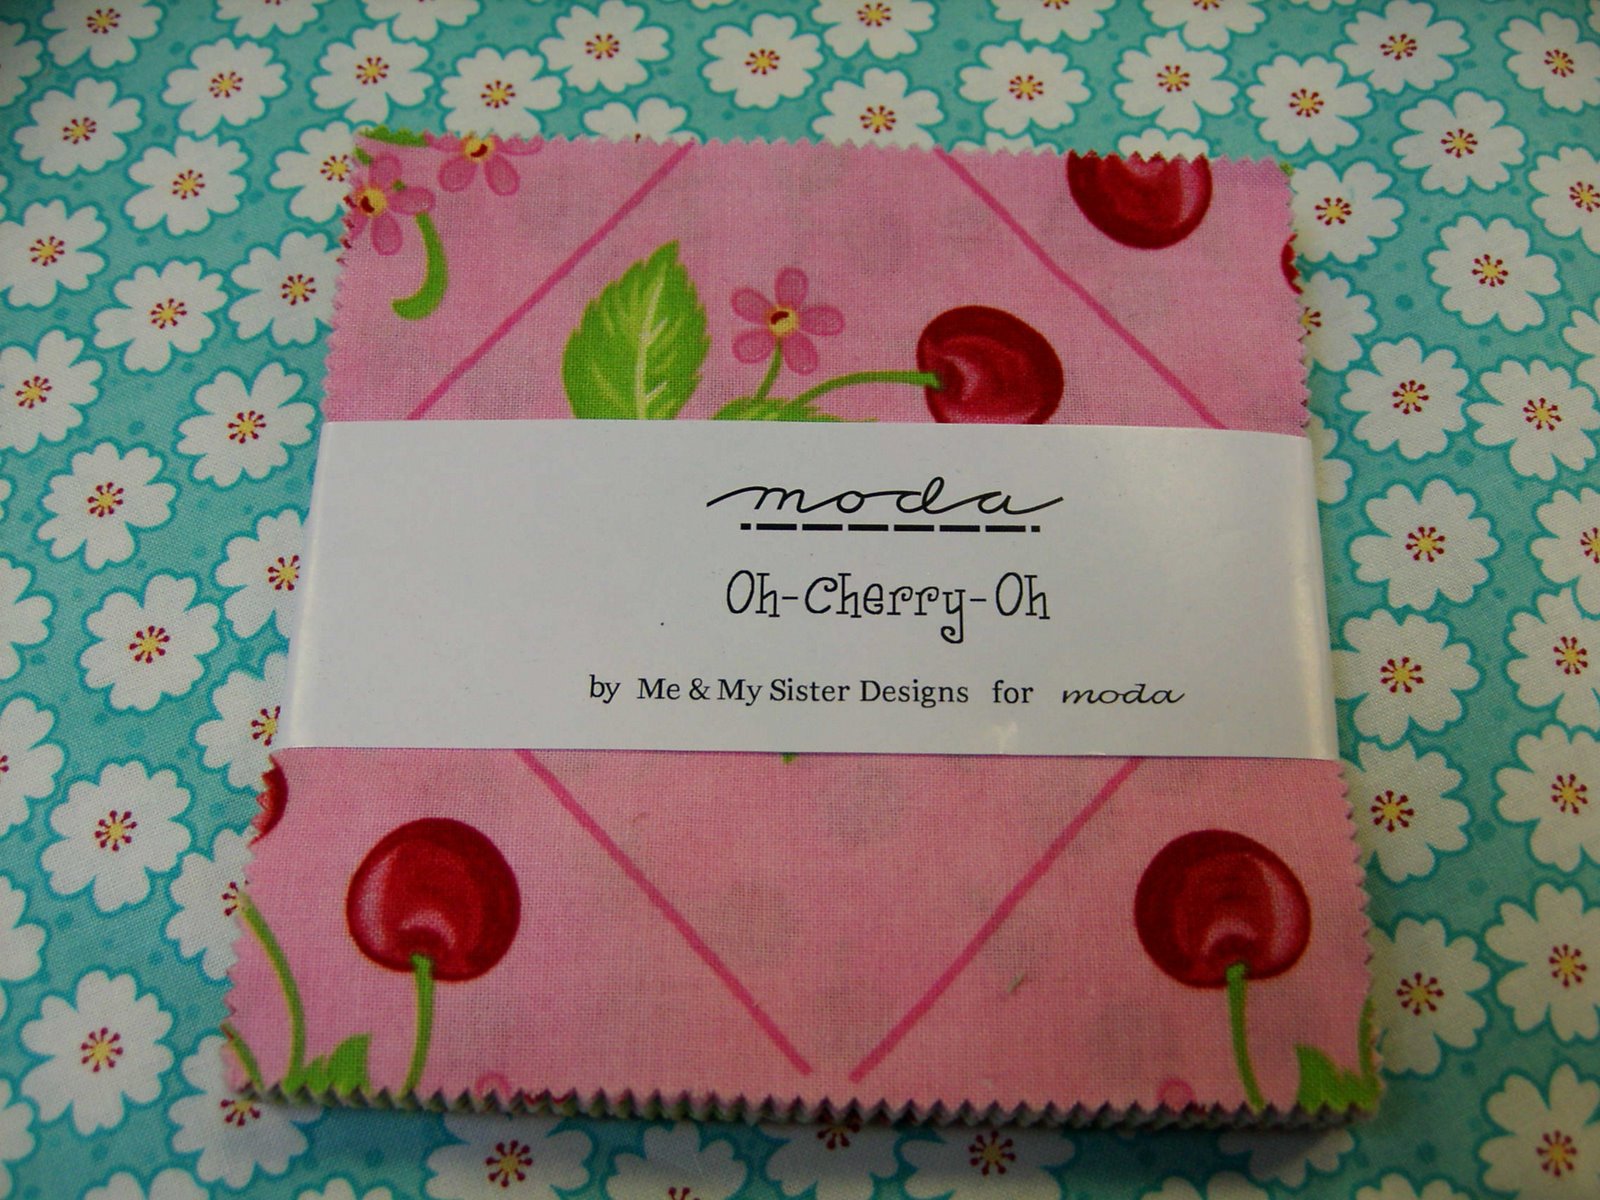
1 Charm Pack of Oh-Cherry-Oh by Me and My Sister
7/8 yard aqua floral yardage of Oh-Cherry-Oh
1/4 yard white fabric
1/4 yard fusible web
1 1/8 yard fabric for backing
38″ x 38″ batting
red thread for applique

4 1/2 yards med red ric-rack

 Step 3.. Cut 1 strip of white fabric 3 1/4″ by width of fabric
Step 4.. Cut (4) 3 1/4″ x 5″ pieces, set aside.
Step 5.. Cut that remaining strip to 2 1/2″ wide, and cut one more strip 2 1/2″ by width of fabric.
Step 6.. Cut into (12) 2 1/2″ x 5″ strips.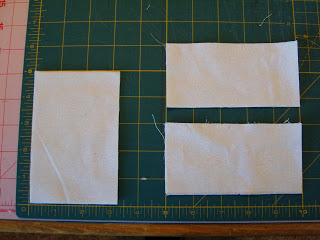 Step 7.. Sew (4) 2 1/2″ x 5″ white strips to the top of (4) of the solid looking 5″ x5″ pieces, and add a 2 1/2″ x 5″ white strip to the bottom of (2) solid pieces. Continue sewing blocks together until you have 2 strips as below. Press seams toward colors.
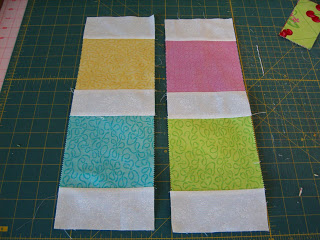 Step 8.. Sew (3) of the 2 1/2″ squares of large cherry ( from step 1.) end to end with a white 2 1/2″ x 5″ strip. Starting and ending with a color. Make (3) strips. Press seams toward colored squares. Sew picture below.
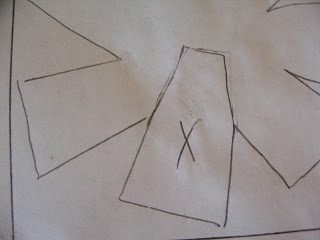
Step 9.. Sew all rows together like picture below. This makes the CENTER.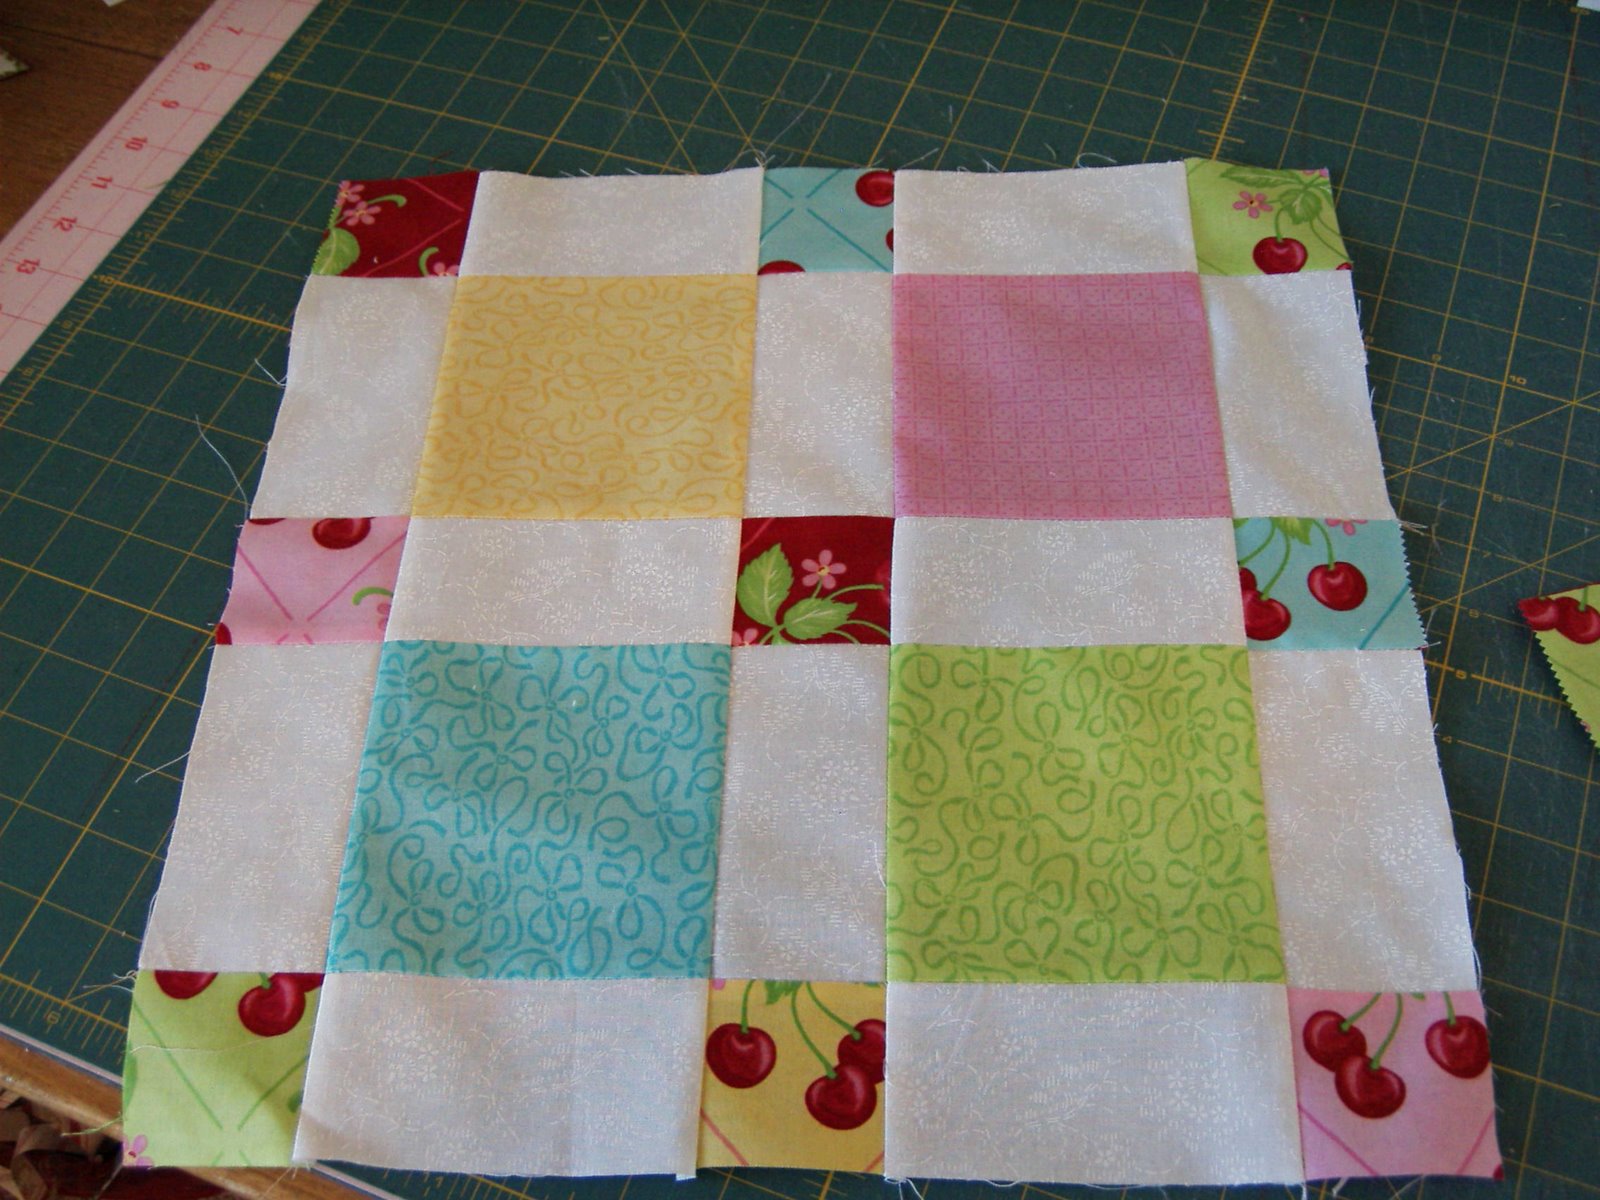 Step 10.. Draw a 5″ x 5″ square on a piece of paper, then draw a 7 petal pinwheel flower and a center circle from a large spool of thread.
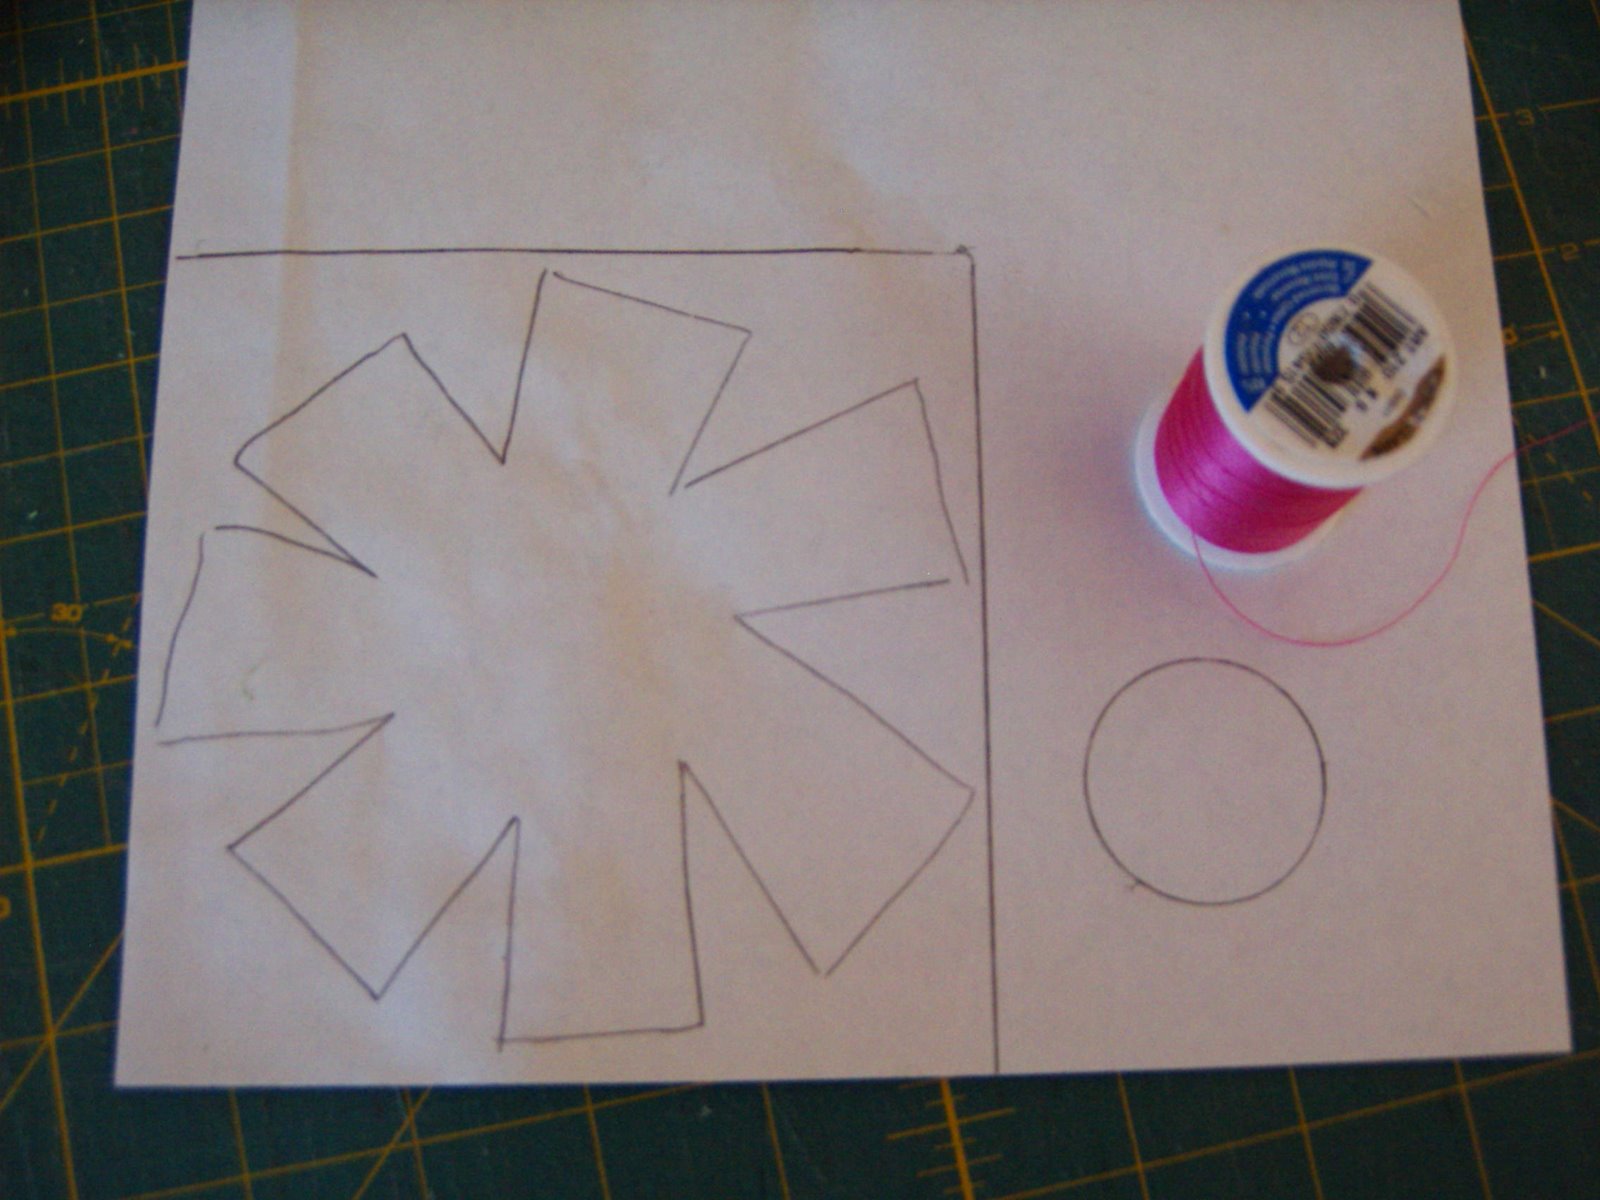 Step 11.. Trace (4) flowers and (8) center circles onto fusible web. Fuse (4) flowers on the 5″ x 5″ floral pieces and (8) centers on the (mostly) solid red 5″ x 5″ piece. You will have to squish the (8) centers on the red, so lay them on before you fuse. Only (4) centers are shown, but you need (8.)
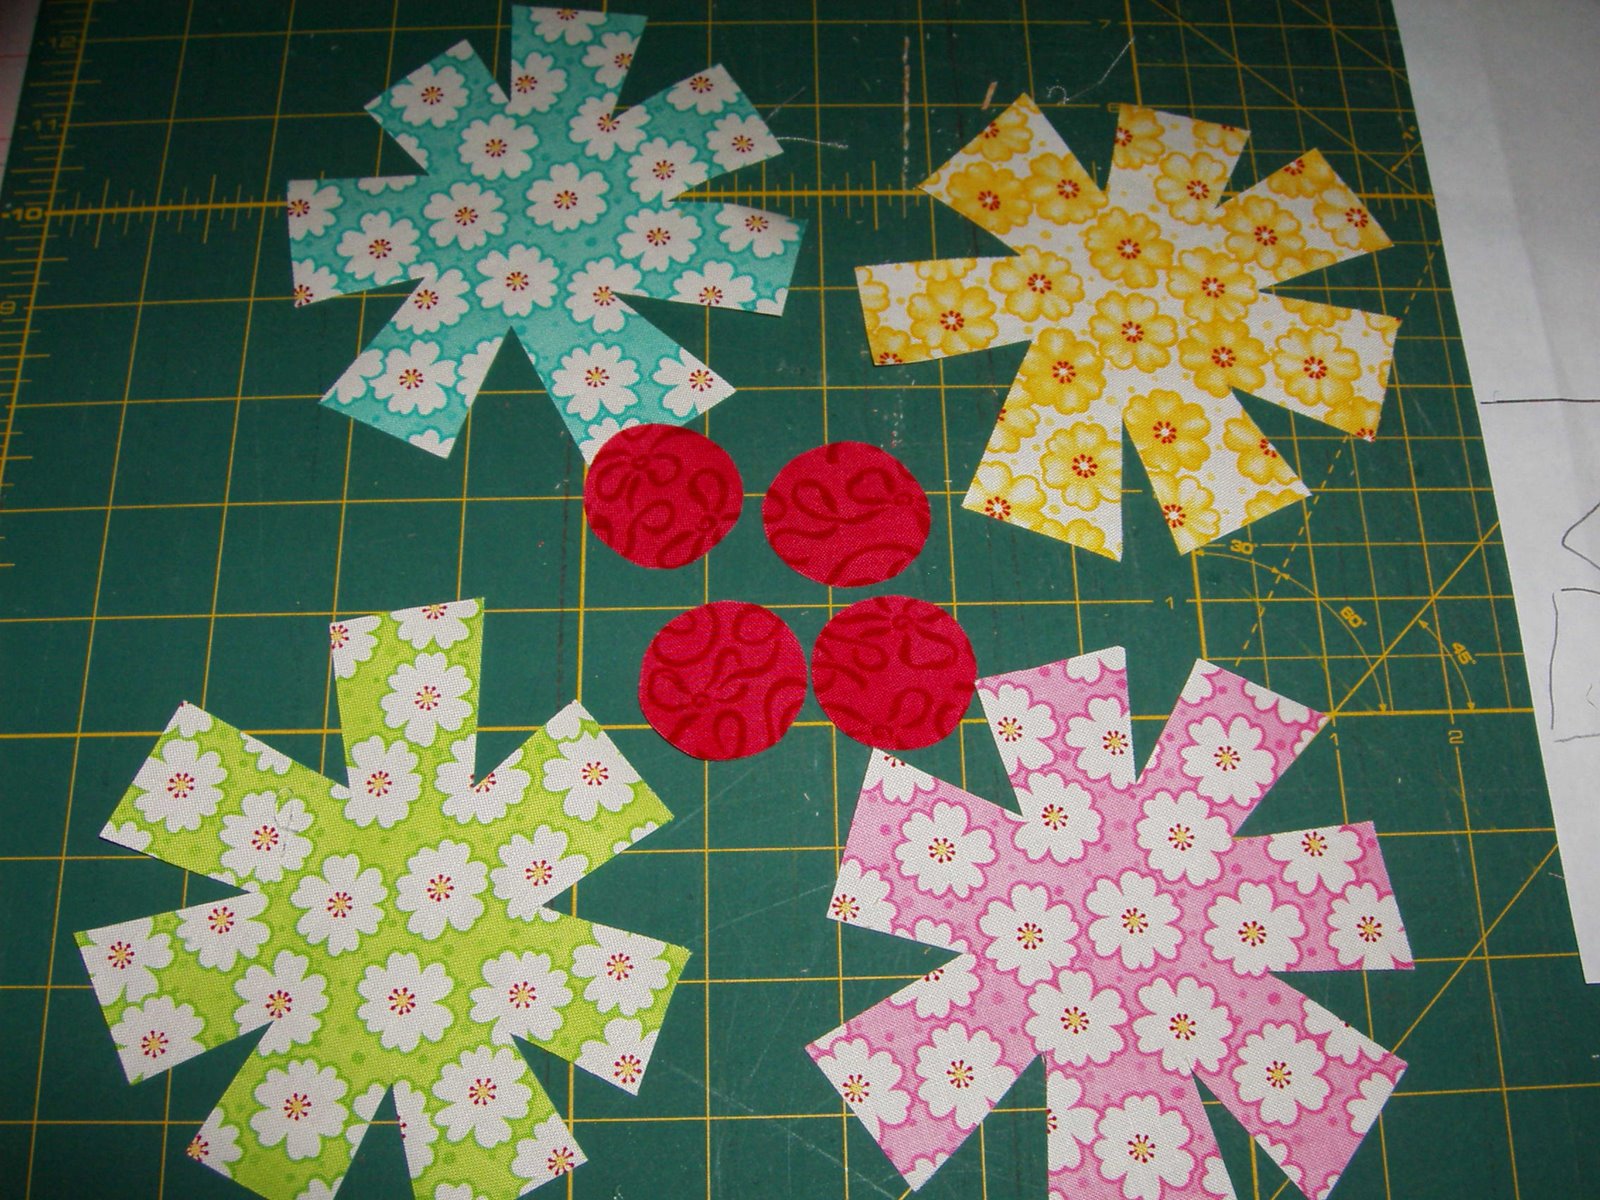 Step 12.. Find the 4 white pieces with very small print, and 2 small cherry prints with white background, save these pieces out for the corner blocks.
 Step 13. . Cut the rest of the 5″ x 5″ squares in half, and adding the 2 1/2″ x 5″ left over pieces from (step 1.) These are now colored strips.
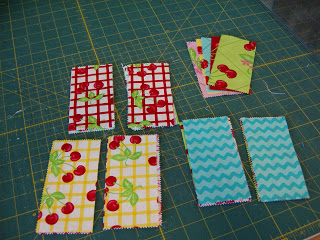 Step 14.. Lay out the CENTER and place the colored strips around CENTER until you like the color arrangement also adding the 3 1/4″ x 5″ white pieces (in the center) and corner blocks.
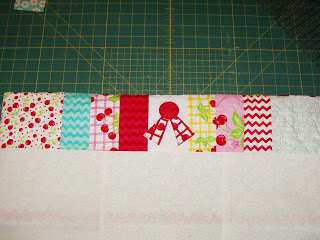 Step 15. . Sew (3) colored strips together with a white 3 1/4″ x 5″ white strip at the end, continue sewing (3) more colored strips to the white making a 7 piece strip. Make (4). These are now border strips. Sew (2) of these to opposite sides of the CENTER.
Step 16. . Sew (2) white corner blocks of small prints, and small cherry prints with white background from (step 12) to the ends of the last 2 border strips. Sew these to top and bottom of the CENTER. Step 17. . Mark one of the petals on your piece of paper, and draw (8) petals onto fusible web, then fuse to left over colored strips. These will go on the 3 1/4″ x 5″ white strips. (see photo step 19.)
 Step 18.. Applique flowers and red centers with red thread to the CENTER. The flowers hang over onto the seams a bit, but that is okay.
 Step 19.. Applique the (8) petals and red centers with red thread to the 3 1/4″ x 5″ white strips.
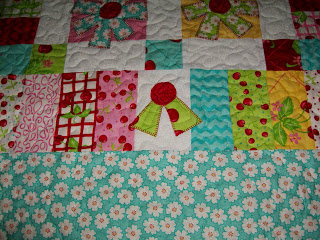
Border:
Step 20.. Cut (4) strips of aqua yardage 5″ width of fabric
Step 21.. Cut (2) strips of aqua yardage to 5″ x 24 1/2″ Sew to opposite sides of the CENTER.
Step 22.. Cut (2) strips of aqua yardage to 5″ x 34 1/2″ Sew to top and bottom of the CENTER.
Step 23. . Quilt
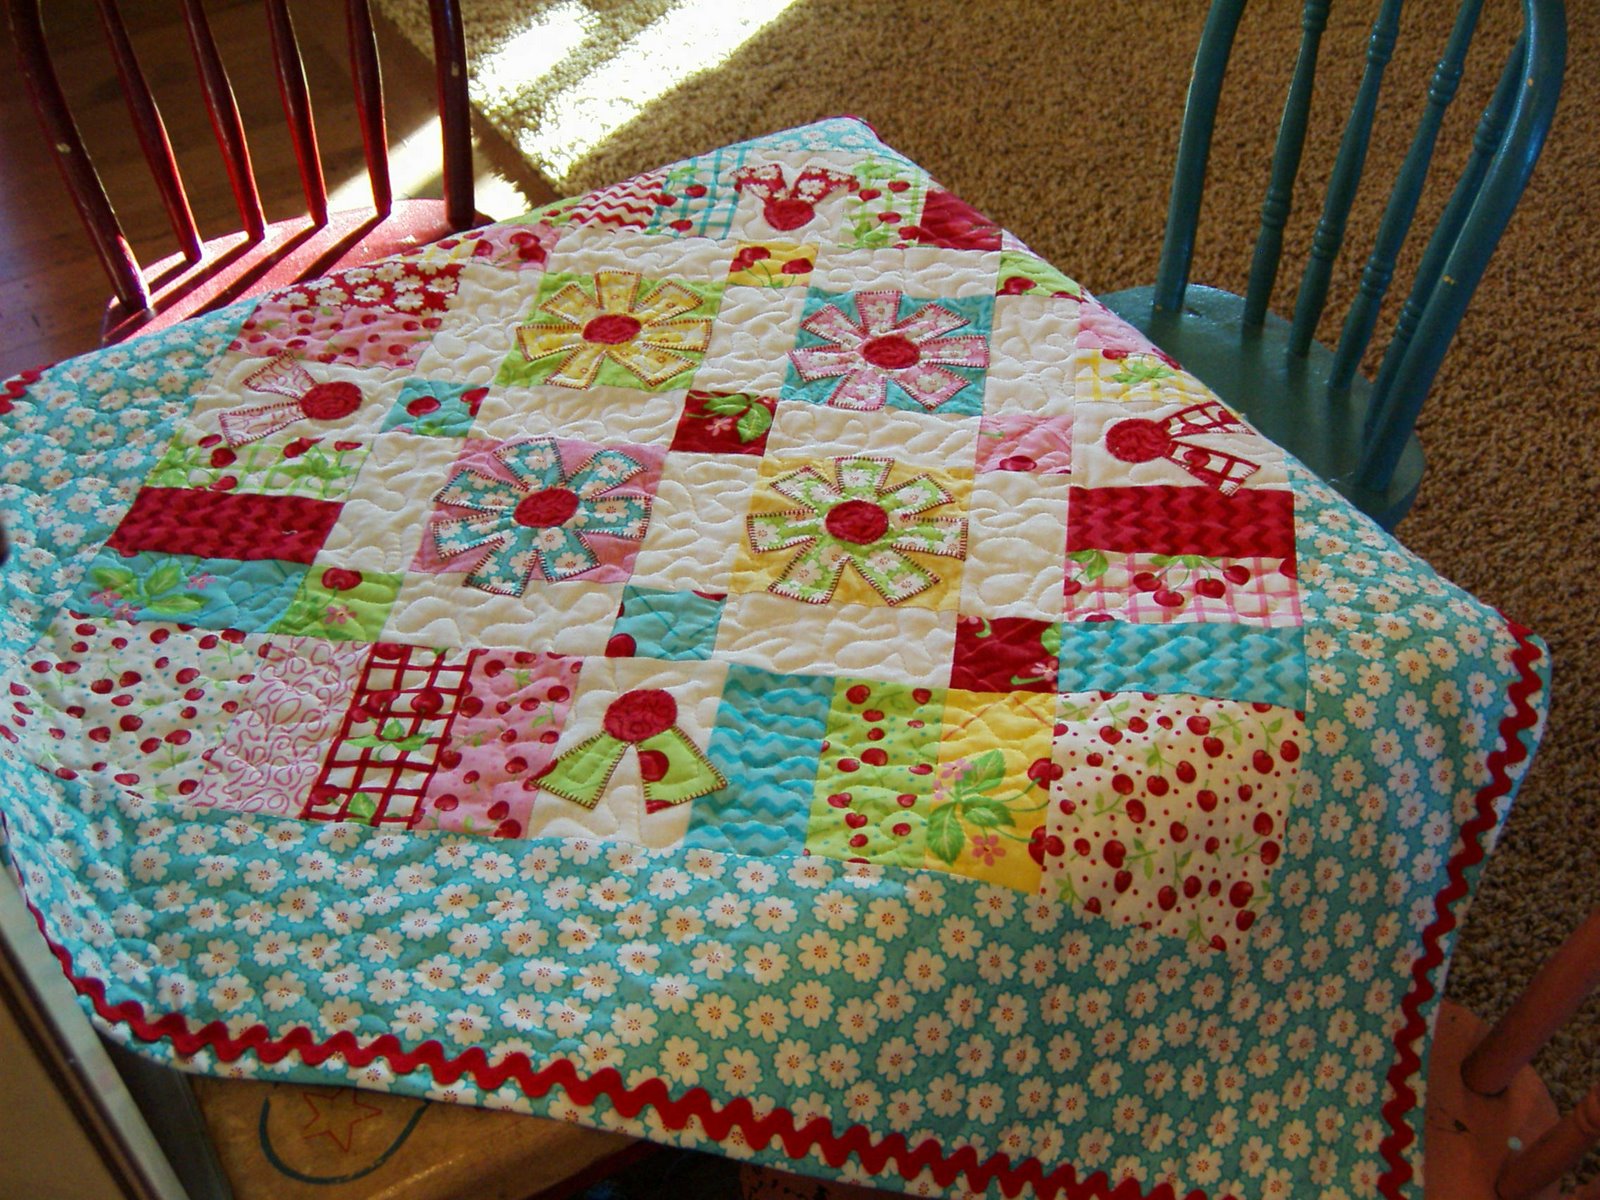
Step 24. . Cut binding strips 2 1/2″. Bind quilt. Finished size aprox. 35″ x 35″
Step 25. . Sew red ric-rack around the edge on the binding seam.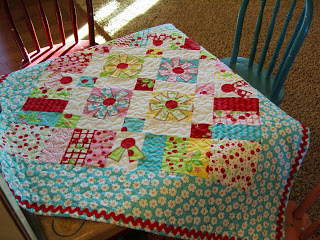

One adorable table topper
Sheri Howard
![]()

Congrats Sheri…this was such a cute project…I just knew you’d be on the Moda Bake Shop!
this is just too cute for words.great, great job!!!😀
Yay for Sheri. So cute and I have some of that fabric. I see a table topper coming.
Beautiful topper and tutorial Sheri! It is just adorable. Gotta’ make one.
How cute can you get?? I just love it!
Super duper cute!
Olá amiga.O seu trabalho ficou belíssimo.Obrigado peals esplicações.bjtos.Nile.
VERY cute!
That is so cute. I love it.
WOW! Those colors are just so vibrant and happy, and what you’ve done with them is PERFECT!
it’s FABULOUS!
thank you!!!
I’m Tara from
http://annuairebytara.canalblog.com/