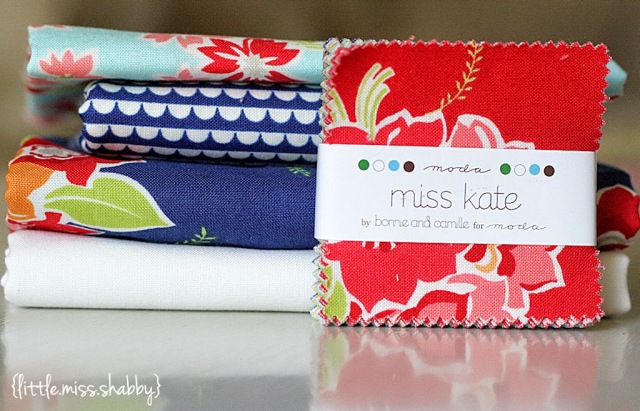
Hello All!–Corey Yoder of Little Miss Shabby here! I always love hanging out over here on MBS and sharing a new project with you. =) This is a quick, beginner friendly design that will add a dash of panache to your living space. It uses just one mini charm pack and a bit of yardage–you might even already have all the supplies you will need to complete this project. I love adding hand quilting to my projects but you could easily swap out the hand quilting for machine quilting and have this pillow on your couch in a jiffy.

(The fabrics I used are in parentheses)
-1 Mini Charm Pack (Miss Kate)
-1/4 yard background fabric (9900-98)
-1/8 yard border fabric (55091-12)
-1/2 yard pillow backing fabric (55090-17)
-1/8 yard binding fabric (55092-17)
-20″ square piece of pillow backing fabric (this will be used for the pillow top sandwich)
-20″ square piece of quilt batting
-18″ pillow form

Thread for hand quilting, if desired. I prefer to use an 8 wt. Perle Cotton.
Cutting Instructions
From the background fabric cut:
(3) 1″ x width of fabric strips, subcut into (36) 1″ x 2 1/2″ rectangles
(3) 1″ x width of fabric strips, subcut into (36) 1″ x 3″ rectangles
(2) 1″ x width of fabric strips, subcut into (2) 1″ x 15 1/2″ strips & (2) 1″ x 16 1/2″ strips
From the border fabric cut:
(2) 1 1/2″ x wof strips, subcut into (2) 1 1/2″ x 16 1/2″ strips & (2) 1 1/2″ x 18 1/2″ strips
From the pillow backing fabric cut:
(2) 12 1/2″ x 18 1/2″ rectangles
From the binding fabric cut:
(2) 2 1/8″ x wof strips, trim selvages and sew together to create continuous binding
Piecing Instructions
Notes:
-Use a scant 1/4″ seam allowance
-You will need (36) mini charms from the charm pack. I opted to remove several of the solid colors.
1. Sew a 1″ x 2 1/2″ background rectangle to the side of each of the 36 mini charm squares. Press toward the rectangle.
2. Sew a 1″ x 3″ background rectangle to the side of the units made in Step 1. Press toward the rectangle.
3. Layout the squares as pictured. Sew the squares together in horizontal rows. Press seams in adjoining rows in opposite directions. Sew together the rows. Press seams in one direction.
Adding the Borders:
(Press all seams away from the center)
-Sew the 1″ x 15 1/2″ background strips to the sides of the pillow top.
-Sew the 1″ x 16 1/2″ background strips to the top and bottom of the pillow top.
-Sew the 1 1/2″ x 16 1/2″ border strips to the sides of the pillow top.
-Sew the 1 1/2″ x 18 1/2″ border strips to the top and bottom of the pillow top.
This completes your pillow top!
Layer the pillow top, 20″ batting square, and 20″ pillow backing square to create a pillow sandwich. Quilt as desired.
Finishing the Pillow
1. Hem (1) 18 1/2″ side of each of the 12 1/2″ x 18 1/2″ pillow backing rectangles. To do so, fold the edge in(wrong sides together) approx. 1/4″ and press into place. Fold in an additional 1/4″ and press. Top stitch into place.
2. With the pillow top facing down, place the hemmed rectangles as shown. The finished pillow backing edges will overlap in the center of the pillow and all raw edges will be aligned.
3. Pin the backing pieces into place. Use a long stitch and baste 1/8″ around the perimeter of the pillow top.
4. Sew the binding onto the pillow to complete your pillow. The scalloped fabrics in Bonnie & Camille’s fabric lines are perfect binding fabrics.

1 beautiful 18″ x 18″ Pillow which, incidentally, is the perfect companion to my Ruby, Pearl, & Opal quilt which I shared on MBS several years ago when Bonnie & Camille’s Ruby line of fabric was released.
You can find the tutorial for this quilt here.
I hope you have enjoyed this tutorial!–I hope you’ll stop by my blog, Little Miss Shabby, for a visit!
Corey Yoder
{Little Miss Shabby}

![]()


