
![]()
Shops are filled with holiday fabrics and we have a series of fun and festive quilts to inspire you to get that Christmas sewing done early this year!


14 Fat Quarters (Be Jolly by Deb Strain)
3 yards light background (Bella solids in Bleached White)
3/4 yard binding
4 1/2 yards backing

Iron and starch your fat quarters. Make sure you have at least 16”x21” of usable material in each piece. Cut each fat quarter into eight 5” squares and four 5.5” squares according to diagram:

From your background (white) fabric, cut:
twelve 2.5”xWOF strips (sashing)
eight 4.5”xWOF strips (border)
eight 5.5”xWOF strips
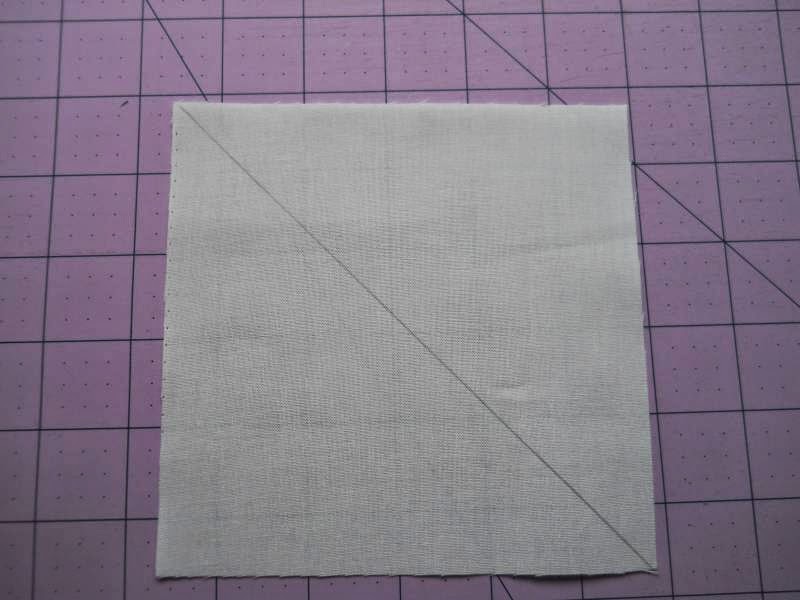
Subcut your 5.5”xWOF strips into 56 @ 5.5” squares. Draw a diagonal line on all of these background squares:
I found it easiest to work with one ‘row’ at a time, so you are working with the prints from 2 contrasting fat quarters at a time (so no fabric mix-ups within the row are possible).
Pair each background 5.5” square with one of the print 5.5” squares cut from your fat quarters:

Sew a scant 1/4” from each side of the marked line:

Cut along diagonal line:

Press seam open:

Trim each HST (half square triangle) to 5”:


On each of the 5” print squares cut from your fat quarters, draw a diagonal line:

Pair each of the 5” squares with a 5” contrasting HST:

Align them so that the drawn diagonal line goes in the opposite direction as the seam on the HST:

Sew a scant 1/4” seam from either side of the drawn line:

Cut on drawn line:

Press seams open:


Trim off dog ears if you prefer (optional). This creates two 3-patch quarter square triangles that are the mirror image of each other:

When you get all the 3-patch quarter square triangles done for each pair of fat quarters, then you can arrange them into the blocks. Sort your 3-patch blocks into piles (there will be 4 different configurations). Lay them out so that all the white triangles face toward you and the small print triangles face each other. I found this the easiest way to keep everything straight.

Half of them will be for the A block, and half for the B block (B block top 2, A block, bottom two):

So, start with the bottom two piles:

There are 8 of each of these 3-patch blocks. Seperate 4 from each pile:

And rotate them 180 degrees so the white triangle face away from you:

Now you can sew these 4 sets of 4 3-patch blocks into your A blocks:


The B block is assembled the same way:

Only, when you sew the B block to the A block, you rotate is 180 degrees.

There will be 4 ‘A’ blocks and 4 ‘B’ blocks (don’t forget to rotate the B blocks!) per row. Sew these 8 blocks (alternating A block and rotated B block) into one long row:

Repeat with the other 6 pairs of fat quarters. When you have your 7 rows sewn, you can start to assemble them into your quilt top. Sew your twelve 2.5”xWOF strips into pairs to make 6 longer strips. Measure your rows (mine measured just over 67” at this point), and cut your 2.5” strips to that measurement. Sew the strips between the rows:

With your eight 4.5”xWOF strips, sew them into 4 pairs and attach your border. You should now have a completed top!

Layer, baste, quilt as desired, and bind!

An approx. 76” x 79” quilt!

Karin Vail
{cascadequilts.com}
![]()
