
![]()
Hi! My name is Erica and I blog over at Kitchen Table Quilting. I am so excited about Moda’s new honeycomb pre-cut and this is a fun, quick way to put them to good use. There are no Y seams involved and it yields a generously sized lap quilt.

1 Honeycomb Hexagons in Natural
2 Boho Jelly Rolls
2 Yards Moda Bella in Sienna
4.5 Yards Boho Wild Child Rain
2/3 Yard Boho Basic Earth
Batting at least 80″x90″

1. Unroll your jelly rolls and put the matching strips into pairs. You will need 36 pairs of strips.


- Pile for the inner ring: two 3.5″ pieces, 2 of the 5.75″ pieces, 2 of the 8″ pieces.
- Pile for the outer ring: two of the 5.75″ pieces, two of the 8″ pieces, two 10.25″ pieces.

5. Each honeycomb hexagon will need a set for the inner ring and a set for the outer ring. Take a hexagon and sew a 3.5″ piece to the top and bottom of the hexagon. Make sure to center your jelly roll piece over the side of the hexagon so a little bit hangs over on each side.


11. Now, using a different print, add two 5.75″ pieces to two opposite sides of your hexagon, press, and trim.
12. Add the 8″ pieces, press, and trim.


14. Cut your solid yardage into seven inch x width of fabric strips. You will need 9 strips, each strip yields 8 equilateral triangles.
15. To make equilateral triangles, lay a 7 inch strip (folded in half) on your cutting mat. Line up the 60 degree mark on your ruler with the top of the fabric.

16. Cut along the edge of the ruler.

17. Flip your ruler over and line up the 60 degree mark with the bottom of the fabric to make an equilateral triangle.


19. Take the 30 remaining hexagons and add a triangle to the opposite side.

20. You will need 24 total of these “A” hexagons with 2 triangles added, so take the remaining 6 hexagons and we will add a third triangle.
21. Add a third triangle to make three “C’ hexagons.

22. And a third triangle to make three “D” hexagons.

23. Arrange your blocks into this layout:
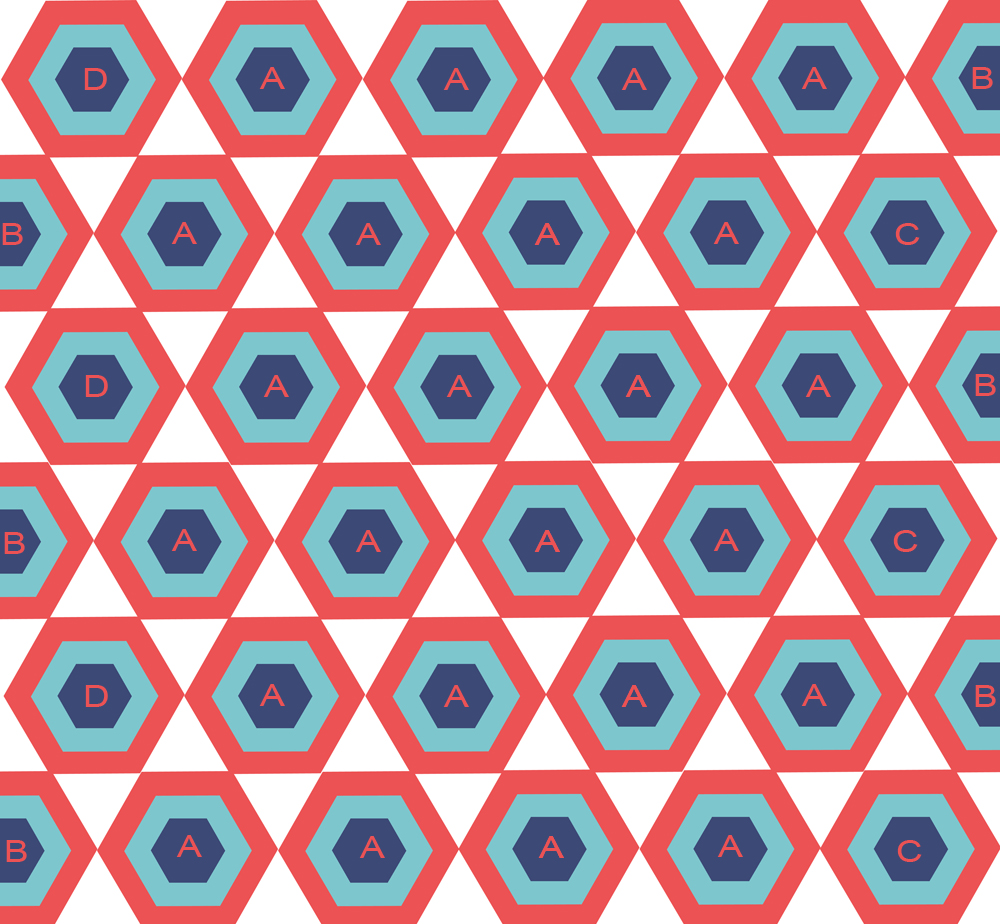
24. Piece the horizontal rows together. Do this by taking two hexagons at a time.


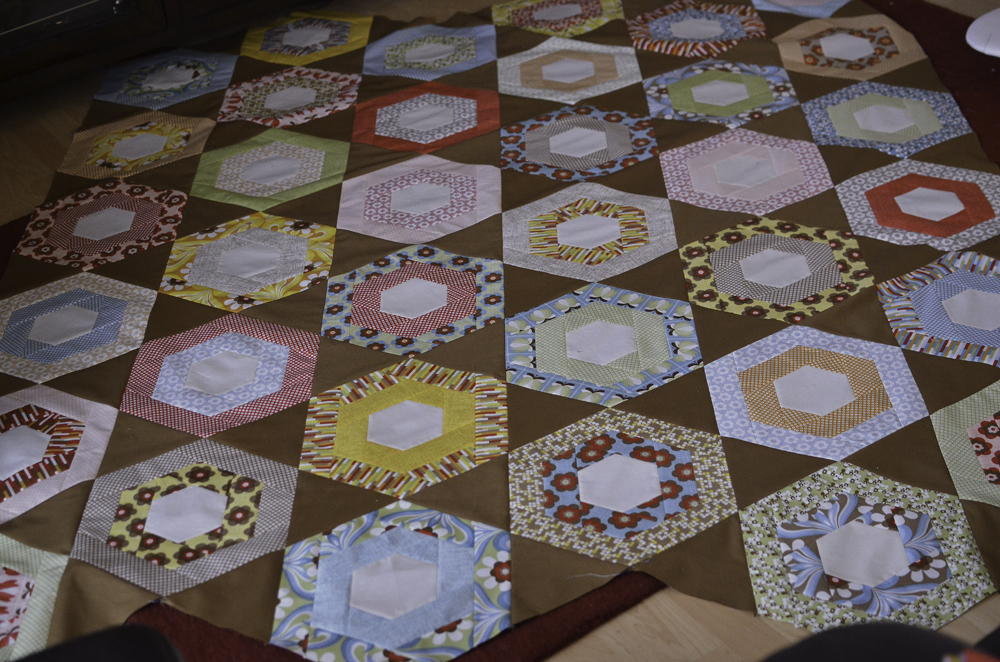
26. Once you have the finished quilt top, two of the sides will need to be trimmed. Use your ruler and rotary cutter to square up the bottom of the quilt and make this edge straight.


Erica Jackman
{kitchentablequilting.blogspot.com}
![]()
