

1 sweet charm pack
two 19″ x 3 1/2″ strips white bella solids
20″ x 20″ piece white bella solids
20″ x 20″ piece warm & natural batting
30″ of 1/2″ wide elastic
ribbon &/or rick rack
 lay out 16 of your fav charms from your charm pack in a 4×4 layout.
 sew the 1st row. pressing seam to the right.
sew the 2nd row. pressing seam to the left.
sew the 3rd row. pressing seam to the right again.
and then sew the 4th row. pressing seam to the left again.
{this will ensure perfect seams.}
 join row 1 & row 2. press.
add row 3. press.
add row 4. press.
 layer with the 20″ x 20″ piece of bella solids & 20″ x 20″ batting.
baste.
and quilt as desired. {i went with good ol’ stipple quilting.}
then trim off your edges just like you would if you were about to complete a quilt.
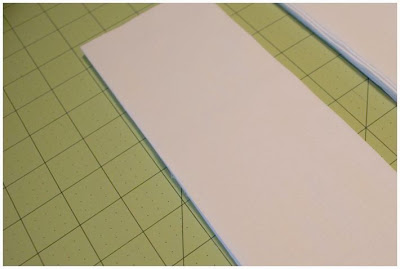 take your two 19″ x 3 1/2″ strips of white bella solids and fold them in half like you would binding. press.
 with the opening facing outwards on, just like binding, sew your strip on.
 you’ll want to do this to the top and the bottom of your little quilt.
yours should look just like mine.
 cut 12″ from your elastic and place a safety pin at one end, like so.
 feed the safety pin end of your elastic through the strip on the TOP of your quilt.
 once you pull the pin through to the other side, you’ll need to remove the pin and secure the loose end of your elastic by sewing over it.
 trim it nice & neat once it’s secure.
 here’s what your top will look like once it’s done.
now cut 10″ from your elastic and do this process again for the bottom.
 after you’ve sewn your elastic into place, you’re gonna have a funky looking quilt like this.
 take the remaining 8″ of elastic and fold it in half.
this will be for you to hang your dispenser by.
{you can use ribbon, rick rack or even fabric here instead of elastic.}
 take your little quilt, right sides together and start to sew down the long, open side.
the ends of your elastic are gonna be a little finicky, but you can do it!!!
promise.
before you go too far, take that folded elastic from the previous step and slide it in place with the opening facing outwards near the top of your quilt.
{i placed mine about 1/2″ from the bottom of the white fabric.}
 after you have sewn down the side, this is what your little quilt will look like now.
 now flip that bad boy right side out …

 and you are done.
{unless you want to wash it & dry it for that straight from the dryer crinkly goodness like i did.}
now all you have to do is add your grocery bags and enjoy!!!
did i mention it takes less than an hour to whip up one of these???
so go whip up a few for you, your mom, your sister & your neighbor…they’re all gonna want one once they see yours!!!
![]()

i love it rachel! … now i just need to find 16 charms that i haven't tagged for another project and make one asap!!
Fantastic…so cute!!
~Karen~
Very nice Rachel!
Rachel That is so cute! I love that fabric combination too. I was just wrestling with my Walmart bags yesterday saying that I needed to make one of those myself. I've even got some cute rooster fabric for the occasion! Great tutorial! I'm going to add that to the project list! hehe Jenn
Rachel, your dispenser is adorable. And I believe I recognize that fabric! Now I need to make one for my house!
GREAT job, Rachel…have seen these around but NOT quilted and the quilting really makes them SO much nicer.
Can you tell me what a mini honey bun is in the “sweet box”?
a honey bun is 40 1.5 inch X45 inch
is the mini smaller in size or less strips?
Thank you for this really fun site
Happy Sewing
kim…
the mini honey buns in the sweet boxes have 10 strips instead of 40.
hope this helps.
oh my heck that's cute! way fun! ooxx`jodi
Cute! Cute! Cute!
My MIL made me a bag dispenser years ago, with a paper-pieced black bear on it. But your pattern makes me want to make another one!
I've seen a bunch of plastic grocery bag dispensers but yours is by FAR the cutest!! Love it. Great tutorial, as usual, too!
what a geat idea!!!!
Love it!
this is cool!!! i have tons of bags, so i need to be making me one!!
Another fun, clever, and useful idea. Thanks Rachel, I LOVE it!!
I am totally into it!
awesome!
Ok..this is the CUTEST bag dispenser I have ever seen!!
THANKS!!
What a Sweet bag dispenser!
Great tutorial, Rachel! Very useful!
I would love to make one of these but in our town (in Canada) we now have to pay for our grocery bags and so we are using reusables. Maybe I will make one anyway and keep tea towels in it or maybe rags. Or maybe someone has a better idea. :o)
Bravo!!
so cute. love it.
would modabakeshop consider setting up an account on twitter. you could tweet when a new project is up. i always forget to check here for updates.
Too cute! And too cute for grocery bags, Rachel. I think I'd fill mine with candy. Or wine. YES, wine! How perfect for a bottle of wine. Pass the cheese, please.
Super cute Rachel. 🙂
I made 2 of these today. Mine were one row shorter than yours. I am grateful for your wonderful tutorials. Following your directions was easy and the results were marvelous. I posted my photos on flickr.
That looks awesome. Guess what everybody is getting for their birthdays now!!
what a great tutorial and such sweet fabric!
Very cute!
thanks for all the SUPER sweet comments yall.
♥
i'm still laughing over the wine dispenser that monica is planning to do!
very cute rach!
I LOVE IT!!!!!!!! And that fabric just makes it even cuter.
成人聊天室,中部人聊天室,免費視訊,視訊交友,視訊美女,視訊做愛,正妹牆,美女交友,玩美女人,美女,美女寫真,美女遊戲,hi5,hilive,hi5 tv,a383,微風論壇,微風,伊莉,伊莉討論區,伊莉論壇,sogo論壇,台灣論壇,plus論壇,plus,痴漢論壇,維克斯論壇,情色論壇,性愛,性感影片,校園正妹牆,正妹,AV,AV女優,SEX,走光,a片,a片免費看,A漫,h漫,成人漫畫,免費A片,色情網站,色情遊戲,情色文學,麗的色遊戲,色情,色情影片,同志色教館,色色網,色遊戲,自拍,本土自拍,kk俱樂部,後宮電影院,後宮電影,85cc免費影城,85cc免費影片,免費影片,免費小遊戲,免費遊戲,小遊戲,遊戲,好玩遊戲,好玩遊戲區,A片,情趣用品,遊戲區,史萊姆好玩遊戲,史萊姆,遊戲基地,線上遊戲,色情遊戲,遊戲口袋,我的遊戲口袋,小遊戲區,手機遊戲,貼圖,我的遊戲口袋,小遊戲區,手機遊戲,貼圖
I posted a picture of the Grocery Bag Dispenser I made on my blog. I also linked over to you. Thank you for sharing such great patterns. http://nrnoodle.blogspot.com/