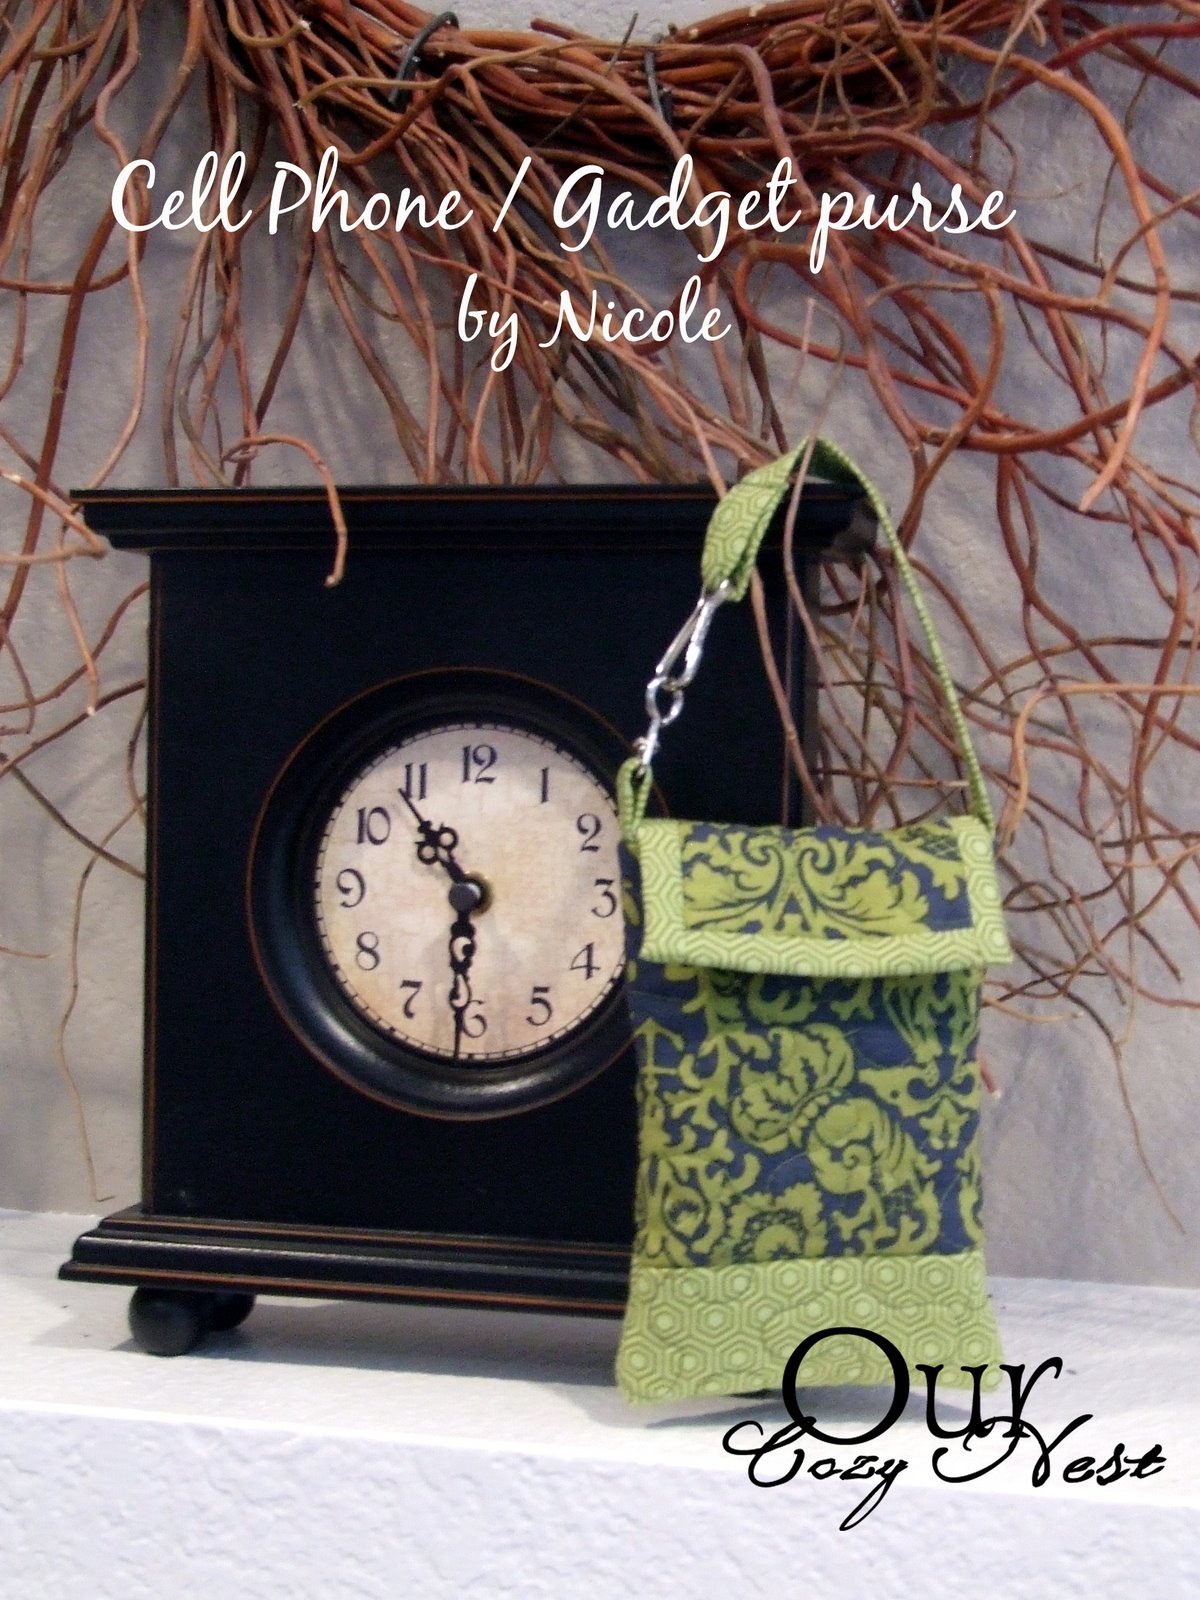
I’m so excited to be featured on the Moda Bake Shop, and praying this little tutorial makes sense. I’m constantly dropping my cell phone so I wanted to make a little case to protect it. It would also work great for other little gadgets like ipods. I made the handle with a little hook so that you can easily hook it to anything you’d like, your purse, diaper bag, whatever! The finished case measures approx. 3 1/2″ x 5 1/2″.

1 Moda Neptune Layer Cake
1 10 x 10″ piece of Warm and Natural or similar batting
1 Sew on Snap, Size 4 or 1 ” Velcro
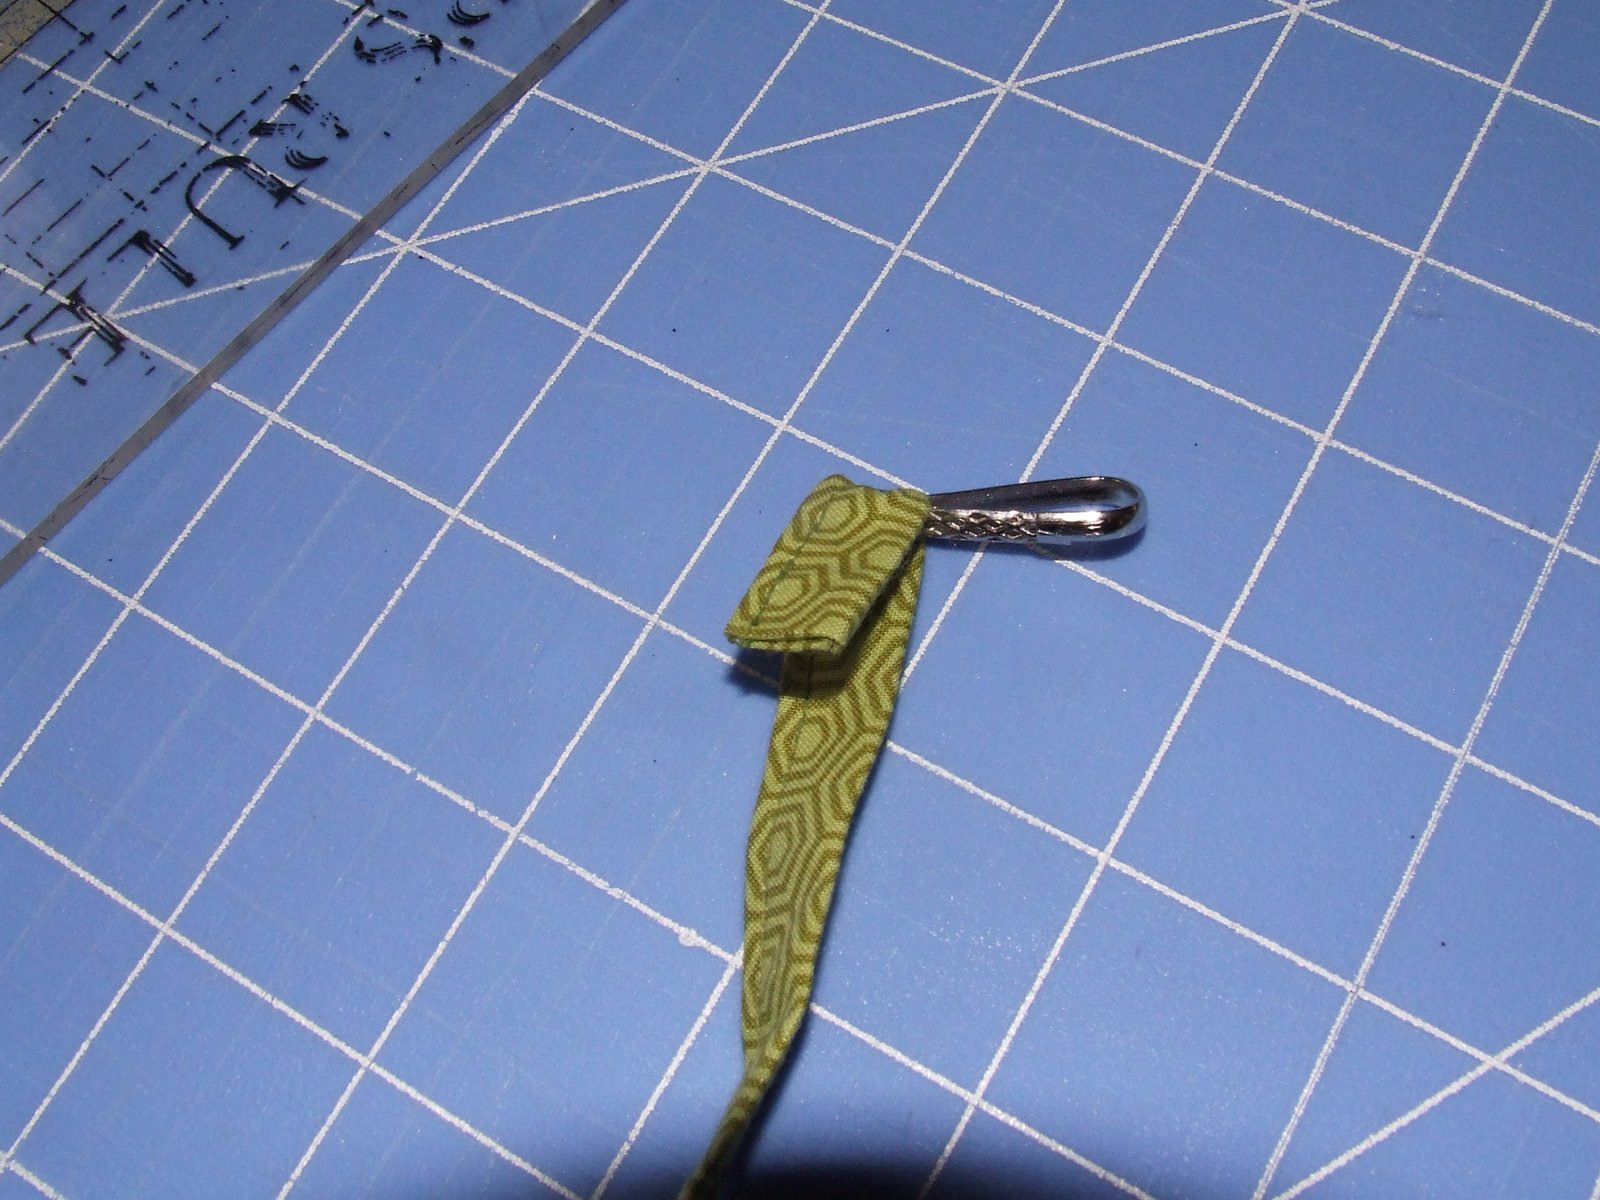
1 Lanyard hook w/swivel (found w/jewelry making supplies at most craft stores)

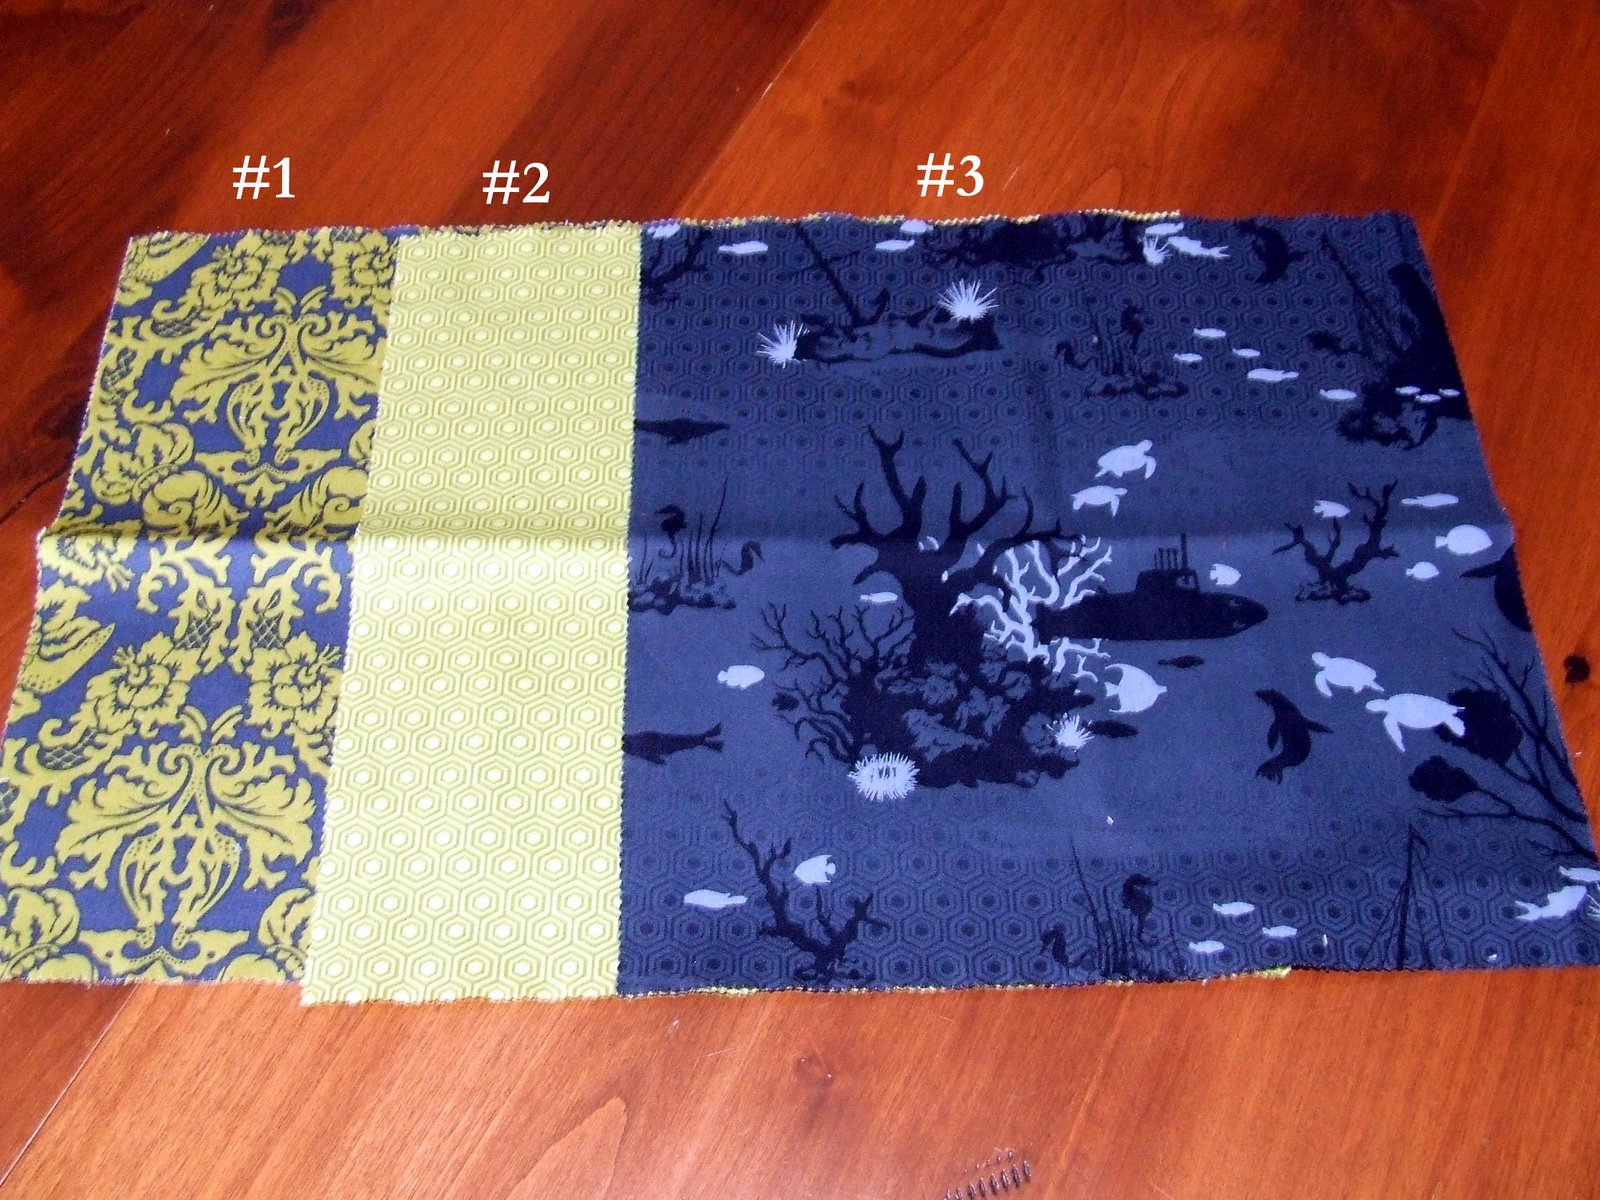
Pick three coordinating fabrics from the layer cake of your choice.
Fabric 1 – Outside of case, and outside of flap.
Fabric 2 – Bottom of Case, handle and binding around flap.
Fabric 3 – Lining of bag, and inside of flap. (This picture shows a blue fabric, I ended up using a green one instead.
Out of fabric #1 you will need to cut two 4 1/4″ x 4 1/4 inch squares. Out of fabric #2 you will cut one 4″ x 4 1/4 inch square. Sew them together with fabric #2 in the middle using a 1/4″ seam allowance. Unless indicated always use 1/4″ seam allowance.
At this point I quilted the piece you just finished on top of a piece of batting with some simple stippling. I also quilted the flap (fabric #2, 3 1/4″ x 3 inch square) onto some batting. This is completely optional. If you decide not to quilt it, you will need to sew the piece you just finished onto the batting by simply putting the fabric and batting together and sewing right down the center of the two seams.
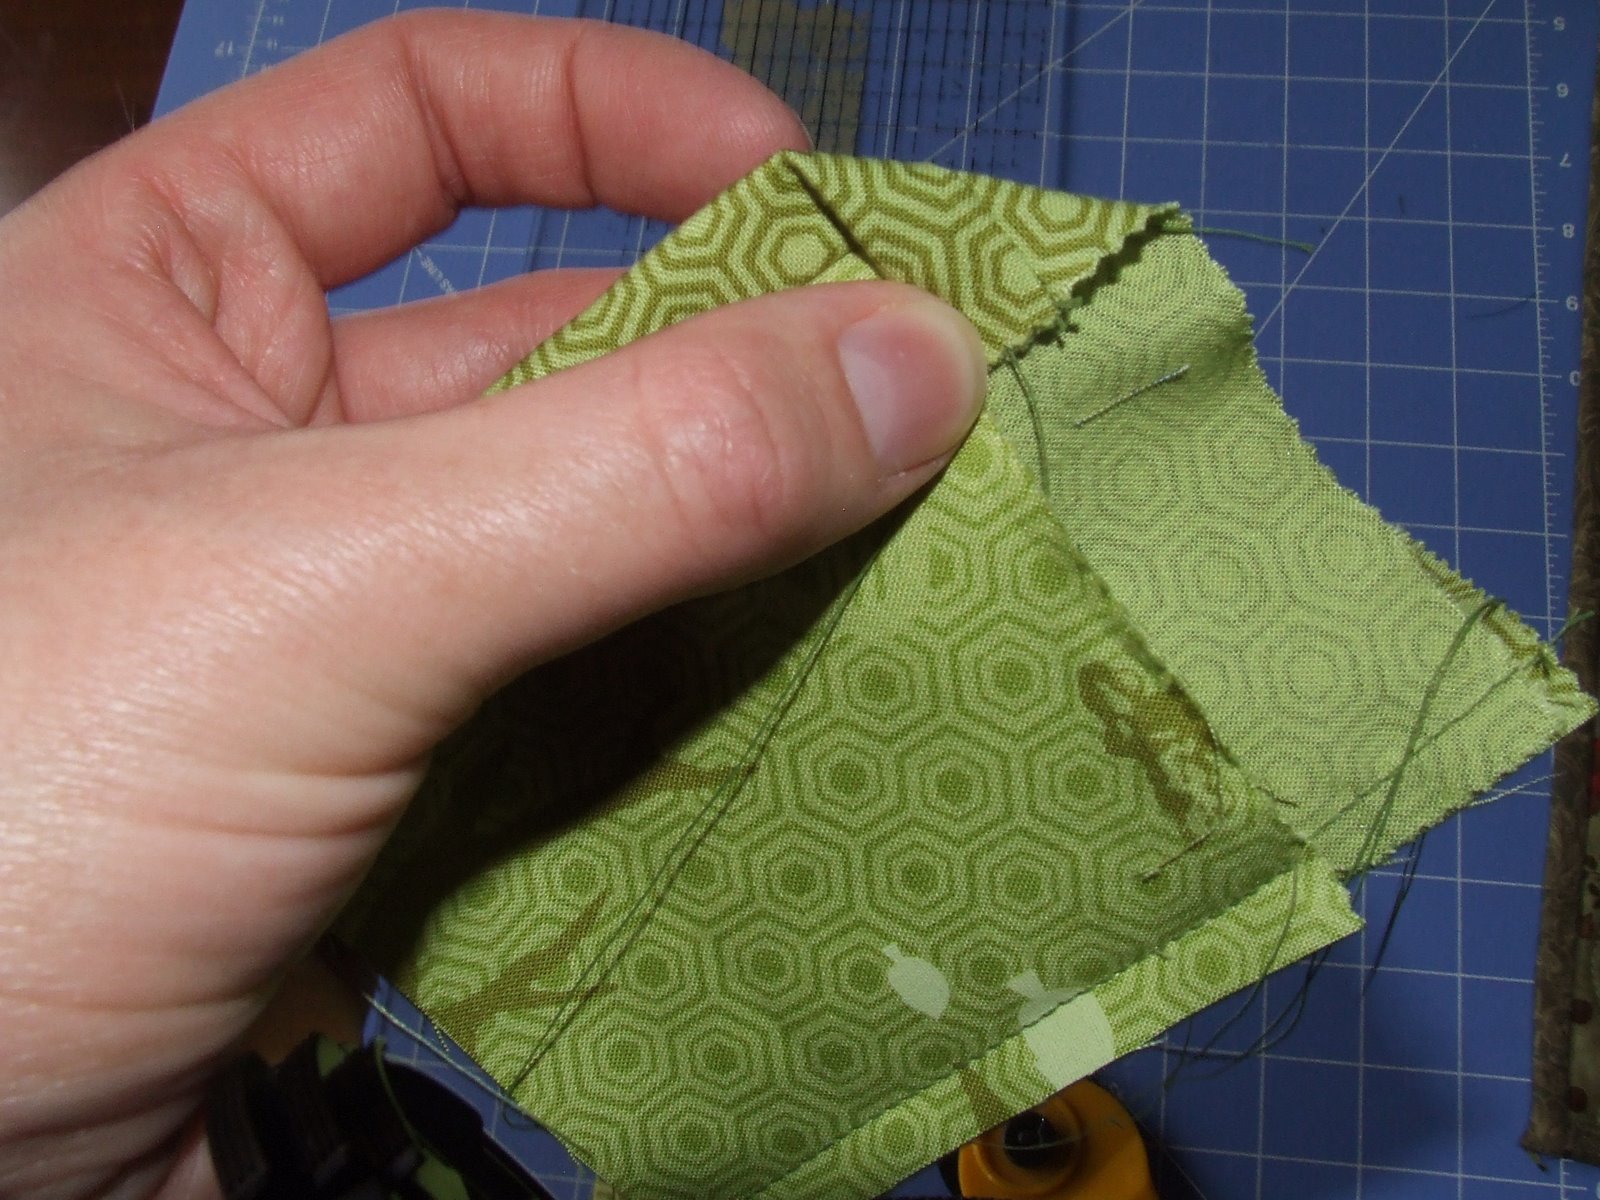
Once the batting is attached to your fabric cut off any extra batting on the sides. Fold fabric in half with right sides together and pin sides together at the seams where the two coordinating fabrics meet. Sew down the sides of fabric and turn fabric right side out. 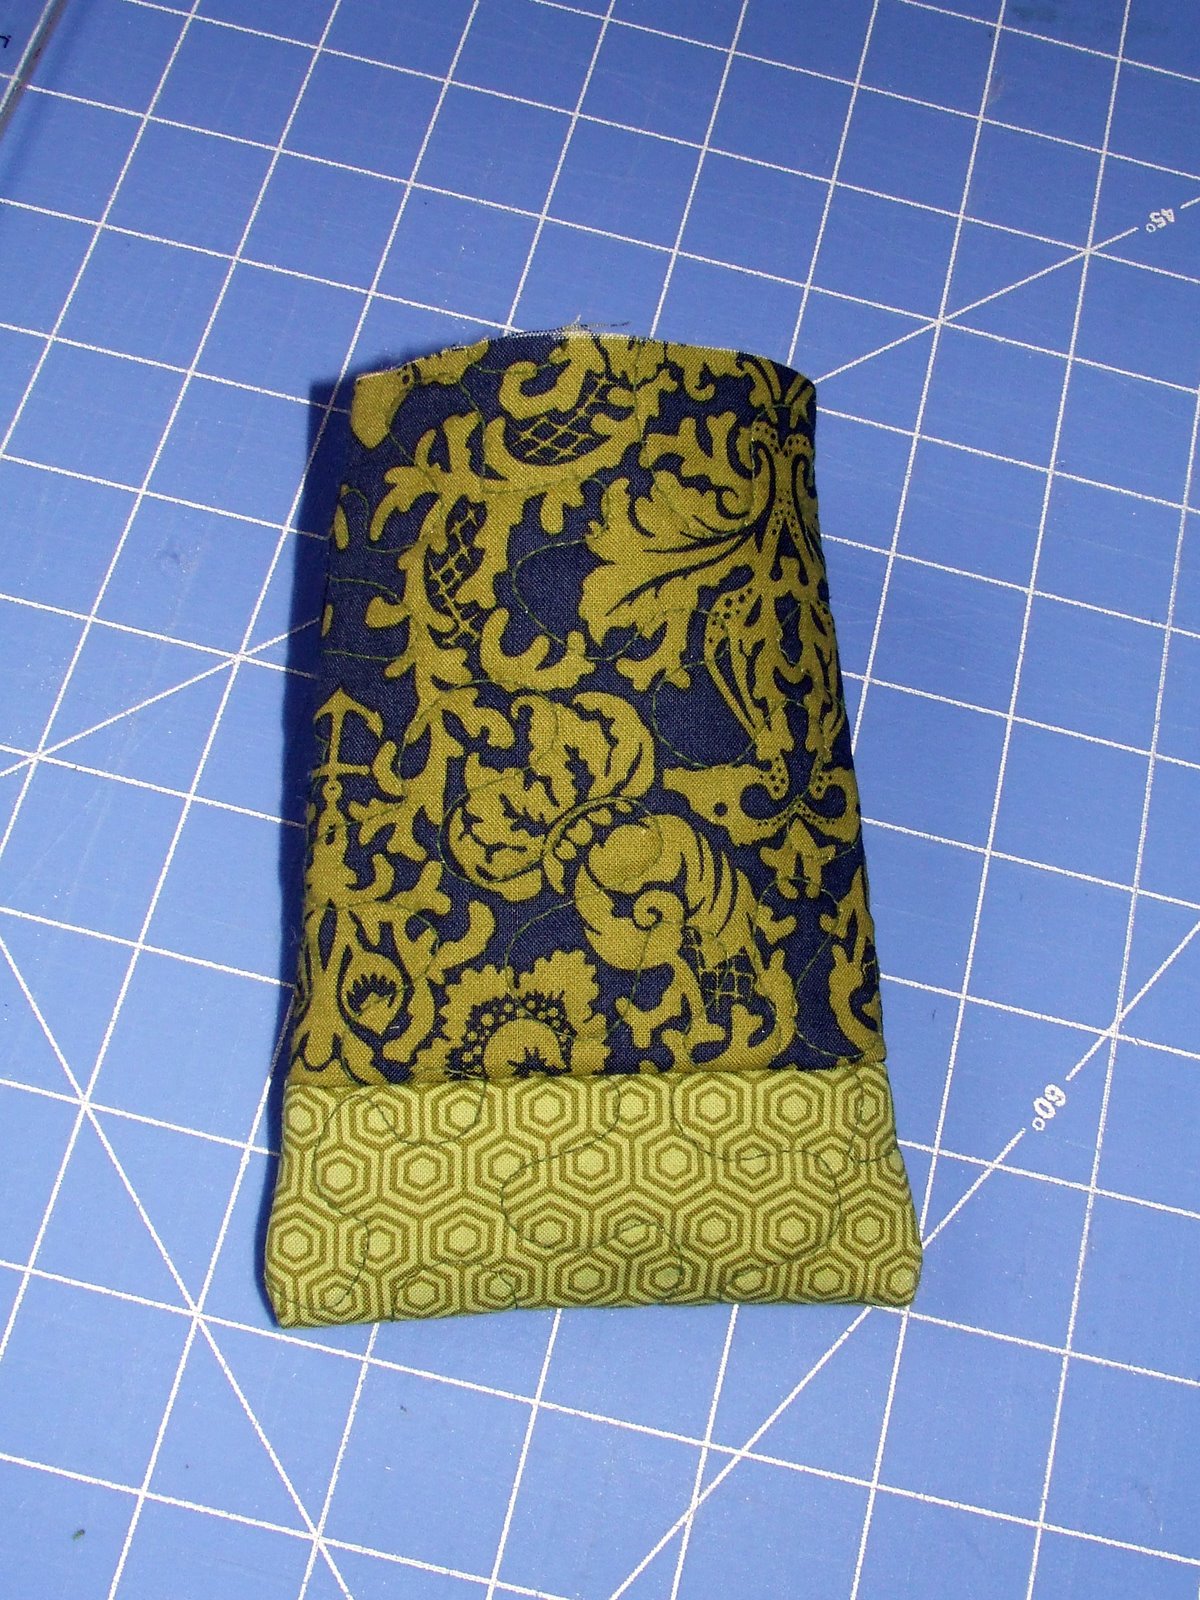
Flap
Cut a 3 1/4 x 3″ square from fabric #3. This will be the inside of the flap.
If you opted not to quilt the outside of the flap to the batting, simply pin the flap, the batting and the inside of flap (fabric #3) with the right sides showing and batting in the middle together.
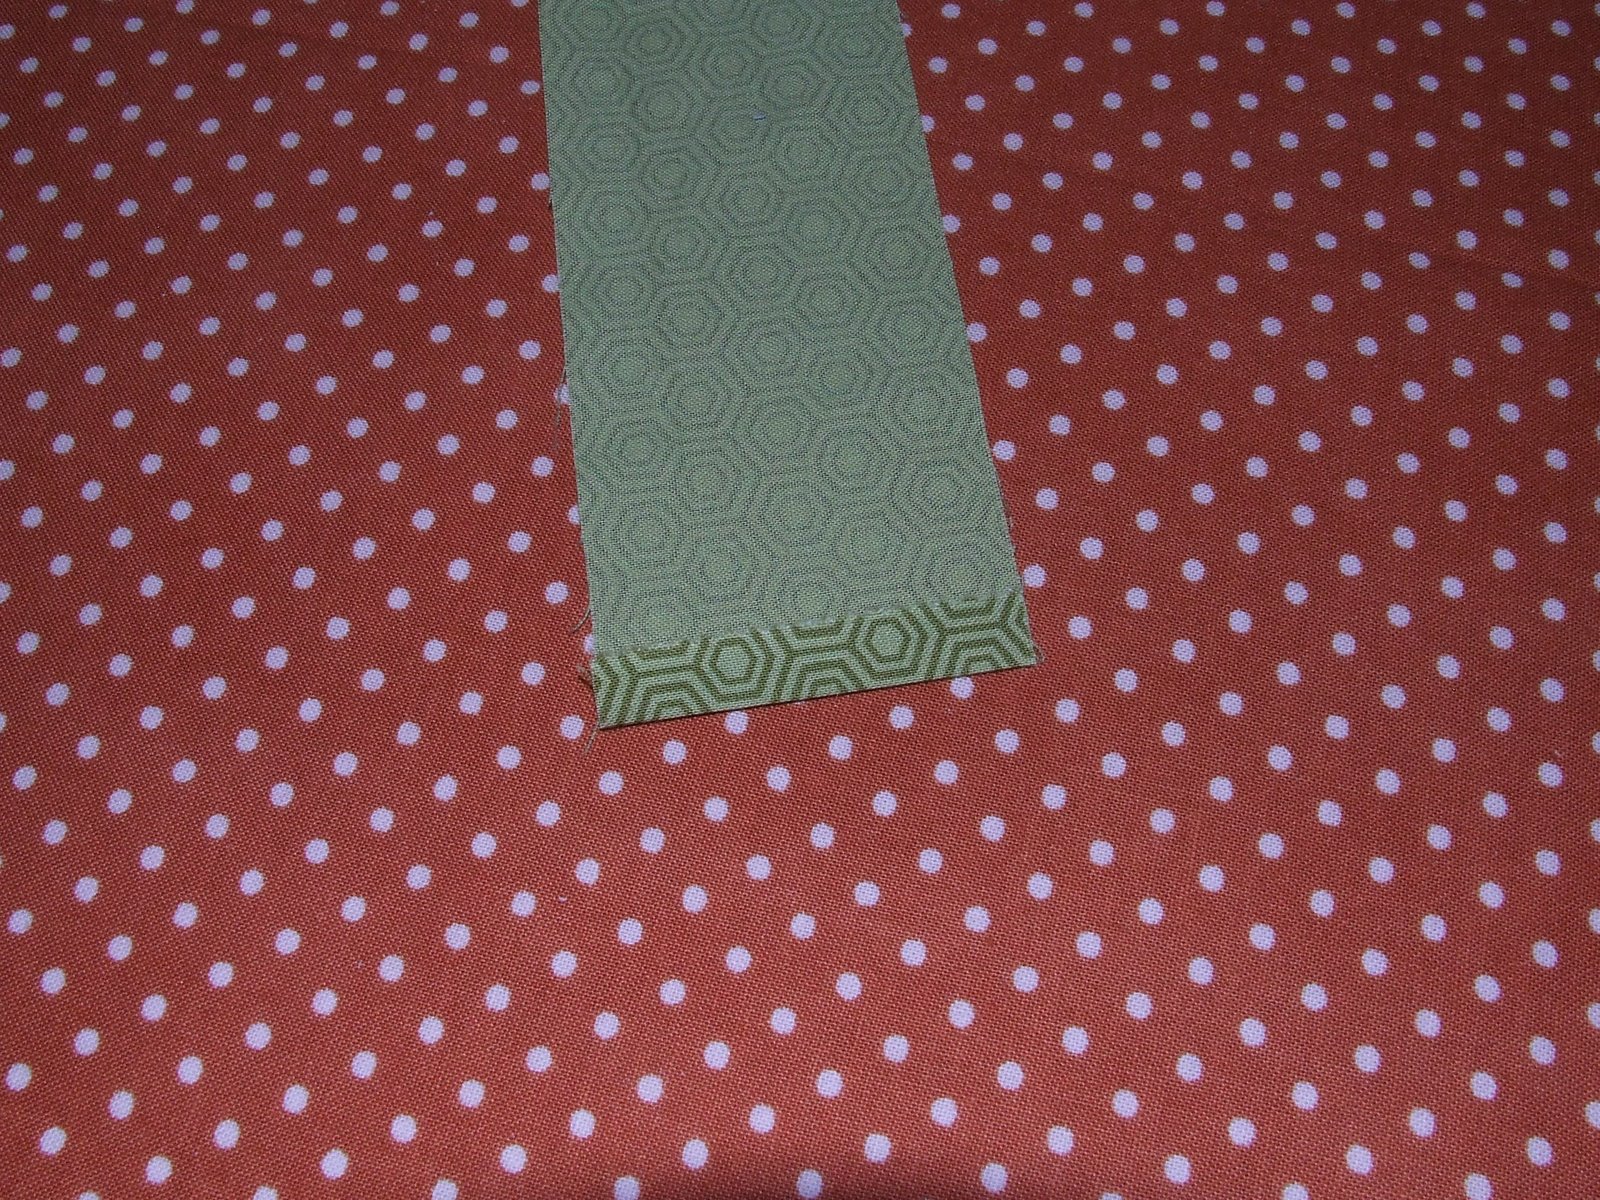
Now your going to cut the binding for the flap.
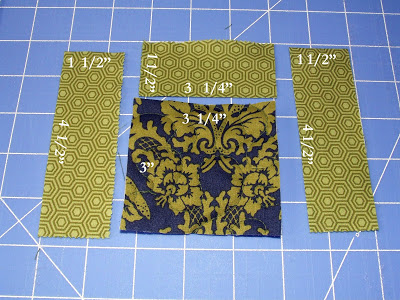
Next you will cut 3 pieces out of fabric #3. Two pieces 4 1/2″ x 1 1/2″ and one piece 3 1/4″ x 1 1/2″. Refer to picture below.
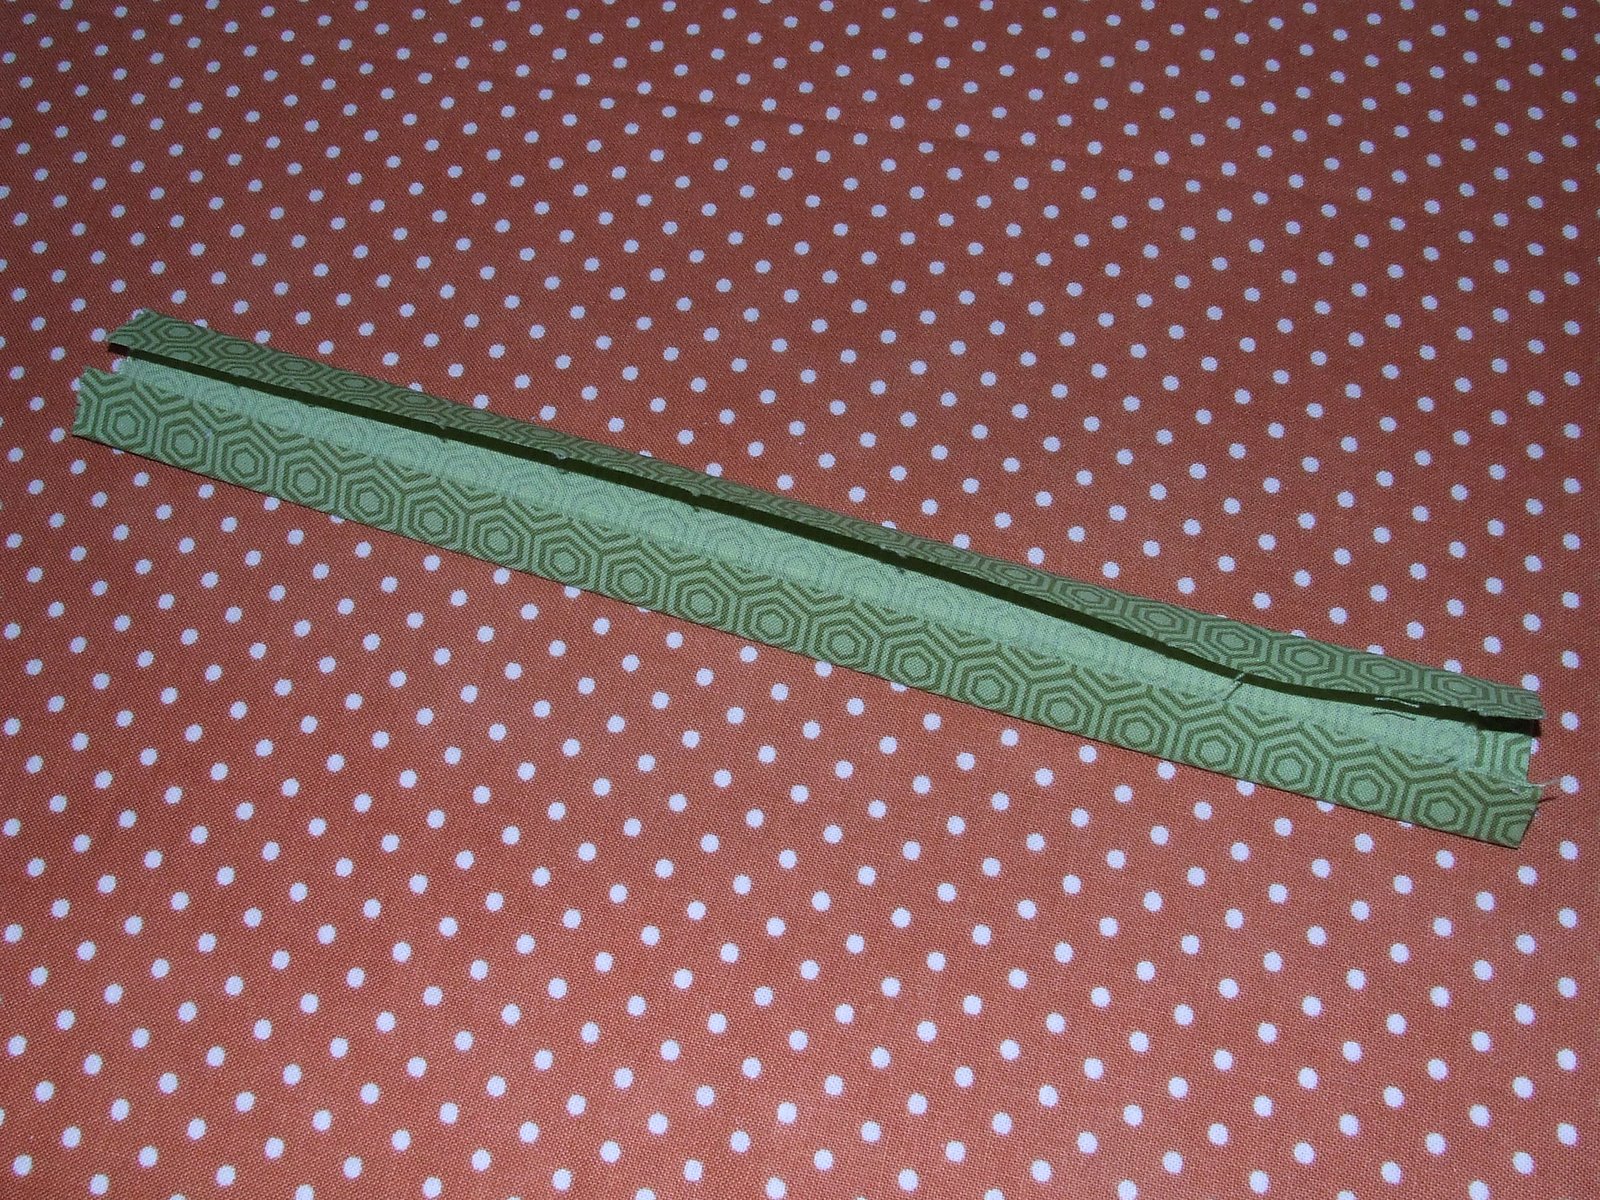
Sew the binding onto the flap by first starting with the top piece. Line up the tops of fabric with right sides together and sew across top.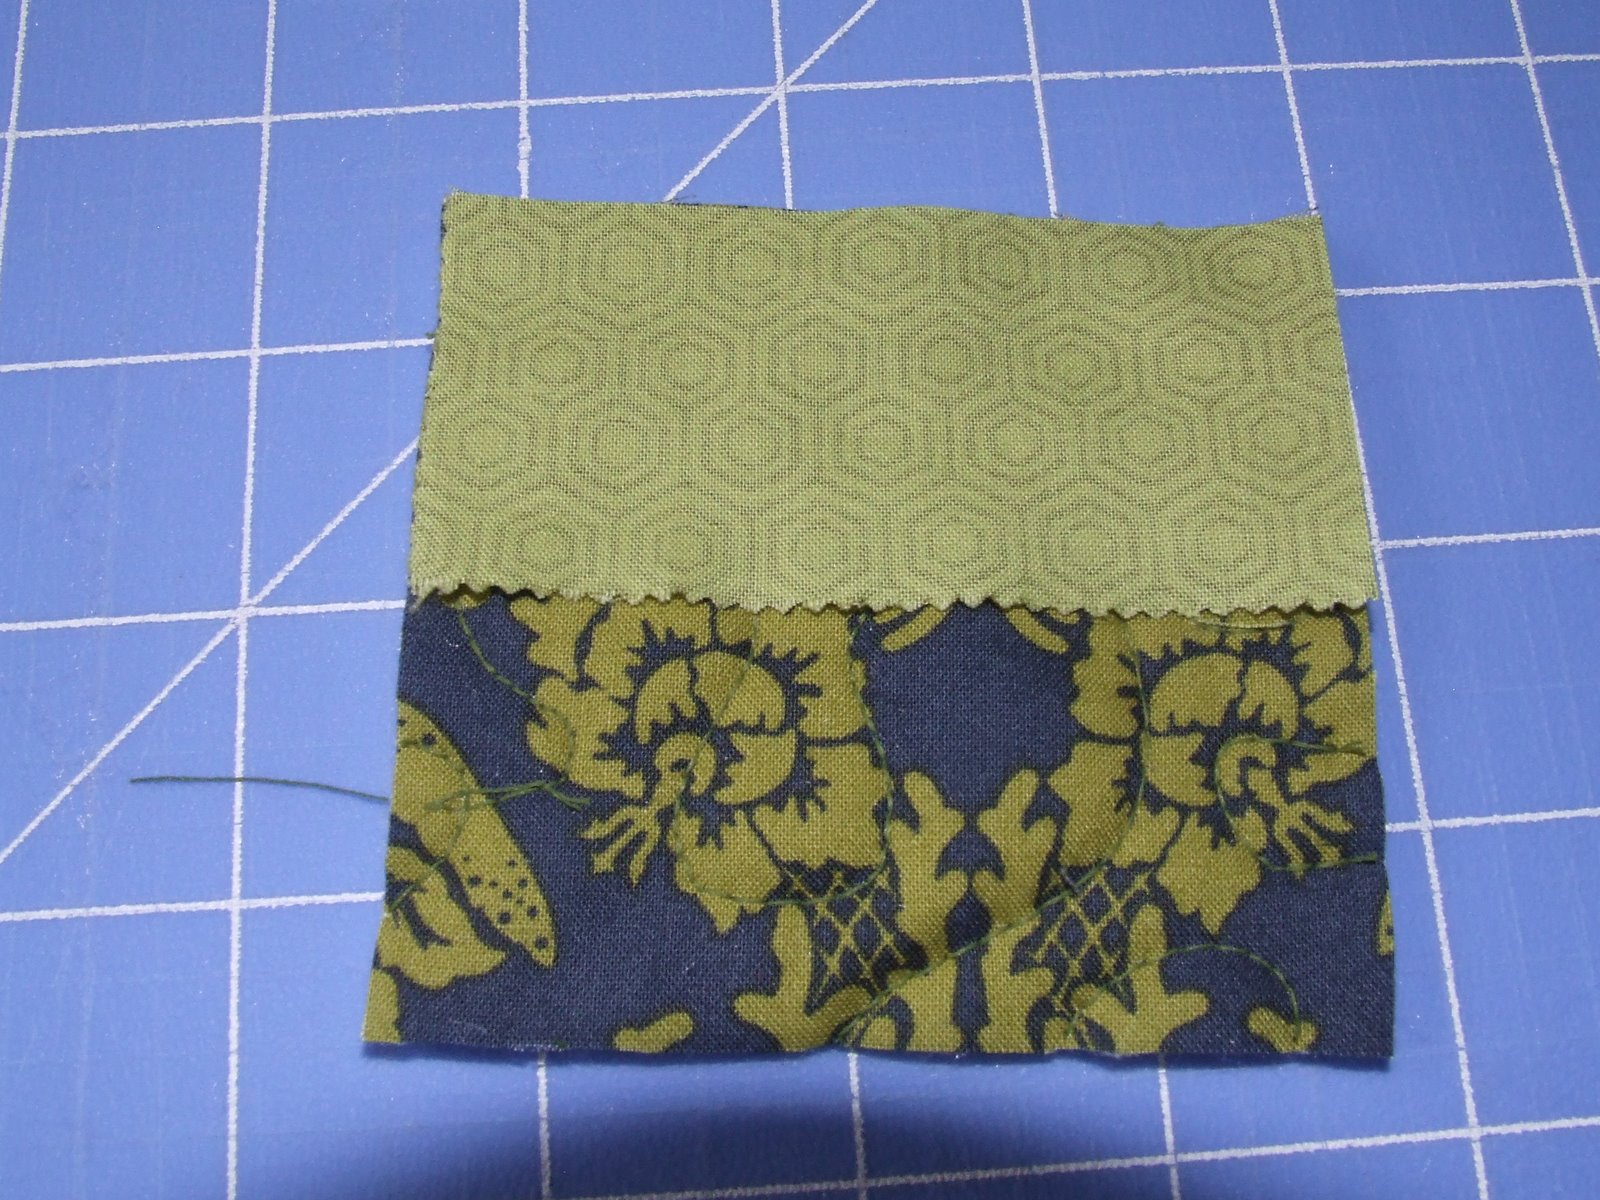
Iron the fabrics open and attach side pieces the exact same way. Cut off any extra fabric on the bottom.

Flap Binding
I know everyone has there own way of binding. Mine probably is not the correct way, but it works for me. So here is how I do it…….. Turn the flap around so your looking at the inside of the flap. Starting with the left side fold the piece of binding over by folding it in half length wise and then fold it over onto the inside of fabric and stitch down with needle and thread. When you come to the corner, fold down at an angle (like the picture below) fold in half and fold down onto fabric and stitch down like before.
Handle
Cut a 2 x 10″ piece from fabric #2. First iron the bottom of fabric over 1/4 “. This will create a finished edge that you will need later.
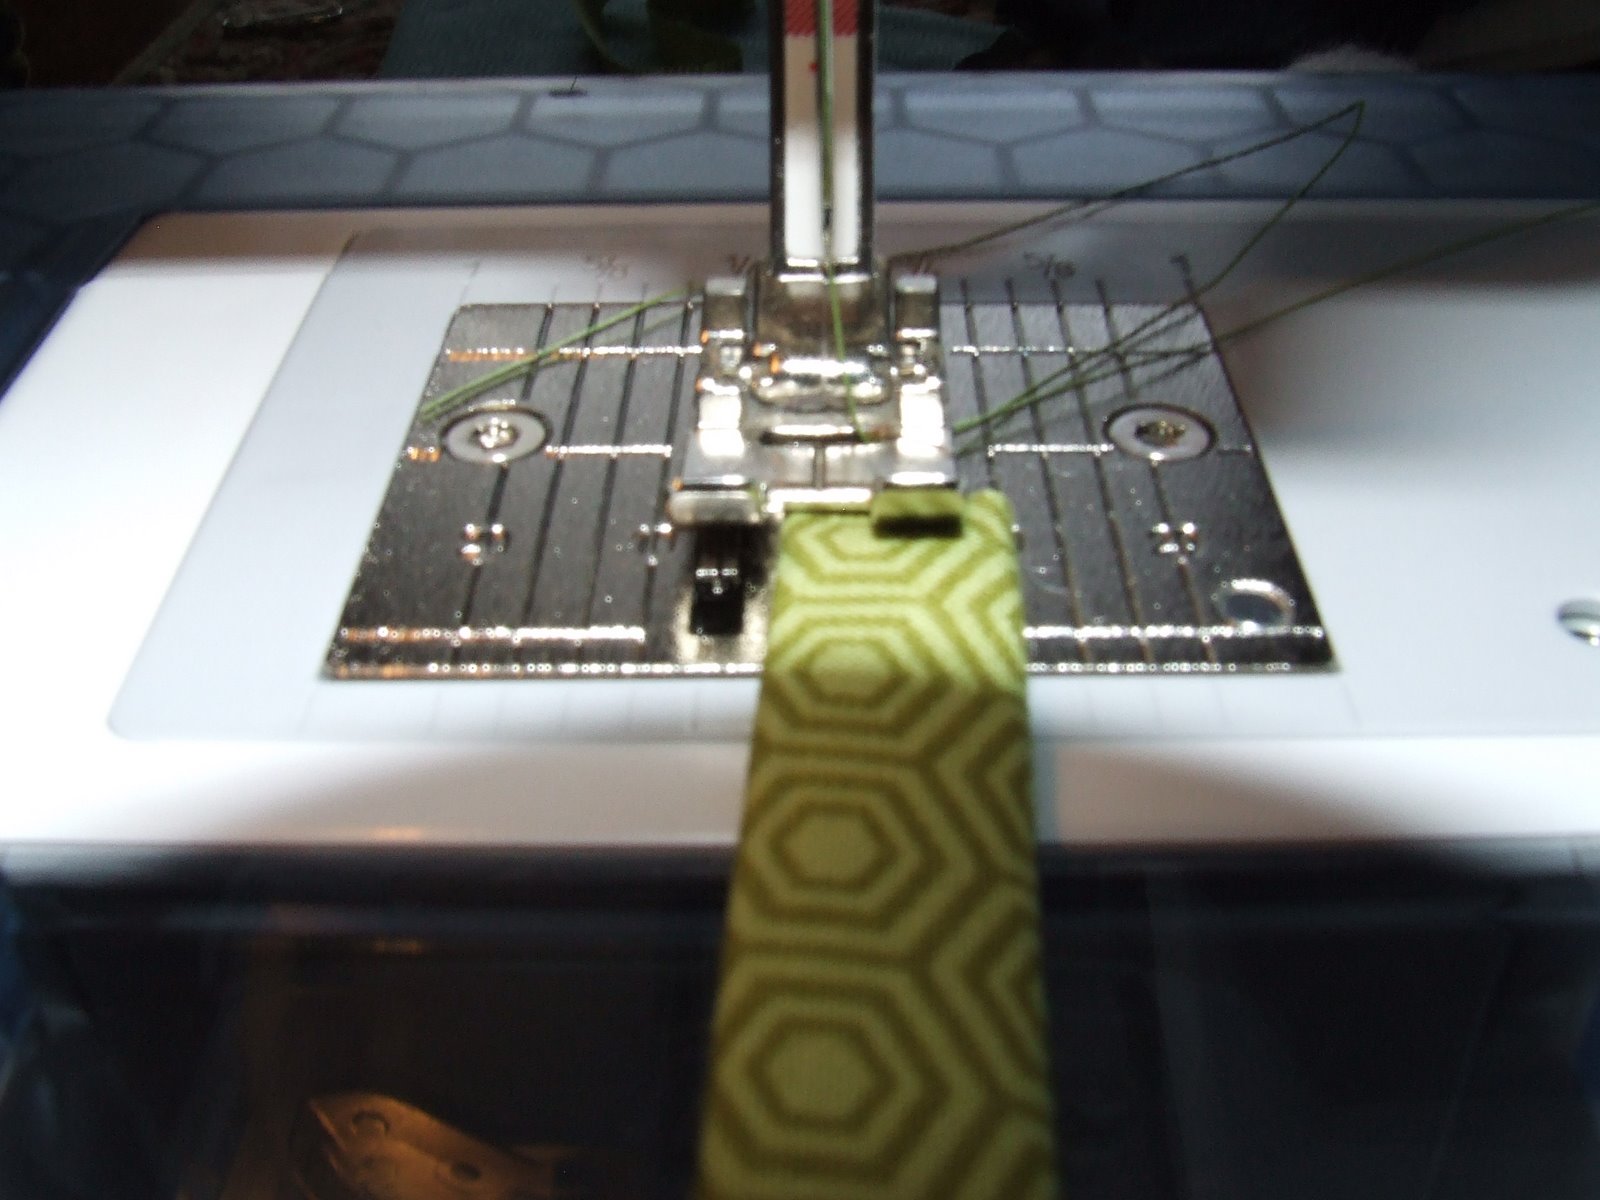

Attach it to bag by putting the two ends of the fabric together then pin them to the to the left side of the bag and centered over the seam at the top.
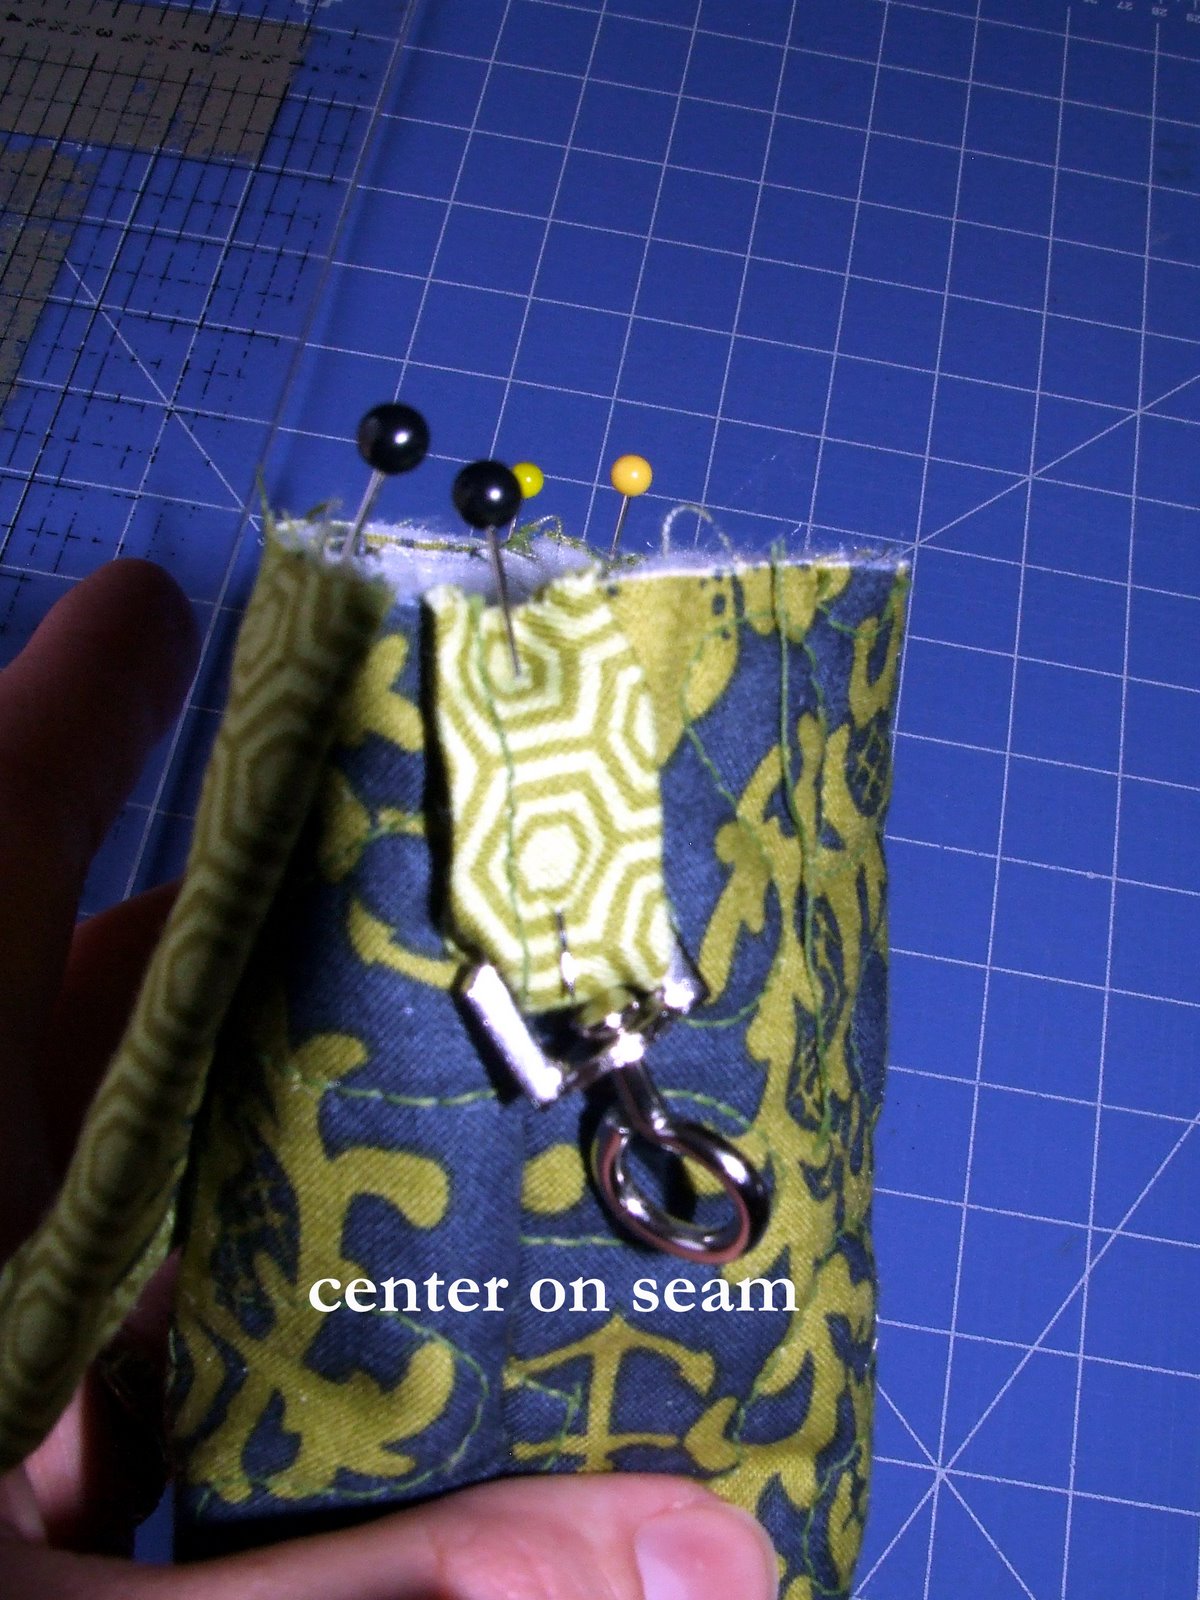
Attach the unfinished edge of the handle to the right side of the bag, centered over the side seam with a pin. Also, now is the time to attach the flap to the back of the bag. Line up and center on the back of the bag with the inside of the flap pointing out and pin.

Lining

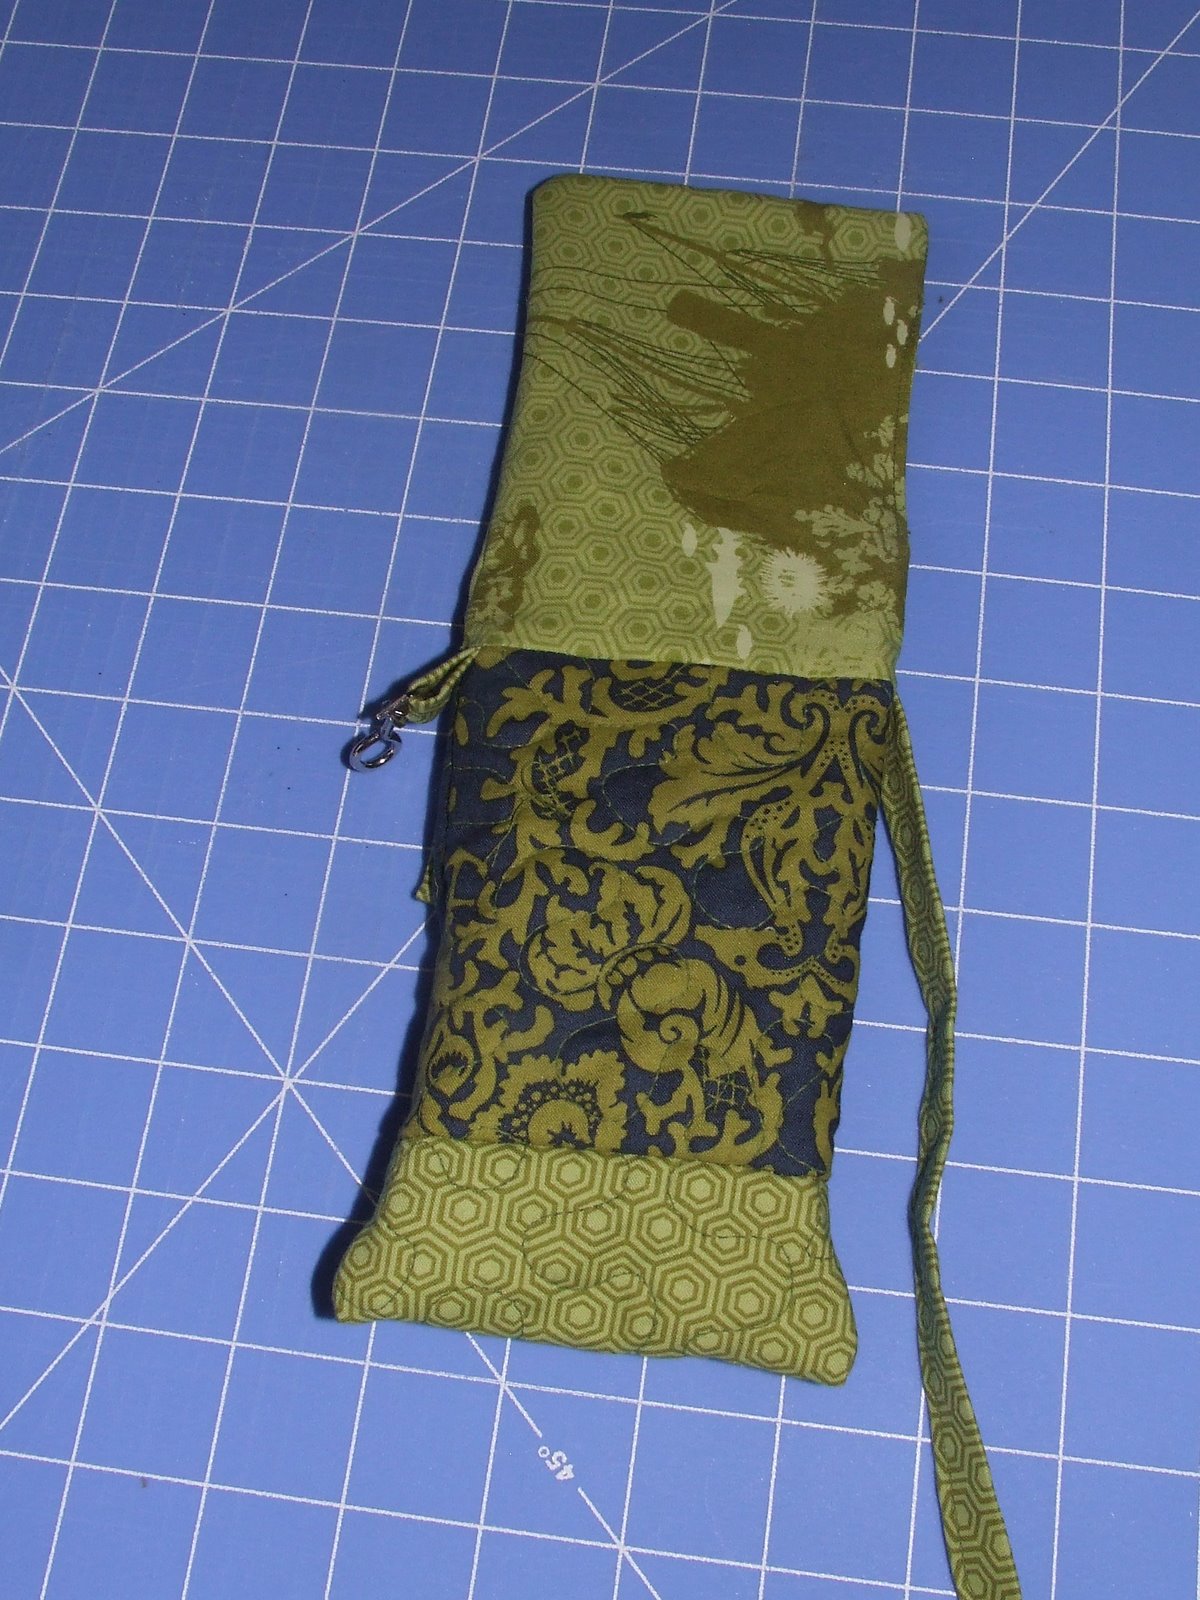
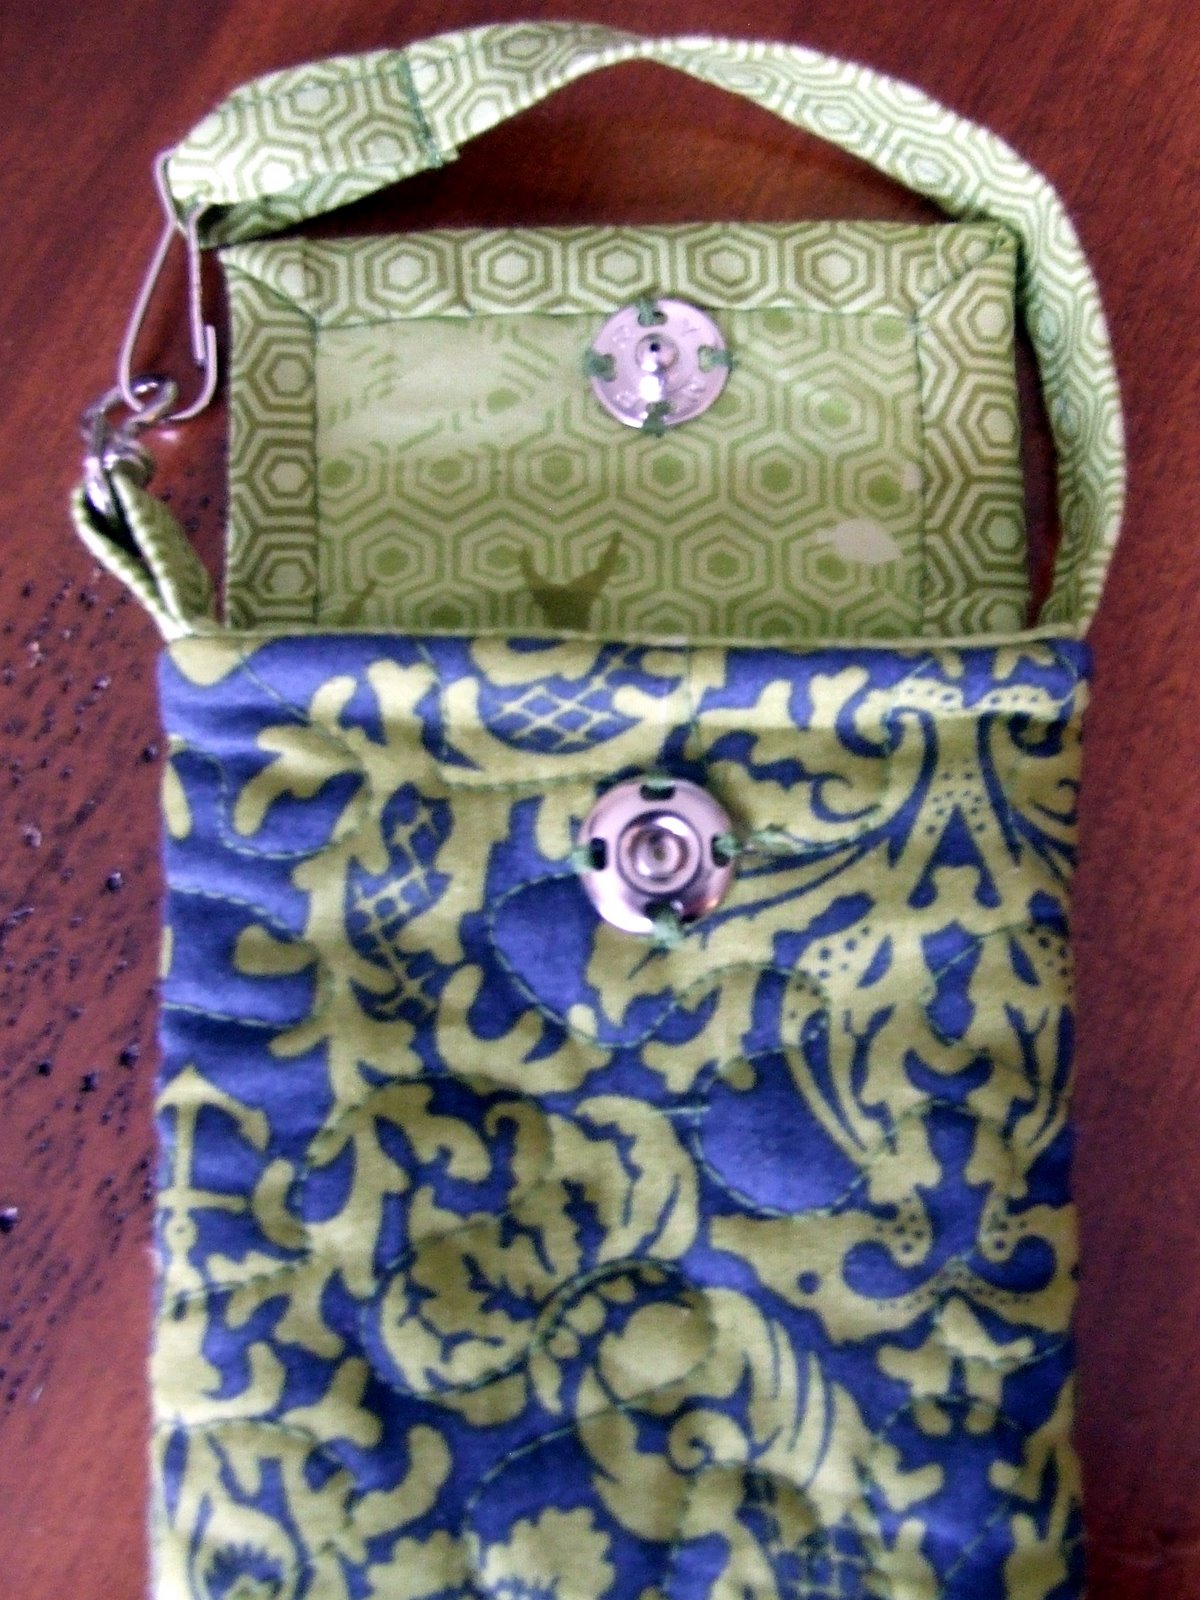
Sew on your snaps with a needle and thread and your finished!!!


![]()

What a great idea! I especially like the swivel hook. I’m going to have to try this one.
My Daughter only said last week that she wants to make a phone cover as her first sewing project so thanks!
Thanks for this I love the swivel hook. Is it possible to make this tutorial printer friendly? It would cut down on my ink and paper consumption. Thanks.
good job nicole.
this is cute!!!
Nice tutorial. I love fast easy projects. So, I may give this a go as I am continually dropping my phone too.
cool. i like this style – scarlette-gabby
Is there some printer friendly button? I’d love to make one of these, maybe more, but without the instructions printed beside me, it would be rather awkward to be running back and forth between machine and computer.
thanks for this wonderful blog.
~a
Neat!!! Will there be a printer friendly option? Or am I missing it this time around?
This is super cute! Thanks for showing us.
The Printer Friendly Version has been posted to the end of the post.
Cute! I need to pick up some batting and make one for my phone!
Oh wow This is so cute!! i love it. I will have to make me one now.
Your just so creative.
This is a great idea! I am going to make these for Christmas gifts this year, thanks!
Great idea, very neat job!
Out-of-control-cute!!!!
Thank you so much for the printer friendly feature. Now I am off to see a couple of these great little projects.
super cute nicole!!!
I love this. I was looking for anew project, and now I’ve found it. Thanks. Love that swivel hook!
excellent tutorial! i’ve made two in as many days.
photos on my blog, on < HREF="http://imellyc.blogspot.com/2009/05/i-made-this.html" REL="nofollow">this
post<>.
I was looking for a case for my Blackberry at the store the other day and couldn’t find one. This is GREAT! Thank you so much!!!
ok..
your post is great idea!
thanks,for shared!