
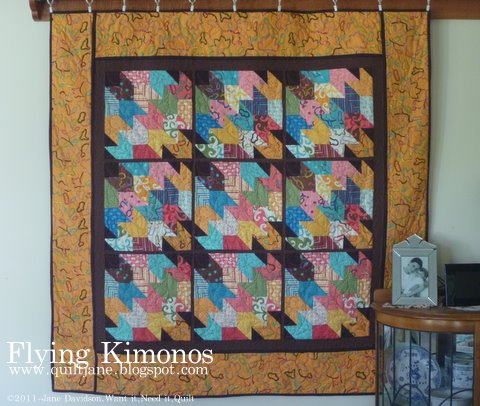
The Japanese have many beautiful traditions one of which is the art of Sashiko. I found a Sashiko pattern that looked like little arrowheads and adapted it to make a quilting block. The following quilt showcases one placement of the block to make a very colourful lap quilt using Modern Workshop by Oliver + S. Liesl Gibson has painted a palette of vibrant hues and subtle designs which made it so much fun to make these Kimonos Fly.
1 x Modern Workshop Jelly Roll
2 yards of main border fabric (use length to cut borders)
1.25 yard Moda Bella Solid – Chocolate 9900 41
1.75 yard Moda Bella Solid – Moda U Brown 9900 71
The instructions are for a 9 block layout. With careful planning and cutting you can make 12 blocks from one Jelly Roll.
These blocks while they look complex, are quite simple to make. The block is constructed using a strip piecing method cut at 45 degrees. There are three main rules to follow when making these blocks.
- Consistency in your seams. Keep an accurate 1/4″ throughout.
- Do not stretch your fabric or pieces. I use spray starch to stabilise my fabrics. I only press my piecing. Do not use steam. Only press a section when complete. This will avoid over pressing.
- Most importantly, always cut your completed strip sets at 45 degrees using the middle seam as a point of reference. If you cut your strips accurately and consistently, they will fit together perfectly when sewing the rows together.

Planning
Each block will consist of 17 separate fabrics for the arrowheads, one orange print kimono, one brown print kimono tail, and dark brown kimono tail and sleeve.
- Select two (2) brown strips and two orange strips (2) from your Jelly Roll. These will be your Kimono fabrics.

- Cut 4 x 2.5″ strips WOF from dark brown solid for Kimono tails and sleeves.
- Select 34 different fabrics from the Modern Workshop Jelly Roll. Each strip set will yield five (5) to six (6) strips blocks. For this tutorial, we will only use nine (9) in total.
- Cut the strips in half to yield 2 x approximately 22″ strips.
 |
| Set 1 – Five blocks |
 |
| Set 2 – Four blocks |
- Make a line drawing of this block and cut a snippet of each fabric and glue or pin to drawing. This will help you organise your strip sets.

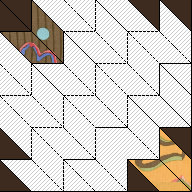 |
| Placement of Fabrics for the Kimono Pattern |
- Layout your strip sets in rows and sew together. Stagger your strips 2″ from top or bottom depending on the orientation of the rows. (See diagram below).

- Press open Seams.

- Cut the strip sets into rows 2″ wide at a 45 degree angle.
The rows must be cut at a 45 degree angle. There is a marking on most rulers. I used a 6.5″ squaring ruler to achieve my 45 degree orientation. I placed the centre line of the ruler on the middle seam and then butted another ruler up against it. Reverse this process to cut the opposite direction.


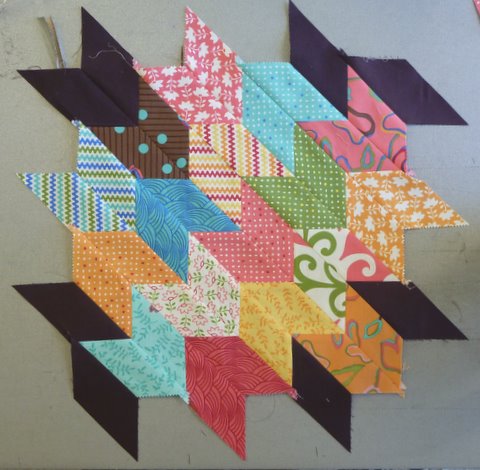
- When you have cut all strip sets into rows, lay them as shown below. You will need to cut nine (9) left diamonds and nine (9) right diamonds to add to the ends from the dark brown fabric.

- Sew each row together staring from the left. The intersecting seams should fit snuggly together. Pin well and slow down when you come to each seam intersection. Press open your seams when block is completed.
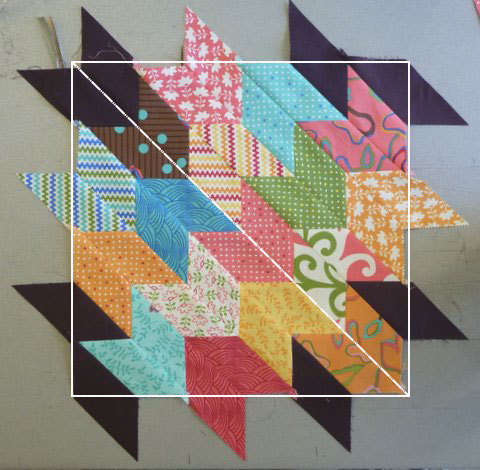
- Cut block – Your finished block should be 12 1/2″. When you cut each block, make sure you place the 45 degree angle of your squaring ruler down the centre and cut each block exactly the same.
- Cut 1″ strips WOF from the lighter brown solid.
- Cut six (6) strips the width of your block – 12 1/2″
- Layout your blocks so the Kimonos all lay in the one direction.
- Sew the sashing strips to the top of two (2) blocks and join to make a row of three. Press seams outward.

- Repeat to make two more rows of three (3) blocks.
- Measure across your sets of three finished blocks. Take the average of the two measurements and cut two (2) x 1″ strips of the lighter brown solid to make the sashing to join the rows. Sew together making sure the sashing intersections all align. Press seams outward.
- Measure across the centre of the quilt. Using 2″ strips of the lighter brown solid, sew to top and bottom.
- Measure from top to bottom of quilt and add 2″ border strips to sides of quilt.
- Measure across the centre of the quilt. Cut 1″ strips of dark brown solid and 6 1/2″ strips of main border fabric. Sew 1″ dark brown solid strip to main border fabric. Sew to top and bottom of quilt.
- Measure from top to bottom of quilt and sew a 1″ dark brown solid strip to main border fabric and sew left and right borders.
- Make sure quilt is square.
- Cut 2 1/2″ strips of the dark brown solid and make double fold binding.
- Sew binding to quilt.
- Quilt as desired. I have machine quilted this project using an all over pattern.

Block size 12 1/2″
Quilt Size 54″ x 54″
One colourful lap quilt.
These are alternative block layouts, which would look fabulous in any of the beautiful fabrics designed for Moda, especially their Bella solid range.

Jane Davidson
{Quilt Jane}
![]()
