

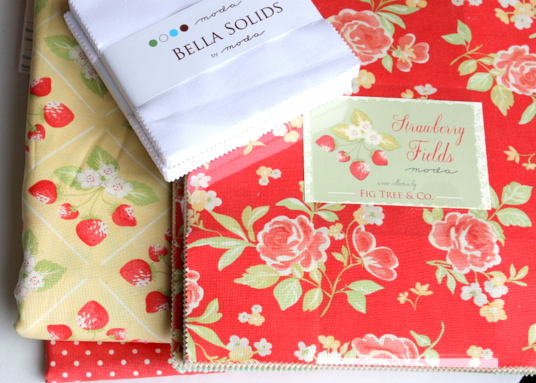
2 Bella Solid White Charm Packs
2 Strawberry Fields Layer Cakes*
1/2 yard red dot binding
3 3/4 yards yellow strawberry backing
*Only 42 10″ squares are needed for this project, so you could get by with just one Layer Cake. I chose to use 2 Layer Cakes because I wanted to use only darker fabrics to contrast with the white Bella solid. I saved my leftover 10″ squares and used them for a second quilt. You can see the second quilt I am putting together on my blog, Diary of a Quilter.
[SIZE OPTION: This would be an easy quilt to make into a twin size quilt by adding a 4″ border all the way around. For this adjustment, 1 yard of additional fabric would be required for the border, cutting it into 8 4.5″ strips. 5 1/4 yards would be required for the backing and 5/8 yard for binding.]

Leah at Burgundy Buttons has created an exclusive kit for this project. All the Layer Cakes, Charm Packs and binding yardage as well as backing options for the Strawberry Fields Bricks quilt are put together and sold at a discount. Hurry because supplies are limited and you know those Strawberry Fields pre-cuts are flying fast.

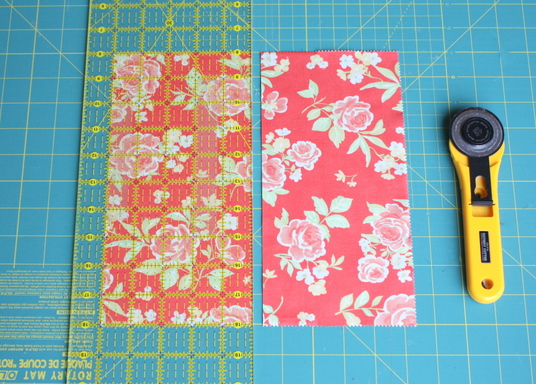
Take 42 10″ squares and cut them in half, creating 84 5″ x 10″ rectangles.

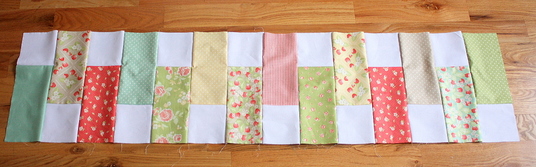
Sew one Bella Solid 5″ square to the top of each of the 84 5″ x 10″ strips. I like to just chain sew them through.

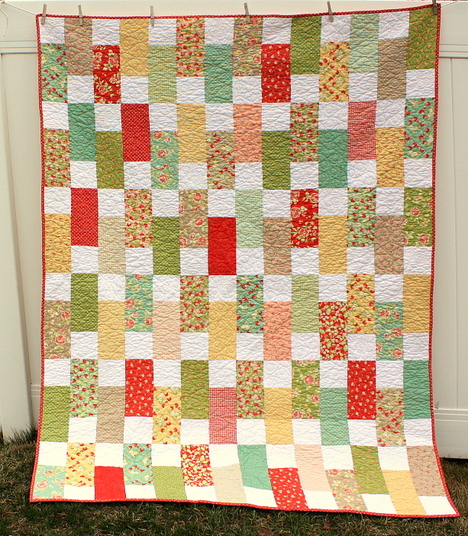

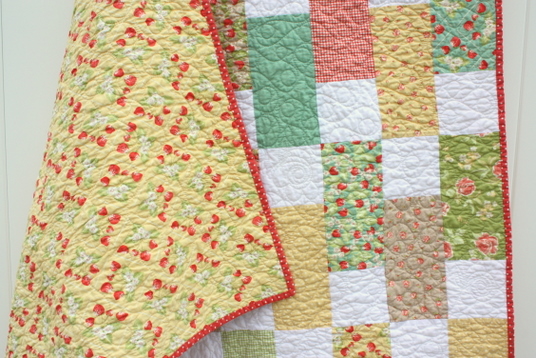
One lovely, quickly assembled 63″ x 84″ quilt! (If you add the 4″ border, the finished quilt will be 71″ x 92″.) I love the simplicity of this quilt and the way it can really showcase beautiful prints. I hope it will be a fun one for you too!
Amy Smart
{Diary of a Quilter}
![]()
